


Likes
Comments
Share


@Weedy_Shepherd
Follow
🍉 Plants continue to grow amazingly into the 3 week 🍉
Temps are going up as Summer is kicking in 🌄
I added some worm hummus to the pot as it will soon start to flower and require more nitrogen from the soil

Likes
40
Share


@valiotoro
Follow
The trim was very easy ✂️
Very surprised with the quality of buds 🤩super fat dense & sticky
The smell is citrus & pine 🍋🌲


Likes
3
Share


@Earthsower
Follow
She has recovered from the under feeding and sprung back with vigour. The scent on her main stem has returned with lime green foil also the peak of her canopy has split open creating an umbrella shape. Her stem is about 5cm wide and she stands approximately 35cm. She is receiving 500 ml of water each week!


Likes
11
Share


@plant
Follow
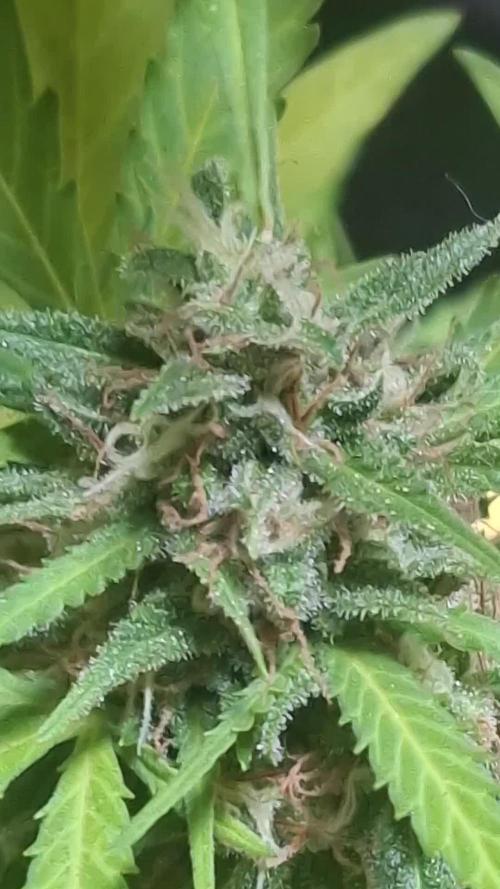
One or two weeks and this little beaut should be finished. Really happy with the trichome development in the last week or so starting to smell gassy 🤙 stay lit everyone, happy new year 👍🐞🤙🌲

Likes
9
Share
@Riseandshine
Follow
Dag 77 van mijn lange spriet van wat ooit een kleine bende was.😅???🍂🍂🍂🌱
Het was gisteren een fijne en ontspannen knipbeurt.
De opbrengst ligt in elkaars verlengde en ik heb er zeker meer dan vrede mee ditmaal. 😎😃👌💥
De weed stond bij beiden wit van de hars en het nodige plakwerk was er zeker en vast. 😵💫🤯😵👌
Het verschil met gaadkloempke was dat precies andere weed heb.
Harder plakken#toppen voller# geur intensiever😁💥💥💥💥💥💥💥💥💥😵💫😵💫😵💫😵💫😵💫😵💫😵💫😵💫😵💫😵💫
Ik mocht vorige keer al niet meer binnen knippen en na deze 2 al zeker niet meer.😅😁💣💣💣👺😂😂😂
Ze hadden deze morgend ook beiden nog elk 2 laatste wensen.😅
Een jointje en een selfie met mij.?😂😂😂
Ik heb ze het hun alvast met plezier gegeven en daarna kop eraf tedju.?😂😂?😂
Nog max 1 weekje met ons zjan alleen en dan is het bijna gedaan vrees ik!🤕🤕🤕
Echt jammer. Maar aan dit liedje komt nog geen einde. Nog noten en canabis zaad genoeg bij mij en SENSI SEEDS. Want dit zijn top planten met top weed👌👌💥?🍂🍂?🌱🌱🌱🌱🌱💯💯❤️
Rise and shine people🌱🌱🌱🌱😎
Likes
8
Share


@Kirsten
Follow
Orion F1 Liquid Nutrients:
The seedling is looking fairly unhappy. I will keep an eye on it.
The plant has been given its first dose of Mega Crop Part B to introduce some more nitrogen, hopefully she will begin to grow some more and start greening up.
The plant was watered when the pot was dried, to avoid mould and root issues.
8.5.25:
The plant was watered with 1ltr of dechlorinated water PH'd to 6.0. I added per litre;
♡ 1/4 TSP Mega Crop Part B
♡ 1ml Trace
PPM: 656
PH: 6.0.
☆ Xpert Nutrients PH down, up to 1ml.
☆ Ecothrive Neutralise 1 drop per litre from the 1ml pipette, which is attached.
This is my dechlorinator.
Let's see how she goes.
Thanks for stopping by 😊🍃✌️💚🤞
Processing
Likes
Comments
Share


@andyandy
Follow
Week 5 started off a bit rough. Continuing to over nute the plant babies, I realised I should flush and step back a little.
The flush helped a lot. I keep the plants outside on days where the weather was good, and put them back inside to maintain 20/4 light schedule.
I defoliated a large fan leaves at the bottom of the plants, as well as any of the yellowing leaves. This, coupled with the flushing, really seemed to perk them up. I trained some more of the branches and tucked away fan leaves blocking bud sites.
All 5 plants are flowering, with B#2 (the untopped one), leading the charge with a solid main cola.
I'm surprised by how little they stretched, but perhaps that has something to do with me nuking them with fertiliser at a critical point. Eh.

Likes
46
Share


@Ju_Bps
Follow
Hello grower,
Growing continue:)
She's biggest and more and more sweet, I can't wait to try it 😅.
Harvest is probably in 4/6 week so need to be patient.
This end week I've found several leaves turning yellow, I'll check that this week, and maybe ask you if not solved.
Good Haloween Day,
👻👻👻👻👀👀👀👀🤡🤡🤡🤡🤡
Have nice week😘


Likes
6
Share


@rvabudman
Follow
The plant took off this week. I am relatively new so was working through getting my PH measuring/balancing down. Now that I have established a better method the plant responded well. Put in a scrog to help even the canopy for the future. The other plant I have running is a bubblegum autoflower that is a few weeks older (right).
Personally I really loved the look of the gold leaf at this point, it had a very nice spiral look to it almost like an xmas wreath.

Likes
16
Share


@Siriuz
Follow
Very happy to start my new Collection from sweet seeds 👽🌱
Thanks a lot for all your kindess
May God bless you always
We are running photoperiod
For the very first time
I think its time for us to grow big
And hopefully we get her into bloom
Happy growing everyone
Day 1 - Place seed into peat pellet and left her fully in a dark
RH was 45/60%
Temp 22/25C
Day 2 - took her out of the dark to get light for 12 HRS
Then back to darkness again
Until next morning
Day 3 - She is finally up and got to fix her a lil since its root was not attach well to peat pellet, just cover her lightly with more Peat moss and place better its root and cotyledons for better growing
She is all set and good to grow
Happy growing everyone 🌱👽

Likes
34
Share


@iLoveGoodWeed
Follow
Seed one receive finalpart at the end of week and will continue till end of next week and then flush time.
Seed two buds getting bigger but it's not yet ready for final part.

Likes
18
Share


@TheCannaProphet
Follow
~ FASTBUDS TESTER #2204 ~
Well friends, here we go on another 'canna-venture' together!
The grow room has had a complete remodel and some upgrades done to it including brand spanking new 4x8 and 4x4 tents and a Trolmaster Hydro X controller along with a new Control Panel.
This tester strain is one of six tester strains that FastBuds has graciously provided me with and I'm looking forward to seeing what this girl has to offer when she's grown to her full potential!
One drawback of 'testers' is I have little to no information on it other than its number and that it's an autoflower... 🤪 But, it's ALWAYS a blast growing them for me because not knowing a lot allows me to just concentrate on the essentials: Light, Environment, Water, Nutrients and possibly a bit of LST... not complicated, just basics like keeping a constant temperature and RH in the tent at a level that gives a good VPD, watering when almost dry and maintaining proper light levels according to their stage of growth.
____________________________________________________________________________________________________________________________________________________________________________________________________________________________________________________________________________________________________________________________________________________________________________________________________________________________________________________
~THE SETUP~
~Initially seeds were lightly scuffed, then soaked for 3 hours in 78℉ distilled water after which they were transferred to moist paper towels laid out in a Jiffy Pellet plastic starter tray with lid. Underneath the tray was placed a Vivosun Heat Mat with Controller that was set to 78℉ where they stayed until their tap roots emerged.
~Planted into Jiffy Peat Pellets that were hydrated with distilled water warmed to 78℉ with a 7.0 ph.
~Once roots emerge from the Jiffy Pellet they're transferred to their fabric pots.
~Grown 100% organic in a 4g Gronest fabric pot and a 3g fabric pot by Wraxly filled with Mother Earth 70/30 Coco/Perlite medium and initially amended with Dr. Earth 4-4-4 / Earthworm Castings / Dr. Earth Flower Girl 3-9-4 and Coast of Maine Stonington Blend Organic Plant Food 5-2-4.
~19/5 light cycle for the entire run with supplemental UVA added during flower. Lights are controlled by a Trolmaster Hydro X controller set for a 15min Sunrise/Sunset simulation.
~Top dressing every 3-4 weeks with slow release dry amendments and Earthworm castings.
~Straight water ph'd @ 6.2-6.8 when needed and bi-weekly Compost Tea's.
____________________________________________________________________________________________________________________________________________________________________________________________________________________________________________________________________________________________________________________________________________________________________________________________________________________________________________________
Weekly Updates:
12/29- Here we go into Week Four of Vegetation but I'm somewhat relieved that they haven't started flowering yet as they are only 5" & 6" respectively so some more time to grow is a good thing right now! It's been a month since these pretty ladies popped out of the ground and other than being short, they are both looking perfect!
The #1's 4g Gronest pot was heavy when lifted as was the #2's 3g Wraxly pot and they both looked happy, so I skipped watering today and will check them tomorrow morning after the lights come on.
Since being topped for the first time a week ago, they both have two new shoots that are emerging and have new growth sprouting out all over with extremely tight node spacing making them definitely Indica dominate, and will most likely result in very short stocky cultivars from this strain which would be ideal for someone with limited grow space. 😎💚
Both of these girls are extremely healthy with excellent vigor and color and I can't wait to see if they get any taller and for them to begin flowering! 🧐💚
12/31- Today was a 'dry day and all I did was refill the humidifier and some canopy maintenance, tucking shade leaves and gently bending branches.
It's been a little over four weeks since they were planted in their amended medium and it's time to give their microbes a good feed so they can continue to provide them with all the macro and micro nutrients they need so, yesterday they got a good watering with 0.5g of de-chlorinated water with GreenGro's Veg, Flower, Green Aminos, Natures Brix and Granular Myco added to it @ 1.5 tsp/g and then ph'd to 6.4 @ 73℉.
Still no signs of flowering on either tester but I anticipate it will be any day now!
01/02- Yesterday I finally saw signs of flowering on the #1 tester! The #2 is still a no-show but as short as she is it's probably for the best!
Today I watered them from the bottom with 0.5g of de-chlorinated water to which I added 3ml/g of Earth Juice OilyCann cal-mag to prevent any Cal-Mag issues they may encounter before they arrive.
I also have the HLG 650R set 36" above canopy and it's set at 60% power which is being controlled by a Trolmaster HydroX controller. The tent environment is on point with temp's running 70 when the light's off and 74℉ with the light on. I'm keeping the RH at 55-60% right now but will drop it as flowering progresses. Finally, I've been keeping the VPD in the tent running 0.85 - 1.05 which I'm happy with!
01/04- They have both been doing really well getting watered every other day and yesterday they received 0.5g each of de-chlorinated water with 3ml/g of Fish Head Farms Fish Sh!t Soil Conditioner which was then ph'd to 6.3 @ 72℉.
The #1 tester is on her fourth day of flower and looking great! Because she's so bushy and was getting choked with growth, I removed a few shade leaves to open her up and get some light penetration down into her canopy.
The #2 tester has yet to show any signs of going into flower which I won't be concerned with unless it persists for another week or so, at which point I'll make a decision on how to deal with her.
😎💚 Thank you for checking out my passion in life! Please visit as often as you wish and I hope you enjoy this journey as much as I know I will! Grow Strong! 💪😎🤙
Likes
13
Share


@Aedaone
Follow
Temperature and measurements listed in grow conditions are averaged for the week. The pH listed in the grow conditions is soil pH. Nutrients listed in nutrients section are ml/per gallon of soil.
Day 1 we had rain showers in the morning and throughout the day. They showed first sign of flower.
Day 2 we had rain in the morning, drizzle and showers in the afternoon. The ferrous sulfate reduced the soil pH from just above 7 to just below. I added 10ml blood meal and 10ml ferrous sulfate top dressed to each pot. The nitrogen should boost the stretch during early flower. The additional ferrous sulfate should keep the pH in the 6.5-7 range and help with chlorosis during early flower.
Day 3 we had more rain, drizzle, and mist all day. The soil pH is responding slowly. It's down to 6.8
Day 4 we had rain all morning. The pots are soaked.
Day 5 we missed the scattered showers, but it's been 80-90% humidity. We did have lots of sunshine.
Day 6 we had lots of sunshine and temperatures above 80° F
Day 7 we had lots of sunshine with temperatures in the mid 80's F. I had to water about .5 gallons directly from the hose. The well water is 7.6 pH and 50°F.
Overall this week was a success this plant more than doubled in height. There's still a small excess of phosphorous in the soil. The plant grew into it this week.
Likes
62
Share


@Reyden
Follow
Siamo sempre più vicino per le Royal Gorilla 🦍, le Gorilla 🦍 Glue di Zamnesia sono ancora indietro mentre la Original Skunk di Seeds Mafia è maturata più veloce quindi verrà tolta più o meno insieme alle 2 di RQS 😎
Ho rispostato The Sin e White Runtz nella tenda piccola e messo una Gorilla Zamnesia e La auto Purple OG Punch di SSSC sotto la SF 2000 per questioni di altezza…le ragazze di Anesia Seeds erano troppo alte e ho deciso che era meglio toglierle…per me questa luce supera di gran lunga anche gli altri modelli più vecchi degli anni passati, avete fatto un ottimo lavoro con questo LED!!! Ora sono curioso di provare gli UV per vedere quanto effettivamente aiutano nella produzione di resina…chissà se riuscirò ad aggiungere nel mio setup 🙌


Likes
12
Share


@Preston22
Follow
Light defoliation and training branches at the bottom with stakes…
I mistakenly pushed down too hard and you know the story after that
But overall plant still moving forward..
Any advice on spots on leaf.. please reach out and let me know if you have any solutions
Processing
Likes
2
Share


@krst97
Follow
17/06 - Starting week
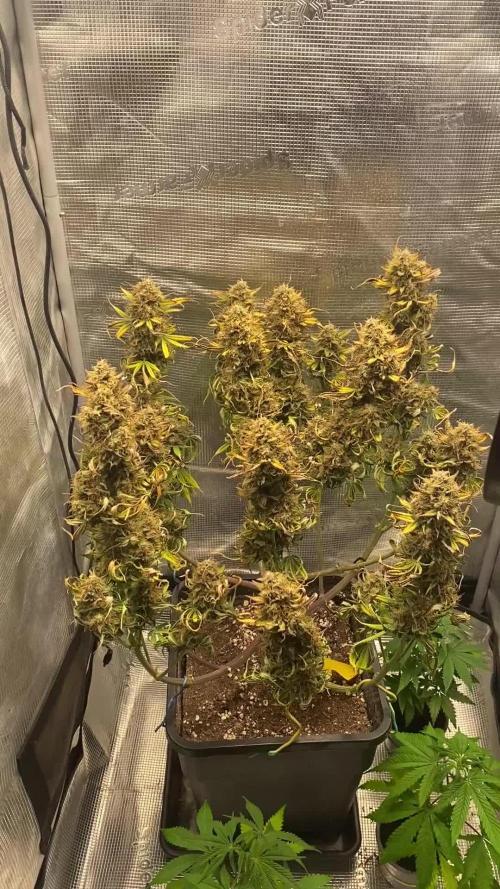
The plant is increasingly purple shades and the flowers are growing well. The trauma caused by supercropping did not negatively affect the health of the plant.
19/06
Feeding:
Only Water 0.5L
23/06
Feeding:
Bloom Complex (7.5ml/1.5L)
SuperVit
pH 6.4 EC 1160
23/06 - End week


Likes
22
Share


@BlumenBot
Follow
3/28 - I moved her up to the flower chamber to give her more space to grow height. I think 1 week in here with veg schedule and then I can flip over to flower. I will be removing some shoots crowding things up and probably a good deal of fan leaf cleanup as well
She got watered, I think moving here up made her jump back to life
3/30 - flush feed
4/1 - flush feed

Likes
14
Share

@DogDoctorOfficial
Follow
GMO Cookies Served with Extra Curiosity ?🍪
Drying & Trimming Report | Garlic, Gold & Preservation
And once again… yes 😄
We are dividing the reports.
At this point it almost became tradition.
But honestly, there is simply no realistic way to fit:
* harvest,
* drying,
* trimming,
* curing,
* smoke review,
* fresh frozen,
* washing,
* strain review,
* extraction plans,
* terpene analysis,
* and all the small details we love documenting…
into one single update without turning everything into chaos.
So first of all:
thank you for the patience.
Everything from seed until harvest was already documented in the previous reports, but for the people arriving only now, let’s quickly recap how we got here.
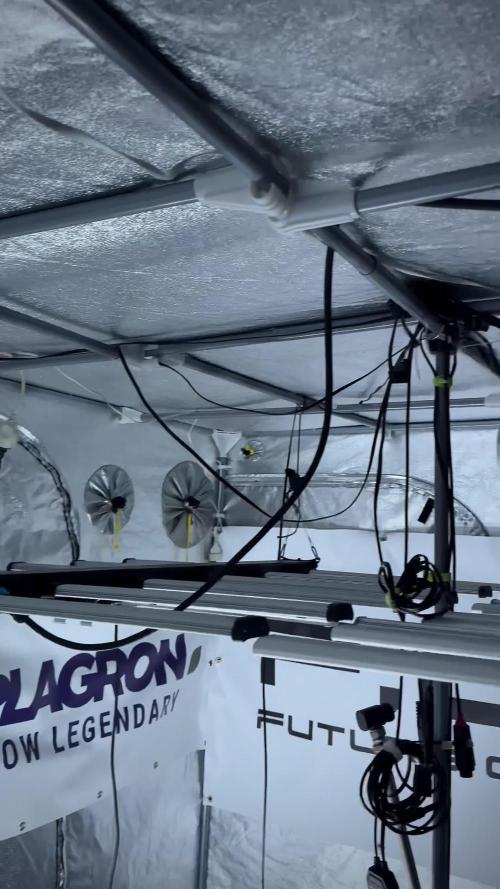
This GMO Cookies run was grown under a 12/12 from seed cycle using the F.O.G. LED setup, with environmental management focused on healthy plant development, airflow, structure, and resin production. Throughout flower the girls received selective defoliation, LST, continuous observation, and careful feeding while expressing one of the loudest terpene profiles we have had in the room in a while.
And now?
Now the plants have moved beyond harvest and entered one of the most important phases of all:
preservation.
Because growing beautiful flowers means very little if drying and trimming are rushed afterward.
So this report belongs to:
* drying,
* trimming,
* handling,
* preserving terpenes,
* collecting resin,
* and slowly preparing the medicine for cure.
The branches that were selected for drying spent approximately:
* 10 days drying,
* around 60% humidity,
* temperatures between 18–20°C,
with the first couple of days running slightly drier in order to help remove excess surface moisture before stabilizing the environment more carefully.
And honestly?
The aromas coming from these flowers during drying were absolutely ridiculous.
Now, to be completely honest and transparent:
these were not the densest flowers from the tent.
Visually they actually looked denser while still wet than they ended up feeling after drying.
But what they lacked slightly in density…
they completely compensated for in aroma, terpene expression, flavor potential, resin behavior, and overall personality.
And honestly, that trade-off is something many growers happily accept.
Because this GMO profile is LOUD.
Like…
walk-into-a-kitchen loud.
Real GMO lovers will understand this instantly.
Every trimming session felt like sitting next to a chef smashing fresh garlic cloves directly beside us.
Savory.
Greasy.
Funky.
Sharp.
Warm.
Almost oily-smelling.
And hidden underneath all that madness:
sweetness,
cookie notes,
earthiness,
and weird creamy undertones slowly revealing themselves as the flowers cured further.
This is not a shy cultivar.
Not even close.
Once the drying process finished, it was finally time to trim.
So:
gloves on.
Trim station ready.
Trim bin prepared.
Scissors cleaned.
Glass jars nearby.
Grove Bags prepared.
And of course…
little self-medication beforehand 😄
Because trimming sessions and cannabis culture somehow always belonged together naturally.
The branches were broken down carefully by hand, one by one, and every flower was trimmed individually with patience instead of speed.
As always, we used pointed curved trimming scissors.
And honestly, they are fantastic for this type of flower structure.
Especially with fluffier or more open flowers, curved pointed scissors allow you to:
* enter tighter spaces,
* remove excess leaf material precisely,
* preserve flower structure,
* avoid crushing calyxes,
* and maintain a more natural-looking final product.
Straight scissors work perfectly fine too of course, but for this type of trimming, curved points genuinely feel more comfortable and surgical.
And with GMO?
You quickly realize precision matters.
Because these flowers become sticky almost immediately.
The scissors start collecting resin.
The gloves become greasy.
Finger hash starts forming naturally.
And suddenly trimming stops being just “work” and starts becoming part of the experience itself.
The first dried branches gave us:
137.1 grams.
After trimming and weighing, the flowers were carefully transferred into Grove Bags, with smaller amounts also resting inside glass jars for comparison and monitoring during cure.
Then we moved onto the flowers dried on the drying rack.
Again:
not the densest plant from the tent.
And honestly, we believe temperatures played a role there.
This cultivar appeared slightly more sensitive to higher temperatures than some of the others around her. Our personal feeling is that she continued pulling significant water during flower development, which likely contributed to the final structure remaining slightly more open once dry weight settled.
But despite that?
The quality remained absolutely beautiful.
Sometimes growers become overly obsessed with density alone.
But density is not everything.
Aromatic expression,
resin quality,
effect,
smoothness,
flavor,
and terpene complexity matter just as much — sometimes even more.
And this GMO absolutely shines there.
The second drying batch landed at:
224.2 grams.
Again carefully bagged for preservation.
And speaking of preservation:
we decided to use Grove Bags for most of the flower storage.
Why?
Because preserving terpenes matters deeply to us.
Especially with a cultivar this expressive.
The idea behind Grove Bags is maintaining stable curing conditions while reducing the constant need to burp jars manually. They help regulate humidity exchange while still allowing the flowers to continue stabilizing naturally over time.
Of course, glass jars still remain legendary and we still use them too.
Honestly?
Both methods have their place.
And later during cure and smoke review, we will probably compare the differences more deeply.
But for now, the priority is simple:
protect the terpenes.
Protect the medicine.
Protect the work.
Now let’s talk about something we personally love a lot:
the “gold.”
Or what many people simply call:
kief.
During trimming, tiny trichome heads naturally separated and fell through the trim bin screen.
And honestly… watching that happen never gets old.
At one point we jokingly started “playing the drums” Moroccan style across the trim bin while working, moving material gently across the screen and collecting the resin heads gathering underneath.
And the result?
Beautiful golden powder.
Tiny greasy trichome heads.
Pure aromatic dust from the plant itself.
Eventually we pressed part of it together gently using finger warmth and pressure, creating a tiny mini temple ball.
Small.
Dark.
Sticky.
Greasy.
Beautiful.
The type of resin that already tells you:
“This plant is going to wash beautifully later.”
And yes…
that curiosity is still alive and stronger than ever.
Because despite everything already documented here, we still have:
more than 700 grams of fresh frozen flower material waiting patiently inside the freezer.
That future report is still coming.
And honestly?
We are incredibly excited for it.
But there is no rush.
That material is preserved safely and waiting for the right moment to become:
* ice water hash,
* solventless resin,
* or whatever expression this GMO decides to offer us later.
For now, this chapter belongs to drying, trimming, preservation, and preparation.
Before ending this report, one more important thing:
cleaning.
Once trimming was finished and the room slowly emptied, it was time to clean everything thoroughly and prepare the environment for future runs.
And honestly, this part matters far more than many growers realize.
Between runs we strongly believe in:
* deep cleaning,
* sanitizing surfaces,
* cleaning fans,
* sterilizing tools,
* removing plant residue,
* using UVC if available,
* using ionizers or environmental tools carefully,
* and resetting the room properly.
Because prevention is always easier than fighting problems later.
A clean room protects future harvests.
And after a run like this?
The room deserved a respectful reset.
Now next week?
Next week we finally move deeper into:
* curing,
* smoke review,
* terpene evolution,
* flavor,
* effects,
* smoothness,
* strain review,
* and our true thoughts about GMO Cookies after spending months with this cultivar from seed until cure.
And honestly…
we cannot wait.
Before ending, as always:
Thank you.
To Zamnesia.
To F.O.G.
To Plagron.
To Lumiflora.
To Grove Bags.
To the platform.
To the community.
To the growers sharing knowledge.
To the hash makers.
To the flower lovers.
To the silent supporters.
To the curious people following this strange garlic-filled adventure 😄
To everyone spending even a few moments here with us.
This GMO Cookies run truly was served with extra curiosity.
And honestly?
That curiosity still hasn’t disappeared yet. 🌱
📲 Don’t forget to Subscribe and follow me on Instagram and YouTube @DogDoctorOfficial for exclusive content, real-time updates, and behind-the-scenes magic.
GrowDiaries Journal: https://growdiaries.com/grower/dogdoctorofficial
Instagram: https://www.instagram.com/dogdoctorofficial/
YouTube: https://www.youtube.com/@dogdoctorofficial Deleted by Youtube - https://www.youtube.com/@TheDogDoctorOfficial NEW
Vimeo : https://vimeo.com/dogdoctorofficial Under construction stay tuned ⸻
Explore the Gear that Powers My Grow
If you’re curious about the tech I’m using, check out these links:
🔆 Lighting & Environmental Control
• Future of Grow — Advanced LED lighting technology
https://www.futureofgrow.com/
DISCOUNT CODE: DOG20
• Lumiflora — Under-canopy LED lighting
https://lumiflorade.com/
• TrollMaster — Environmental controllers and automation gear (past collaboration)
⸻
Genetics
• Zamnesia Seeds — Genetics used in this project
https://www.zamnesia.com/
⸻
🌱 Soil, Substrates, Boosters & Root Support
• Plagron — Substrates, bio mixes, and supportive products
https://plagron.com/en/
⸻
🎒 Storage, Curing & Preservation
• Grove Bags — Curing and storage solutions
https://grovebags.com/
⸻
📸 Photography Equipment & Tools
(Not sponsors, but part of my creative toolkit)
• Sony A6700
• Sony full-frame macro lens + few more
• Stacking photography workflow - learning
• iPhone (for behind-the-scenes shots)
As always, this is shared for educational purposes, aiming to spread understanding and appreciation for this plant. Let’s celebrate it responsibly and continue to learn and grow together.
With true love comes happiness. Always believe in yourself, and always do things expecting nothing and with an open heart. Be a giver, and the universe will give back in ways you could never imagine.
💚 Growers love to all 💚
📸 P.S. – The Eye Behind the Lens
All photos in this diary (for now — except for the ones showing the camera, which I took with an iPhone) are taken with a Sony A6700 paired with a Sony full-frame macro lens and a few more.
Photography is part of the story — it’s how we share the fine textures, the glow, and the quiet details that words can’t always capture.
I’ve also started experimenting with photo stacking — a technique where multiple images, each taken at a slightly different focus point, are layered together to create one perfectly sharp image from front to back.
It’s not digital enhancement or AI; it’s pure photography — a way to reveal the plant’s beauty in microscopic depth, from trichome to petal.
You’ll even see a few shots of "ghost me" capturing the shots — camera, lens, setup — because every grow deserves not just to be cultivated, but documented like art.
FOR DISCOUNT CODES AND MORE JUST FOLLOW THE LINK https://website.beacons.ai/dogdoctorofficial
NEW DISCORD - Official Server Invite Link : https://discord.gg/ksjAkA5T74