
Likes
Comments
Share


@VividLeaf
Follow
Flush week!!! I also pre-harvested one branch to see the difference in taste (flush vs no flush) and also the difference feel (body/mind high).
Super sticky stuff! And soooo smelly! Citrus fruit with spice

Likes
5
Share


@Ninjabuds
Follow
Buds and leaves are starting to have a black hue to them the plant is starting to fourm decent buds they have a lot of resemblance to the gas cream Runtz and some of the bubble og phenos


Likes
21
Share


@cadur
Follow
Lots of nutrients burn. I think it's okay now but I stress the word 'think'. The brown spots on the edges of the leaves seemed to have abated.
All coming on nicely though. Autopot working wonders. The plant seems to be getting through 1.5 litres a day.

Likes
49
Share


@Hashy
Follow
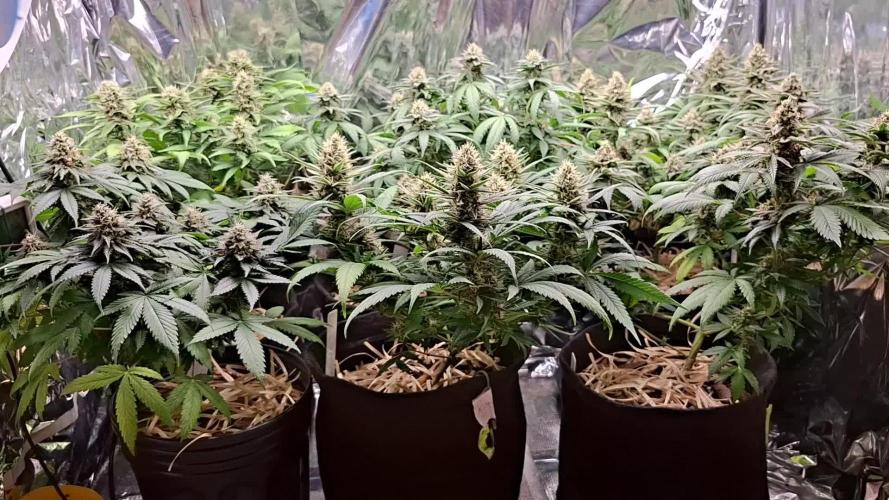
Week 13 9th week of flower.
Light settings
12/12 on at 9.00am off 9.00pm
Light power= 100% 240w
Radiator settings
LIghts on
Turn on if temp drops below 21.5c
Turn off if temp goes above 21.5c
Lights off
Turn on if temp drops below 18.0c
Turn off if temp goes above 18.0c
Extractor settings
temperature 23c with 1c steps
Humidity 35% with 2% steps
Max speed 10
Min speed 4
VPD aim 1.0-1.4
DLI aim 35-40
Wednesday 19/4/23 Day 85 (Day 57 flower)
Massive defoliation.
Thursday 20/4/23 Day 86 (Day 58 flower)
Nothing
Friday 21/4/23 Day 87 (Day 59 flower)
Flawless 2ml/L
Ec=0.4 Ph=7.1/7.1
5 drop Ph D Ph 6.3/6.0
Autofeed 8 runs (2,3,5,10,15,15,15,15 total 80 mins)
Flawless Ec=0.4 Ph=6.3/6.0
2L left
Roughly L each.
#2 0.1L runoff
Autofeed 8 runs (2,3,5,10,15,15,15,15 total 80 mins)
Water Ec=0.2 Ph=6.3/6.0
2L left
Roughly L each.
#2 0.1L runoff
Saturday 22/4/23 Day 88 (Day 60 flower)
Sunday 23/4/23 Day 89 (Day 61 flower)
Cut scrog net and moved plants about.
Monday 24/4/23 Day 90 (Day 62 flower)
Raised plant #2
Tuesday 25/4/23 Day 91 (Day 63 flower)
Manual water 2.0L
This is the last weekly update for the grow as they are all being chopped sometime next week. The next update will be the harvest update in a few weeks time once its dried and had a 2 weeks cure.
#2 Tropicana Cookies is nearly ready for the chop. Mainly cloudy trichomes and still some clear and hardly any amber.
Power used for week
Light
(2.69+2.68+2.68+2.68+2.69+2.69+2.68)=18.79Kw
Extractor
(0.58+0.58+0.58+0.58+0.58+0.58+0.58)=4.06Kw
Fans
(0.92+0.95+0.97+0.94+0.90+0.93+0.92)=6.53Kw
Dehumidifier
(++++++)=Kw
Radiator
(1.39+1.45+1.38+1.45+0+0+0)=5.67Kw
Water pump.
(0+0+0.03+0+0+0+0)=0.03Kw
Total for the week=Kw
Back in a few weeks with harvest and smoke review.
Thanks for stopping by.

Likes
21
Share


@reirrac1
Follow
NCH x SB is starting to fade significantly and has stopped throwing out new pistils, trichomes are significantly cloudy and a few on the sugar leaves are beginning to turn amber. Debating whether I should pull her at full cloudy in a week or two or wait until I see more amber. Sour Kush is still fattening up and has a lot of white pistils yet to mature, trichomes are of course a mixture of clear/milky, no fade on this plant yet. Tangerine Dream is making great progress in flowering and bud sites have thickened up considerably, trimmed a majority of larfy bud sites on this plant since the discrepancy in the distance to the light was so large. Water pH 6.15, EC 0.4. Feed pH 6.15, EC 0.717.


Likes
4
Share

@Elemental
Follow
Segunda dose de chá de banana dia 10 de novembro.
O caldo estava denso.
Os buds estão engordando lindamente.
Likes
41
Share


@TheBulldozerSicily
Follow
Venerdì 23 agosto
Controllo ec 3360 per livello basso ed ec alto Aggiungo 25 lt acqua osmosi inversa e arrivo ad un ec di 2460
Domenica 25 agosto
Inizio controllo ec 3580
Cambio acqua partenza da 75 lt acqua osmosi inversa ec 404
Aggiungo tutti I nutrienti ottenendo ec 1704 ph 6.5
Lunedì 26 agosto
Per livello acqua bassa Aggiungo 50 lt acqua e nutrient

Likes
18
Share


@electabruce420
Follow
F21 Starting week 4 of flowering, the code red is already about 80 cm and the crescendo around 70 cm. Pretty good for a 3-4 week veg from what I've had.
The tips on some leafs are a bit burned in the code red but besides that everything going fine, they are drinking like 24 liters every week
Can't believe the smell from the code red, it's amazing really, and the terps are forming everywhere, already want to smoke it. It's like a weird strawberry fruity soda of sorts. And the Crescendo isn't very smelly but it seems like will be getting an orange citrus aroma like the one before, not strong in flowering but after curing it gets much better.


Likes
165
Share


@SlowpokeFuegobud
Follow
🐟 🐠 🐙 🐡 🐟 🐠 🐙 🐡 🐟 🐠 🐙 🐡 🐟 🐠 🐙 🐡
Welcome to week 7, dear fish lovers! 💙
This week we finally moved into the 80x80 tent, wiiiiii! 💙
I meanwhile water three times a day, I try every 8hrs but well.. 💧 😎
DAY 47
Had to flush for the first time.. EC of runoff was terribly high, I spare you the details. ^^ (actually my notes say so argh)
Made a bottle with just Green Buzz boosters and calmag and another one with a lighter feeding solution EC 1.0 ✌️ 🚑
Between making me crazy with being hungry and thirsty the fish apparently found time to go and visit some growmies, again without me! 😳
And even to Cali, my dream, I cannot believe it!! At least @Sour_D didn't also try to keep him. 😜 My fish smelled like a cured fish, my friend!!
Also he visited @Zurban_Poisonia, after stealing my remote controlled snake. Really?! 😝 I hope that was ok, buddy!! ✌️
Thanks, growmies, for checking in! 💚 💚 💚 😘
Always remember, we are not our thoughts, nor are we our emotions, or experiences, we are limitless, immortal and divine souls making a 3D experience. 🙏 ❇️
____________________________________________________________________
Strain info:
Tropicana Cookies Auto is the perfect variety for growers of all levels, especially beginners as this strain performs very well outdoors and indoors, and can produce up to 500gr/m2 in 56-63 days without needing extra maintenance. Reaching up to 110cm, this strain grows fairly tall with medium-sized branching, showing its mixed heritage. Definitely the right choice for those with a high tolerance looking to get their hands on the strongest autoflowers out there. Thanks to the 27% THC, you can expect an extremely powerful and long-lasting high that’ll boost your mood and give you that extra push you need to start your days on the right foot. This variety offers the whole range of citrusy and woody flavors with a strong candy-sweet background that will keep you coming back for more and more.
Bud description
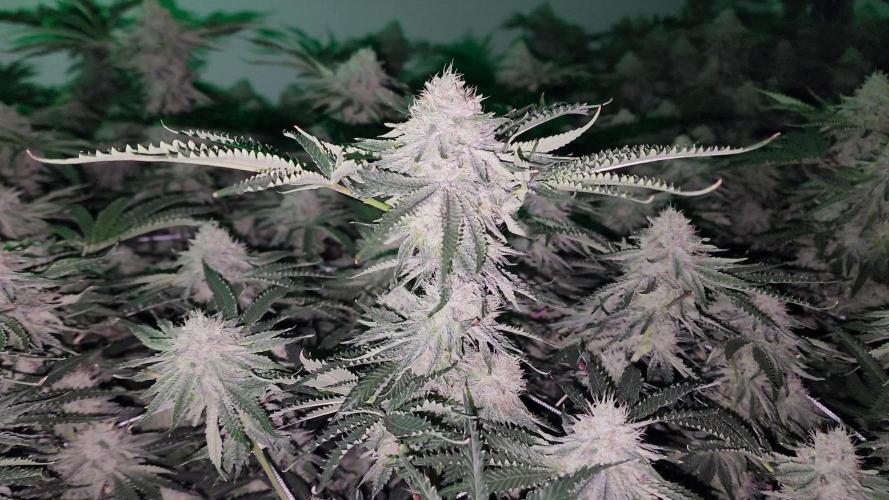
Tropicana Cookies Auto produces gorgeous dark purple flowers, so expect really dark buds with gorgeous hues of pink, purple and blue, and thick dark-orange hairs that get completely covered in resin by harvest time, giving them an almost shiny-white appearance.
This variety develops a typical Indica-like structure and very few sugar leaves that will make your trimming sessions a breeze. But make sure to store your trimmings as the gorgeous flowers reek of a mouth-watering blend of lemon peels, orange juice, and sandalwood that gives it almost a citrus candy-like flavor that makes for the most aromatic hash and extractions.
Smoke report
Thanks to the 27% THC, Tropicana Cookies Auto’s effect starts with an energizing head rush that gets your mind up and running while leaving you in a nice calm state. As the Indica-dominant side kicks in, the powerful cerebral effect gradually moves downwards and hits your whole body with a deep relaxation that leaves you with a joyful stoney sensation that alleviates chronic pain while leaving you in an overall happy and positive state of mind.
It’s the perfect daytime and nighttime strain as it can boost your mood and enhance a night out with friends but can also quiet your mind as you get ready for a good night of sleep. No matter the scenario, expect a powerful high that lasts for hours on end.
Plant appearance
Tropicana Cookies Auto reaches up to 110cm and develops a tall main cola with shorter side branches, typical of hybrid strains. You can expect a stocky yet tall main cola with medium-sized side branches and thin fan leaves that fade into a yellowish hue with a beautiful dark purple tint. Thanks to the excellent selection, this variety develops a short internodal spacing that makes the medium-sized flowers look like they’re growing stacked on top of each other. It’s the ideal choice for growers who want to get big yields without having to deal with huge plants, as this monster yielder can produce up to 150g per plant while growing relatively short.
Grow tips
This variety grows super dense buds so make sure to space out the branches by tying them down, this way you improve airflow which helps prevent mold and other pests. Tropicana Cookies auto reek of a delicious sweet and sour smell so make sure to flush thoroughly to enhance the aromas even more. This terpene heavyweight finishes with lots of resinous sugar leaves that make for fantastic hash and extractions so remember to have your trim bucket ready!
Flavor
Tropicana Cookies Auto boasts remarkably sweet flavors that resemble a blend of lemon peels and fresh orange juice, with subtle floral undertones that make it the perfect choice for extractors looking for unique terpene profiles.
Expect an overall citrusy zest that’ll coat your whole mouth and leave a delicious tropical candy-like flavor aftertaste. The sweet and sour flavors get balanced out with a herbal background that gets stronger as you exhale and gradually opens up, bringing out the whole range of woody, floral, and spicy flavors, making it the perfect choice for the most flavorful extracts.
https://2fast4buds.com/seeds/tropicana-cookies-auto
_________________________________________________________________________________
SETUP:
80x80x180 cm Zelsius
240W Full Spectrum LED IR UV dimmable
DW240H-A6-HS
Heatsink color red
LED Chips:
512pcs SAMSUNG LM301H + 24pcs Osram 660nm + 8pcs Osram IR 730nm + 8pcs UV 385nm
Color mix: 2700K + 4000K
2,8umol/J
Driver HLG-240H-C2100B
Coverage: veg 5x3ft / flower 4x2ft
Product size: 628x205x68mm
Green Buzz Nutrients
Shouts go out to my sponsors @GreenBuzzNutrients, thanks so much for your support! ❤️
If anyone would like to try their amazing organic products, use code GD42025 for generous 25% discount (for orders of minimum 75€) ✨
https://greenbuzznutrients.com/
Mills Nutrients
Biobizz Lightmix
custom exhaust fan 320/270cm³/h
Carbon Active Granulate 240cm³/h
tab water pH 8 - EC 0,25 with Calmag to 0,5
Advanced Hydroponics pH minus Grow + Bloom to pH 6.2
🐟 🐠 🐙 🐡 🐟 🐠 🐙 🐡 🐟 🐠 🐙 🐡 🐟 🐠 🐙 🐡
Likes
10
Share


@Dthebudguy
Follow
Bud development is going well smell is just starting to be noticeable happy with the grow great structure

Likes
3
Share


@Shugz_Nugz
Follow
Heavy Defoliation and Training this week, Noticed a bit of TMV on one leave (Tobacco Mosaic Virus) Thankfully it didn't really affect the plants growth at all! Stay Tuned


Likes
39
Share


@Velk1
Follow
expect high super high levels of frost , be sure to start your training early on this plant and defoliation of lower growth will help out a lot, with care you can have beautifull massive grapewalker kush's glad ivesaved some for the vault , thanks for sticking around for this journey now for the next =)0

Processing
Likes
30
Share

@Velk1
Follow
All the baby's are in great shape the mbap's are taking to the scrog well loads and loads of bud sites
The grape walker kush are getting nice and big I esspesially like the look of the mainlined/folded one structure is nice and open
Now the gold glue by topping this seems to have really done it well more open branchy structure much Easyer on training this one is going to be interesting ......... Check out the insta for more @velk_1
Likes
3
Share


@MicroHidroGrow
Follow
Día 16. Por ahora las plantas siguen en proceso de estiramiento. Hoy hice una defoliación fuerte. Esta etapa me pone ansioso porque quiero ya empezar a ver los primeros pelos de las flores. Pero viene bastante lento el tema. Supongo que voy a tener que esperar un poco más que 10 semanas para la cosecha. Pero tampoco me desanimo.
Likes
1
Share

@Ketamine
Follow
These ladies are coming along quite nicely. Will be harvesting likely in 2 more weeks.


Likes
21
Share


@TriangleBotanistProject
Follow
FINALLY TRANSPLANTED into 10 gallon pots:
Flowering SUPER SOIL COMPOSITION (per 20 gal):
Medium:
-25% coco loco (sustainably sourced from shrilanka i think)
-25% peat moss (sustainably source in north america)
-50% recycled depleted soil
Amendments:
-3 cups Citrus Tone Espoma 5-3-6
-1 cup 4-8-4 Mother Earth Bloom
-1 cup 2-3-6 Earth Dust Boost
-5 cups worm castings
-80g w- 20 wollastanite (si + ca)
-80g epsom salts
-40g dolomite lime
Here is what i am thinking:
-Plants look good in the new pots, i figure it will be ready to scrog in about a week.
-Never heard of anyone using this citrus tone fert but the utah state study said that optimal fertilizer is 20-10-20 blue mixture. Well as an organic grower I want to replicate that ratio. Its not 100% but the point is its high in nitrogen and potassium with adequate phosphorous because I am researching small scale rn and one day I will need to be very mindful of my P usage to be sustainable and regenerative.
-I performed a preventative insect repellent because I saw thrip damage and I want to be safe. Honestly I think I am just going to do a neem oil treatment twice before going into flower every time now. I did 1tsp cold pressed jacks neem oil + 1 tsp w-20 wollastanite per 16 oz spray bottle and I drenched both girls all over. I plan on doing one more the day I decide to flip to flower.
-Ca is far more important than phosphorous and the nutrient companies have been milking the myths about nutrient ratios for 50 years.'
-I really put focus on the rock dust and inert minerals because I have never paid any attention to them but I will be stressing and pushing these plants with light so i need them optimal.
-I started my own compost bin with holes in the back yard and I am planning on buying african night crawlers to start a worm bin that way I have two kinds of compost to break down my bubble hash waste and food from the kitchen. Will be great for teas.
-I will water them in with a compost tea I am brewing/aerating currently. Giving it 24 hours.

