
Likes
Comments
Share


@Hempface86
Follow
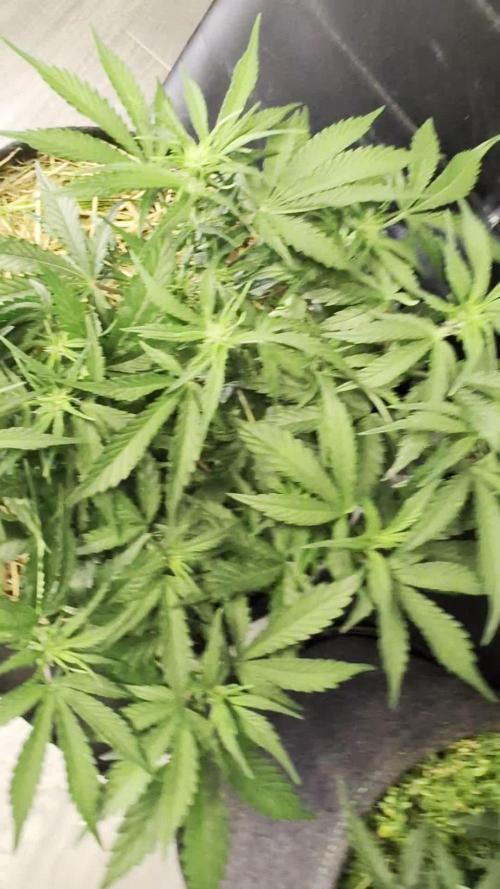
All right guys so we're just over a month of flower and she's starting to stack as of now I would say officially... I think we're going to see a lot of growth in the next two weeks to 3 weeks.. WEEDSEEDSEXPRESS thank you for the opportunity to showcase your genetics and just how strong they truly are because as I said in the video and as I've said this whole time this girl has taken a beating like none before... She had the disadvantage of starting life and old dirt that had salt base nutrients with plenty of residual left in the medium.. I planted two plants the other one did not survive.. not only did she pull through in the early stages but once she got past the hump of the situation I put her in she has been growing great ever since and as you can see I have done massive training to her I've topped her a whole bunch of times been tying her down because I wanted to see just how resilient the plant is.. it's amazing that the plants will to live is stronger than most humans.. with that being said next week we should see a good amount of growth and I am extremely excited for this one as it is strawberry cough.. thank you again to everybody at WEEDSEEDSEXPRESS.. until next week happy growing everybody ✌️😎
https://weedseedsexpress.com/us


Likes
17
Share


@Ts1Ko
Follow
So. From the early beginning, this plant was my favourite. So she didn't dissapoint me. If we remember that fact that for last 3 weeks i was taking some every day, overall outcome was still very good. the high is amazing, and the smell is 'something'. I would recommend this strain to everyone if you are thinking to get one.


Likes
4
Share


@Tmasm
Follow
Saudações
Iniciar diários fast buds
Encomenda chegou dentro do prazo, muito discreto.
Dia 16/11/2023
Selecção de 5 sepas, colocando em papel toalha
Dia 17/11/2023
Mantido em papel toalha
Dia 18/11/2023
Colocando em vaso final, com um cúpula para manter umidade alta.
Agora é esperar que corra tudo bem
Não se esqueça de ver novidades em https://2fast4buds.com

Likes
13
Share


@420DeepGrow
Follow
Gracias al equipo de AnesiaSeeds y XpertNutrients sin ellos esto no sería posible.
💐🍁 Frozen Face Auto
Nueva variedad autofloreciente, tan refrescante como una mañana helada con un toque de cereza y lavanda. Esta variedad es una auténtica obra maestra de la cría, con un linaje dominante 70% Sativa que aporta una vibración edificante y energizante a tu cultivo. Perfecta para los que aprecian la belleza veloz de las semillas autofeminizadas y la mezcla única de dicha aromática.
Con un contenido de THC del 30%, Frozen Face Auto promete una experiencia tan estimulante como una zambullida en un lago fresco, dejándote fresco y vigorizado.
Ofrece rendimientos impresionantes de 550 g/m² en interior y hasta 300 g por planta en exterior. Con un ciclo de 70-75 días.
🚀🌻 Consigue aqui tus semillas:
🍣🍦🌴 Xpert Nutrients es una empresa especializada en la producción y comercialización de fertilizantes líquidos y tierras, que garantizan excelentes cosechas y un crecimiento activo para sus plantas durante todas las fases de cultivo.
Consigue aqui tus Nutrientes:
https://xpertnutrients.com/es/shop/
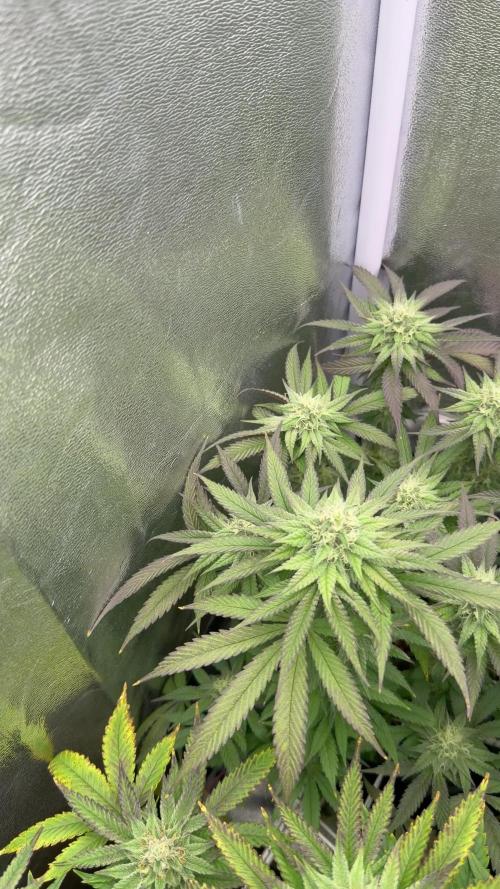
📆 Semana 10:
Parece que el tiempo va mejorando, los cogollos son grandes y siguen acumulando resina.
Engorde final y lavado de raices

Likes
12
Share

@BenandLippisfinest
Follow
Trotz des doch heftigen LST und toppen der Pflanzen, entwickeln sie sich sehr gut, auch die G Donuts erhölt sich, wird aber nicht sehr Groß werden, diese sollte man also einfach wachsen lassen. Die Mango G entwickelt sich wie erwartet nach dem toppen, durch ihre Runtz Genetik ist dies auch kein Wunder, haben doch bis jetzt alle Runtz bei uns einen Boost erlebt nach dem Toppen.
"Despite the heavy LST and topping, the plants are developing very well. The G Donuts is also recovering, but won't grow very tall, so it's better to just let that one grow naturally. The Mango G is developing as expected after topping; with its Runtz genetics, that's no surprise, as all the Runtz we’ve had so far have seen a boost after being topped.
Likes
Comments
Share

@PurpleBeen
Follow
Week 5 / Flowering
During this 5th week of flowering, everything is going very well. There have been a few periods of heat, but overall everything is progressing nicely. A few buds are hidden by some leaves, but given how advanced the flowering stage is, we will avoid removing them.
Beautiful colors are starting to appear: a pinkish-purple tone for Froasted, while Purple Cookies is showing a darker shade. Our odd one of the group, Sticky Berry, continues on the same path.
There are also a few signs of previous overfeeding or underfeeding, but nothing concerning at this stage.
12/12 switches : 12/06/2026
Back: Frosted Grape
Front left: Purple Cookie
Front right: Stick Berry
Watering remains moderate: ~600 mL for the larger plants and ~300 mL for the smaller ones, with 1 L being the maximum applied so far.

Likes
24
Share


@Familytrees19
Follow
So I posted a video here as well as Instagram (@familytrees19) of my attempt at making my own automated feed. I got some tweets to do but so far looking great! So this week was great good growth and smelling nice!! I am most likely gonna flip these babies Monday or Tuesday. I can’t wait to see this light in action with flowering!! Oh Ye I had a quick power outage this Morning I had to redo all my timers and check to make sure they turned on at the proper time, all my tents but this one! This one has the AMAZING kind led k5 Wi-Fi xl1000 it went right back to schedule! I checked and it was like nothing happened! What a great light really plug in set it up and that’s it! Anyways hopefully next week I’ll have a video of my automated feed in 💯 working

Likes
9
Share


@PlumpPelican
Follow
Start of week 3 - Plants are still stretching and aren’t slowing down either..
I raised the HPS hood because the tallest stems were starting to show signs of heat stress.
Hairs are coming on quickly now, time for the ladies to push out some beautiful bud!

Likes
4
Share

@Organic473
Follow
Her new top branches are popping up. I tried a few clones and defoliated her again. She still looks healthy, loving the progress thus far.

Likes
3
Share

@Grow_for_Happiness
Follow
Exciting week, this girl has gone into flower! Was seeing the start of some pistils at beginning of week and by end of week they are fully into flower. Just over an inch of growth a day, and were just hitting stretch. Nice busy even plant, with zero training or defoliation to date. Love how blueberry crosses are almost always naturally bushy plants. Trying out Plagrons Power Buds, claims more bud sites, see how she. Goes! Plants seem happy with the mix so far, so good! Lights at 30" hitting 580-600 umol/s

Processing
Likes
3
Share


@Greenzfingerz
Follow
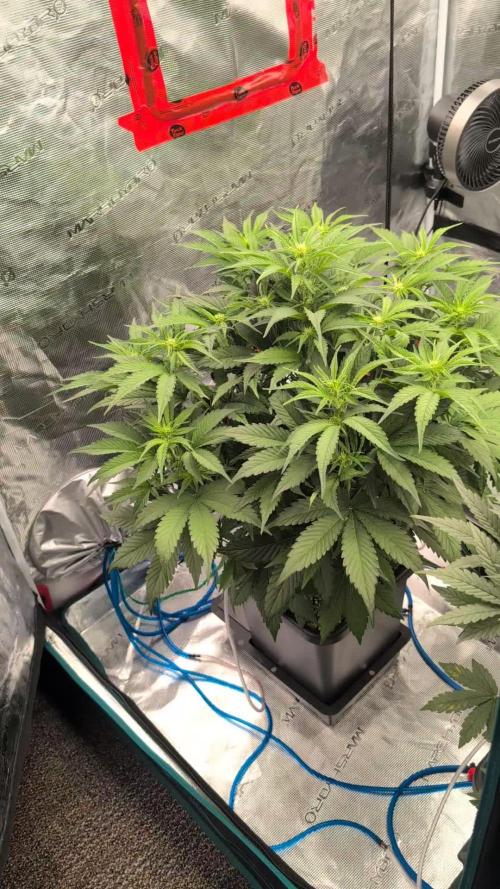
Good week all branches tied and bottoms caught up quote small and bushy with quite a few node sites. Try update some better photos soon. Just switched to 12/12 today, been running 600hps was goin to add another but heats alittle much so ive added two 1000w led photos to follow. Hoping to fill out room more withjn a few weeks of stretch to 12/12.
Likes
10
Share


@CanadianFillmore
Follow
Welcome to my second grow of the Glueberry OG strain. This girl was veg'd for 14 week in a small pot while my first grow of this strain is in the flowering room. She didn't gain much more in size, despite the extra veg time, probably due to lower levels of nutes and the smaller pot size. Still she's looking good after moving her to the big pot and giving her a trim.
Thanks for checking out my grows!

Likes
177
Share


@DreamIT
Follow
⏳🍁 The Endless RED Garden 🍁⏳
____________________________________________________________________________________
🍊 17.3 -2
🍊 18.3 -1 ... The last Red mandarinas are ready to be harvested and the new clones have been decanted (with a lot of delay, as you can see from the roots) but I delayed to allow the 8 new entries (7 having moved the male) a more luxuriant growth. the new clones will be placed in about 3-4 weeks, in the meantime they will continue to vegetate under tneon
🍊 19.3
🍊 20.3
🍊 21.3
🍊 22.3
🍊 23.3
_________________________________________________________________________________
📜👀 A look at the details of what I'm growing 👀📜
🍊💚 Red Mandarine F1 🍊💚🌱🍭 Sweet Seeds 🍭🌱
📋 Details 📋
⚧ Gender
▪️ Feminised
➰ Genes
▪️ 55% Indica / 45% Sativa
🎄 Genetics
▪️ Red Poison Auto (SWS39) хCalifornia Orange x Skunk hybrid)
🚜Harvest
▪️ 400 - 500 g / m²
🌷Flowering
▪️ 49 - 63 days
✨THC
▪️ 17-20%
✅CBD
▪️ 0,2%
🏡Room Type
▪️ Indoor
🌄Room Type
▪️ Outdoor
🕋Room Type
▪️ N/D
🎂Release Year
▪️ 2019
_____________________________________________________________________________________
👀📷🥇 Follow the best photos on instagram 🥇📷👀
https://www.instagram.com/dreamit420/
🔻🔻🔻Leave a comment with your opinions if you pass by here🔻🔻🔻
🤟🤗💚Thanks and Enjoy growth 💚🤗🤟
Likes
9
Share


@TheBulldozerSicily
Follow
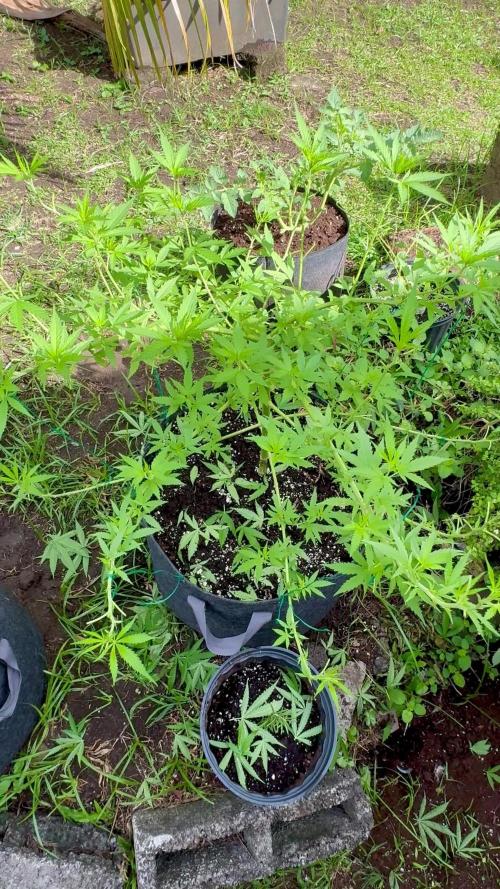
Niente da dire, 0 stress questa settimana non ho fatto niente, la prossima settimana aggiungeremo acqua se necessario.
Si iniziano a vedere i fiorellini,

Likes
22
Share


@SkunkyDog420
Follow
Hallo zusammen 🤙.
Alle 3 Pflanzen sind geerntet.
Wir sehen uns in 2 Wochen mit dem Erntebericht.
Bis dann 🤙
