
Likes
Comments
Share


@DyadyaAsya
Follow
Progress for the week.
The clones have arrived!
They were on the way for almost 2 days.
This is the first time I'm raising clones, let's see how it goes.
Left tray will have Feno 1, right tray Feno 2.
Vega (18/6), days: 7
Total, days: 7
Ec 2.15 (Athena bloom, grow, Core, Cleanse, Balance)
Ph 6
Red 40%
Blue 55%
UV 5%
DLI ~26
T. Day: ~25C
T. Night: ~22C
Humidity: ~62%
T.leaf: 22C
VPD: 0.68kPa
Already 5-6 nodes, I will do topping after 10-11 nodes.
Some leaves have damage, most likely some roots were damaged during delivery and the plants are recovering.
The first 4 days I gave Bloom (recommended by Athena) and then I started giving Grow.
I add a decent amount of blue light, because this variety stretches out a lot.

Likes
5
Share


@deepsheeba
Follow
Corrected the nutrient ratio to 120-20-100 ppm.
Plant is still stretching and I'm waiting she start fattening.
Two sanlight are going to be implemented for a CO2 heavy growing

Likes
11
Share


@Chubbs
Follow
420 Fastbuds
FBT2304 Week 4
Weekly update for these two beauties. From sprout to this point they've grown like Champs. A little calmag issues a few weeks back but over all nothing major. Still spraying PureCrop every Monday as preventive maintenance for pest,mold, or any other topical problems. I upped to feeding to 2000ml everyother day and alternating from nutes to just Ph'd water. Until next week's update grow fam Happy Growing my fellow growers.

Likes
42
Share


@TerpTurtle
Follow
12 day dry @ 58-63RH & 60-66F in blacked out dry tent | Glass Jar Cure
Early taste test & this Bud KOs leaving you in major terp sweats! Hits like a Sumo wrestler sitting on you tickling all over! Flower bowls hitting like fat juicy dabs, with overwhelming squeeze & flavor like you're drinking a smoothie!
Breaks down chunky and greasy with a vivivd dark purple color. LOUD N STANKY, opening a jar gives you the duck face funk face.


Likes
49
Share


@AsNoriu
Follow
Day 119. Will update later. This grow is almost finished ....
Jar day - all is done, now cure left.
Happy Growing !!!
P.S. if you are searching for Killer Kush, she got separate diary, my favourite of all 3 strains.

Likes
39
Share


@BelgianBudtender
Follow
Yo what's up growmies.
smooth sailing, no more leaks have sprung, the buckets have been recirculating nicely, it seems as if my mad idea to turn my DWC into an undercurrent RDWC mid flower wasn't so mad after all!
the plant bucket is as good as off limits now, its a whole lot of noodle, the roots in it have swallowed my InkBird Probe, which has been kept at a cool 19 degrees steadily. I'm happy i have an easy access bucket now, though, i noticed that if i do not aerate the reservoir, black smuts starts collecting on the bottom, so I put in some better air stones and we are good now.
As for the plant; after starting green sensation these things have become incredibly sticky and smelly, I still cannot place the smell! i like it a lot once i'm acclimated to it, but when first opening the tent it attacks your sniffer quite violently, this is not a stealthy strain, she is resinous and loud.
I think I am happy with my training and how she turned out with a few exceptions, next time, I'm growing following a guide, like Nebula Haze, whilst taking clones.
I know this is week 6 of flower, but honestly its more like week 3 or 4 of actual flower, hence why i waited so long to add PK to the mix, this girl took a while to hit puberty and start flower production after flipping to 12-12, Im not sure if its the strain, a fuck up on my part, or just nature being nature, she did seem to stretch after flipping and before starting flowers, so I'm going to guess it's one of those Sativa quirks where it all just seems to take...a.....little.......longer.
which is I will also set up a veg tent, sick of waiting for flowers! gotta keep that perpetual grow going, you know how it be.
Stay safe and keep growing

Likes
6
Share


Likes
6
Share


@PattersonFarms
Follow
The room smells like sweet citrus. This grow was pretty easy but I was expecting a higher yield. Overall she was a good plant! Now time to fire up the curing chamber.

Likes
5
Share


@Mr_nugs_lover_David
Follow
She has a nice structure, hope to get many buds from this lady, it's a strain I'm very excited to work with, hope to have a nice jar full of this diesel in a few months, stay here with me to see her performance! 💚❤️👨🌾

Likes
7
Share


@GoodBudz
Follow
The final week! These Auto's are BEASTS!!
No more nutrients just leaching with tap water Ph between 6 - 6.1 the taps ppm is 200 so I will eventually get an R/O system.
Really packing on some weight!! Had to tie branches to other branches to hold them up. Did a final defoliation a little late in the week normally I would do it at the start of the last week.


Likes
169
Share


@SlowpokeFuegobud
Follow
🍊 🐶 💜 🍊 🐶 💜 🍊 🐶 💜 🍊 🐶 💜🍊 🐶 💜 🍊 🐶 💜 🍊 🐶 💜 🍊 🐶 💜
Welcome to week 9, my fellow growmies!! 💚 💚 💚
DAY 57
Watered with 3ml humics +growzyme + bigfruits 💧
DAY 59
Watered with 3ml bloom (?) + 2ml PK + 4ml humics + growzyme + 3ml bigfruits 💧
DAY 61
Watered with 4ml bloom + 3ml PK + 4ml humics + growzyme + bigfruits 💧
DAY 63
Watered with 4ml bloom + 2ml PK + 4ml humics + growzyme + bigfruits + LO + 2ml calmag
💧
Thanks for stopping by, it's a true pleasure to have you as visitors!! 💚 💚 💚 😘
💜 🐘
______________________________________________________________
About Sour Tangie Dawg cannabis seeds
Sour Tangie Dawg is a sativa dominant cross between the famous Tangie and Chemdawg. Expect a combination of sweet & fruity mixed with a gassy, jet-fuel flavour. The amazing mix of citrus, tangerine, pine and gasoline produces uniquely rich, dank buds. The powerful sativa high is strong, uplifting and long lasting, great for creativity and socialising.
Chemdawg is the parent of OG Kush, all Diesel strain originate from Chemdawg. The Tangie is originally a Skunk hybrid strain but extremely fruity with the trademark Tangerine flavour. This strain is potent with THC-levels over 20% alongside very generous yields of top quality weed, very suited for hash and rosin producers. If you’re looking for a strain to produce the best tasting concentrates this Sour Tangie Dawg is a proven winner! She easy to grow and the perfect choice for SCROG growing due to her growth speed and stretch. We advise switching to 12/12 light when 75% of the net is filled. For outdoor growers the harvest period is early October. Indoors she’s finished after 9 weeks of flower - fast for a sativa dominant strain. We recommend growing in soil with organic nutrients for the best tasting weed.
Get some fantastic genetics here: https://supersativaseedclub.com/ 💜 🐘
___________________________________________________________________________
SETUP:
80x80x180 cm Zelsius
240W Full Spectrum LED IR UV dimmable
DW240H-A6-HS
Heatsink color red
LED Chips:
512pcs SAMSUNG LM301H + 24pcs Osram 660nm + 8pcs Osram IR 730nm + 8pcs UV 385nm
Color mix: 2700K + 4000K
2,8umol/J
Driver HLG-240H-C2100B
Coverage: veg 5x3ft / flower 4x2ft
Product size: 628x205x68mm
Green Buzz Nutrients
Shouts go out to my sponsors @GreenBuzzNutrients, thanks so much for your support! ❤️
If anyone would like to try their amazing organic products, use code GD42025 for generous 25% discount (for orders of minimum 75€) ✨
https://greenbuzznutrients.com/
Biobizz Lightmix
custom exhaust fan 320/270cm³/h
Carbon Active Granulate 240cm³/h
tab water pH 8 - EC 0,25 with Calmag to 0,5
Advanced Hydroponics pH minus Grow + Bloom to pH 6.2
🍊 🐶 💜 🍊 🐶 💜 🍊 🐶 💜 🍊 🐶 💜🍊 🐶 💜 🍊 🐶 💜 🍊 🐶 💜 🍊 🐶 💜


Processing
Likes
4
Share


@Fergie
Follow
HEy guys so another week has passed and it is getting close to end for my lemon ak girls . Begun flush this week passed 10 gallon through eachnplant and strip back all main fan leafs to e,pose buds . The remo is a monster ready to flip for sure and i will repot blueberry llater to 3 gallon til i swap again to 9 gallon after auto done . All look good sorry again light i haven't got a good led yet and i have be cautious where i stay .- 😉
Likes
4
Share

@Daddy_farmer
Follow
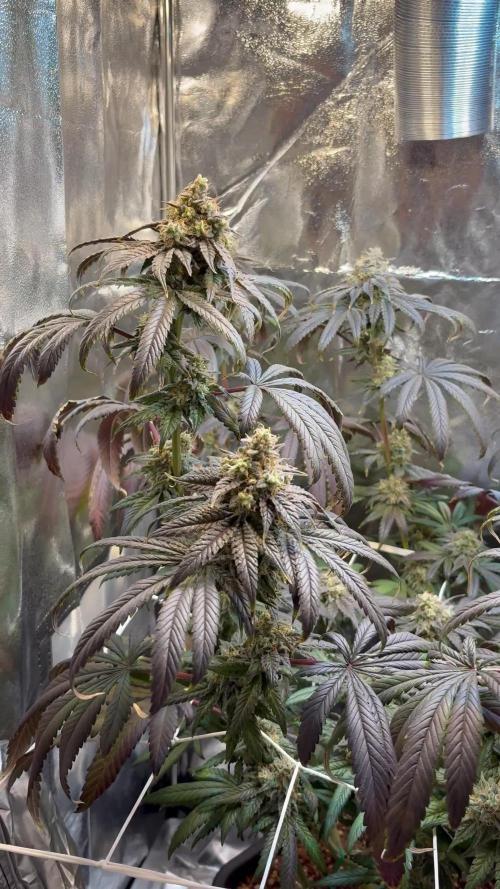
She gets really nice colors now- starting to eats what compensates in fan leaves. 🍁
Flowers not fattening as I expected. I wasn’t able to check and correct past two week due to absence.
Plenty mistakes on the first coco grow but overall I’m really enjoying what I see.


Likes
Comments
Share


Likes
13
Share


@DrDuhboto
Follow
Other than having to remove the Buttercream gelato from the room and harvest it because it went Hermie everything else is going well.
All plants are fattening nicely, air flow is good, there are some sings of cupping on the leaves of Blueberry and Maui Waui,
I rearranged the Scrog and pulled the larger buds lower to help combat this. Cheese has some amber on it already, which lines up well with the timeline for harvest of my last cheese plant which was 15% amber at the start of 8 weeks.
I will let this one go a bit longer if possible so I have a slightly higher cbd version of cheese to go with my high thc batch I harvested last crop.
Blueberry will likely come down a week after that and Maui could go up to the full 10 weeks from what I am seeing.
Added Silica, Enzymes and Molasses to my feeding regimen.
I add the silica to tap water mix it and then put air stones in the resevoir,
I let that sit for a few hours then add my Micro, Gro and Bloom, then add Cal Mag and Sensizyme and Molasses. I use a drill with a mixer attachment to mix it well. This really helps with the molasses.
I find if I add about a tablespoon of fish fert to that mix I end up with 6.5 PH.
Fish fertilizer stinks but the plants love it.


Likes
3
Share


@SimplyGrowLogical
Follow
This week I started using Power Si Bloom because I had it for my indoor garden so why not... nothing new here but I did start feeding 2 gal water per plant every other day. Still using recharge and kelp

