
Likes
Comments
Share


@Nofeckingclue79
Follow
I've not had to trim any fan leaves they have all died on their own and I have just picked them off with tweezers apologies for the video I don't know what happened but I add smoked a doobie before 😂😵💫

Likes
8
Share

@hinterhofgrower
Follow
.
📹: Video on YouTube @hinterhofgrower please like & subscribe
🌱: Training day 88, 90
💧: 4l day 88, 4l day 90
💡: Dli 45 mol/m²/day
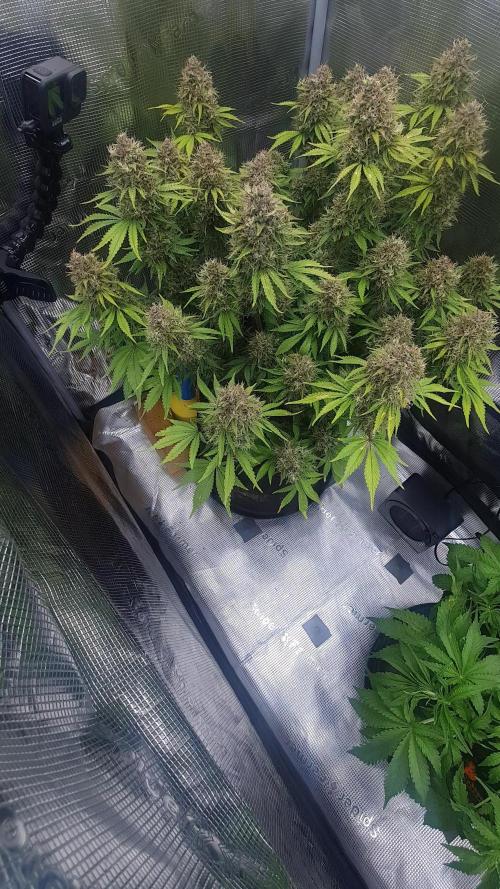
🤔: By week 13, the heatwave had passed. In my view, the foxtailing has been confirmed. The plant continues to be closely monitored; I am continuing to check the buds for mold and ensure optimal air circulation.


Likes
25
Share


@Bakeryguy420
Follow
Easy to grow . Fun to grow smells so fucking dank. Like peeling back fresh grapes tbh. I was able to make some cannabutter for my wife birthday V day weekend bash. Also was able score some fire ass trim and pressed it with my new 20ton press. I'll post more photos later but the hash rosin from just the trim smells so fucking good. Ethos did a great job on these autos so happy I was able to grow them. Straight out my multipass box easier said then done. Thank you again to everyone who followed me growing these beauty's.

Likes
5
Share


@Bryankush
Follow
Giorno 1 molto bene le ragazze sono state defogliate per entrare pulite nella terza settimana di fioritura
Giorno 2 nuovamente LST sul ramo apicale, è infermabile


Likes
Comments
Share


@JamieKnolliver
Follow
Die Stretchphase ist in vollem Gange! Erste Blütenansätze sind deutlich sichtbar. Alles läuft stabil – kein Mangel, keine Schädlinge. Netz wurde leicht nachjustiert, um das Blätterdach gleichmäßig zu halten.


Likes
8
Share


@Zark002
Follow
Segue engordando bem, sem muitas novidades, estou regando apenas com água há 7 dias e vai assim até o final

Processing
Likes
2
Share


@PlantGod
Follow
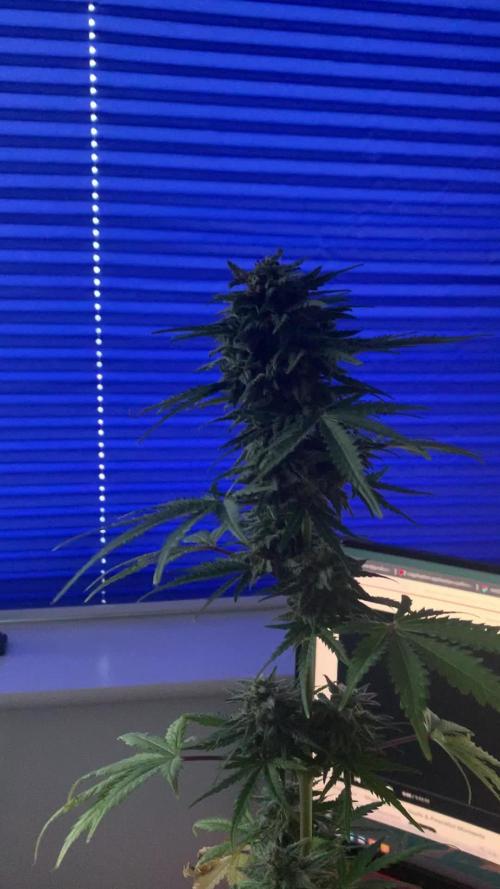
This thing is insane!
Rapidly growing everyday. I need to keep it under control for another for about 30 more days before I can fit it in my other tent.
Likes
6
Share


@Wenz004
Follow
Fängt so langsam an zu wachsen...obwohl ich nicht mehr so recht daran geglaubt hab.
Ende der Woche 5 noch ein topdress bekommen...2 EL FHM von Almicana


Likes
57
Share


@Wastent91
Follow
Eccoci ragazzi, scusate il ritardo ma purtroppo sono molto impegnato in questo periodo, è faccio fatica a stare dietro ai diari.. Apparte questo questa blue dream sta crescendo davvero molto imforma e vigorosamente! Ha già sfumature bluastre ed un odore speziato molto particolare! Ho tolto un po di rami inferiori che non prendevano abbastanza luce, ed ho provato a fare qualche clone, se questa ragazza si rileva come sembra un ottima genetica potente, in questo modo avrò delle sorelle identiche in forza e vigore che mi daranno un erba eccezionale nei prossimi cicli? Speriamo che attecchiscano! Per il resto tutto ok, sto seguendo la scheda di Terra Aquatica e si stanno rivelando degli ottimi nutrienti! Grazie a tutti voi che mi seguite, spero vi piacciono le mie ragazze quanto piacciono a me! P. S come potete vedere dalle foto è in corso una massiccia infestazione di tripidi, e nonostante le molteplici trappole che ho messo dappertutto, non riesco a liberarmene, anzi stanno sempre riproducendo di più e sinceramente sono un po' preoccupato, spero che il raccolto non ne risenta troppo.. Ho pensato di mettere qualche coccinella come predatore naturale ma per ora non è il periodo e ne ho trovata solo una che nn risolve di certo la situazione.. Grazie ancora buone fumate a tutti! 420 🍀🙏💪😸🌱🌿🥦🧑🌾
Likes
4
Share

@SplishSploosh
Follow
TOTAL COST : 138£
-
Electricity usage - £8
Buying the Grow lights - £54
Buying the Nutrients - £45
Buying Pots (x3) - £16
Tools - £5
Soil - 10£
I should say I had the nutrients for over 2 years so I’m using the price for that initial purchase. They were used in all my other gardening endeavours such as tomato's, strawberries and chillies, I had great results with BAC and Nutrigrow but they are somewhat pricey. You might find some cheaper alternatives if that figure puts you off.
-
31/05/26- This plant blew my expectations, from seed to harvest she was amazing, developing faster than expected at all stages, with keep in mind very limited resources, still she was a productive, over achiever and definitively one of my best grows of all time!
But harvest day is upon us, her tricomes are in that sweet spot for Milkey/small amounts of amber! So Now is the best moment to harvest!
It’s always a bit emotional but I like to play some calm peaceful music like a final concert dedicated to the plant right before I put her to sleep! And start drying her.
I like to make use of all the leaves brewing them into a tea. I’ll update the dry weight later!
03/06/26 - This is great I got the dry weight back and got 10grams of dry sticky amazing weed, this is better than I initially expected, I had in mind that I would be lucky for 8 grams! But now I'm curing it and developing those terpenes flavours which should enhance the experience! This is modest quality and I couldn’t be prouder

Processing
Likes
24
Share


@GrowGuy97
Follow
Day 28 - RH 58% Temp 81F . Ladies are growing great, they are really starting to turn into little bushes & the double mainline is going strong 💪🏻 Thanks for following friends & make sure to check back for daily updates! Happy growing✌️🏼🌱
Day 29 - RH 57% Temp 78F . Couldn’t be happier with the growth!
Day 30 - RH 60% Temp 78F . Everything is looking great!
Day 31 - RH 51% Temp 78F . Watered today with PH at 6.5, all 3 ladies are doing amazing!👍🏼
Day 32 - RH 53% Temp 81F . Considering topping the ladies tomorrow not sure yet! Still growing beautifully!
Day 33 - RH 52% Temp is 80F - Bushing out like crazy & growing strong! The double mainline seems to be bouncing back as well! So far very impressed with this strain😍👍🏼
Day 34 - RH 56% Temp is 79F - Decided to top the two bushy plants today, they also got fed today with PH about 6.3

Likes
5
Share


@Major
Follow
hello that's it we're in the home stretch I'm starting to rinse my plants the buds are okay I'm very happy with my upcoming production. and already tested in smoke I'm happy😃😃😃😃😃😊


Likes
11
Share

@Paying_Customer
Follow
Not stretching as much and the buds are starting to bulk up all the bud sights have a nice purple fade. She’s a short plant but looks like she will be productive in the end. Day 47 had to remove some of the big fan leaves that were blocking light on some of the bud sites below them. She's really starting to put on some weight.
Likes
11
Share


@Madman2020
Follow
Generative steering
Day 30 sprayed with Jas
Day 31 noticed spider mites
Likes
16
Share


@osmrducks
Follow
Day 8: Woke up and checked on the ladies, they were bone dry. Hit em with 70 ml of AN Coco Grow diluted in my mix.
Day 9: Got the new lights in today and hooked up. Girls are looking pretty good I think. Still letting em dry out a little. Gonna add a shot of Great White on next water. No nutes will be in this shot.
Day 10: Still looking good. Had to stack some loose Coco around a couple as they had a good stretch going and were leaning pretty good. Also noticed a couple of brown spots on the leaves. I am led to believe after asking questions and researching, it is more than likely nute burn? No more nutes for these girls for a while. I also got a humidifier to raise humidity as it was pretty low.
Day 11: These girls almost double in size every day! They would probably be a little bigger if I hadn't of tried to give em a drink of nutes earlier on! Lesson learned!! Not bad for 6 days out of the ground regardless though, I think. Got a humidifier in the tent and it stays around 50% now. Other than last night it got up to 73%. I need to get that fixed.
Day 12: Nothing new to update other than they look healthy. Think I am gonna let them dry out a touch more before watering.
Day 13: Gave the girls 1 cup of ph 6.0 water this morning. Thermostat battery went out and lucky my girl caught it in time. Temp got to 86° for a couple of hours. Opened the tent for an hour to get the temp back down. Humidity has been hovering around 50% for the most part. Minor fluctuations here and there. Girls are looking good for 8 days out of the earth though!! 💪
Day 14: Looking like they need another drink, dry down to around 1" deep. Gave em 2.25 cups with super diluted Coco Grow and a touch of Great White. 😳 They are doing great! 👍 Looking forward to see what week 3 has in store! Going to build a support to add my 2 CREE lights back in along with the Mars lights.
Likes
34
Share


@The_Bearded_Grower
Follow
looking very good and getting fat. the tricombs are nice and milky. 1 more week till flush baby

Likes
134
Share


@DogDoctorOfficial
Follow
OMG OMG OMG finding hard to put on words all i am felling with this one, she was a delight to grow and without trying yet her medicine she wen strait to my top 3, i mean super strong Mama, strong to everything pests you name it, amazing structure her terpene profile is taking me back to the 90s with her almost like gasoline smell mixed with limes and pines OMG cant wait to try out this one much but much respect to DutchPassion on this creation of them she is so so so , like glue that you cant touch without getting it everywhere <3 <3 haded the last 3 weeks and harvest time-lapse i fell like this one could have gone more than the 71 days in flower that she did, but there is no time for that in this run but i will run her again thats for sure and a must for me.
Guys trust me on this one , she is a must , a real must in any garden <3 <3 <3
Thank you so much Dutch Passion for this blessing of an opportunity and for everything you guys do for the community much respect and appreciation <3<3<3
Everyone best of luck for the contest this was an amazing and fun one <3 <3 <3
As always thank you all for stoping by for the love and for it all, i truly appreciate and enjoy the ride so much more with you guys around <3 <3 <3 you guys make me fell super blessed <3 <3 <3
#aptus #aptusplanttech #aptusgang #aptusfamily #aptustrueplantscience #inbalancewithnature #trueplantscience #growerslove #dogdoctoofficial
With true love comes happiness <3 <3 <3 Always believe in your self and always do things expecting nothing in return and with an open heart , be a giver and the universe will give back to you in ways you could not even imagine so <3 <3 <3
More info and updates @
https://growdiaries.com/grower/dogdoctor
https://instagram.com/dogdoctorofficial
https://youtube.com/channel/UCR7ta4DKLFMg2xxTMr2cpIg
<3 <3 <3 Growers love to you all <3 <3 <3
I will post more photos from her dry trimmed bud report smoke etc asap <3 <3 <3 and need to clean space on my iPad so that i can upload the rest of them photos and videos , my apologies <3 <3
Done hehehe waiting on this beauties to dry now <3 <3 <3
