
Likes
Comments
Share


@BruWeed
Follow
Esta semana ya realice la poda. Se encuentra en estos momentos en etapa de secado dentro de una caja especial para secados de flores que uso siempre y nunca me falla.
En humedo hay 195g y utilice una lampara led de 150w en todas sus etapas.
Próximamente estaré publicando cuando este en curado.

Likes
7
Share

@Sundancers
Follow
In der letzten Woche hat sie extrem an Biomasse zugelegt zu unserer Freude. :-)
Trotzdem ist sie im Verhältnis noch sehr klein. Deshalb haben wir uns entschlossen, sie nicht zu toppen und kein LST an ihr vorzunehmen. Im späteren Verlauf eventuell noch HST, aber als ersten Versuch lassen wir der Natur ihren Lauf. Die Cinderella soll einer der schönsten Pflanzen sein -- Wir werden sehen :-)

Likes
2
Share


@Saintvicious
Follow
She's unstoppable. Looks like we are about to be in pre flower. It's show time.
Likes
27
Share


@Smokepurple137
Follow
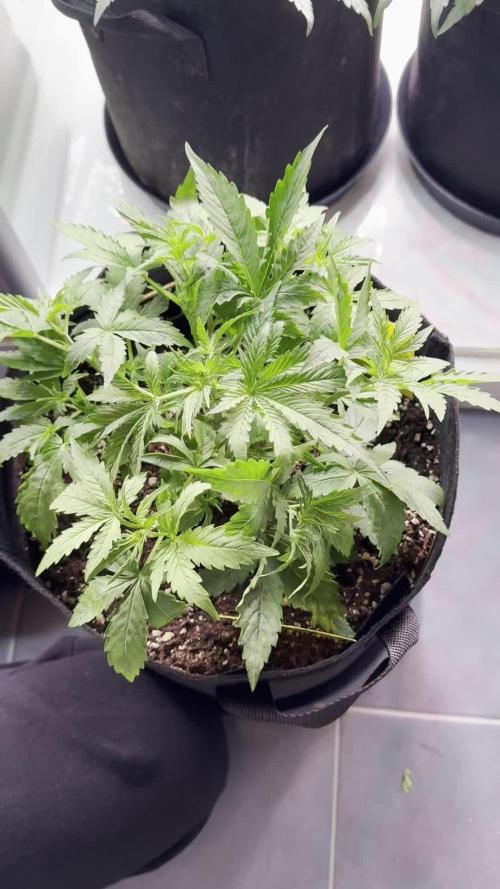
Stretching really well in 2nd week don't think I will veg them too long, maybe another 2-3weeks, been able to top 2 of them so far. I will be topping all of them just the once. Growing slightly quicker than the last barney's seeds I used. All looking very healthy.

Likes
6
Share


@Ninjabuds
Follow
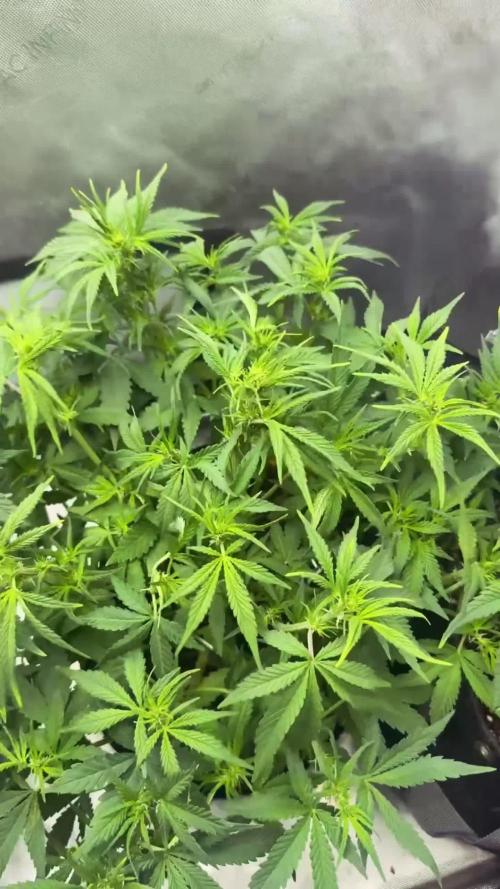
The Permanent Markers are finally taking off! They've at least doubled in height since last week. Of course, they're still really small, but it's cool to see them finally getting going. They look healthy and are developing nicely.
Well, another year has come and gone. Yesterday was New Year's Eve, and I want to wish all of you a happy and healthy 2025. May this year bring you all the things you've been wishing for. Let's make this the best year yet!


Likes
13
Share


@HIAZ_urbanbudfarmer
Follow
Yes it's a very confusing diary, spent to long in Cloner, no where to put her , moved to veg tent in small pot & neglected, hand watered when I remembered.her & another clone brought back from the brink of death & put into DWC , around 9 weeks old but looked about 3 weeks. HST trained them for about 5 to 6 weeks in veg, moved to flowering tent, were 5 weeks into flower & both got root rot.The 2nd plant died saved this 1 by cutting away majority of roots. No point continuing to flower her as she would have greatly been affected, so put her back into veg, transplanted into recirculating hydro & been reveging for 7 weeks 46 days. Started getting new vegative growth over the last month.looking healthy & lush now, planned to put her back into flower with the new plants when they are ready to flower, hopefully she will be worth the effort & time when it comes to harvest, sh is around 24 weeks old!!!
Likes
14
Share


@tiasmaaa
Follow
so the original clon is having a little issue with the yellow leaves, don't know if it's because it's approaching the end or maybe I started flushing too early I don't really know.
and jelly pie is always looking great, for the moment I keep giving them nutrients and I'll start flushing in a small week
Likes
14
Share


@concentrate_on_coco
Follow
12/5 - Feeding begins! I call this my official day 1 of veg. The Critical +2.0 must think this is a race. Made up 1.5 liter of nutrient water for all plants.
12/6 - Babies getting RO today (6.4ph). The Dosido is giving me a hard time, I've got one good one.
12/7 - I've lost 3 seedlings leaving me with 23 plants to work with. Mostly all plants have their 4 little leaves grown out. Made up 1.5 liter of nutrients for feeding, used about half bottle. (6.0ph)
12/8 - Used remainder of nutrient water and topped all pots with RO (6.3ph) to maintain soil moisture.
12/9 - Made up 1.5 liter of nutrients (6.1ph), half in am and last half in pm with RO to maintain moisture.
12/10 -
12/11 - Looking good.


Likes
16
Share


@Tipton
Follow
Day 45 in flower... Trichomes are about 80% milk and no amber... The paint and big Z are 7-9 weekers and orange cake is 9-10... Def few weeks on the orange cake... But getting close to how I like it on the other two... The smells are outta this world... Orange cake smells like orange cake... Very orange like it's nuts... Never smelt anything like it tbh... The paint is a different pheno than previous ones because there's usually a chemical skunk smell but this is a fruity pebble smell with layers of earth smell and a sticky presence that doesn't go away for a long time lol... The big Z is another sweet smelling but more along the smell of a mouth full of Skittles and that dirt earth smell aftertones... They're awesome and I'm really excited!
Day 46
They fattened up over night! Coming to n end... I did find little clusters of amber trichomes on the paint and I can't find many clear on the big Z... So it's right where I want it!

Likes
1
Share

@Stacy_smokez
Follow
Did some defoliation but she def filled back in and I may defoliate again just to make sure light is getting through all the way but overall everything is going well
Likes
22
Share


@Silverback_Guerilla
Follow
3/23:
I let them go totally dry this time and fed them with about 3/4 gallon each including terpinator, signal, sweet & sticky, cal-mag, armor si, cha ching, tiger bloom, big bloom, and humic acid. This was probably the last time the shorter one gets any nutes. She's ripening up now.😃
3/27:
I watered them today with about 3/4 gallon of filtered water with sticky & sweet, terpinator, signal, cal-mag, and a little bit of cha ching.
I looked them over pretty well. Soooperrunt is the furthest behind of the three plants, but her cola is gonna be massive. This was the last time that the other two get any nutes at all. I'll flush them once they are dry.

Likes
209
Share


@Rock_n_Roll_Randy
Follow
2nd week for the 54 plant grow. 42 different strains of photoperiods and 12 different autoflower strains.
GAME ON FOR A CRAZY GROW!!!
IN THE 8X8 GROW TENT WITH THE NEW FC-E6500, FC4800 AND TSW2000 and green buzz all organic/vegan fertilizers🤘
BREEDERS AND SEEDS:
DIVINE SEEDS:
MAZAR, OPIUM, WHITE WIDOW, OG KUSH, PABLO ESCOBAR, DIVINE INDICA.
AUTO WHITE WIDOW
AUTO PABLO ESCOBAR
AUTO WHITE RUSSIAN
AUTO FRACTAL
AUTO MONTREAL
AUTO OPIUM
AUTO KABUL
AUTO MAZAR.
WEEDSEED EXPRESS:
GREEN CRACK, GHOST TRAIN HAZE, LITHIUM OG, CHEESE.
DOCTORS CHOICE:
DC KUSH, AUTO NIAGARA, AUTO ROCK MACHINE.
EXOTIC SEEDS:
HIPPIE BERRY, MALASANA GELATO, EXOTIC ANIMAL.
GENE/MEME SEEDS:
BLACK HELL.
ORIGINAL SENSIBLE SEEDS:
PURPLE PUNCH COOKIES, WEDDING CAKE, PURE KUSH, GORILLA COOKIES.
SWEET SEEDS:
BLACK JACK, GORILLA GIRL, SWEET ZKITTLES.
EMERALD TRIANGLE SEEDS:
GORILLA GLUE, MASTODON KUSH.
SEEDSMAN SEEDS:
BLACK SUGAR, PEYOTE FORUM, PEYOTE WIFI, BADAZZ COOKIES OG, PURPLE GHOST CANDY, STRAWBERRY BANANA GRAPE, L.A. PEYOTE KUSH, PEYOTE WIFI CBD, FUEL DOG, CRITICAL PURPLE KUSH.
AMSTERDAM MARIJUANA SEEDS:
GIRL SCOUT COOKIES EXTREME, GREEN CRACK.
QUEBEC CANNABIS SEEDS:
BRUCE BANNER, GREEN CRACK, QUEBEC CBD 20:1.
I 💚 GROWING MARIJUANA:
SKYWALKER OG, BANANA KUSH, BLUEBERRY CBD.
FOR EVERYTHING MARS HYDRO VISIT:
www.mars-hydro.com
PROMO CODE: rocknroll
VISIT THE ALIEXPRESS STORE:
@marshydro_aliexpress2
Instagram: @marshydropenny
https://youtube.com/channel/UChU5ZWwNi-DvnO3oWVU3ceA
https://greenbuzzliquids.com/
#greenbuzzliquids
@GreenBuzzLiquids
https://greenbuzzliquids.com/en/shop/
PROMO CODE: rocknroll
https://www.youtube.com/watch?v=8hEqyS1jPpI
https://growdiaries.com/diaries/112437-grow-journal-by-rock-n-roll-randy/week/593118
Thanks for taking the time to read and check out my shit🤜🤛
New FC-E6500 Led Grow Light-FC-E6500 grow light with 3978pcs OSRAM BridgeLux Diodes & Moso Driver, market-leading PPF 2.7 µmol/J, Max 2.5g yield/watt with 30% higher Average PPE, more cost-effective compared with other same type lights.Only consumes 650W, perfectly cover 5x5ft (personal), 4x4ft (commercial) grow space.Innovative Precise Uniform Lighting-Built-in removable bars interval & dimmability enable the exact & dynamic PPFD control over each of the plant growing stages, FC-E6500 detachable bars deliverSuperior Heat Dissipation: Real Aluminum heatsink together with 6 slim profile passive cooled bars (THINNER & LARGER surface) and detachable Meanwell Driver, create less heat, save 50% energy than other old grow lights! Driver can be mounted remotely on the side of a grow tent/rack or on an adjacent wall to remove heat from grow space.Full Spectrum UV IR LED: With Yield Max spectrum (660nm Osram enhanced Deep Red,2800k-5000k,730-740nm IR,380-410nm UV LEDs), Average PPFD FC-E6500 LED grow lamp enable cultivators to produce Density Buds, perfect for full-cycle hydroponic,soil,grow tent/room growing.
Dimmable Commercial Grow Light: Cost-efficient,easy dimming & daisy chain max up to 20 lights, IP65 Waterproof, master light easily controlled for commercial & home horticulture.
GET THE MAX FROM MARS👍: Welcome one of the newest members of the Mars Hydro family🤜🤛🤘. The Mars Hydro FC 4800 480W LED Grow Light can accommodate up to a 4' x 4' area for flowering. It has OVER 2000 LED chips consisting of the best selling Samsung LM301B diodes which has a Luminous Efficacy of: 220 lm/W
0.2 W, 3 V mid power,
Osram 660nm Diodes, Infrared light and UV LIGHT👍. It boasts the incredible efficiency of 2.8 µmol/J, maximum 2.5gram yield per watt with 30% higher Average PPFD. This High-intensity spectrum is beneficial for plants at all stages - from veg to bloom, and creates Big dense Buds👍. achieve 50% higher yields & quality compared with the old lights! Only consumes 480W for 4x4ft personal grows, and 3x3ft for commerical grow. It comes with a dimmer and daisy chain function with a maximum of up to 15 lights, the master light controls the rest👍. Wide 6-bar design offers even & wide canopy coverage and can maximizes your grow space. slim 180° FOLDABLE DESIGN... YES I SAID FOLDABLE🤘🤣 , making it compact and easy to install, it's IP65 WATERPROOF and will give you no worries while growing in a humid environment and makes it a flexible high performance commercial grow light for enormous SUPER FROSTY yields.😛😛😛. MARS GETS EM FROSTY BOYS👍
AWESOME HEAT DISSIPATION: The Low energy consumption FC4800 growing light has 6 passive-cooled bars and an aluminum heat-sink a removable driver you can upgrade later or have it outside your tent. with zero noise you can save up to 50% in your electricity bill compared to HID's or HPS lights!
It also has a removable driver so you can upgrade it in the future or have it outside your grow space for better heat control in your growroom👍
UPGRADED FULL SPECTRUM: Yield Max Spectrum with enhanced red (Top-Bin Samsung 3000k-5000knm, Osram 660nm Deep Red), speed up blooming & fruiting, perfectly suited for full-cycle growing. The FC4800 LED grow lamp was born for Big Buds, perfect for commercial, grow tent, grow room, hydroponics, and all soil grows.👍
THE BEST SAMSUNG DIODES: THE FC4800 has Top Bin genuine Samsung Osram Diodes, combined with remarkable 2.8 µmol/J Efficacy, 30% higher Average PPFD, 50% less energy consumption, to maximize your yields. They give you a TRUSTED 3 years warranty 100% Satisfactory guaranteed!!!
The MARS HYDRO 8x8 Grow Tent interior is made of a unique diamond design mylar which is highly reflective. (Other companies mylar and reflective rate is as low as 50%, and it won't provide efficient light. They use thick 1680D oxford canvas, and being double stitched, it is tear proof and perfect for locking in the light. Their grow tent keeps 100% of the light inside the tent and helps your plants absorb more light. EXTRA-THICK material means No light leaks or rips at all.👍
Strong Stable metal corner adapters and poles are the trustful supporters of the tent. It's very sturdy, neither rusting or paint flaking off. quick and easy tool-free setup. They use heavy-duty metal zippers, with double layer black lining, by far the best on the market which creates a light-proof seal.
The Easy observation windows are made by double layers of cloth. Observe the growing conditions of your plants without opening the tent and avoid disturbing your plants. The observation windows also serves to dissipate heat and ventilate the air.
The tent includes 2 removable waterproof floor trays to hold soil and water. The removable tray can be taken out to wash easily.
They guarantee the grow tents are easy to install even if you've never done something like this before. Clear Instructions and no tools needed! They also offer 30-day unconditional refunds for quality problems. Just contact their friendly 24 hours customer service 👍
Likes
17
Share


@Shugz_Nugz
Follow
This grow went extremely easy, I believe I held off on harvest till week 13
She dried for 7 days around 55-60 RH and 72-75° F could have been better but not the worst
Good moisture level still inside the buds been burping the jars and reloading them letting the RH slowly decrease inside the buds
This stuff gave me 1 gram of rosin off a 3.5 gram press at 205°f
Great returns overall and awesome smell!

Likes
82
Share


@BigBadLion
Follow
Heeeey all!
Sorry for the extremely slow update! The past few weeks have been crazy for me! 😱
This week I made a lot of defoliation and decided to be somewhat greedy. I'll let the plants grow a bit more so they'll stretch well during flower! So while I defoliate I'll allow the plants to recover properly! 💪
Near the end of the week I also made another mistake with Roko (poor baby! 😭). I broke another of the stems (the one that divided the plant in two, right in the middle) and I feared the worst! But so far the plant kept growing without any problems.
I'm still thinking a name for my 4th baby, she has surprised me greatly and I didn't notice how many new branches had grown until I defoliated her and I'm sure she'll deliver some great buds! 😍
Anyway everyone, this is all for now.
Thanks for reading this journal and soon I'll update the next week! 😃

Likes
9
Share


@TheBulldozerSicily
Follow
Niente da dire, stanno crescendo piano piano, questa settimana non aggiungo acqua perché ancora abbastanza, la prossima settimana controlliamo dinuovo, se necessario cambieremo l'acqua e i

Likes
92
Share


@DogDoctorOfficial
Follow
🌱 Weekly Report: Week 16 Flower – Gorilla Melon Highlights 🌱
Room Dynamics and Challenges
This week marked a pivotal phase as we approached harvest. The decision to harvest Gorilla Melon in two stages allowed us to navigate a potential mold issue effectively. The mold was confined to select areas of dense colas, which were promptly removed to protect the rest of the plant. This experience reinforces the importance of keen observation, especially in the final weeks.
Environmental Parameters
• Temperature: 26°C
• RH: 53.2%
• VPD: 1.57 kPa
• CO₂ Levels: 1067 ppm
• PPFD: 690 µmol/m²/s
• Solution Stats: pH 6.67 | TDS 695 ppm | Temp 18.3°C
The ThinkGrow LEDs and TrolMaster systems shone during this critical period, maintaining precise control over the environment. The addition of deep red and UV light at 100%, with whites at 50%, seemed to amplify trichome production, resulting in a frosty finish across the garden.
Highlights of the Week
• Fading Colors: The garden displayed a stunning spectrum of fading hues, signaling the end of the cycle. Gorilla Melon’s red highlights and frost stood out beautifully.
• Defoliation Success: The earlier defoliation efforts paid off, minimizing mold spread and allowing light to penetrate deep into the canopy.
• Trichome Inspection: The frost level across Gorilla Melon was nothing short of mesmerizing, a testament to her genetics and the controlled environment.
Gratitude and Community
A heartfelt thank you to the community for your support and engagement. The sponsors—ThinkGrow LED, TrolMaster, Aptus Holland, and ProMix Soil—made this run possible. It’s been a pleasure to share this journey with you all.
What’s Next?
With Gorilla Melon harvested, the spotlight now shifts to the other girls in the garden. Stay tuned for their individual harvest reports, smoke reviews, and more as we wrap up this epic series!
Discount Codes so you can save big on your next check out 💚💚💚
CannaKan- DOGDOCTOR 15% off
terpyz.eu - DOCTOR 15% off
The Neutralizer - PORKIT5-DOG 15% off
Fast Buds - DOGDOCT 15% off
As always thank you all for stopping by, for the love and for it all , this journey of mine wold just not be the same without you guys, the love and support is very much appreciated and i fell honored and so joyful with you all in my life 🙏
With true love comes happiness 💚🙏 Always believe in your self and always do things expecting nothing and with an open heart , be a giver and the universe will give back to you in ways you could not even imagine so 💚
Friendly reminder all you see here is pure research and for educational purposes only
Growers Love to you all 💚💚💚


Likes
10
Share


@DeepRootsGrowTrees
Follow
MIMOSA ZKITTLEZ FF/
GANJA FARMER
WEEK #15 OVERALL
WEEK #5 FLOWER
This lady is a beast 💪 she's c completely taken over the tent she's about 4 inches from the light I mean she's just about as much plant as you can get into a small ⛺️ impressed with the genetics of this strain hearty and a strong 💪 plant she's producing nice looking buds!! Stay Growing!!
Thank you for stopping by and taking a look it's much appreciated!!
THANK YOU GANJA FARMER!!
BUDTRAINER.COM BUD CLIPS
MIMOSA ZKITTLEZ FF /
GANJA FARMER

Likes
16
Share


@eldruida_lamota
Follow
Que hay familia, recta final de estas xupet y haribo de Rkiem seeds, la verdad que los esquejes de mi colega e flipado, Los 8 ejemplares han salido muy bien, tienes unos tonos y aunque no sean muy grandes se ven flores muy prietas y repletas de tricomas, espero se puedan apreciar bien en las fotos y el vídeo.
Ya e practicado un lavado de raíces que era necesario para proceder a seguir regando sólo con agua unos días más.
Sin más dilación , me despido hasta el año que viene 🤣 buenos humos y feliz año 💨💨💨🎉🎊.
Likes
4
Share


@Zoe_Spacecake
Follow
Enseño todo, la planta, sus bichos, oídio y un poco de botrytis. Hay bastante arañas pero prefiero esto que poner insecticida encima de los cogollos. También hay unas manchas de oídio encima de unas hojas pero nada encima de los cogollos. A pesar de todo esto después de la cosecha los cogollos tienen buena pinta.
Likes
18
Share


@Barcelona_Farmers710
Follow
Esta la pasaremos junto las 2 Runtz x Strawnana y la tiger bomb al armário grande, cuando acabemos el seguimientos de Royal Queen Seeds! Entrenaremos el Scrog por primera vez.🤙🏻
