Likes
Comments
Share
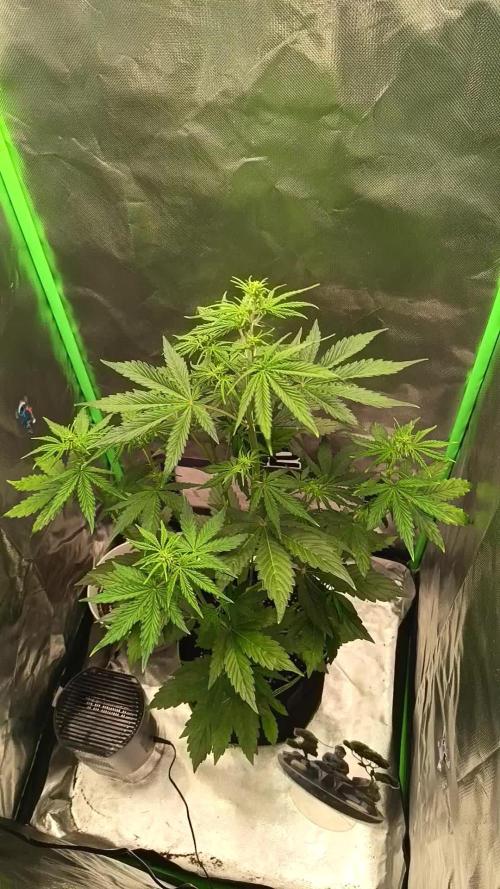
Week 3 and a repot is done and now in day 3. Finally it’s settling down after the repot, which was not pretty at all😂 Hope to get some massive plants this run 🌱 ________________________________________________________________________________________ Light from @MarsHydroLED 😎 FC-E6500 EVO🔥 730w±5%⚡️💥 PPE 2.9 μmol/J & PPFD 3.14 μmol/J🔥 Full Spectrum 🌈 WiFi smart connection 😱 Exhaust fan : Mars Hydro 6”. Heating mat: Mars Hydro “48x20.75”
Likes
14
Share
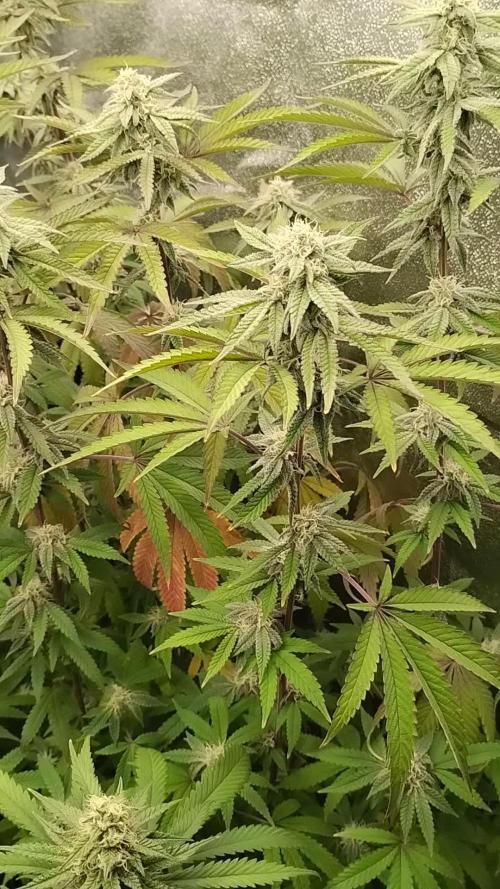
She bounced back well from the crap leds she's now under a mars hydro 600 watt and loving it transplanted her to a 3 gallon pot as this will be her home for the rest of her life . She's a little stretchy from the crap led. So I micro topped her the ocean Forrest soil burned her a bit but not enough to flush her
Likes
8
Share
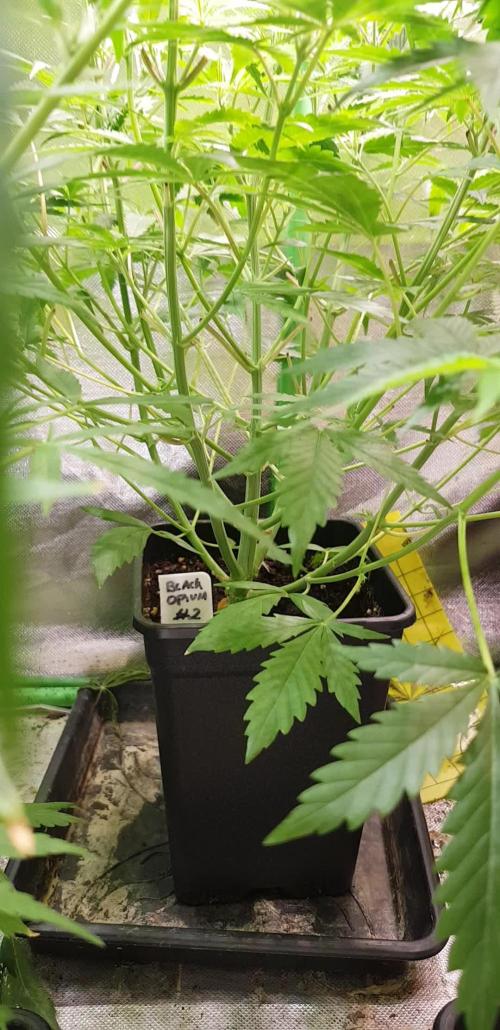
Semaine 2 de la végétation, purple shine arrivé à 4étage de feuilles , ça va être le moment de lui appliquer la première taille. Dans son air pot 1L purple shine développe un joli réseau de racinaires. Le 15/04 première taille application+ application foliaire de geisha, au lendemain de la taille purple shine semblait aller très bien l'apport foliaire geisha lui a fait un grand bien. Cette seconde semaine de végétation purple shine a commencé a profiter de tout les nutriments de croissance contenu dans la gamme terra samouraï de @shogun(terragrow, katanaroot, silicon, calmag, geisha foliar)
Likes
10
Share
GMO Cookies — Week 8 From Seed (≈ Week 3 Flower — 12/12 From Seed) “Served with extra curiosity.” 🌱 Quick Recap (For Everyone Joining Now) These girls have been running 12/12 from seed from day one. No traditional vegetative phase. They decided their timing — we followed. This is not about chasing more harvests per year. It’s about efficiency, energy management, and less unnecessary labor. We are now at Week 8 from seed, which we consider early–mid flower transition (Week 3 flowering) based on pistil development and stacking behavior. ⸻ 🌡️ Room Conditions The room is looking strong and stable. • Temperature: ~28°C • Humidity: ~70% (slowly reducing) • PPFD: 800–1300 µmol/m²/s (varies per plant height) • Airflow: Heavy exchange + vortex + crosswinds Now let’s explain the why. We are prioritizing leaf VPD, not just room VPD. Because of strong airflow and active transpiration, we can run slightly higher humidity at this stage without creating microclimate issues. Big intake. Big exhaust. Vortex movement. Crosswind fans breaking boundary layers. This allows us to push intensity safely. And intensity is where the fun begins. ⸻ 💡 Lighting Strategy We are not just running a top light. We are using: • Over-canopy lighting • Inner canopy lighting • Under-canopy lighting Why? Because photosynthesis doesn’t only happen at the top cola. Lower sites can remain productive if light penetrates and airflow supports them. Benefits: • More uniform energy distribution • Reduced larf • Better lower bud development • Higher nutrient demand (which we are seeing) This multi-angle light system is part of why we can push EC while still seeing substrate EC remain low. ⸻ Feeding & EC Strategy Current Irrigation EC: ~2.4 Substrate EC reading: ~0.9 That tells us something important: The girls are eating. When runoff/substrate EC remains low despite high input EC, it means uptake is strong and salts are not accumulating. The moment we see substrate EC climbing? We reduce feed EC immediately. End goal: Final week or so → likely water only. ⸻ Current Nutrient Recipe • CalMag Pro • Terra Bloom • Power Buds • Green Sensation • Pure Zym • Sugar Royal (No more Vita Race foliar for now.) ⸻ 🔬 Why We Switched Additives We moved from Power Roots → Power Buds + Green Sensation Power Buds • Encourages flower initiation • Supports generative growth • Helps hormonal shift into flowering mode Green Sensation • PK booster • Adds Magnesium & Iron • Supports enzyme systems & chlorophyll stability • Assists in energy transport during early bulking phase We are now in the stage where roots are established — focus shifts to flowers and energy management. ⸻ ⚗️ Order of Mixing (Chemistry Matters) This is important. 1. CalMag first Our water is very soft. We raise EC to ~0.7 using CalMag before adding anything else. Why? • Calcium stabilizes solution chemistry. • Prevents nutrient lockout. • Reduces risk of precipitation when adding PK later. • Supports cell wall strength during high transpiration. 2. Base nutrients (Terra Bloom) 3. Additives (Power Buds, Green Sensation, Pure Zym, Sugar Royal) Mixing order affects solubility and stability. This is not random. ⸻ 🌿 Plant Development Defoliation was done recently. Result? It looks like nothing happened. The canopy refilled quickly. Structure is strong. Stretch is controlled but active. Stacking is beginning. They are bigger than expected at this stage, to be honest. This is where things get interesting. ⸻ 🔬 Macro Season Begins We are entering the phase where microphotography becomes meaningful. Yes, it’s always interesting. But now: • Trichome stalks are forming. • Resin heads are developing. • Pistil clusters are stacking. • Leaf surface gland density increases. From this week forward, macro and focus stacking will become part of the reports. Not for hype. For documentation. ⸻ 🔮 What To Expect Next Week • Continued stacking • Slight humidity reduction • Possible EC adjustment depending on substrate readings • Increased resin production • Internodal swelling No drastic changes planned — just observation and precision. ⸻ 🤝 Appreciation Section Thank you to: • The long-time followers • The OGs • The critics • The silent readers • The new growers joining • The Grow Diaries platform • The sponsors • And everyone watching quietly This doesn’t happen because I’m alone in the garden. It happens because of community. The girls grow — but the journey is shared. 📡 Please stay tuned they can try and take us down but we never quit https://www.youtube.com/@DOGDOGTHEDOCTOR NEW 🙏 Thank you for your patience and continued support. FOR DISCOUNT CODES AND MORE JUST FOLLOW THE LINK https://website.beacons.ai/dogdoctorofficial 📲 Don’t forget to Subscribe and follow me on Instagram and YouTube @DogDoctorOfficial for exclusive content, real-time updates, and behind-the-scenes magic. We’ve got so much more coming, including transplanting and all the amazing techniques that go along with it. You won’t want to miss it. GrowDiaries Journal: https://growdiaries.com/grower/dogdoctorofficial Instagram: https://www.instagram.com/dogdoctorofficial/ YouTube: https://www.youtube.com/@dogdoctorofficial Deleted by Youtube Vimeo : https://vimeo.com/dogdoctorofficial Under construction stay tuned ⸻ Explore the Gear that Powers My Grow If you’re curious about the tech I’m using, check out these links: 🔆 Lighting & Environmental Control • Future of Grow — Advanced LED lighting technology https://www.futureofgrow.com/ DISCOUNT CODE: DOG20 • Lumiflora — Under-canopy LED lighting https://lumiflorade.com/ • TrollMaster — Environmental controllers and automation gear (past collaboration) ⸻ Genetics • Zamnesia Seeds — Genetics used in this project https://www.zamnesia.com/ ⸻ 🌱 Soil, Substrates, Boosters & Root Support • Plagron — Substrates, bio mixes, and supportive products https://plagron.com/en/ ⸻ 🎒 Storage, Curing & Preservation • Grove Bags — Curing and storage solutions https://grovebags.com/ ⸻ 📸 Photography Equipment & Tools (Not sponsors, but part of my creative toolkit) • Sony A6700 • Sony full-frame macro lens + few more • Stacking photography workflow - learning • iPhone (for behind-the-scenes shots) We’ve got much more coming as we move through the grow cycles. Trust me, you won’t want to miss the next steps, let’s push the boundaries of indoor horticulture together! As always, this is shared for educational purposes, aiming to spread understanding and appreciation for this plant. Let’s celebrate it responsibly and continue to learn and grow together. With true love comes happiness. Always believe in yourself, and always do things expecting nothing and with an open heart. Be a giver, and the universe will give back in ways you could never imagine. 💚 Growers love to all 💚 📸 P.S. – The Eye Behind the Lens All photos in this diary (for now — except for the ones showing the camera, which I took with an iPhone) are taken with a Sony A6700 paired with a Sony full-frame macro lens and a few more. Photography is part of the story — it’s how we share the fine textures, the glow, and the quiet details that words can’t always capture. I’ve also started experimenting with photo stacking — a technique where multiple images, each taken at a slightly different focus point, are layered together to create one perfectly sharp image from front to back. It’s not digital enhancement or AI; it’s pure photography — a way to reveal the plant’s beauty in microscopic depth, from trichome to petal. You’ll even see a few shots of "ghost me" capturing the shots — camera, lens, setup — because every grow deserves not just to be cultivated, but documented like art. FOR DISCOUNT CODES AND MORE JUST FOLLOW THE LINK https://website.beacons.ai/dogdoctorofficial NEW DISCORD - Official Server Invite Link : https://discord.gg/ksjAkA5T74
Likes
2
Share
very stable, healthy and vigorous hyped!
Likes
19
Share
Don’t judge. A few days away from chop! Again... looking forward to see how the “stress” improves quality...? Photos/video taken 133 days after breaking soil, day 56 of flower. UPDATE: Plant harvested on 1/7; day 136 after breaking soil, day 59 of flower.
Likes
45
Share
@Burmese
Follow
Week 11 Day 71~77 Hi everyone, During this week, the buds are filled with alot of trichomes.They look so big and frosty.Almost all the buds are equal and that’s the benefits of ScrOG training.I took some macro shots and already can see some cloudy ones.Not so long to harvest.... Merry Christmas and Happy New Year to you all... 🎉 😊 ✌️ Jack RO water Bloom- 3.0ml/L Micro- 3.0ml/L Overdrive- 2.0ml/L pH-5.3 ppm-1000 Run off pH-6.3 ppm-1250 Jack Potting mix recipe Coco peat: 50% Perlite: 20% Soil compost: 10% Bone meal: 5% Earthworm fertilizer: 5% Marble Stone: 5% Tea leaf fertilizer: 2% Crashed Egg shell: 1% Chicken manure: 1% Gypsum: 1% Scrog size Area : 1ft x 1ft (30cm x 30cm) Hole size : 2” (5 cm) Material : iron welded by four steel pillars. Height from base: 6” (15cm)
Likes
3
Share
Día 26. Estamos en la 4ta semana. Por ahora mantengo la solución y la planta sigue creciendo pero ya está casi para cortar los esquejes. La semana que viene seguro estoy cortando, y ya tengo que preaparar todo para pasar al otro modulo del infoor. Decidi dejar de aplicar HST y apliqué una recnica con colgantes que bajan las ramas y las mantienen perpendiculares al piso. De esta forma las ramas laterales empiezan a subir. Está técnica me ha dado muy buenos resultados anteriormente. El crecimiento ha sido acelerado y las ramas estan bastante gruesas. Mañana voy a cambiar la solución. Vengo realmente contento con los resultados. Este experimento me va a permitir saber cuanto puedo llegar a sacar de este espacio y ver si me permite armar un ciclo para poder llegar a la próxima cosecha con remanente para poder ir guardando variedades diferentes. De paso ya tengo una referencia de cuantas semanas toma hasta poder cortar esquejes, y así saber en que momento poner la próxima semilla. Puse unas semillas bastardas que tenía, y las pienso mandar a la terraza a florecer directamente en el invierno. Otra experiencia que si bien no ha dado grandes resultados, ha sumado al stock. La semana pasada no llegué a subir mucho. Pero mañana hago un update de cómo se han movido las ramas bajas. En el último video se muestran bien las ramas que pretendo convertir en esquejes. Seguro saque varios, así que habrá para regalar si logramos que enraizen varios. De por cierto las manchas blancad que se ven, es tierra de distomeas que ha quedado desde la aplicación en 2da semana. Día 28. Termina la 4ta semana de crecimiento con un muy buen ritmo. Hoy cambié la solución y mantuve la formulación anterior (1g/L de feeding grow y 0,5g/L de green jungle bioestimulante de crecimiento). La planta está fuerte y ramificada. Sostengo que los esquejes se van a cortar un poco antes de lo previsto. Calculando que son 5 semanas de crecimiento y 1 semana de enraizamiento de esquejes, voy a tomar 6 semanas para preparar la próxima madre. Así que siendo esta variedad de unas 10/11 semanas de flora, voy a poner a crecer la nueva madre en la 4ta semana de floración. La planta tiene distancia internodal corta/media por lo que observo, así que es un detalle a tener en cuenta. Ya me empieza a dar la ansiedad de ver que todo va saliendo y quiero ya poder pasar a floración. Va a ser jna nueva experiencia hacer una planta desde semilla en hidroponía, ya que siempre hacía sólo esquejes y la madre la pasaba a tierra a florar en otro lado, debido a que por las raíces no podía sacarla del sistema que tengo ahora. Pero resolví eso y voy a ver por primera vez la potencia de la hidroponia en una planta desde semilla. Le hice corte apical a las dos ramas más largas esperando ver una mayor ramificación, ya que tengo un espacio de 1,2m x 0,55m por llenar y administrar. Espero que todo siga en marcha. Nos vemos en la 5ta semana desde mañana.
Likes
24
Share
Plants started getting real bushy a couple of days after topping. Low Stress Trained all the plants at the end of the week by tying them down using rubber coated garden wire to spread out the newly grown tops. Also spaced out each plant evenly on the tray and turned on the other 2 PB2000 LED lights I had ready to go.
Likes
17
Share
Likes
7
Share
📆 Semana 5: La Alien Moonrocks empieza a sacar todo su potencial en esta quinta semana de floración. Los cogollos están cogiendo tamaño y se empiezan a cubrir de una capa de resina que promete mucho. El olor es fuerte y penetrante, con notas terrosas y un fondo dulce que ya anticipa una fumada potente. Los Adlite de Mars Hydro están haciendo un trabajo espectacular: la distribución de la luz es perfecta y eso se refleja en la formación pareja de flores por toda la planta. Se ve claramente cómo mejora la producción y la calidad general del cultivo. El plan de XpertNutrients sigue funcionando a la perfección. La Alien Moonrocks muestra un color verde saludable, tallos robustos y sin señales de carencias, respondiendo muy bien al empujón de PK de esta fase. Todo apunta a una gran cosecha si seguimos así. Seguimos creciendo fuerte 💪.
Likes
34
Share
@Hexus
Follow
Week 3 - Day 15 - She's still looking good, and starting to take off! PHing a little every day and watching her water carefully for signs of algae/cyanobacteria. Things are still looking good, so I think I may have this DWC thing under *some* sort control.
Likes
5
Share
@RookGrow
Follow
Smells beyond good and definitely got me high before it cured so it is good with me. I let it dry for 10 days then chopped. The Total weight after was 2.5 ounces, this plant took some beatings I will let all the stems grow out next round, I want everything lol.
Likes
9
Share
Saw a few burnt tips at the start of the week so I’ve only been feeding water. Other than that I still just hope to harvest, at least. So far so good she’s been quite strong from the get go! I hope to last another week, exciting times ahead!
Likes
4
Share
My o my, what can I say... These ladies are gorgeous! Along with adding in the 2000W along side my 600W, I cut out the grow solution in my nutes contrary to the instructions and my ladies are booming! We'll see how the rest of the week continues! I started a majority bloom with some added glucose for my feed to help with bud weight but they are really packing on. Hopefully next week will be my last week of feeding as trichrome production increases and I can start my 2 week flush!
Likes
5
Share
@420keef
Follow
Had to pull this one out of the tent because i had to make room for the bigger outdoor plants🤷‍♂️🏻
Likes
3
Share
Thank you growdiaries for all the support
Likes
4
Share
Vamos terminando la tercera semana de crecimiento en el día siguiente a este post. Se realizará una poda dejando las plantas como chupa-chups. Se bajará el horario de iluminación para inducir al cambio de floración . Esta semana sufrimos un ataque de araña roja. Que se a podido eliminar sin muchas complicaciones. Las plantas al reaccionar rápido ,no sufrieron daños visibles.
Likes
82
Share
Hello, fellow growers! I’m happy to share with you the progress of my plants. This is my first grow and I’m amazed by the beauty of these plants that I’ve only seen in pictures before. The plants have grown a lot in the past weeks and they are almost done stretching. They have been stable for a day now and I don’t expect them to get much taller. They are looking healthy and green, with no signs of pests or diseases. However, I did find some fungus gnats on the fly traps that I set up as a precaution. To get rid of them, I watered the plants with nematodes and adjusted the pH level of the water. I think this should solve the problem and prevent any damage to the roots. I’m planning to resume my normal feeding schedule in two days. I’m using organic nutrients and following the manufacturer’s instructions. I want to give the plants enough food to support their flowering stage, which is about to start soon. I can already see some tiny orange hairs on the buds, which means they are ready to bloom. I’m very excited to see how they will develop in the next weeks and what kind of aromas and flavors they will produce. I’m hoping for some big and dense buds with lots of resin. That’s all for this week. Feel free to leave a comment or a question below. Happy growing!
Likes
9
Share
@Deceptive
Follow
This last week has been a good one. I've been watching the girls get so much fatter, it's actually awesome haha All 3 ladies look beautiful & are starting to display signs of the end in the leaves. I imagine next weeks flush will exacerbate these signs too. I dropped my feed down slightly as per the Professors Nutrients feeding schedule & pumped up the watering to 1L per day. The plants had no issues with taking the extra water & I would imagine it's helping the buds get that much thicker. I started defoliating mid week & particularily on Plant 3 to clear out any bigger leaves & leaves gaps to hopefully be filled + give the bigger buds some air. She's gotten the least amount of defoliation this grow as she's at the back of my tent. But she also has by far the bigger buds... so a good lesson learned for future grows. I also cut all LST wires at the end of this week & now all plants are holding their own. All plants trichs are looking nice & Plant 3 has more amber in the colouring, it also happens to have the bigger colas 😏 Plant's 1 & 2 trichs however appear to be more dense. The change of light cycle from last week has seemed beneficial with no negatives sighted, which has been good. It's hard to believe that this coming week is the start of the flush & my next post will be harvest. It's exciting! Check back for the harvest ✌️🏼
Likes
28
Share
Hey everyone 😃. Day 1 : The seeds were placed between 2 moist towels to germinate and sealed in a box. Day 2 : No change . Day 3: Both seeds have sprouted and you can see a small tip of the root coming out. Day 4: The tip of the root looks out about 0.5 - 1 cm. today they were set in stone wool blocks. These were placed in water beforehand and mixed with a little Rizotonic to stimulate root formation. Day 5: Today, both seedlings stick their heads out about 1 cm 😊. (The grow box is sprayed under the hood every day to keep it moist.) Day 6: Today the heads are already looking 2 cm out. Day 7: Both rock wool blocks were planted in Canna Coco, and some water with an Ec mixture 0.4 was added. So they stay under the hood for about 7-10 days. (The lid is opened a little wider every 2-3 days to get used to the lower humidity. I hope you have a lot of fun with the update, stay healthy and let it grow 🙏🏻😊 You can buy this Strain at : https://www.royalqueenseeds.de/feminisierte-hanfsamen/115-amnesia-haze.html Type: Amnesia Haze ☝️🏼 Genetics: Original Amnesia Haze 👍 Vega lamp: 2 x Todogrow Led Quantum Board 100 W 💡 Bloom Lamp : 2 x Todogrow Led Cxb 3590 COB 3500 K 205W 💡💡☝️🏼 Soil : Canna Coco Professional + ☝️🏼 Fertilizer: Green House Powder Feeding ☝️🏼🌱 Water: Osmosis water mixed with normal water (24 hours stale that the chlorine evaporates) to 0.2 EC. Add Cal / Mag to 0.4 Ec Ph with Organic Ph - to 5.5 - 5.8 .