


Likes
Comments
Share


@GermGrowFox
Follow
So langsam fangen die Blüten wirklich an schön auszusehen.
Bin zufrieden mit dem visuellen Ergebnis der Blüten. Über den Rest urteile ich vorerst mal nicht haha


Likes
74
Share


@XII_XII_MrGreen
Follow
With this grow coming to an end I'm very satisfied, I've just cut the last girl down and they are hanging to dry now. The girls showed good vigor through out the whole grow feeling pretty comfortable in the organic soil mix I've made at the start. Later in flower I started giving the whole Plagron line from time to time to give them that little bit extra power throughout their flower cycle.
I've took the two most different (looking) phenos I got and try to make some nice pictures, but in week 15 you can find the photo session I did with the nicest pheno in my eyes.


Likes
3
Share


@CannaBossBizz
Follow
I did bend her down and she's doing Great! I think i will Mainline her or so it Like i did with the Fastberry. The topping went good. She recovers from the Stress pretty fast and ist doing a grat Job! Looking forward. Stay tuned 🤙🏽

Likes
2
Share

@Darsilius
Follow
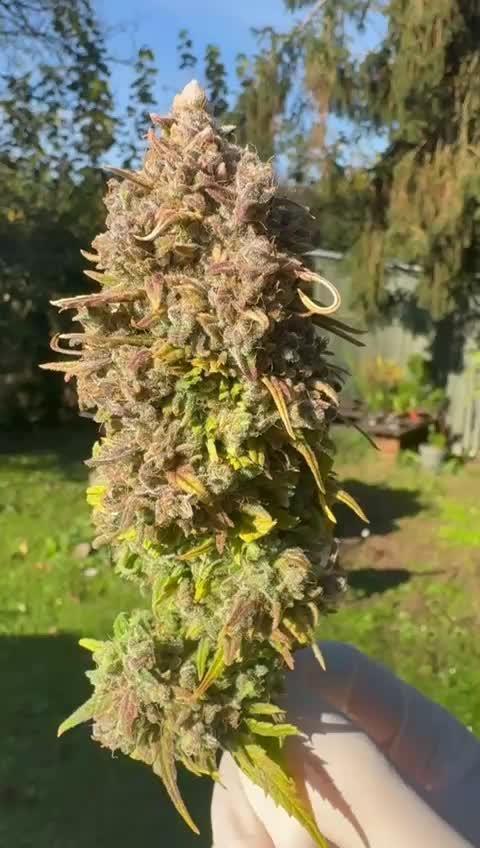
Final weeks guys, it was nice journey with new breeders and genetics for me. A lot of experience in new room etc.
Enjou the last pics session from veg phase. Next will be harvest with all the girls and final product result :)
This week id more compilation of last two where i used only water and flawles finish from advanced nutrients
It is visiblew from leaves that all nutrients were flushed and last flower is ready to harvest :)
enjoy


Likes
7
Share


@StonedBay
Follow
I kept tucking those branches pretty hard and mad a decent canopy. Though I may have over done It and now my forest is pretty bush. Day 10 of flower, Im gonna defoliate and maybe lollipop a bit in the next few days and then add next layer of trellis to use as support. Started adding Canna Boost. Other than that, I fixed my calmag issue by switching to tap water, but Im not feeding nutrients at full strength since I have pretty hard tap water.

Likes
2
Share

@Canivent11
Follow
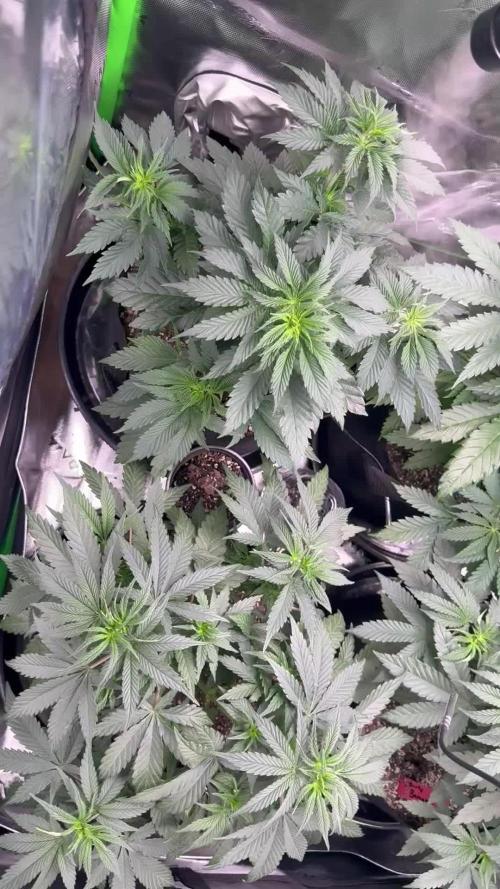
1st feed of green rush leafy green grow, Gaia green all purpose and power bloom as I get ready to flip this girl to flower in a week or so.


Likes
14
Share

@MrGrowDiarie
Follow
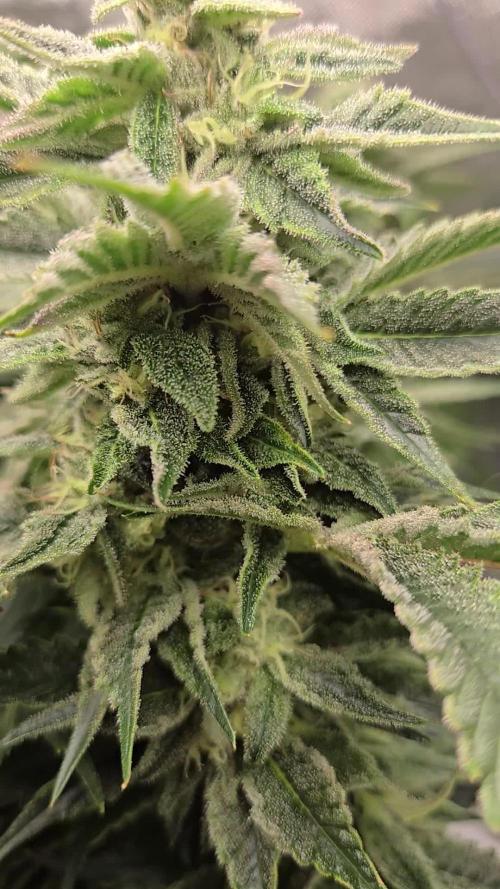
Day 113
The leaves are still a healthy green, with only minor fading visible on the lower foliage, which is expected at this stage as the plant begins to draw stored nutrients from older leaves. The sugar leaves surrounding the buds show a perfect balance of color, and the pistils are gradually turning amber and curling inward, signaling that the harvest window is approaching.
The plant's overall posture is strong, with branches supporting the weight of the buds nicely - a good indicator of strong stems and well-managed airflow. The grow space looks clean and stable, maintaining ideal environmental control for these crucial final days.
Likes
67
Share


@AwfulBuddy
Follow
the roots obstruct the drainage of the system and the water does not descend into the tank easily and the rockwools and roots are flooded, this causes the increase of ph in the reservoir and in the rockwools.
this week I hope to solve the problem, for the moment I use a timer for the water pump (15 on 30 off).
update:
I solved the problem of the roots on the drain by folding the mat on itself with the whole pack of roots descended into the tub, a little rough but functional.
but unfortunately I lost almost a week to flush the girls due to the flooding of the root zone
I have to start halving the doses of nutrients again ...
... it was a bad week but maybe I learned something 🍀
water pump restored 24/24h
Light lifted up from 50 to 90cm
Ppfd 1300 > 1000

Processing
Likes
2
Share


@BigGGrows
Follow
She is now coming into preflower and loving the new T5's. She is growing nice and bushy with future tops shooting for the stars. The stretch is definitely near. She will continue to be tied down and has been pruned and defoliated as needed to give her that sexy shape i want her to have in flower. Her terpines are beginning to be noticeable and is of lemons, earthy notes, and loud gas. She is now also getting kelp extract added to the nutes. She is growing very nicely and i could not be happier at the moment. So far OSSC has my attention as their phenotypes have been very nice.

Likes
7
Share


@Zuppler
Follow
Week 11 - Sixth Week of Flower
The Donutz tent has officially entered the “sit back, water, and enjoy” phase. With all the hard work done, it’s now a matter of letting the plants do their thing and watching the magic unfold.
Key Updates:
Steady Growth: The buds are stacking up nicely, with the purple phenos becoming even more vibrant and the other plants continuing to bulk up. Even the thinner phenos are starting to show signs of filling out as they settle deeper into the flowering phase.
Stable Routine: Watering with reverse osmosis (RO) water remains consistent, and the tent environment is running smoothly with no changes needed.
Observations:
The trichomes are sparkling more each day, covering the buds and sugar leaves with a frosty layer.
The aroma is intensifying, filling the space with a sweet, rich fragrance that’s impossible to ignore.
The canopy looks uniform and healthy, a testament to the early defoliation and training work.
Next Steps:
Simply monitor the plants, ensuring they stay hydrated and happy.
Enjoy the show as the buds continue to develop and the trichomes ripen.
The Donutz are cruising toward the finish line, and the Florida Gang vibes are at an all-time high. It’s all about patience and appreciation now — the hard work is paying off!

Processing
Likes
31
Share


@Peeman
Follow
I am at a loss with HSO blue fire. First of all the germination rate was poor and now my only blue fire plant has gone Herme. I removed her from the tent and put her in the corner of the room under a separate light which is going to cost me more money in the long run. I should probably just get rid of her but I don’t have the heart to. I’m not the only grower that has had this problem with blue fire. Very disappointed


Likes
20
Share


@Pulsar00
Follow
Welcome back in the Purple Project !
Buds still growing gently, nice earthy smell slowly tickling my nose.
No excess or deficiency at the moment.
I'm not using Rhino Skin and Bud Factor X cause I couldn't find them where I am. I Ordered some from a online spanish shop but it's never been sent ...
Stay tuned for big purple colas,
The Dude
Likes
35
Share


@Master_weeda
Follow
Bonjour à tous les padawans et les maîtres jedis
Pour cette semaine je prévoit de pratiquer comme technique spéciale le LST et juste un arrosage.
Pour cela comme à mon habitude j'attend le cinquième noeud ou que je juge la plante robuste.
Je profite que cette semaine qui va être relativement calme pour faire un LST appliqué et vous faire un rappel de ce qui est pour moi la meilleure technique pour arroser une autofloraison et la façon dont je pratique le LST.
En suivant ces quelques simples conseils vous obtiendrez un résultat optimal tout au long de votre culture :
Le cannabis est une plante qui n’aime pas recevoir un léger arrosage en continu. Il est impératif de l’arroser en grosse quantité, puis d’attendre que la terre soit bien sèche avant d’arroser à nouveau!
Pour calculer la quantité d’eau nécessaire à chaque plante, suivez cette règle :
Le volume d’eau à donner lors de chaque arrosage doit représenter au moins environ un quart du volume du pot !!
Exemples :
pour un pot d’1L, donnez 0,25L d’eau à chaque arrosage pour un pot de 4L, donnez 1L d’eau à chaque arrosage pour un pot de 12L, donnez 3L d’eau à chaque arrosage pour un pot de 30L, donnez 7,5L d’eau à chaque arrosage !etc…
Pour donner un tel volume d’eau, il est souvent nécessaire d’arroser en deux (voir trois) fois, lentement et uniformément sur toute la surface. Disposez de bonnes coupelles sous les pots, celles ci se rempliront d’eau qui remontera dans le pot par capillarité en moins d’une journée. Il est également très important d’utiliser un bon terreau de qualité, avec une bonne capacité de rétention d’eau mais qui assure également un bon drainage (celui ci doit contenir de la perlite, et/ou de la coco, etc..)
Il vous faut alors maintenant attendre quelques jours en sous-pesant régulièrement les pot avec vos bras. Quand ils seront redevenus très légers, vous pourrez arroser à nouveau !!
En effet, comme l’eau pèse beaucoup plus lourd que la terre, un pot gorgé d’eau pèse plusieurs fois le poids d’un pot d’une plante prête à être arrosée. Avec un peu d’entraînement, vous apprendrez donc très rapidement à sous-peser vos pots pour savoir quand une plante a soif.
C’est une technique à la fois très facile et très efficace, et qui peut être appliquée à toutes les plantes en pots !
En arrosant de cette façon, en général vous devrez arroser vos plantes tous les 3 à 6 jours.
Pour cette semaine 3 au jour 17 ma plante fais 12 centimètres et son cinquième noeud apparaît je décide donc de pratiquer un LST sur ma plante.
Pour ce j'utilise du fil de fer galvanisé que je plante directement dans le substrat en faisant attention de ne pas endommagé les racines car n'oublions pas que ce qui pousse dessus pousse aussi dessous.
Jour 17 je pulvérise du une solution composé d'une cuillère à café de savon noir mou dilué dans un litre d'eau en prévention d'éventuels nuisibles.
Je corrige mon LST suivant la pousse de ma plante ...
Pour ma par c'est la manière dont je procède. Comme promis petit rapel de:
Quand commencer à appliquer la technique LST
De nombreux cultivateurs commencent la manipulation dés que les plantes possèdent entre 3 et 6 nœuds ou une paire de feuilles. Durant cette première étape de la croissance, le tronc encore flexible est pliable sans risque qu’il ne se casse, même si au fur et à mesure du développement de la plante il sera de plus en plus difficile de le plier. Nous pouvons continuer à guider la croissance des branches durant toute la culture, même durant la floraison, ce qui pour cette étape représente un grand avantage face à la taille, qui n’est pas du tout recommandé une fois que la formation des têtes commence, cela stressera en effet la plante, ce qui aura pour effet de retarder la récolte.
Comment appliquer la technique de guidage LST
Si nous sommes prudents, la flexibilité naturelle des fibres du cannabis permet de plier leur tronc et branches avec une relative facilitée, même durant la floraison des plantes.
En utilisant une corde fine, nous pouvons accrocher la pointe de la plante à la base du pot par exemple ou à un tuteur que nous aurons planté dans le substrat. Nous plierons le tronc avec précaution et nous le fixerons avec la corde, à partir de là, nous pouvons augmenter progressivement la tension de la corde, chaque jour un peu plus, jusqu’à obtenir la position souhaitée. Soyez attentif à la réaction de la plante, essayez de ne pas appliquer trop de pression sur la corde et rappelez-vous que la flexibilité des branches peut varier d’une plante à l’autre.
Pour obtenir de meilleurs résultats, il suffit de suivre quelques règles simples. Pour commencer, nous devons choisir une corde fine mais pas trop pour ne pas blesser les troncs au fur et à mesure qu’ils grandissent et qu’ils deviennent plus gros.
Nous pouvons utiliser des crochets en plastique souple ou de n’importe quelle autre matière flexible pour éviter d’endommager les plantes. Spécialement en intérieur, utiliser des cordons en plastique de couleur (voir les diaries de @Silky) est très pratique pour voir facilement les accroches et faciliter le travail au milieu du réseau formés par les cordes, les tuteurs, les mailles ou les supports que nous aurons dans la culture. Bien entendu, en culture extérieure et surtout en guerilla nous ferons juste le contraire et nous utiliserons des matériaux de couleur qui n’attirent pas l’attention pour que notre jardin reste discret.
Pour stresser les plantes au minimum, la mieux est de réaliser ces manipulations le soir ou juste après que les lampes en intérieur s’éteignent, ce qui leur permettra de se remettre durant la nuit. Normalement, le jour suivant nous pourrons observer comme les pointes des branches que nous avons pliées se dressent de nouveau vers le haut à la recherche d’une source de lumière.
Que la force soit avec vous
Likes
2
Share

@Black_Widow
Follow
Привет садоводы !
Началась новая неделя
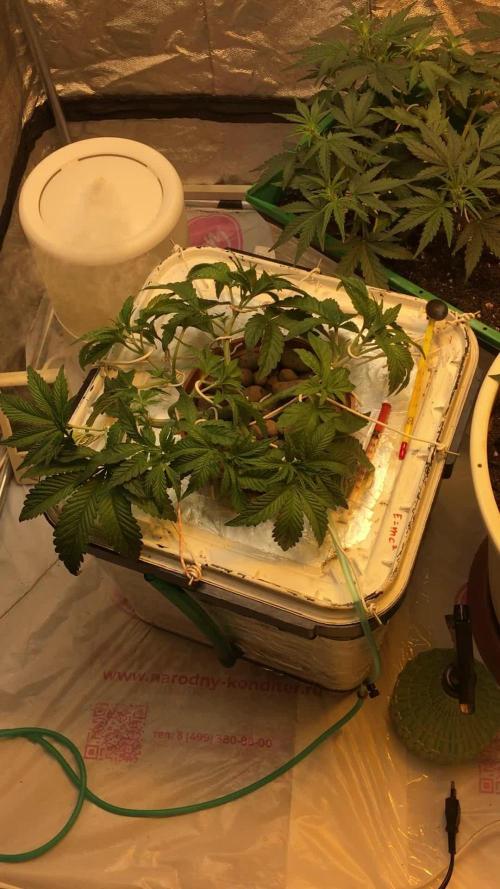
сегодня я заменил питательный раствор на новый и сделал его немного покрепче
все в пределах таблицы кормления
теперь он в значении 700 ppm
а PH также я держу в пределах 5,6
тот цветок ,что в земле после пересадки я пока не поливал
растения выглядят хорошо ,но растут немного медленно
а в общем вроде не плохо
😎

Processing
Likes
8
Share


Likes
162
Share


@nonick123
Follow
Día 86 (01/01/2024)
Riego solo con H2O con pH ajustado 6,21
Día 87 (02/01/2024)
Avanzando hacia la cosecha. Observo algunos tricomas ámbar 😁
Día 88 (03/01/2024)
Al inspeccionar y tocar los cogollos, vuelven a salir los aromas a skunk y naranjas. Delicioso! 😍
Día 89 (04/01/2024)
El aroma se está volviendo complejo en esta recta final, como naranjas, skunk y con toques picantes de fondo. Impresionante 😍
Día 90 (05/01/2024)
Mañana la cosecha! Hoy le tocaría riego, pero como mañana es la cosecha, la dejo con 24 horas de estrés hídrico.
Día 91 (06/01/2024)
Al final cosecharé un día más tarde. Los tricomas están prácticamente perfectos, con la mayoría nublados y alguno ámbar
Día 92 (07/01/2024)
Día de la cosecha! 😍💥💨😁
Peso húmedo 150
Increíble rendimiento para 92 días desde semilla, y con el estrés hídrico de los dos últimos días
Ahora comenzamos el proceso de secado (7-10 días) donde pondré la semana de la cosecha, y posterior curado (+30 días), tras lo que tendremos el informe de humo
Gracias a todos los que estais al otro lado de este diario!