


Likes
Comments
Share


@Hempface86
Follow
All right here we are guys day 52 a flower 114 total I think I'm going to hit her with recharge one more time and the next day or so and then that's it water the rest of the way as I'm sure from top dressing there's still some nutrients making its way through the medium.. the nugs are starting to get rock hard and they actually are starting to smell like strawberries which is amazing.. as you can tell and as I've mentioned before I've done a ton of training to her she started her life in a bad home but we got her out of there at a young age put her in the right home and look at her go.. plants are a lot more like human than we know.. they're fragile when they're young like us then when we hit puberty it's the equivalent of them showing sex and that's when us humans stretch just like the plants and then we are considered adults where we are off on our own to produce our own fruits from our own labor.. the only difference between us and a plant is we devour our own fruit the plant feeds everything and everyone but itself.. we can learn a thing or two from plants.. anyway thank you WEEDSEEDSEXPRESS again for the opportunity I highly suggest you guys check them out God bless everyone and happy growing ✌️😎
https://weedseedsexpress.com/us

Likes
111
Share

@RockoCalenberg
Follow
Chicken & Wafflez Harvest Report 🍗✂️✅
Blütewoche 12 – Erntezeit
An Blütetag 84 war die Chicken & Wafflez soweit. Schon mit bloßem Auge war zu erkennen, dass sie ihren Reifehöhepunkt erreicht hatte. Die Trichome wirkten tagelang immer weißer und frostiger. Kurz vor der Ernte verlor dieses strahlende Weiß dann langsam seinen Glanz und bekam einen leicht cremefarbenen, gelblichen Ton. Zusammen mit den zunehmend ausreifenden Blättern war das für mich das eindeutige Zeichen: Jetzt ist sie fertig.
Schon beim Ernten wurde klar: Hier wachsen keine riesigen XXL-Keulen. Die Stärke der Chicken & Wafflez liegt nicht in der Größe einzelner Buds, sondern in ihrer gleichmäßigen Struktur und ihrem außergewöhnlichen Erscheinungsbild.
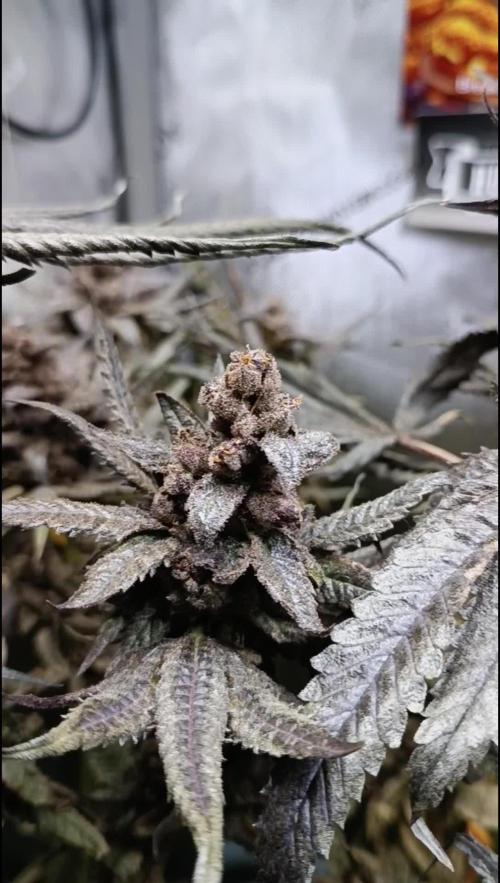
Optisch ist die Chicken & Wafflez ein echtes Highlight. Die Colas erinnern an kleine Kirchtürme, die über Nacht komplett mit Raureif überzogen wurden – das tiefe Violett, fast schon Schwarz, bildet einen unglaublichen Kontrast zu der dicken Schicht glitzernder Trichome.
Mindestens genauso beeindruckend war ihr Wuchs. Trotz leichtem Herunterbinden entwickelte sich die Pflanze bis auf 115 cm Endhöhe und zeigte vom ersten Tag an einen enormen Vigor. Immer wieder richteten sich die Triebe von selbst auf und wollten nach oben. Fast schon ein kleines Beast – ähnlich wie die Fruitbomb Punch, dabei aber deutlich unkomplizierter und über den gesamten Grow hinweg angenehm einfach zu führen.
Unzählige Seitentriebe lagen am Ende fast alle auf derselben Höhe und bildeten ein außergewöhnlich gleichmäßiges Blütendach. Lediglich der Haupttrieb ragte noch etwas darüber hinaus. So viele gleich starke Tops an einer Pflanze sieht man wirklich nicht oft. Genau das macht die Chicken & Wafflez für mich aus: unkompliziert, wuchsfreudig und vom Keimling bis zur Ernte eine der pflegeleichtesten Pflanzen des gesamten Terp Tests.
Auch beim Trimmen spielte die Sorte ihre Stärken aus. Im Vergleich zu vielen anderen Pflanzen war deutlich weniger Blattmasse vorhanden, wodurch die Ernte angenehm und zügig von der Hand ging.
Nassgewicht: 140 Gramm auf rund 0,18 m² Anbaufläche (30 × 60 cm). Auch beim Aroma geht die Chicken & Wafflez ihren eigenen Weg. Während die beiden anderen Sorten eher fruchtig-süß unterwegs waren, präsentiert sie sich deutlich würziger. Schon direkt bei der Ernte zeichnet sich der typische Charakter immer klarer ab: eine angenehme Würze, kombiniert mit einer dezenten Süße, die tatsächlich an Ahornsirup erinnert. Genau diese Mischung macht das Terpenprofil schon jetzt unverwechselbar und hebt die Chicken & Wafflez deutlich von den anderen beiden Sorten des Terp Tests ab.
Die Chicken & Wafflez ist kein klassischer Heavy Yielder mit riesigen Monsterbuds. Ihre Stärken liegen ganz klar woanders: enorme Wuchskraft, eine hervorragend gleichmäßige Pflanzenstruktur, viele kräftige Tops und ein außergewöhnliches Erscheinungsbild, das vom ersten bis zum letzten Blütetag begeistert hat. Die 140 Gramm Nassgewicht auf 0,18 m² sind für mich deshalb ein Ergebnis, mit dem ich absolut zufrieden bin.
Mein persönliches Fazit fällt deshalb durchweg positiv aus. Wer ausschließlich auf maximale Erträge aus ist, wird vermutlich andere Sorten bevorzugen. Wer dagegen eine unkomplizierte, äußerst vitale Pflanze mit enormem Vigor, einem perfekt gleichmäßigen Blütendach und außergewöhnlich schönen, frostigen Buds sucht, sollte sich die Chicken & Wafflez definitiv genauer anschauen.
Easy Growing vom Keimling bis zur Ernte – genau so wünscht man sich eine Genetik.
Am Ende entscheidet das Glas. ✌️🌱💚




Likes
34
Share


@MadeInGermany
Follow
Info:
Unfortunately, I had to find out that my account is used for fake pages in social media.
I am only active here on growdiaries.
I am not on facebook instagram twitter etc All accounts except this one are fake.
Have fun with the update.
Hey everyone 😀.
A week with a wonderful development is over again 😃.
I decided to stay in the vegi for another 10-14 days and to top it off a few more times.
Then it is put into bloom.
Until then, I wish you all the best 🙏🏻.
You can buy this Strain at :
https://www.exoticseed.eu/
Type:
Quick Sherbet
☝️🏼
Genetics:
75% Indica / 25% Sativa
Sunset Sherbet X Black Lemon
👍
Vega lamp:
2 x Todogrow Led
Quantum Board 100 W
💡
Bloom Lamp :
2 x Todogrow Led
Cxb 3590 COB 3500 K 205W
💡💡☝️🏼
Soil :
Canna Coco Professional +
☝️🏼
Fertilizer:
Green House Powder Feeding
☝️🏼🌱
Water:
Osmosis water mixed with normal water (24 hours stale that the chlorine evaporates) to 0.2 EC. Add Cal / Mag to 0.4 Ec Ph with Organic Ph - to 5.5 - 5.8 .

Likes
5
Share


@Bluemels
Follow
Tag 68: Noch eine Woche bis zur Ernte. Zum Glück. Die Blätter sehen auch echt nicht mehr gut aus. Vermutlich war ich beim ph wert einstellen noch zur vorsichtig, und er war noch etwas zu hoch?!? Ich traue mich immer nicht soviel von Säure zum senken rein zu machen 😬

Processing
Likes
10
Share


@Trying4Trees
Follow
Week 1 - Day 1
20L Super Air Pots with a bottom layer of clay pebbles, (an inch deep at the centre point) and topped off with Growdog’s 70/30 coco perlite mix.
The tops of the pots are covered by green plastic water distributers to evenly spread the water from the 12” watering rings.
2 lights; each 300W actual draw, currently inside the tent. 2 more coming next week to make a total of 4, across the 6 plants achieving a true watt draw of 1200W.
Aiming for 1g/watt
Germinated seeds from FAST BUDS, were planted and hand watered using tap water pH’d to high 5.8 to low 5.9 with H&G Roots Excl. giving a nice PPM of 362 to start.
The BudBox tent is a 2x2x2m, using a Medusa Boosted XL run off trays to a waste brain were the run off can be tested. This will then be recirculated into the feeding tank again. The feed tank will a standard 100L water butt, retro fitting pumps inside for Feeding and Pump to waste - for cleaning the tank out each week. Another 100L water butt will contain a store of filtered RO water which will fill the feeding tank.
A 10L PureMate humidifier is set at 65%, along with 2x RAM 16” oscillating wall fans which are mounted to the top of the tent for maximum coverage - set to lvl1 on swing giving the 25°C. No extraction yet. This is ready and waiting. 8” HyperFresh fan with a RHINO 8”x600 pro filter. We are using 8” acoustic ducting.✌️🏻
Week 1 - Day 2
No change. Keeping the new environment stable is difficult. The humidifier is not large enough for the space.
Week 1 - Day 3
Fed PH RO water this morning. Trying to keep the humidity up inside the tent.
They have popped up! It begins :D
Did a feed of 5.8PH RO with CocaA&B 0.4ml/l, Roots excl 0.3ml/l, Calmag 0.2ml/l for a 150PPM. 300ml was used to moisten the coco per pot.
Extraction fully connected. Environment stable at 23-24°C, trying to stay at 23.3°C. Humidity fluctuating 47-60%, humidifier struggling, but hopefully be okay.
Week 1 - Day 4
All 6 are up and reaching. Husks hopefully will pop off soon. Will be doing another small feed this evening to keep the coco moist.
Little leaves have appeared!! Fed another 300ml, 5.8PH @ 151PPM/ plant.
Week 1 - Day 5
All shooting up now, tallest at 5cm down to 3.5cm 🌱
I gently helped the last 2 husks off the smallest ones to hopefully even them up. Gave the coco 1L of RO water around the edges.
Week 1 - Day 6
Nothing to report this morning. Another PPM feed to be done shortly.
Soaked the coco until run off with around 3-4L per pot using 5.8PH nuit water; 0.4 Canna A&B, 0.2 Calmag, 0.3 Roots Excl. 152PPM.
First time we tested the Medusa brain - works well and pumps away to the feed tank, need to change one of the low trays to be a boosted tray for better drainage. Giving 5 boosted trays and one normal. Hand feeding up until this point, but will connect up the automation in the next week.
Week 1 - Day 7
Strongest are growing around 1cm a day now. Tallest 6cm, smallest at 4cm. Looking forward to next weeks progress :)
Bought a wet&dry vac - best thing ever!! Haha. Cleans everything in sight plus all the water from the dirty run off.
Lifted all the pots, still a good weight to them so no feed or RO water today I think. Bring on week 2! 💪🏻


Likes
30
Share


@DrewbieDoobieNoobie
Follow
Water the ladies with some PH 6.0 CALMAG 5ml/gal and a small shot of KING COLA and EMREALD GODDESS about 1ml/gal in between feedings.
I am using a little heavier feeding this week than last weeks late flower per EH chart. I leaned into it a little more by 2ml extra per gallon I have not seen any nuite burn the whole time so I think they can handle an extra 250ppm its my last feeding I am hoping for some swell up on the colas, I know there is some sacrifice in yield with the 11/13 flower shedule but these bitches smell bad ass. I have to leave the fan and filter on all the time now as soon as I open the tent it wafts through the garage. If a bag of citrus fruit were to slapping sloppies with a brick of Blonde Lebanese is the only way I can describe it. I am going to feed this week and start flushing next week with PH 6 rainwater for the last two to three weeks. The hairs are starting to turn orange and trichomes are getting more cloudy. thanks for liking.

Likes
18
Share


@Jays_Not_Here_Man
Follow
Week 1 (Day 7) Flower- Running with the Indo nutrient line, easy to use, 3 bottles. They were recommended from the friend I got the clones from, and his did great. The girls started to stretch immediately, waited till day 7 flower to start the Flowering nutrient dosages.
Setup:
2x4x5 AC Infinity Tent
X2 LED 600 watt (blurples ☹️)
X2 6” clip on fans for canopy and light heat
Floor fan pushing fresh air from the bottom
Vivosun 4”in-line fan/12” carbon filter
Humidifier in the tent
Dehumidifier In the lung room for excess Rh
Timers set to 11 hours 💡/ 13 hours 🌜💤


Likes
53
Share


@DogDoctorOfficial
Follow
Ladies, gentlemen, and all the wonderful beings following this journey, I am thrilled to announce that we have reached the highly anticipated harvest week for our beautiful PCRs. This has been an incredible journey, and now it's time to reap the rewards of our hard work and dedication.
The PCRs are nothing short of perfection. Their frost-covered buds are a sight to behold, glistening like they've been kissed by winter's breath. The trichomes are abundant and sparkling, making these ladies look absolutely stunning. The aroma is intoxicating, a true testament to their strong genetics and the care they've received.
Upon taking them out of the tent, I was amazed by their strength and resilience. Despite my best efforts to make them dance, these ladies stood tall and proud, requiring no support at all. This just goes to show the exceptional quality and sturdiness of the PCR strain.
Aptus Holland's Enzym+. This product is a game-changer, breaking down dead root material and turning it into usable nutrients, ensuring our soil remains rich and fertile for future grows. Speaking of which, I do plan to reuse the soil, thanks to the amazing benefits of Enzym+. This enzyme product not only helps with nutrient uptake but also keeps the soil ecosystem healthy and thriving.
Here's the final stats for this week:
TDS: 130
PH: 6.8
Temp: 21°C
A huge shout-out to Aptus Holland for their incredible products that have consistently supported my plants' growth and health. Also, a massive thank you to Art Genetix for creating the phenomenal PCR strain that has brought so much joy to this grow.
To all my fellow growers, followers, and the entire community, your support and encouragement mean the world to me. This journey wouldn't be the same without you. As we move forward, let's continue to spread love, positivity, and the joy of cultivating these amazing plants.
Stay tuned for the final results and more updates as we dry and cure these beautiful buds. Until then, keep growing, stay positive, and never stop believing in the magic of cultivation.
Peace, love, and happy growing!
Genetics - P.C.R. @Art_Genetix_Team https://artgenetix.world/
Nutricion @aptusholland https://aptus-holland.com/
LED Power @Lumatek and @viparspectra
As always thank you all for stopping by , for the love and for it all, i fell blessed to have you all with me for one more love journey Thank you Thank you Thank you , you guys are great and have been amazing , thank you for everything !
#aptus #aptusplanttech #aptusgang #aptusfamily #aptustrueplantscience #inbalancewithnature #trueplantscience #dogdoctorofficial #growerslove
With true love comes happiness , Always believe in your self and always do things expecting nothing and with an open heart , be a giver and the universe will give back to you in ways you could not even imagine so !
Friendly reminder all you see here is pure research and for educational purposes only
Growers Love To you All
Discount Codes :
@thecannakan DOGDOCTOR 15% off
@theneutralizer PORKIT5-DOG 15% off
@kannabiaglobal DOGDOCTOR 30% off
@seedsmangenetics DOGDOCTOR 10%off
@terpyz.mutant.genetics DOCTOR 15% off
Have a fantastic week!


Likes
2
Share

@Meshugga
Follow
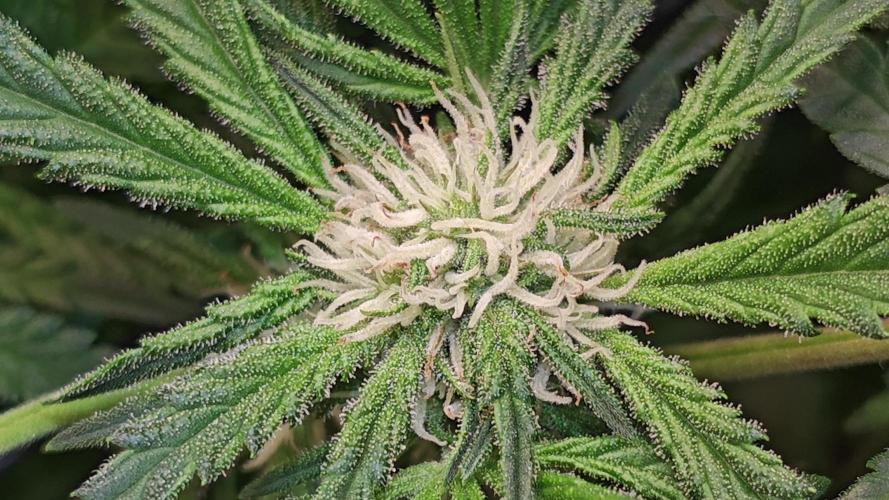
Jdu do květu tento týden mi začíná pořádná zábava, pokoukáníčko, vyvoňený byt a radost na čím dál tím větší úrovni!! Tento týden jsem ve 42 den udělal defoliaci pravé a dal jsem jí síť. Levá mě furt tak nějak trápí protože pořád nechce přepnout do květu. Nevím možná tý levý nebudu moct dát síť a snad se nezhermí... PK 13 14 jsem dal až včera a jenom pravé, protože už má docela pěkný květy, taaak ať jede bomby. Uvažuji jestli a jak hodně to případně defoliovat dál, tu pravou, u té se bojím víc jak u té levé tam je jasné že nějaká defoliace bude muset proběhnout ale otázkou je kdy?A jak moc...?
Likes
22
Share


@valiotoro
Follow
Sooooo impressed with the size & quality of the buds😳
Super dense & sticky✂️
The smell is sweet fruity mix berries🤤🍓
Likes
7
Share


@fabialien
Follow
Lunes 18 de marzo 2024, 3 de 3, germinación exitosa, entramos en fase de plántula 🌱, alumbramos con 100w directos, mantenemos en 18/6. No daremos nutrientes hasta el transplante.
Likes
Comments
Share

@ellioschka
Follow
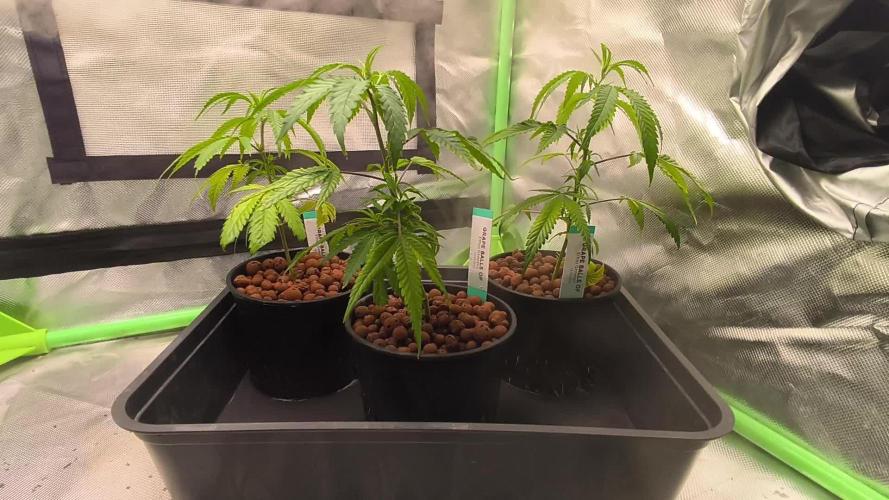
Die Grape Balls of Fire RBX Pflanzen sind relativ langsam mit ihren Wurzeln und waren mit den Lemon Zkittle die mit dem höchsten Magnesiumbedarf.😏
Die Wurzeln wachsen, statt an den Seiten der Töpfe auszutreten, lieber nach unten und sammeln sich dort. Genau wie für alle anderen Pflanzen wurde die Düngergabe nach leichtem Mg Mangel angehoben. Das Besprühen wurde komplett eingestellt und der VPD auf den Bereich 0,8-1,0 erhöht. Nächste Woche gehts ins große Zelt. 👍


Likes
7
Share


@cwgrows
Follow
Going off what other people say about 2x-3x growth during the preflower stretch I decided it's time to flip!

Likes
7
Share


@CanarianGrow92
Follow
The 22nd and 23rd of of july nothing important happened, we provided some water and the plant was looking quite good
The 24th of july a heatwave started, reaching 40C° outside, i needed to move the plant to my balcony, she continued outdoors but with some more shadow as the direct sunlight for such a long time would have fulminated the little plant
25th of july we provided bioenhancer from green house and some synergy mycorrhizae
26th of july nothing
27 of july water
28th of july nothing
29 and 30 of July starting week 2 veg. Temperature seems to start getting better, next couple of days we will move the plant to the roof again, gave only water


Likes
11
Share


@WIKETFOLE
Follow
Thanks to spliff for amazing genetics The plant adapts well to strong nutrition.🤟
I think it will have fat buds.
