


Likes
44
Share


@Chedderbob112
Follow
El living la Vida chedda mother Fukin Bob 112 here wee fuking go usual rite troops need tae go see a man aboot a dug


Likes
19
Share


@Zurban_Poison
Follow
What can I say here? she exceeded my expectations and grew much more than I expected. I'm looking forward to its beautiful blossoms.

Likes
7
Share


@eldruida_lamota
Follow
Vamos familia actualizamos la cosecha de las gelato Olandese de Dutchfem .
La verdad que el secado muy bien 7 días en Malla y a los botes, 40% humedad y 24 grados es la temperatura ambiental que han tenido en el secado.
Por lo demás de miedo os la recomiendo.
Gracias a DutchFem, Agrobeta y Mars hydro , sin ellos este proyecto no sería igual 🙏.
Agrobeta:
https://www.agrobeta.com/agrobetatiendaonline/36-abonos-canamo
Mars hydro:
Code discount: EL420
https://www.mars-hydro.com/
Buenos humos.

Likes
31
Share


@TacoKart
Follow
Added another 1800w LED (pulls like 250w from the wall) to the 1800w one we already have. Provides a better even spread of light so they aren't all reaching for the middle and they can grow upwards towards the light instead. Raised average temps by a few degrees with still below 80 so its good.
Ended up flooding the tent on accident when the water was left on and it drained our reservoir. The plants experienced some nutrient burn probably because of the 4 gallons of nutrient supplemented water they were flooded with. The time lapse will show the flood :P
Refilled the reservoir with 5.8 pH'd water with no nutrients to help the nute burn.
Did some defoliation and LST. Janice and Rachel were topped. Ended up accidentally snapping one of the lower branches on Monica and just propped it up and its healing well no issues. Have some great before and after pictures of some of the defoliation and growth on the plants.
With the defoliation tons of new bud sights are growing well since the light can penetrate better and the addition of the new light helps too.
The runt (Pheobe) is still.... runty. basically just gonna use the zkittlez to fill out some empty spaces that the sour grape kush doesn't fill. The sour grape kush is super bushy and is doing noticeably better.

Processing
Likes
15
Share


@dank604
Follow
Thelma (2 gal) has a massive fade setting in, only a handful of ambers though. I start her flush this week and will chop in 2 weeks, assuming the number of ambers has multiplied bigtime by then.
Louise (3 gal) is looking nice and healthy and I'm looking forward to compare harvests between both, she's a week younger.
So close!!


Likes
20
Share


@TeamQuality420
Follow
Now here we go !!!
This girl is just starting to take off, as for every gorilla glue lineage strain I have done , they really pack on weight at the very end . Just when you start to feel disappointed, it will explode.
More notes to follow as I am just getting things posted up !!!
*** My phone glitched out and added last week's photos, not a clue why but no stress, 💖.
Y'all better get ready to see some special!!!

Likes
2
Share


Processing
Likes
39
Share


Likes
12
Share
@eldruida_lamota
Follow
Que pasa familia, vamos con la séptima semana de floración de estas Gorilla Girl F1 de Sweetseeds.
Vamos al lío, las plantas se trasplantaron a macetas de 7 litros.
El ph se controla en 6.5, la temperatura la tenemos entre 24/21 grados y la humedad ronda el 50%.
El ciclo de crecimiento puse 12h de luz, el foco está al 100% de potencia.
Tengo visitantes, trips que combatiremos con control biológico.
Me gustaría estar más encima este cultivo pero la salud me está impidiendo un poco este 100% con el proyecto.
- os dejo por aquí un CÓDIGO: Eldruida
Descuento para la tienda de MARS HYDRO.
https://www.mars-hydro.com
Hasta aquí todo, Buenos humos 💨💨💨


Likes
91
Share


@biggreens420
Follow
Hey guys back with rqs new top shelf strain green gelato starting in plagron natural soil on heat mat geminated in 3 days no issues put straight under 400w hps in a shaded corner on day 3 moved under Mars hydro epistar 120 with just veg on gotta test the new toy and it uses less power will be using plagron natural range nutes with green sensation in flower mixed some mykos in pot before planting and she seems healthy and happy will get some daily pics this week not much else to say thanks for reading happy growing guys
Likes
14
Share


@Noon_Grows
Follow
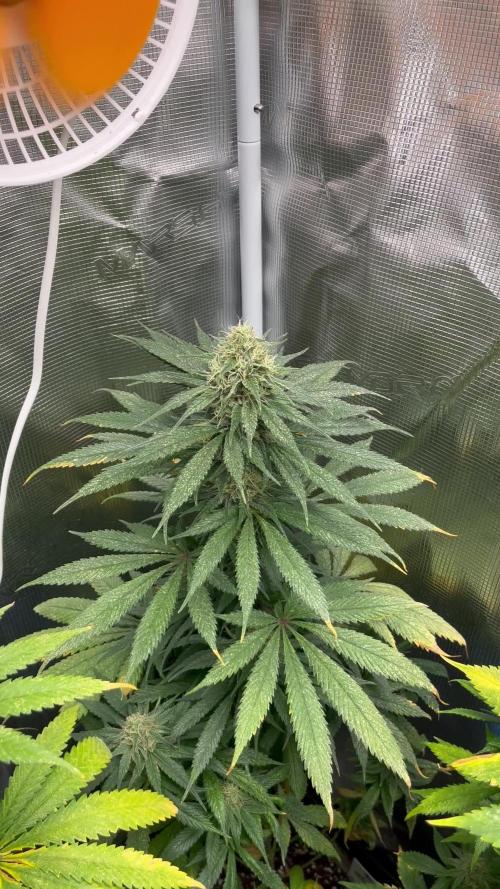
After last weeks defoliation I am stoked to see the progress in their growth, opened them up nicely and exposed all the remaining bud sites to some good light 😁... I have around 4-5 weeks left from here, super keen to see what these ladies can do 😁

Likes
42
Share


@Maggie_de_Block
Follow
Tried some new growing techniques, which may have resulted in lower yield compared to my last grow, but I also think the strain just yields a bit less. Overall easy to grow, didn't have to do too much and got a decent amount of good looking buds
Likes
2
Share


@burnercorona
Follow
Solid week. She's recovering quite well from training and some pH issues almost time for flower
Likes
1
Share


@OGMeow07
Follow
Everything is supercropped to able for them to fit but i adjusted my led light and stick the thing into the ceiling 🤣

Likes
11
Share

@eldruida_lamota
Follow
Que pasa familia, vamos con la quinta semana de floración de estas Gorilla cookies Auto de FastBuds.
Por el momento todo va bien tienen buen color, van ahí formándose esas flores y empezando a tricotar guay.
Alimentamos nuestras plantas con Agrobeta.
Por supuesto el ph se mide en cada riego y se mantiene en 6.2 y riego en intervalos de 48h.
La temperatura está entorno al 22/24 grados y la humedad anda sobre el 50%.
Las plantas en si ya están bien sanas, tutore la rama principal para que no se fuese de madre, y así controlaré la altura.
Yo creo que en 1 o 2 semanas podré darles machetazo, pero ya vamos viendo estas semanas.
Mars hydro:
Code discount: EL420
https://www.mars-hydro.com/
Agrobeta:
https://www.agrobeta.com/agrobetatiendaonline/36-abonos-canamo
Hasta aquí todo, Buenos humos 💨💨💨


Likes
2
Share


@BLAARWOOD
Follow
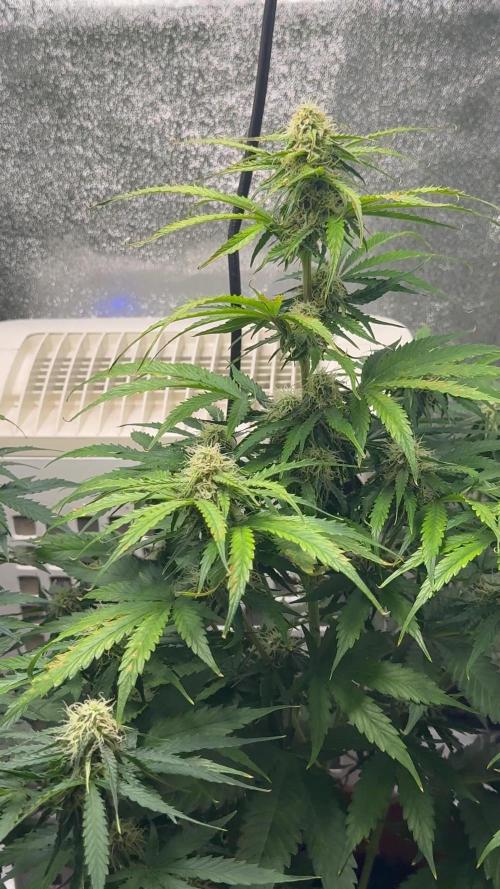
adjusting placement of the stem buds, for maximum light penetration & maximum bud production. Trying not to cause light burn in the process.