
Processing
Likes
Comments
Share


@Teamdirtbag3
Follow
The party continues...
We now have 6 plants transplanted and ready to get pollinated along with everything else in the yard....
The boy is actually a girl..... Citrus Farmer f2 and it's a powerful orange peel pheno sprayed with collateral silver.
We have:
Citrus Farmer f2
Tahoe Kush x Kush Breath #1
Slurricane
Sour Diesel x Fire OG x pre 98 Bubba (SFK)
Tahoe Kush Breath #2 x SFK
Fire OG
All being in the circle jerk. 🤣🤣🤣🤣
I'm very interested in how much tangerine is coming from the father. Only one has tangerine Terps..... so let's get some seeds and see. This question may take some time ofcourse, but it will be interesting to see if the tangerine comes through.????


Likes
4
Share


@Willy_Balls
Follow
All the ladies bounced back from the little stress at the transition. They are all charging.
On 9.11 I’ve increased the light from 600 to 660w. We will see tomorrow how they handle it.


Likes
12
Share


@CanadianFillmore
Follow
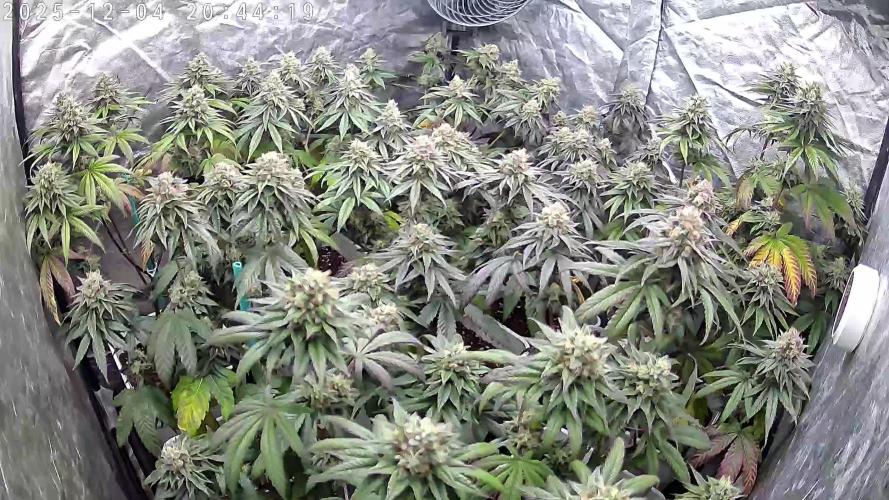
Week 6 begins for LSD and Green Crack! These ladies were thirsty! They will get an extra 1/2 round of feeding later this week to satisfy their hunger. LSD smells so fruity and citrusy and is frosty. Hopefully they'll bulk up from here to the finish line. Green Crack is just starting to show frost, she's got lots of bud development, but still waiting for them to bulk up over the next 2-3 weeks.
Thanks for stopping by growfessors 👽🌳💚


Likes
388
Share


@yan402
Follow
🌸🍏✨🍭🌸🍏✨🍭🌸🍏✨🍭🌸
Hi and welcome to another Kannabia grow!
This time I’m running their Apple Fritter (feminized photoperiod). She’s going to veg under 24hr light and be manifolded.
Still cleaning the rest of my Candy Cream GF (11.04.25) — going to sow the seed tomorrow (12.04.25)
*been lazy, sowed on 14.04.25
🌸🍏✨🍭🌸🍏✨🍭🌸🍏✨🍭🌸
---
💭❗💭❗💭❗💭❗💭❗💭❗💭
❗Events & thoughts worth noting❗
💭❗💭❗💭❗💭❗💭❗💭❗💭
12.04.25 (GW1) – Cleaning + flushing the old coco coir. Might need to add another brick. *No new brick needed ✅
This is how I recycle my coco coir — fast, cheap, no BS.
🌿 Harvest plant
✂️ Chop roots small — they stay in for structure (organic perlite)
💦 Hot water rinse — remove salts & dust
🍶 Pre-soak with light feed:
Micro 10ml
Bloom 0ml
GreenBuzz 10ml
Cal-Mag 60ml
FFJ/FPJ 10ml (new disgusting batch)
pH down (citric acid)
♻️ Media stays — Roots stay — Back in service.
14.04.25 (GW1) – Planted seed in final pot ✅
16.04.25 (GW1) – Did last tent clean up + setup ✅📸
17.04.25 (GW1) – Seed germinated 🎉📸 — roughly 48hrs in final pot. Solid start👌♥️
23.04.25 (VW1) – Minimal burnt tips 📸 — not progressing, not a concern.
26.04.25 (VW1) – Started using the new batch of FPJ/FFJ
https://growdiaries.com/diaries/266849-grow-journal-by-yan402
30.04.25 (VW2) – Increased TriPartMicro & GreenBuzzBloom 10ml → 15ml
03.05.25 (VW2) – Increased TriPartMicro again 15ml → 20ml, topped the plant, and added final layer of clay pebbles around the base, trimmed side branches and did LST in preparation for "manifold" 📸
08.05.25 VW3 finished manifold📸
13.05.25 VW4 Increased TriPartMicro to 30ml and GreenBuzzBloom to 20ml.
15.05.25 VW4 Done defoliation and LST 📸
18-19.05.25 VW5 pruned all the shoots bellow my "mains" and did a full defoliation📸
24.05.25 VW6 increased GreenBuzzBloom to 30ml
04.06.25 VW7 did a cleanup📸
11.06.25 VW8 increase TriPartMicro to 40ml
17.06.25 (VW9) – Final structure pass 💈🌿
Did a clean perimeter prune + removed weak shoots. Ended up with 12 tops, was aiming for less, but she made the call
Didn’t fight it, just shaped it the best I could
Airflow’s good, structure’s stable
🛑 No more cuts until post-stretch
Pics coming shortly 😘
Flip coming soon — we’ll see how she handles it.
20.06.25 VW9 Switched lighting to 12 hours, may the stretch begin 🤞
22.06.25 VW10 Did a good LST session,made some pics, and came to some conclusions and a small change of plans:
Originally planned for 8 mains — long, spaced colas and maybe a couple stronger “titans” if she wanted to go that way.
But she’s showing me something else, and I’m not here to fight her — just guide her.
Now after stretch, I’m keeping side shoots only if they: Fill real canopy gaps
Don’t crowd neighboring tops (minimum 15cm spacing)
Aren’t growing into walls or toward the next plant
Anything too close, too low, or heading into shade gets removed. No point forcing it.
Looks like I’ll finish with 14–16 solid tops, depending on how she settles.
I’m just trying to give each one enough light and space to stack properly.
No overcrowding, no larf — just letting her do her thing with a bit of structure.
Increased Tri Part Micro to 50ml as well.
28.06.25 VW11 one week since I flipped to 12/12 and she is stretching nicely, a bit shy in showing pistils compared to the Fantasy Feast regulars I have in the same tent.
29.06.25 VW11 increased GreenBuzzBloom 30→ 60ml
06.07.25 FW1 TriPart Micro: 50→ 30ml
TriPart Bloom: 0 → 20ml
Home-made FFJ/FPJ (Watermelon + Pumpkin): 10 → 30ml
12.07.25 FW1 GreenBuzzBloom 60 →40ml, TriPart Bloom: 20 → 60ml, fpj 30→60ml
🌱💦🌱💦🌱💦🌱💦🌱💦🌱
🌿 Day to day tasks & actions 🌿
🌱💦🌱💦🌱💦🌱💦🌱💦🌱
11.07.25 FW1 – Fed 5l of #1 → 2l runoff
12.07.25 FW2 – Fed 5l of #1 → 2l runoff
(*RUNOFF reused for tomato plants)
🍶💧🍶💧🍶💧🍶💧🍶
💧 Nutrients in 30L #1 – Week 11 Veg
🍶💧🍶💧🍶💧🍶💧🍶
💧 TriPart Micro: 10 → 15 → 20 → 30 → 40 → 50ml → 30ml (1.00ml/L)
🍶 TriPart Grow: 0ml (0.00ml/L)
💧 TriPart Bloom: 0 → 20 → 60ml (2.00ml/L)
🍶 GreenBuzz Bloom: 10 → 15 → 20 → 30 → 60→40ml (1.33ml/L)
💧 Cal-Mag: 60ml (2.00ml/L)
🍶 Home-made FFJ/FPJ (new batch): 10ml → 30→60ml (2.00ml/L)
💧 pH Down: Citric acid (buxXtrade)
📦 TOTAL: 250ml per 30L
🔬 8.33ml/L
🍶💧🍶💧🍶💧🍶💧🍶
⚙️✂️⚙️✂️⚙️✂️⚙️✂️⚙️
✂️ Tools & equipment ✂️
⚙️✂️⚙️✂️⚙️✂️⚙️✂️⚙️
✂️ 2× MarsHydro SP3000
⚙️ MarsHydro 150mm ACF Ventilator
✂️ Trotec dehumidifier (big unit)
⚙️ Mini no-name dehumidifier
✂️ Kebab skewers (LST – stainless)
⚙️ Wire + roast skewers (LST assist)
✂️ Scissors (HST)
⚙️ Vacuum (for spills & cleanup)
✂️⚙️✂️⚙️✂️⚙️⚙️✂️⚙️✂️⚙️✂️⚙️
---
🍏🍪🌬️🍬🍏🍪🌬️🍬🍏🍪🌬️🍬
Apple Fritter (Kannabia Seeds)
🍏🍪🌬️🍬🍏🍪🌬️🍬🍏🍪🌬️🍬
Species: 50% Indica / 50% Sativa
Genetics: Sour Apple × Animal Cookies
THC: Up to 25%
Effect: Euphoric, relaxing, creative
Flavor: Sweet, fruity, pastry notes
Flowering: 56–63 days
Resistance: High
Indoor yield: 450–500g/m²
Outdoor yield: 600g/plant
Structure: Strong, bushy, dense buds

Likes
24
Share


@Captensmokey
Follow
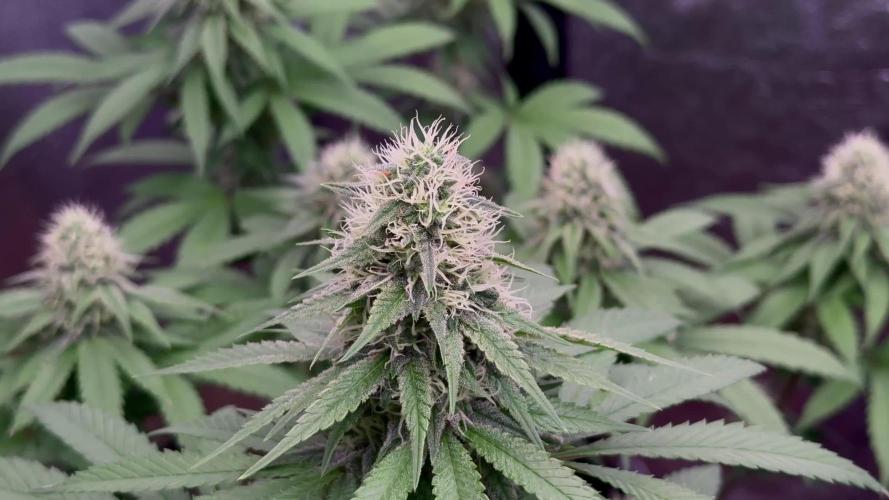
What a week. They turned purple and I thought they were stressed.... But I had smoothly forgotten that purple punch was in it.😅🤣Also, thanks to hesi Bv. I can show you how good their products are. Keep following me on growdiaries insta and youtube. Green greetings CaptenSmokey haha 🙏🍀
Likes
5
Share


@braxat420
Follow
It's just starting to form flowers, but it's looking like it's forming a ton of them. I'll probably go through and defoliate this afternoon. One of the plants has for sure overshadowed the other, but I think that's okay. I don't think I had enough room in the 3x3 for two plants the same size. I'm happy with this water/worm/frass only run.

Likes
24
Share

@THcHunteR23
Follow
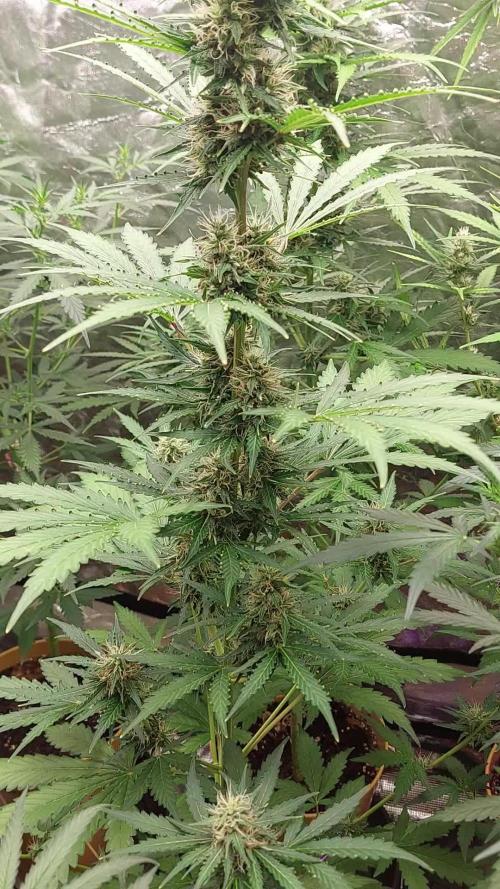
C’est vraiment magnifique de la voir fleurir. Elle démontre constamment une belle vigueur. Ont voit déjà que les pépites seront compact. Avec les nutriments organiques qui favorisent la production de terpènes c’est à tomber par terre. Moins fidèle à la pure skunk elle dégage quand même une odeur très forte , Extrêmement sucré et doux !!

Processing
Likes
15
Share


@chefrob15
Follow
the girls are starting to look good! my tent is running a little hot the past couple of days though, 84 flirting with 85. I took the white light out, it runs to hot. now my question is how much light should be provided to accommodate 5 plants in a 2x2x5 space. I went to a hydro shop last night to get some green pads to add some c02 and homeboy told me to drop a light that 2 -300 watt lights should be sufficient for the space. my temps did drop down to the 79-80 degree range and that's from dropping 1 light. so im thinking im just going to ride with it like that for now. starting week 3 in a couple of days and we will start on the c-4 from mills.

Likes
10
Share


@Tetiana_Riz
Follow
Hello everyone, in short with our girl what happened, if anyone has encountered such a thing write,

Likes
3
Share

@Z420Organics
Follow
Autoflowers Update 🌱⚡
One of the autos is clearly ahead of the others, showing faster progress in its flowering stage 🌸. It’s exciting to see the difference in growth rates between them!
I had a small issue with the light, which caused some slight leaf burn 🔥🍃 — you can see it in the video too. Nothing serious, though, and the plants are still looking healthy and happy overall. 💪🌿
Can’t wait to see how they develop over the next couple of weeks! 🚀.

Likes
80
Share


@JamMAKEcan
Follow
9wk flowering. Loupe shows all clear CRYSTALS I guess 10 week flowering might be the lick.. Maybe even 11 😜😜maybe even 12. Im straight going off amber CRYSTALS .. Now their all clear🤔🤔or is it milky.. Most defenetly now AMBER


Likes
Comments
Share


Likes
13
Share

@Chucky324
Follow
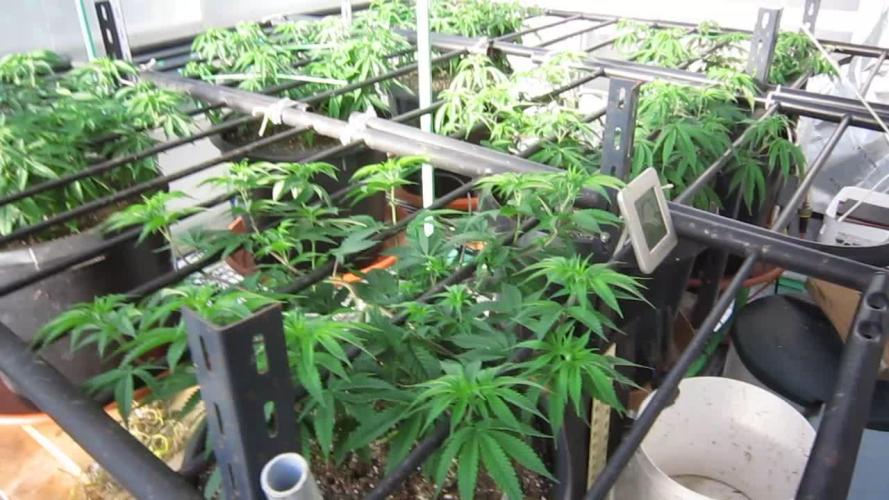
Hello This is the end of week 9 and the beginning of week 10 of veg.
Got them outside and into the greenhouse last week. I see they have warm up, and all the leaves are facing the sun now.
Got them spread out so they can cover their area. Slightly split 1 stem and didn't bury 2 root balls deep enough, so the top branches have to go over the first rung and then under the second. I think I'll try, putting a top net in here instead of the bamboo I've used for the last few years.
Gave each plant 2 liters of ph adjusted water and poured it down the stem, so the water will travel down the stem to the root ball, and the drier soil will wick any extra water away and not cause problems for the roots of the plants. Cannabis plants don't like cold, wet, root balls.
I'll do some LST next week and take some clones of these smelly plants.
Some have the smell of sweet but strong lemony cleaner Some smell a little like desert and earthy.
They leave a smell on your fingers you can still smell minutes later. These plants should be really good... is what my experience is telling me.
OK. Be Really Cool.
Chuck.
Likes
37
Share


@Rabidreject
Follow
UPDATE - sat 6th March
Doing good for first week. The change of light made all the difference. One is a hempy that I am going to add some worm castings and I’m already adding loads of microbes so it should buffer the ph for me.
UPDATE - Monday
I ordered some worm castings so I can mix it with my coco and perlite, as well as a few other goodies so I can treat a hempy more like a soil grow but get the benefits of the passive hydro system.
I’ll probably use around 10%.
I’m still waiting for my fan and my microbial product that is made by the same people as charge.
It looks great. Loads of ph buffering microbes to munch on the vermicompost and enable me to get away without spending 60-70 on a ph meter.


Likes
35
Share


@eldruida_lamota
Follow
Venga familia, va la quinta semana de floración de estas Frosted Guava de Zamnesia.
Que color que sanas se ven como se nota que Agrobeta es de lo mejor, las niñas están de 10.
La humedad está en su punto, y por fin puedo controlar la temperatura en 22 grados.
Las flores empiezan ya a tricomar bien y desprender aromas bastante llamativos.
Ya vamos viendo cómo progresan estas próximas semanas y van formándose esas flores.
Os comento que tengo un descuento y para que compréis en la web de Zamnesia de un 20%, el código es ZAMMIGD2023
The discount 20% and the code is ZAMMIGD2023
https://www.zamnesia.com/
Mars hydro:
Code discount: EL420
https://www.mars-hydro.com/
Agrobeta:
https://www.agrobeta.com/agrobetatiendaonline/36-abonos-canamo
Hasta aquí es todo, buenos humos 💨💨💨

Likes
7
Share


