


Likes
Comments
Share


@Dargaville_Dukes
Follow
Seedlings are struggling. My guess is it's from over watering substrate with vermiculite in it but I'm not 100% sure. I've been fairly moderate with water. If they were in regular potting mix this amount of water would have been okay. Next time I'll start them in plain potting soil.
I also thought that maybe there was a nutrient shortage because I'm using 25% coco coir but actually this seems unlikely. In any case I put a bit of extra soil on top of the pots.
Despite the browning off this week the stems are still really strong. I'm still confident they will recover and just need time. The temperature fluctuations of the last week might have had a negative effect.

Likes
13
Share


@J_diaz420
Follow
Bienvenidos!!
Para germinar las dejo 2 a 3 días entre papel húmedo, luego las paso a sustrato y las dejo al menos 12 hrs en obscuridad antes de encender el primer ciclo lumínico de 18 hrs donde comienzan a brotar inmediatamente.

Likes
4
Share


@m0use
Follow
***Sponsored Grow*** = Medic || https://medicgrow.com || Grow = ***Sponsored Grow***
Plants still looking good from last week, Run off was a bit high for my liking but only seeing minimal signs of nutrient burn. Still watering once with feed and runoff and then later in the week with water and no/little runoff for my watering cycle.The number in the nutrient section are wrong but the EC and ratio are correct. sucks this thing is an auto and not a fast version, I dilute the feed down to 1/2 as the other photoperiods, its in its end of life now and kinda of a waist of space. Not impressed with this plant. might steer away from fast flowers because of this.
Lights doing well. The V1 spectrum is good on the medic grow mini sun-2's 240w. No issues so far, dimmed at 80%
.
Till next week.
***Sponsored Grow***
Official Website: https://medicgrow.com/
Facebook:
https://www.facebook.com/medicgrowled
Twitter:
https://twitter.com/medicgrow
Instagram:
https://www.instagram.com/medicgrow420/
YouTube:
https://www.youtube.com/channel/UCNmiY4F9z94u-8eGj7R1CSQ
Growdiaries:
https://growdiaries.com/grower/medicgrowled
https://growdiaries.com/grow-lights/medic-grow

Likes
14
Share


@Momgrowsthechronic
Follow
So, Week 4 is done and the Sweet Seeds Gorilla Girl XL Autos are slowly coming along. It has been even colder in Canada this past week and temperatures in the tent have been hovering around the 70 degree mark. The humidity has come up a bit to around 30% and this is an improvement but the combination of too cold + humidity too low = small, struggling but surviving plants. It’s disappointing but this is consistently my toughest grow cycle of the year. Other than that, I increased the water to 4 litres per watering which is still being done every 4th day- so that’s 0.7 of a litre per plant per day. Although I was planning on topping all four of these plants following my previous Sweet Seeds grow experience, these ladies are just not up for it- too small, too slow and surviving not thriving. I will look forward to that with my next and final Sweet Seeds grow so stay tuned for that in future.
Mom’s Tip for Week #4- Cleanliness is next to Godliness!… I wholeheartedly feel that a clean and organized tent/grow room is essential for a successful grow. I often see other growers leaving dead foliage to pile up in the bottom of their tents, watering with no drip trays or not cleaning their space in between grow cycles. They are often plagued with unwanted visitors, fungal infections and a nasty build up of crud in the most precious place- your happy garden! Here are my top tips for keeping your tent/grow room clean, organized and consistently productive. Always remove dead or defoliated foliage from the bottom of your tent and take it all the way out of the immediate growing area/room. Biodegrading foliage provides the perfect environment for unwanted insects/pests to hide in and feed on- potentially creating an infestation that could devastate your crop and contaminate future grows. I place all green materials including my post harvest plants into the compost pile where it breaks down creating beautiful, natural fertilizer for future grows! Always use drip trays when watering or clean up excess dirty water that seeps through your pots/containers- potentially creating ideal conditions for various fungi and molds that can affect your plants, equipment and perhaps even you. I use inexpensive, plastic drip trays to catch any run off instead of relying on the waterproof bottom that is sold with my tent. I have personally witnessed the mold that can grow on and between these waterproof bottoms and the actual bottom of your tent as well as moisture so severe that it rotted through the stitching/seams of an otherwise perfect tent. Always clean your tent/grow room in between each and every grow cycle as well as throughout the grow as needed- potentially avoiding cross contamination from the previous grow and maintaining a high daily standard. Aside from insects and pests, fungi and molds- pollen from a previous grow gone wrong can wreak havoc on future grows if not dealt with correctly. I thoroughly vacuum my entire tent and wipe it down with a hot water/bleach solution applied with a spray bottle and a clean cloth. I also use a cordless Black and Decker hand vac conveniently mounted on a wall near the tent for daily maintenance and clean ups as needed. Keeping your tent, immediate grow space and supplies organized will also make things easier. I keep everything up and off the floors and if possible stored in rubbermaid type containers. This allows for quick and easy sweeping/vacuuming, wiping/dusting and the deep cleans required in between grows. All of the above mentioned tips will help increase the odds in your favour for a successful grow/harvest but they will also increase the longevity of your equipment too. Growing Cannabis at home can be quite a hefty initial investment so if a little light cleaning can make my core components (tent, lights, intake/exhaust fans, etc.) last longer, work better and equal more bang for my buck- it’s a no brainer!
Likes
8
Share


@Eldorado_ed
Follow
Good seeing the difference in each done some LST with them all but the middle 2 in the 25L I’ve did both of them different to see the outcome Fiming with one topping on the other and some defoliation on one and not the other Newbie goals practice make perfect 😂✌️🏻

Likes
7
Share

@Calo
Follow
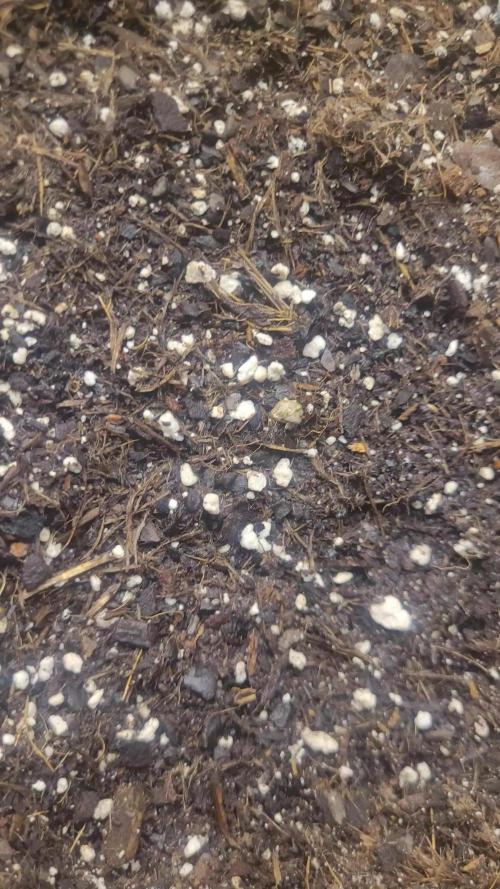
It's time to start a new selection!
In this growing cycle I will select 1-2 mothers that will become part of my personal genetics collection :)
Unlike other cycles in which I use organo-mineral fertilization, in this cycle I will use pure minerals from the Athena line. I have heard a lot of good things about this line of fertilizers and I can't wait to try them.


Likes
27
Share


@Ganjagrandaddy
Follow
It is officially time to admit they are women now !.... Seeing all the little white pistils and the "starfish" look to the tops shows hope.
They have been spreading out nicely This week with even the Ghost OG gaining more vertical and lateral growth. There are easily defined differences already between these 3 ladies and having the variety to train together is always a challenge. I am hoping the Ghost can fill put in the next bit of stretch to get her canopy level with the others. The wedding cake is Thickening and growing daily so well now. She shows no signs of slowing yet either so I think she will dominate this NGT tray if not kept under manners !!. GG#4 is setting herself up nicely for some fruit bearing and I look at her skinny arms and wonder how thehell this strain can hold such dense buds without a total collapse but know from experience they can too. With these ladies being the last to officially become women , we are now in a full flowering room. Roll on harvest time in a out 8 weeks for these girlies now. stripping out at day 21 will help fix the final buds.
Likes
115
Share


@DogDoctorOfficial
Follow
Greetings, fellow cultivators! We've officially crossed into the much-anticipated flowering stage with our beloved Cherry Cola Auto, and let me tell you, it's nothing short of a horticultural fiesta! The transformation over the past week has been nothing short of magical, with our once lush bush evolving into a budding beauty.
Last week was a game-changer as I bid farewell to the training supports that have guided our Cherry Cola through her bushy phase. Now, she's free to express herself, growing wild and embracing her natural beauty. The transition from veg to flower has been seamless, and I'm witnessing a symphony of bud formation that's simply breathtaking.
One of the marvels of autoflowers is their ability to veg and preflower simultaneously. It's like witnessing two acts of a play at the same time – the plant is reaching for the stars while also gearing up for the grand flowering spectacle. Cherry Cola's growth rate is nothing short of impressive, and I find myself in awe of this dynamic phase.
With the shift into flowering, I've made some adjustments to our nutrient regimen. The Start Booster has gracefully bowed out, making way for two new players on the stage – P-Boost and Topbooster. P-Boost, a phosphorus booster, is a soluble wonder that not only enhances blooming but also contributes to improved water pH. It's like giving our Cherry Cola a backstage pass to a nutrient orchestra.
Meet the New Stars: P-Boost and Topbooster:
P-Boost, with its organic acids and phosphorus punch, is playing a vital role in stimulating protein, hormone, and vitamin production. It's a symphony conductor orchestrating the blooming processes. Meanwhile, Topbooster, the dynamic duo partner, is enhancing the flowering response, producing larger fruits with more fibers, resins, and sugars. It's like a magical potion for quality and flavor enhancement.
Oh, did I mention that our Cherry Cola looks perfect to my eyes? She's a vision of green excellence, and I'm captivated by the flawless symmetry of her growth. Every day, she inches taller, embracing the flower formation with grace and poise.
As we wrap up this Week 1 Flower report, I'm left in amazing of the beauty unfolding before us. Cherry Cola Auto, with her wild growth and budding allure, is a testament to the marvels of cultivation. Stay tuned, green enthusiasts, for the next thrilling installment as the floral overture continues!
Genetics Cherry Cola Auto @Fast_Buds @fastbuds_genetics_official @fastbuds_official @fastbuds_espana
Nutrition: @aptusholland @aptus_world @aptus_
Love, Care, and Attention: @dogdoctorofficial
As always, thank you all for joining me on this journey, for your love, and for it all. My horticultural odyssey would never be the same without you. Your love and support are cherished, and I feel both honored and blessed to have you in my life <3 <3 <3
#aptus #aptusplanttech #aptusgang #aptusfamily #aptustrueplantscience #inbalancewithnature #trueplantscience #dogdoctorofficial #growerslove #fastbuds #specialplants #homegrown #fastbuds #cherrycola #CultivatingBeauty #NatureArtistry #HomegrownMagic #GreenPassion #JourneyWithPlants
With true love comes happiness. Always believe in yourself and always do things expecting nothing in return, with an open heart. Be a giver, and the universe will respond in ways you can't even dream off.
Friendly reminder: all you see here is pure research and for educational purposes only.
Growers Love to you all <3 <3 <3

Likes
35
Share


@nonick123
Follow
Día 9 (10/06) N/A
Día 10 (11/06) N/A
Día 11 (12/06) Llueve mucho. Humedad alta por aquí. Eso les favorece
Día 12 (13/06) Se empiezan a desarrollar las hojas verdaderas a una buena velocidad! Todo en marcha! 💨
Día 13 (14/06) Riego ligero 100 ml sólo H20 EC 0,5 en previsión del trasplante en el día 15 de la planta
Día 14 (15/06) Se nota que estamos en el día 14 desde germinación y la mayoría de las plántulas van viento en popa!
Día 15 (16/06) Hoy procedemos a trasplantar a las chicas a su maceta intermedia de 6,5 litros
Se prepara con 5,5 Litros (85%) de sustrato PRO-MIX HP BACILLUS+MYCORRHIZAE + 1 Litro de Insect Frass (15%) + 65 gramos de Earth Vibes Super Soil (10 g/L substrato)
Se llena la maceta de sustrato con las manos (limpias) y rompiendo los trozos más gruesos, para que el sustrato esté aireado y esponjoso, sin presionar
Se coloca una maceta vacía de 1L para que quede la forma perfecta de la maceta donde están las plántulas (ver fotos)
Se espolvorea la parte proporcional de la probeta de microorganismos sobre el agujero de trasplante
Se saca la plántula de su maceta actual (bonitas raíces 😍) y se coloca en la maceta final
Se riega muy lentamente hasta percolación profunda con H2O EC 0,5 pH 6,5
Se coloca mulch (acolchado) de paja para evitar traspiración excesiva y cuidar a los microorganismos del suelo
A ver como reacciona al trasplante!
💦Nutrients by Lurpe Solutions - www.lurpenaturalsolutions.com
🌱Substrate PRO-MIX HP BACILLUS + MYCORRHIZAE - www.pthorticulture.com/en/products/pro-mix-hp-biostimulant-plus-mycorrhizae

Likes
22
Share

@J_diaz420
Follow
Esta semana una pequeña defoliación superior, solo dos hojas por planta y me decidí tarde en hacer poda de bajos , como quedaron los brotes bajos a la misma altura puede que coloque malla scrog como tutor para ayudar a soportar el peso de los futuros cogollos.
Likes
6
Share


@Budbotonist84
Follow
Just been playing about with a DIY co2 generator with sugar water and yeast considering paying out for a better system and meter but at least I can still monitor to a degree but I don't think this co2 meter is up to much cop......
I've made a co2 bucket with an air pump still using sugar yeast 2x tomatoes and a potatoe puree'd 1x teaspoon active brewers yeast and 2.5 liters of water in a 5l bucket with sealed lid ratchet strapped shut sat on a 20cm square heat mat set on a thermostat at 24c to 27c temps sits about 26c for a prolonged co2 release levels have defo increased spiked quite high then settled approx 1200 to 1500ppm or the meter is wank but either way its adding co2 just for how long though ?
I've read up on the fungus method which last 6months so I'll be sorting that soon


Likes
7
Share

@D33jW
Follow
Week 13 – Day 90 / FLO 61
🌞 Temp: 24°C
💦 RH: 44%
💥 PPFD: 700 µmol
🌬️ VPD: 1.6
⚡ EC: 0.2
💦 H2O: 700ml/24h
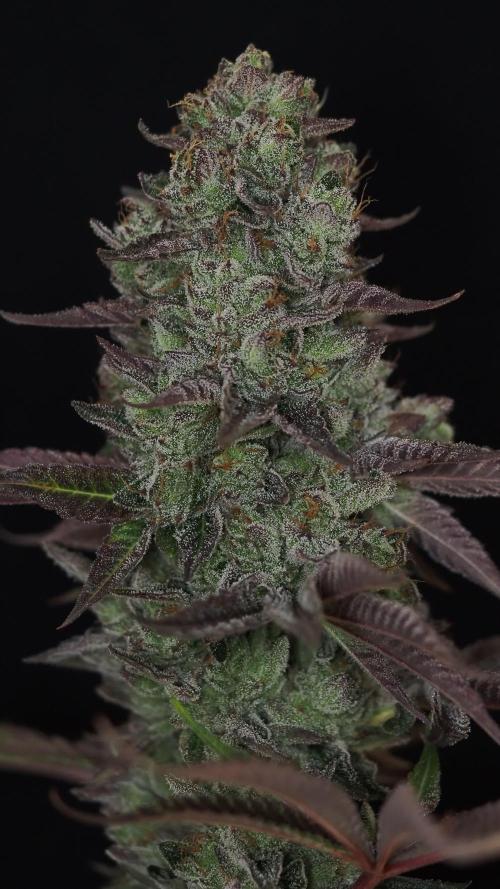
Berry Crusher harvested at 61 days. Tall plant, good yield. Nice, subdued scent of RS11. Sweet, berry-like with a touch of forest notes ?🌲

Likes
47
Share


@Dynab000
Follow
Perfect and easy to grow, thankful no pests this round. Had no issues at all. It was such and easy grow and will definitely grow this again. Love it
Likes
Comments
Share

@PapaTerps
Follow
Wizard Fuel - Wizard Trees
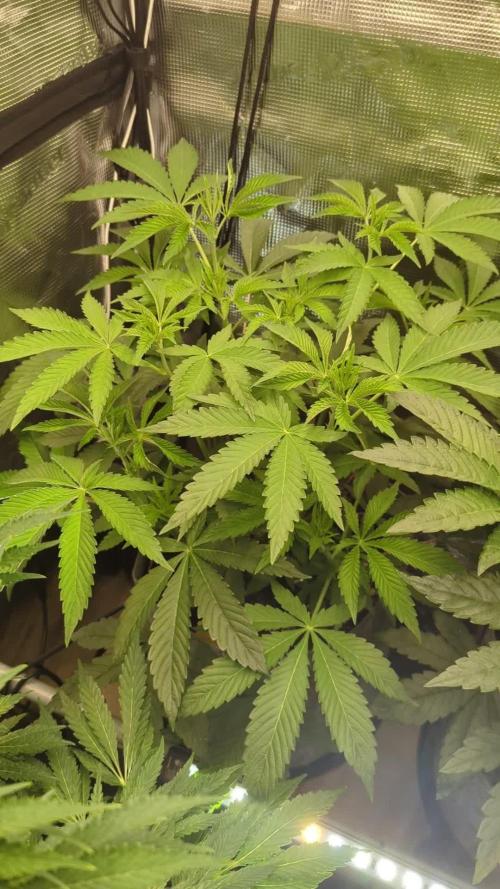
Day 48 - Watered with 2L of RO tap water with nutrients mixed individually and in order, then finally pH'd to 6.3, watered over three phases to allow the water to penetrate the soil slowly.
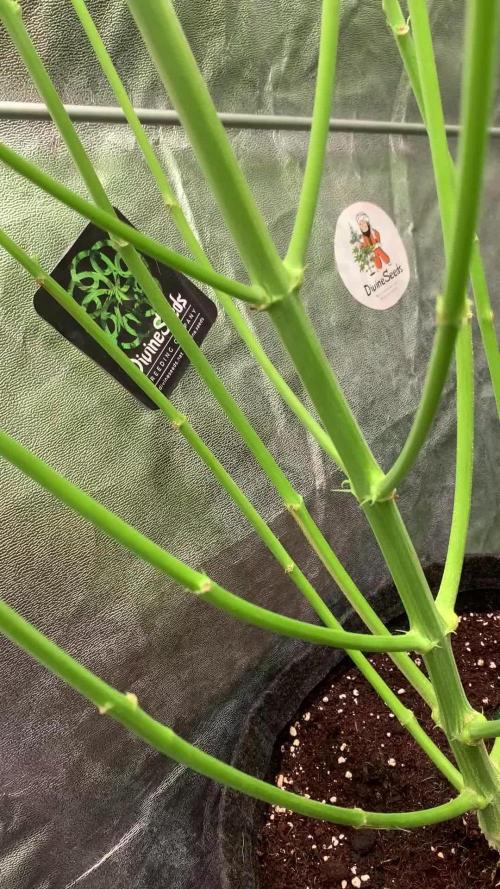
She is still in her stretching phase, so I haven't done anything with her just yet. The topping I performed on her a week or so before I put her into flower, has allowed her to grow a nice even canopy with six distinct stems. When she finishes her stretch, I will lollipop her and defoliate to improve both light penetration and airflow 👍🏻




Likes
41
Share


@gottagrowsometime
Follow
Welcome to my Auto Cinderella Jack Diaries from Dutch-passion
DAYS 57-63 flowering days 32-38.
Both plants have left pre flower behind. And have put on some decent weight. Both girls are very healthy. Even with the constant stress of been dried out and again and again. Has caused some of my plants to hermie. But, these girls are OK. Checked them out very well. And females parts all round. Let soil dry out. And sprayed a 6% h202 on top of the soil to kill and larva or gnats that haven't gotten wings yet. And let's hope this will be the last week of these shits.
Am going to push a much higher PK with my synthic booster on the synthic CJ. and for the other, I'm going to leave her be. She's not needing or wanting anything. Maybe another 2-3 more weeks max
The organic stands at 58cm and side nodes can reach up to 40. She's a very bushy plant with a lot of bud sites.
The Synthetic has a completely different structure. And looks like she was topped and trained hard to give off even cola base (was not the case) just the way she turned out.
Thanks for viewing my diary. Drop a like or comment if you'd like me to visit your diaries. Either way, thanks for dropping by.

Likes
26
Share


@thomasgreen
Follow
I am excited because the time for harvesting is coming.
She is growing too healthy compared to my expectations.
Plant #1, which she blooms one week later than my plant #2 about 1 week, I continue to increase the amount of nutrients for her in this crucial stage.
Plant #2, she is really my queen, the size of buds and the smell that makes me feel excited.
I used a microscope to test her trichome, most of them turned milky that is a good news.
So I decided to flush her and plan to harvest in the next 1-2 weeks when 20% of the trichome turns amber.

Likes
74
Share


@TheFoxFarmer
Follow
Week 8 Flower
Flush flush flush 💦💦
Fading and fattening up, she's looking very frosty and smelling as beaut as ever. I like to pluck a few of her biggest, greenest leaves throughout flush as it'll speed up her fade and flush her quicker by taking away stored nutrients.
Looking forward to watching her fade!
Thanks for following and happy growing! 🐺

Likes
36
Share


@BrigadeDesTerps
Follow
Freaky se porte bien pour l’instant, elle n’a pas l’air d’attirer les limaces.
Je vais commencer à l’alimenter en thé de compost oxygéné pour la booster un petit peu

Likes
18
Share


@MrHappyKid
Follow
First day of chop! and my dry room stinks like fresh wild garlic. I think she's around 500-750 grams in weight, i don't own big scales so couldn't really check. The grow could of been better but around week 5 I had a serious accident so I've had my friend look after my girls so couldn't really train and take off useless popcorn so she looks very airy to me but packed in crystal. I'll update once dry.
