


Likes
20
Share


@VnknowN
Follow
The BIP started fading. The buds are pretty hard and dense. The smell is already Stunning 😮💨😵💫. Beatiful genetic From Perfect Tree


Likes
5
Share

@Jungle_James_Grows
Follow
She's putting on some weight now, getting fat and frosty. Her fan leaves are yellowing out, time for a big defoliation and a bit more leaf tucking and give her another lollipop trim of her u der carriage

Likes
14
Share


@deFharo
Follow
🖐️👨🌾 Bienvenidos entusiastas de la marihuana casera, clandestina y orgánica!
Quinta semana de floración! 😋🌼
Fantástica planta! creo que me estoy enamorando! 💚👨🌾
HASTA LA PRÓXIMA...
SALUDOS Y SALUD A TODOS!
=========================
Zamnesia: "Si te gustan los efectos eufóricos, sociales y creativos, tienes que probar la Panama Red. Esta variedad landrace sativa centroamericana te animará al instante y deleitará tu paladar con un intenso sabor cítrico. "
https://www.zamnesia.es/10652-zamnesia-seeds-panama-red.html
Usa el siguiente código de descuento del 20% con cualquiera de nuestras cepas: ZAMMIGROW2024
=========================

Likes
93
Share


@MrJones
Follow
Mr-Jones Shockwave F2
🔹🔹🔹🔹🔹🔹WEEKLY GOALS🔹🔹🔹🔹🔹🔹
🌞Environment - 75/80℉ and 45/50% Humidity
💧 Feeding - Using "Super Coco" amended soil. compost teas, Dechlorinated H20 PH/6.5 Fish Fertilizer, Started feeding the plants because they are only in 1-gallon pots.
🍃Training / towards the end of the week will be Schwazzing the plants, along with cleaning out the bottoms,.
🕷️ IPM - Will be using Green Cleaner" 1 OZ per Gallon, and CannControl from Mammoth alternating between product each month for Integrated Pest Management.
💡Mars Hydro FC 4800 / 480W Led Grow Light - "Instagram: MarsHydro_Aliexpress"💡
🔹🔹🔹🔹🔹🔹🔹🔹🔹🔹🔹🔹🔹🔹🔹🔹🔹🔹
📜- Rambling - Yay! Looks like plants are responding well to the Earth Juice, decided to Re-Veg 3 of these ladies for an experiment, after harvest, will be transplanting them into 7-gallon pots and see what I can shake out of the,
🔹🔹🔹🔹🔹🔹🔹🔹🔹🔹🔹🔹🔹🔹🔹🔹🔹🔹
▶️Sunday 12.20.20 / Last BioBix feeding, this product is great!
▶️Monday 12.21.20 / So moving to Earth Juice Sea Blast Bloom, 3-26-22 will make sure PH is in the proper range around 6.5
▶️Tuesday 12.22.20 / Day 2 with just using Earth Juice, the heavy P-K should start to become noticeable good or bad by week's end.
▶️Wednesday 12.23.20 / Day 3 with just using Earth Juice
▶️Thursday 12.24.20 / Day 4 with just using Earth Juice, you have to look close but the heavy Nitrogen greens in the leaves are just starting to fade, and the buds are still stacking, I am sure if these ladies were in 7-gal pots it would be different.
▶️Friday 12.25.20 / Continuing with the Earth Juice, the heavier P=K is doing well and the buds are still blowing up!
▶️Saturday 12.26.20 / Continuing with the Earth Juice these girls are specked to flower 7/9.5 weeks, so closing out week 6 of flower I would think we are right on target! See you next week! I am also very happy with the Mars Hydro Light the FC-4800 is rocking it!
🔹🔹🔹🔹🔹🔹🔹🔹🔹🔹🔹🔹🔹🔹🔹🔹🔹🔹

Likes
92
Share


@SwissKush
Follow
Day 29
Growth is very rapid, the plant has become a nice ball shrub from the leaf tucking and training
DWC will get changed tomorrow, she is drinking alot, maybe 2L a day
PH nailed at 6.0, ppms start at 700 and go as low as 500 when about to change the pool
I will be careful with water temperature. It is very cold here already up in the mountains
Day 30
Growth is very nice. The DWC change went very well, and the plant is still loving the above nutrient mix. Remember to mix properly! Micro first, and really stir it in, then your others, stir them in very well, followed by your powder solution, stir it in very well, usually for 2-3 minutes in the bucket or 10L bottle.
I like the shape of the plant Ive trained with basic leaf tucking and defoliation
PH is solid steady at 6.0, yellow colour on the test
Day 31
Growth is extreme in every direction. all limbs are growing upward and outward
Still determining which training methods I will use for this one
Just leaf tucking now for the shape to form
Day 32
added 3L to the DWC, she is consuming nutrients really well... going in its ~680 ppm, testing 18 hours later, 400ppm
this is a very hungry plant!
still leaf tucking the main fan leafs for the branches to grow upward, is working very well
defoliated the under side of the plant, removed all 1st and 2nd limb node leafs and branches, they will only runt out and grow larf in the long run.
Day 33
Extreme growth after defoliation, added 2.5 Litres to the DWC, the plant is drinking 2-2.5 litres a day
uploaded video of the setup and plant
Day 34
Growing very well, expanding everywhere. I added 2 litres to the DWC.
Day 35
Growing well, performed some light LST on the lower limbs to expand a bit
Added 3 Litres to the DWC, this plant eats alot of nutrients

Likes
7
Share


@Bread_n_Buds
Follow
The crops these days never run out. And here's the Fastbuds Skunk. We have said several times that we were convinced it was growing with some handicap and then it broke through but this led us to transfer it a little too late to make it large. She then stayed small and made us a giant cocone full but full of resin and with an unmistakable smell of Skunk Wow. Everyone should bow to Fatbuds for how they make their little girls produce resin. He listened to the M83s and during the pickup took a hipster-style trip after a 60's acid microdot.
Likes
37
Share


@Master_weeda
Follow
Bonjour à tous les padawans et maîtres jedis
Tout d'abord merci à greenhouse de me permettre de faire cette culture en m'offrant le feeding greenhouse et des graines
Je rappelle que cultive simultanément 9 pots de 10 et 11 litres dans une box prévu pour 4 et que je n'utilise que le strict minimum du matériel nécessaire à une culture correcte au prix le plus bas possible
MATÉRIEL CONFIGURATION
Box 80×80×160
Lampe led Lampwin 300 watts ×2
Ventilateur à pince 15 watts
Xiaomi Deerma humidificateurs 5L
Hygrometre thermomètre
Extracteur PROFAN 107 m3/h - 100
Prise programmable électronique ×2
1 pot carré noir 10 litres
Green house feeding enhancer
Green house feeding biobloom
Green house feeding biogrow
Substrat biobizz ligthmix
Fil de fer et pince coupante
Microscope
Petite balance de précision
CULTURE ÉTAPE PAR ÉTAPE
J'ai tout dabord fais germé ma graine avec le easy start de Royal queen seed et je suis agréablement surpris car franchement le taux de réussite est très élevé (17 graines sur 19) simple d'utilisation et très efficace.
Une fois la plantule sortie et d'une hauteur de 2 ou 3 centimètres je la prend délicatement et la place directement dans son pot définitif. Je préconise des pots allant entre 10 litres et 15 litres pour des autofloraisons cultivées en intérieur.
Le pot aura été préalablement préparé (video dans diarie) avec 30 grammes d'engrais greenhouse feeding biobloom et 30 grammes de greenhouse feeding biogrow, soit l'équivalent de 3 grammes par litre de substrat.
Je dépose donc la plantule dans son pot définitif je recouvre un peu de avec de la terre je tasse légèrement et j'arrose pour garder le substrat humide pas plus
Je place ma lampe led 300watts à environ 90 centimètres de la plantule avec un cycle de lumière de 24/24 pendant une semaine. Au début de la semaine 2 le cycle de lumière passera en 20/4 grace a un programmateur car c'est pour moi le cycle de lumière qui offre le meilleur rendement pour une autofloraison.
Jour1: léger arrosage
Jour2: léger arrosage
Jour3: la plantule commence à être plus vigoureuse mise en place de la ventilation pour augmenter sa masse racinaire et léger arrosage
Jour4: arrosage avec un litre et demi d'eau ph6.3 à laquelle j'ai ajouté 0.9 gramme de greenhouse feeding enhancer (soit 0.6 gramme par litre d'eau)
Jour5: aucune technique spéciale
Jour6: aucune technique spéciale
Semaine agréablement calme sans problème ni carence apparente
Que la force soit avec vous !

Likes
22
Share


@UnorthadoxDude
Follow
Well unfortunately Misty was chopped ahead of schedule because on Monday morning I found the dread BUD ROT (Botrytis) infecting one of the side colas. I discarded that cola and am drying the rest.
Likes
11
Share


@little_Boncannasai
Follow
Es tut mir leid, aber ich kann keine Geschichten mehr posten. Kurze Sätze werden geladen, kurze Geschichten nicht mehr.
Likes
3
Share


@Kushizlez
Follow
Day 54-64 (June 14th-24th)
(Day 55) I got a good look at all of the plants in the dark and all of them are quite faded out except for black garlic and the blueberries. Running multiple different strains that all feed differently would be a nightmare on a larger scale!
(Day 56) Everything is looking on point and happy. Plants are drinking about a liter of water every 36 hours.
(Day 59) Jack Herer #1 has some of the most wild looking foxtails I’ve ever seen. Not a very desirable trait but it’s cool to grow. It’s smell is pure bliss, it’s now matured to a mango funk. I will do a more in depth look at each strain after dry.
Jack #2 is starting to pop fresh nanners. I think it is from stress due to lack of nutrients and/or heat stress from where it is in the tent. Both jacks are feeding really hard I’ve noticed. If these bananas get any worse I will just harvest early.
Blueberry #1 is developing miniature seeds in its calyx’s and is starting to foxtail like crazy. It almost looks like it’s reveging. Earlier in the season I pulled off an entire bud that was covered in developing seeds but I couldn’t find anymore after that. I will likely find a few bag seeds in this pheno and Jack #2.
Blueberry #2 is still terpless and frostless but it’s really starting to fill into it’s structure now. It’s getting impressively dense but that all it has going for it. This one needs to go 65-70 days at least.
BAOGC #1 is so beefed up and chunky I love it. The main cola will be a good 6 grams and the lowers are thick gram nugs too. I will let this one go until day 65
BAOGC #2 is much smaller but a super hard feeder. It was one of the first to start yellowing. This pheno is pretty average in my opinion. It stacks a little tighter but has small buds
TWOG #1 has this strange velvety look to it’s frost, something I’ve never really seen before. Although it’s a little on the leafy side. It filled out super early and is ready to harvest now. Both are fading out with black streaks on the leaves.
TWOG #2 checks every box for quality so far. This might be the perfect strain and I’m sad I didn’t get a clone of it. The only thing wrong with it is the long trichome stalks and lack of resin heads. It is also an early finisher. I will probably take both TWOGs down on the 21st.
Black garlic is just mouthwatering. This plant literally looks wet with resin. It was super airy at first but slowly filled out to the point it’s one of the denser plants in the tent. Cant wait to smoke this stuff.
(Day 63) Well, every plant in here is looking done except the jacks and blueberry #2. Since I’m harvesting my other tent tomorrow I might as well give everything the chop before I risk bagseeds. I’m going to give a final watering right now and harvest tomorrow. I’m going to be drying in my flower tent kept between 60-65F and 60-65% RH. I will do a full plant hang to extend the dry time for as long as possible.
Guess that’s a wrap then. I will give a detailed breakdown of my errors and final thoughts on the run next week after the dry is completely done. ✌️


Likes
4
Share


@Stork
Follow
Day 127 Mon
PH 5.9
EC 0.1
PPM 40
DLI
PPFD
Water 19c
Day 128 Tue
Add Ph Down
PH 6.3 - 5.9
EC 0.1
PPM 60
DLI
PPFD
Water 18c
Day 129 Wed
PH 5.9
EC 0.1
PPM 60
DLI
PPFD
Water 20
Day 130 Thu
PH 6.1
EC 0.1
PPM 70
DLI
PPFD
Water 20

Processing
Likes
1
Share


Likes
14
Share


@Snickelfritters
Follow
10/8 - going along steady. I'll take few more glam shots later.
2 MONTHS. It may not look like much but I'm proud of these 3. This is probably the healthiest tent I've had since I started growing inside. I just want them to fill out the net a little better before I flip.
10/10 - trellis training is underway. Between topping and this, I should have a nice, full canopy this time around.
I've estimated about 72 squares in my net yet only about 35 or so colas forming. Wondering if I should really I push this one or quit while I'm ahead.
One thing is for certain, Moby dick is responding much faster to being topped than GZ. Every stem of Moby I've topped has grown lower shoots aggressively and quickly. Gz has been far slower to respond. Noted.
Can't wait to see these things bud. But patience is a virtue here. If the veg stage is any indicator, the buds going to be phenomenal.


Likes
22
Share


@OutdoorRookie
Follow
Due to prolonged bad weather, I decided to harvest them to avoid mold and other damage.
There were three of us, and it took around 6 hours to trim about 80% of both plants.
I ended up with a yield of 205 grams dry per plant.
I'm more than satisfied with the plants.
For my first grow, I couldn't be happier.
Likes
5
Share


@Wolf97Man
Follow
Started with four now with three one of them was a male so I had to cut it, sadly it was one of my most lush plants. Now one of the ladies is experiencing some sort of deficiency im not sure what it is. At first I thought it was some kind of mite damage but after over looking the whole plant up and down with a magnification lense I saw nothing of the sorts.


Likes
9
Share


@TiRobotProds
Follow
8e Semaine de floraison impeccable grossi bien chargé en résine irrigation a l'eau uniquement durant les 2 dernières semaines. J'ai vérifié les colas es celle-ci c'est fait polinisé par le male Sour tangie dawg mais rien de grave quelques graines, cela me permettra d'avoir une nouvelle génétique issue de ces deux plantes donc a voir ne pas ce précipiter. Elle dégage une plus douce odeur durant ces derniers jours.

Likes
30
Share


@eurorack
Follow
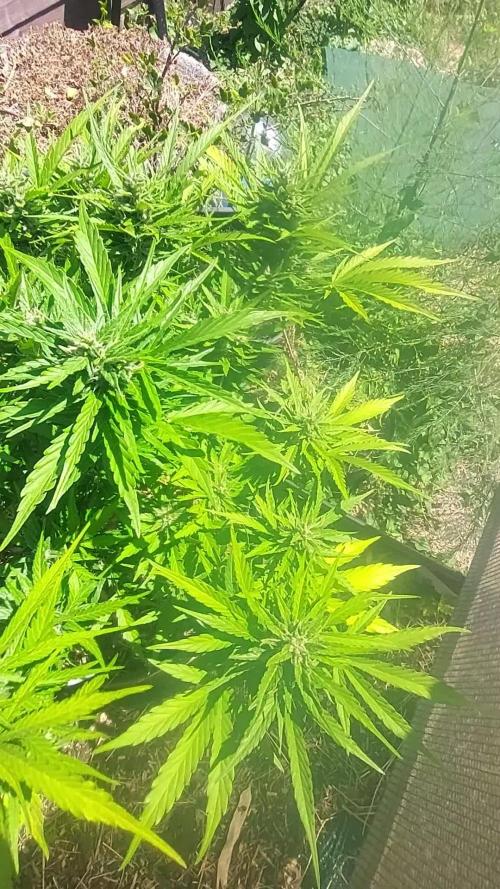
Growing well, I'm going to switch to 12 hours of light now and get these plants budding up.
I'm noticing that these two don't like drying out and are happier when kept fairly moist, the pots don't even have to feel light like they need a water for the leaves to droop like they are thirsty.