
Processing
Likes
Comments
Share


Likes
5
Share

@NoProbation4Weed
Follow
This week the plant only got Water.
Light hits the plant with around 750 PPFD

Likes
25
Share


@XperencdGmanXG
Follow
this should be the last week of vegetation. Flowering should be starting soon. Seems like no end to this drought we are suffering from in Southern Ontario.

Likes
6
Share


@Cultivandomedicinanatural
Follow
Esta es la última semana de crecimiento que le doy a las pequeñas, el último día antes de hacer el cambio de horas de luz le hago una pequeña poda de bajos ya que eso le dará más aire a la zona baja y más fuerza a la parte superior de nuestras plantas. En esta semana terminamos con una Ec de 1.6 y un ph de 5.8. Están creciendo muy rápido y con fuerza en los tallos.
Los tamaños de las pequeñas son: las red hot cookies 24 y 34 cm, las tropicanas 27 y 37 cm y la purple puch og 24 cm.

Likes
5
Share


@Herbie
Follow
Mrs Banner aka Bruce banner #3 aka the Triangle grow, is Budding away nicely.
I've given her, her last feed of nutrients so she will be on just water now until harvest.
I've been concerned shes a little on the small size but just as the name suggests she starting to "Hulk up."
I'm hopefull of a harvest in about two weeks, but with a few grows under my belt, I know that
1) two weeks may turn into six
2) patience wins the grow game


Processing
Likes
26
Share


@BigBadLion
Follow
Hey everyone!
Week 3 of my babies and they look beautiful! 💪
So far I've noticed these issues:
- The girl on the back seems to be growing slightly slower compared to one closer to the camera. Maybe it's the lights?
- That same girl grew with one of the leaves broken or something like that, which looks interesting! But, what could've caused it? I checked the leaves and there was nothing!
- The girl on the front had one leaf tip slightly broken! Perhaps some slight over fertilization or something?
- Both girls have some small patches with different colors in one of their leaves.
But besides what I mentioned, everything looks well!
I also took a timelapse this week!
Anyway, see you all next week with the next update! 😍

Likes
7
Share


@El_Bottanico
Follow
Week 8
Here came fall.
End of last week plant seemed hungry, the fade wasn't progressing as supposed so I gave her two nutes round with only water round in between them.
I used bottled feeding: biobizz biobloom + top max (2ml each per liter), ghe ripen (2ml per liter), solved micronutrients and calmag (not mixed, one time one the next the other, 1-0,5 ml per lt).
Solution EC was about 1,4, starting with 0,3 tap water.
She reacted well to the feeding in my opinion. now the fade is progressing more naturally.
I did observe that the plant under the less powerful COBS in the same tent are doing better then the ones under the sp250 wich has a higher par output, so I raised the light to 45-50cm from canopy. This had a positive effect on the plants imho. I'll stay a little bit further from the beginning in my next grow.
I took a sample under the microscope to take some tricho pictures, they look beautifully clouded but the buds still has to ripen some 50% more. Based on that I think we are arriving to an end in 10-15 days max.
Happy bottanic guys
Likes
3
Share


@NocturnalGardner44
Follow
Caught up... things are going well, Bruce stretched like crazy and has evened up its canopy to the others idk if it's that big bud in it or what. Lilac has looked a solid week and half ahead of the others since flower, she looks wicked though, trichromes are starting to build. I've done my last training, I usually go hard on thinning but I'm trying to be conservative and only uncover buds under leaves. Still same feeding routine.. looking forward to the finish line but know this is an important time with terms and trichromes beginning to resonate... I sick at this guy's but I want to get better at chronicling my grows.. so hourly I will improve in the process of Journaling.


Likes
18
Share


@DeepRootsGrowTrees
Follow
PURPLE KUSH / KANNABIA SEEDS
WEEK #20 OVERALL
WEEK #8 FLOWER
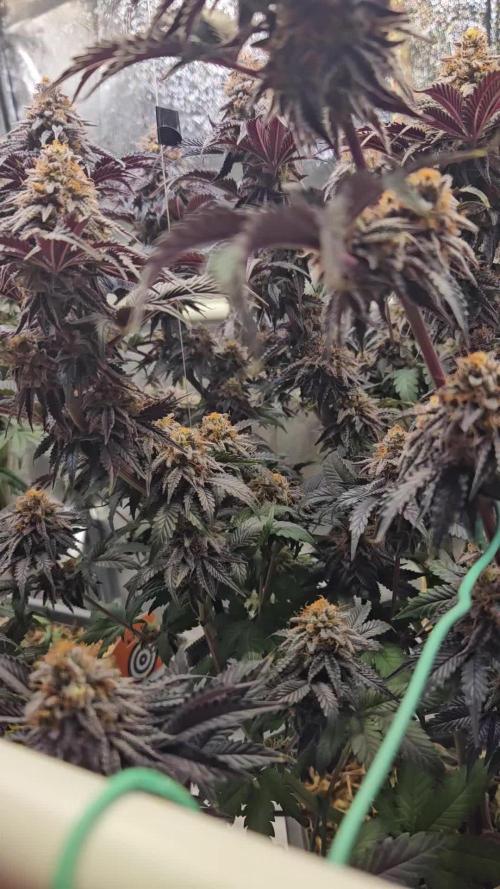
This week she's starting to get some aroma to her and her buds are getting frosty she's got about 2 weeks left before harvest she's got a nice buds structure going on!! Stay Growing!!
Thank you for stopping by and taking a look it's much appreciated!!
THANK YOU KANNABIA!!!
KANNABIA.COM / PURPLE KUSH 💜

Likes
22
Share


@Greenwolvesfarmer
Follow
Ha reaccionado bien a sus estímulos , agua , CO2 , luz y amor...
Esta semana le daré solo agüita para que descanse de los fertilizantes , de todas maneras , todo depende de la planta misma ...esperando no maissss
Likes
132
Share


@SwissKush
Follow
Tag 71 (64 tage aus der erde)
- blumen gut
Tag 72 (65 tage aus der erde)
- alles gut
Tag 73 (66 tage aus der erde)
- 3000ml wasser ohne nahrstoffe
- blumen gut
Tag 74 (68 tage aus der erde)
- alles gut
Tag 75 (69 tage aus der erde)
- alles gut
- video
Tag 76 (69 tage aus der erde)
- blumen gut
- 3000ml wasser
Tag 77 (70 tage aus der erde)
- blumen gut
Likes
3
Share


@GrowAndSmoke
Follow
For the first 2 weeks the pot was weighed before watering.
Into Substrate 10ml
D1:
D2: 5ml
D3: keep moist
D4: 10ml
D5: keep moist
D6: 13ml
D7: put towel in tent for more humidity
Lamp 70% 65
Likes
5
Share


@Mr_nugs_lover_David
Follow
The plant looks super beautiful, typical OG kush fat indica leaves, excellent growth pace, obviously short height, I love OG kush, last time I grew this strain it was 4 years ago, it's gonna be a beautiful plant for this 2021, she loves the spanish sun! Stay tuned everybody
Likes
31
Share


@LockDownGrow
Follow
ok so everything has gone fantastic , no nutrient burns at all , and have been slowly creeping up the base nutrients , i have stopped the cal mag and now adding house and gardens bud XL at full strength these girls are now in full swing of flower and i bought a new ph stick this week ,
i have found when PHing the feed bucket that its best too have air stones in the bucket , add all nuts and then ph but do not use the feed that day as if you check the next day the ph is off again so i left it 24 hours after i add more ph down , and it seems too make the measurements alot easier and stable , i have bent down the main stems " without damaging them onto my netting too A keep the canopy all the same high so my lighting is covering all plants at the same distance and also it allowed the side stems too reach up too , the zkittlez did stay alot shorter and compact compared too the rest , but she has had the shame conditions than the rest , so she much just be a shorter pheno type
i also was sponsored another new led light by kingbo this week so have added another 600watt led too the grow , so now have two 600's and one 900watt , and temps are still fine sitting at 24c lights on and 19-20 off , so am pleased with that , this lady stayed very short and compact and didn't really stretch much at all and it by far the smallest plant of the bunch ,
Likes
8
Share


@Spliffi
Follow
Heya👍🤙👍🌱
All good. Busy with Major projects.
Check out my Facebook profile:
https://www.facebook.com/share/v/H6PnoahTHrEzm63U/?mibextid=oFDknk
Big BIG BIG thank you to Sebastien, Heather from Fastbuds420. You guys are the best. Can't wait for the next live.
Even Bigger shout out to Hydroponic.co.za. My local Hydro Shop and Sponsor. Thank you Sir.
👍🤙👍🌱
Likes
7
Share


@Bingbings_garden
Follow
Hello growers HNY!
Last leg of the grow now maybe35-40 more days give or take for this girl. She is growing her buds at a steady pace. She is getting smelly with a nice gassy smell starting to fill my balcony and house.
Watered in some sugars and cal/Epsom today and will wait for he to let me know when she needs more.


