
Likes
Comments
Share


@Bread_n_Buds
Follow
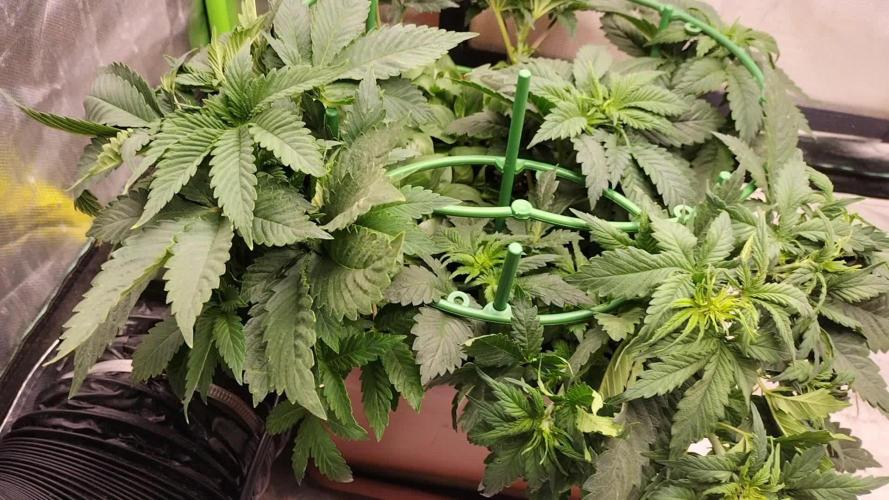
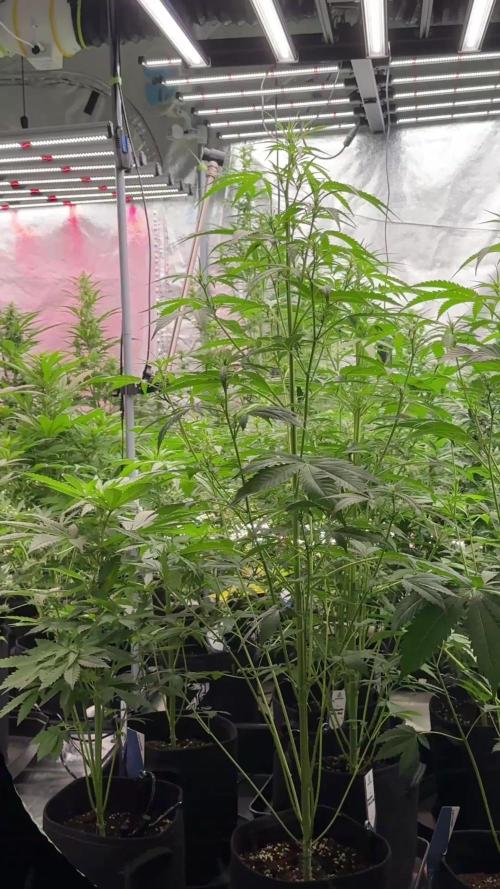
Our Jet Fuels have the aroma that we like the most potentially at Casa BreadandBuds the Diesel aromas and derivatives are the favorites.
That said we have two plants, as with all photoperiods, one planted a little earlier to be worked with the topping that will start next week, the other planted 10-15 days later to avoid size problems will be grown straight with the main cola, because giving up the main cola is a tear to the heart.
We gave Power Roots 1 Ml/l , Pure Zym 1 ml/l , Sugar Royal 1 ml/l , Alga Grow 3 ml/l -
Plagron nutrients are available at Zamnesia in convenient pack formats for all growing styles. I used this one with a simple search you can find the other products.
Try a seed of this strain that drives us crazy...
---- https://www.zamnesia.io/it/11258-zamnesia-seeds-jet-fuel.html
Zamnesia Description //J Jet Fuel (also known as G6, Jet Fuel OG, and G6 Kush) is a modern hybrid rich in THC and terpenes with a diesel aroma. Originally created in Colorado by crossing Diesel with Aspen OG, this 60% sativa-dominant hybrid is a must-have for any smoker who enjoys an uplifting and energizing high. Now, thanks to the hard work of our breeders, the original Jet Fuel is even easier to grow at home. Order your seeds, plant them in soil, and enjoy their rapid growth. After just 9–10 weeks of flowering, you can expect a generous harvest of premium sativa buds!
All the best that mother nature can offer is on ----www.zamnesia.com


Likes
Comments
Share

@doomstree
Follow
with one plant turning out a lowrider some excessive defoil plus topping was needed for the other plants to keep the light on her. changed the alignment of some of the plants, started roughly feeding every plant 0.3 to 0.4l water, daily flooding the pot with 5l water over the day, every two days I added some German homebrew fertilizer npk 7+5+6
Likes
15
Share


@Papabro2k
Follow
This one was a please watching grow I never did much training and she never got so much attention in the back turned out great ! So much frost thanks 😊
Likes
4
Share


@El_argentino
Follow
Agua base 256ppm. 20ml de bloom y 10ml de candy en 10 litros de agua. 800ppm final al riego.
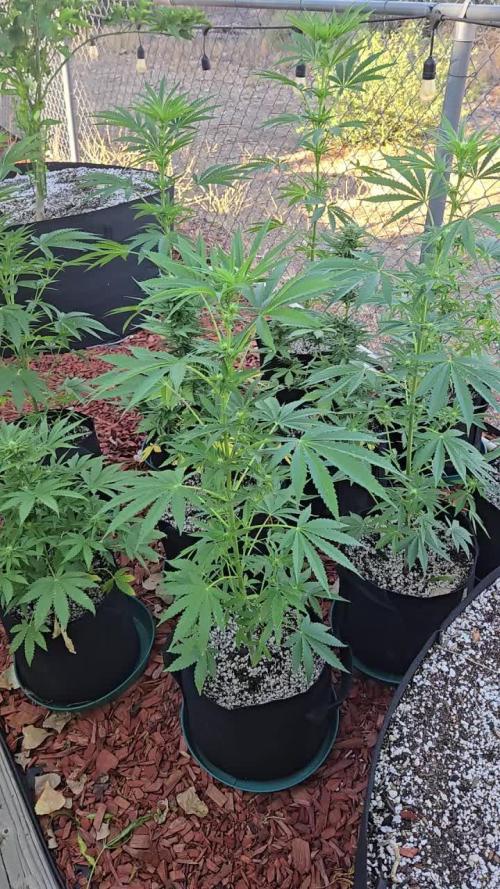
Las plantas resultantes de la cruza resultaron ser todas fotoperiodicas y muy similares las 9 plantas.
Tuvieron 70 días de vegetativo con poco cuidado pero llevan 30 días con cuidado extremo sin controlar clima ya que su luz es el sol de invierno argentino
Processing
Likes
6
Share


Likes
4
Share


@UrbanBoer
Follow
I am back online, and another successful week of agriculture Lamby is taking her time while bulking up the stem, I love her short thick fan leaves, they started coiling up and hindering growth where it mattered, thought of defoliation but I promised myself I would only defoliate in September, what I’ve done with all the ladies if to LST all established out the way to all the sunlight to reach the new growth. The other reacquiring motif, is using the main stem as a single root that will covert brunches into stems. Lamby might be sprout at a snail pace however, I am certain she will produce fire numbing bud.
Likes
2
Share


@DrBud420
Follow
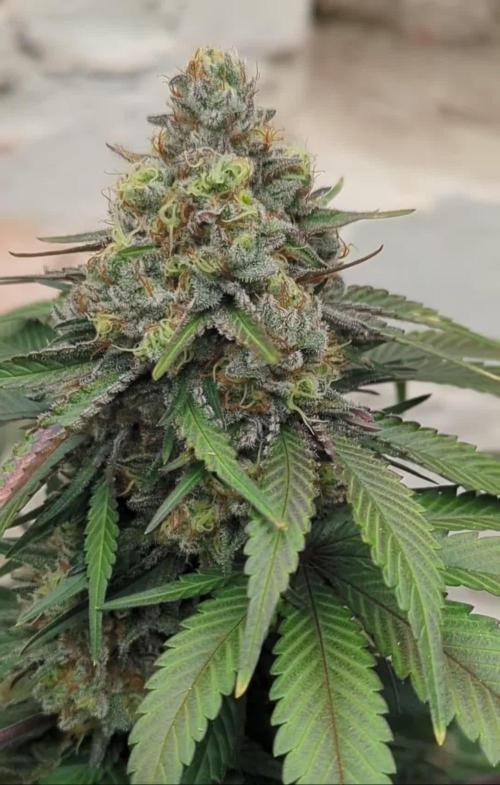
What can I say about this plant, it spent most of the day in the shade, if it had the same conditions as dos si dos, it would eat it for breakfast in terms of yield... 450 g of dry matter and some popcorn... I am very satisfied with but the plant didn't get nearly as much sun as it needs...it didn't fill up, but it wasn't empty either, the heads are nice and fleshy...when I picked it, it smelled like lemon or KeyLime as Barney says...but no on citrus, but really lemon combined with some heavy stench, I can't wait for this miracle to work for some time in the jar...
Next year we will see it in its full glory, so let's try to get a one kilo and a half dry from it alone, that's a bit of a challenge for me...but with this kind of genetics and this kind of variety, I don't think it will be a problem in 100-150 liters of soil for this kind of monster... this year my plants were in 40 to 50 liters of soil and almost each of them produced from 450 to almost a kilogram of dry grass
Likes
19
Share


@SooSan
Follow
Elle sent la mangue, le sucre, les tropiques 😍
Et ce champs de trichomes est superbe...


Likes
7
Share

@Chubbs
Follow
Weekly update fam. We got preflowers, so we all know what that means. The flower stage of the plant cycle has started. I'm extremely happy the way these have grown requiring no special treatment what so ever. They're getting attacked by some pest but I'll spay and hopefully get that under control before to late into flower. I generally don't like to spray past week 3 of flower. All in all Happy Growing.

Likes
24
Share


@MaxMo8
Follow
Hello my friends . The last week before harvest, I gave her chlorinated water. And sorry for not leaving weekly notes due to lack of time, thank you all for my support. I wish you happy days😘🙏👌🙋♂️

Likes
Comments
Share

@ElCapitol
Follow
That's the hard work all done. Few weeks on plain water and I think these girls are about ready. Lights are on 100% and they're reacting with some nice purple hues. Out of the three strains I have running these look the biggest tightest buds. Beautiful aromas from them too. Apart from my over watering they've been a very easy grow. Would recommend these to beginners happily. Big buds, easy grow, not too much stretch. They look great in my opinion. They're absolutely stacking the trichs on. Couldn't fit any more on. Few cloudy ones appearing. I usually wait for mainly cloudy with a lot of amber. I like a heavy stone from Indica dom strains.
I've out a video on, hope it's come out OK.


Likes
23
Share


@Horseluisweed
Follow
Teniendo el sustrato preparado con antelación un par de días antes.. nos animamos a germinar, tengo una tremenda ilusión con esta pequeña, me hace muy feliz verla crecer!🌱 Ojalá todo salga bien y pueda acompañarla hasta el final en este precioso viaje 👽❤️🌱
Nos hemos marcado tres objetivos en este cultivo:
1-hacer un cultivo seguro y no ser detectados👮♂️🥇
2-conseguir una cosecha en menos de 2 meses con éxito 🏇🥈
3-gastar la mínima cantidad de recursos posible con el máximo rendimiento posible🤑🌍⚡🥉
Likes
28
Share


@TeamQuality420
Follow
Oooooo baby !!!
This is starting to come together very nicely .
So everything is looking green and mean !!
I would say that they are gonna need to have a boost in feeding . The leaves are looking just a little bit lime . Nothing to be too worried about .
I'll be sitting on my hands to keep them from plucking these ones crazy I'm definitely going to leave it till week 3 just to see how it works out usually I would definitely pretty much every week but let's just see what happens on this one.
So more notes as the week go on , stay tuned .
If anyone has any ideas of how to get a better S.o.g picture please hit me up.
So I finally said " Let's do this" took the girls out of the room to get some good shots of them !!!
So at the end of this week we are start to get a bit of stretch going on, still staying bushy plants, I am so excited to pluck these motherfudgers!
Find these world calss genetics at :
https://www.exoticseed.eu/
Or
https://www.seedsman.com/eu_en/cannabis-seed-breeders/exotic-seeds
If you want to know more about the nutrients that fuel this grow
Likes
Comments
Share


@FreeSmokegrows
Follow
Super Bad ass Plant, I feel like That part on the Movie Pineapple Express, where he's like we are the only guys in the city that have this!
Likes
32
Share


@WildeWeed
Follow
This was a fun plant to grow. The trichome production was amazing and the last couple weeks she really packed on the weight. The trichomes changed from clear to milky to amber a lot quicker than I anticipated. However I had started my flush 2 weeks prior so everything seems to be top notch. I water cured a small amount and the high is GREAT!
Likes
4
Share

@nijuana
Follow
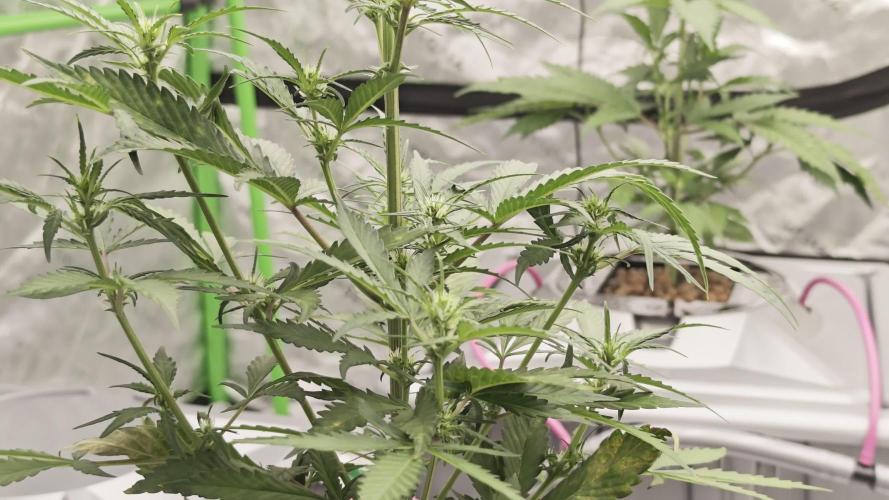
I had some potassium/phosphorus deficiencies due to the very fast change from veg to flower


Likes
22
Share

@DogDoctorOfficial
Follow
🌸 Week 4 Flower — Permanent Marker 🌸
Here we are, my dear friends, entering the 4th week of flower and things are getting really exciting. The two phenos are now starting to show their true personalities:
• Pheno #1 — our sky-reacher, standing proudly at 2 meters tall! She’s stretching hard, aiming for the moon, and has forced me to pull the lights all the way up. Fingers crossed she slows down here, but what a presence she has in the room.
• Pheno #2 — the compact sister, sitting around 120 cm tall, balanced, and just as beautiful. Both are similar in structure and leaf formation, but their size difference makes this grow even more fascinating.
Despite the heat challenges earlier, the girls are holding strong. With the AC unit now installed, conditions are finally more under control, and I’m hopeful it will make all the difference going forward.
✨ This Week’s Focus ✨
• Height management: Lights are maxed out, now it’s all about keeping balance and preventing stress.
• Environment: Temps are more stable with the AC, giving the plants the comfort they need to keep stacking.
• Observation: These differences between phenos are a reminder of how unique each expression can be, even within the same strain.
🌱 Nutrition
Still running with the Aptus organic program: regulator, top booster, calmag when needed. The base super soil and pellets are carrying the weight beautifully. Leaves are lush, flowers forming, and energy is focused upward.
🔎 A Note on Pheno Hunting
One of the most exciting parts of growing from seed is watching the phenotypes express themselves. Even seeds from the same pack can show different growth patterns, some stretch tall like Pheno #1, others stay compact like Pheno #2. Neither is “better” or “worse”, they simply carry different traits from their genetic background. This diversity is what makes pheno hunting so magical: it gives growers the chance to select the expression that best suits their style, space, and taste.
🐝 The Dognabis Cup is ON! 🐝
This week also marks a special moment, the Dognabis Cup is officially underway! 🎉
Welcoming packs have started arriving at growers’ doors, unboxing photos and videos are already popping up, and the first diaries are live. It’s a joy to see the community coming together.
💌 Invitation
I invite everyone to check out the new Cup diaries, cheer for each other, share experiences, and most of all, have fun. Remember, the more complete and detailed the diaries are, the better your chances to win. And with both autos and photoperiods in the packs, everyone has two chances to shine.
**THE DOGNABIS CUP OFFICIALLY STARTED** ⏰
@everyone
**The Dognabis Cup** is an independent, community-driven virtual competition designed to bring people together, celebrate and share the passion for cultivation. This competition is organized by DogDoctorOfficial and is not affiliated with any of other third-party platforms.
More than 30 contenders will have to grow with the same genetics and using one of our Aptus Pograms (Premium, Clean, Super Soil).
We can follow weekly updates
***(list will be updated all the time as more growers join)***:
🌱 **Dognabis#09P** (**P**hotoperiod)
https://growdiaries.com/diaries/285981-grow-journal-by-sadhus
🌱 **Dognabis#09A** (**A**utoflower)
https://growdiaries.com/diaries/286091-grow-journal-by-sadhus
🌱 **Dognabis #16P**
https://growdiaries.com/diaries/285519-grow-journal-by-fabisfinest
🌱 **Dognabis #017P**
https://growdiaries.com/diaries/285851-grow-journal-by-highgrower0711
🌱 **Dognabis #18P **(**P**hotoperiod)
https://growdiaries.com/diaries/265751-grow-journal-by-develgrow
🌱 **Dognabis #18A **(**A**utoflower)
https://growdiaries.com/diaries/285549-grow-journal-by-develgrow
🌱 **Dognabis #21P**
https://growdiaries.com/diaries/285531-grow-journal-by-mrs-larimar
***Here are some other useful links:***
*Dognabis Cup on Instagram:*
https://www.instagram.com/dognabiscup/
*Explore Aptus Premium Programs:*
https://aptus-holland.com/premium-programs/
*Explore Aptus Clean Programs:*
https://aptus-holland.com/clean-programs/
*Explore Aptus Super Soil Programs:*
https://aptus-holland.com/super-soil-programs/
Happy growing everyone 💚
⸻
🔥 The garden is alive, the Cup is alive, and I couldn’t be more excited. Week 4 flower is just the start of the show, let’s keep pushing forward.
Good luck to all participants, and may the buds be ever in your favor! 🌿💚
📲 Don’t forget to Subscribe and follow me on Instagram and YouTube @DogDoctorOfficial for exclusive content, real-time updates, and behind-the-scenes magic. We’ve got so much more coming, including transplanting and all the amazing techniques that go along with it. You won’t want to miss it.
• GrowDiaries Journal: https://growdiaries.com/grower/dogdoctorofficial • Instagram: https://www.instagram.com/dogdoctorofficial/
• YouTube: https://www.youtube.com/@dogdoctorofficial
⸻
Explore the Gear that Powers My Grow
If you’re curious about the tech I’m using, check out these links:
• Genetics, gear, nutrients, and more – Zamnesia: https://www.zamnesia.com/
• Environmental control & automation – TrolMaster: https://www.trolmaster.eu/
• Advanced LED lighting – Future of Grow: https://www.futureofgrow.com/
• Root and growth nutrition – Aptus Holland: https://aptus-holland.com/
• Soil & substrate excellence – PRO-MIX BX: https://www.pthorticulture.com/en-us/products/pro-mix-bx-mycorrhizae
• Curing and storage – Grove Bags: https://grovebags.com/
⸻
We’ve got much more coming as we move through the grow cycles. Trust me, you won’t want to miss the next steps, let’s push the boundaries of indoor horticulture together!
As always, this is shared for educational purposes, aiming to spread understanding and appreciation for this plant. Let’s celebrate it responsibly and continue to learn and grow together.
With true love comes happiness. Always believe in yourself, and always do things expecting nothing and with an open heart. Be a giver, and the universe will give back in ways you could never imagine.
💚 Growers love to all 💚
Likes
19
Share


@eldruida_lamota
Follow
Bueno, empezamos por el final familia.
Gorilla girl, me parece una cepa BRU-TAL , ya partiendo de esa base, mi error, creo que e cometido , es poner estos ejemplares en macetas de 5L, que tonto... mínimo recomendado 7L y a ser posible 11L
Otro error fue no dejarlas una semana más. pero, escasez. (intentaremos curarla un par de semanas).
Cepa con flores muy compactas, hay bastante separación entre nudos pero compensa las flores de verdad.
Sabor muy dulzón a mi me recuerda a melón , es un pepino recomendado para amantes de la hierba que llevan tiempo en esto, un colocón muy fuerte, ahora mismo estoy bajo los efectos de esta vaina, aseguro que con cada frase, leo varias veces y detenidamente por que válgame.