
Likes
Comments
Share


@BusyBeeFarmer
Follow
Germination and Preparation
The Do-Si-Dos seeds from WeedseedExpress arrived well-packaged in a discreet envelope with bubble wrap and a branded shopping bag. The seeds look promising—large, with beautiful marbling.
I started by soaking the seeds in water with a pH of 5.8. After just a few hours, one seed already sank to the bottom, not a good initial sign. Despite this, I kept all three seeds in the germination process, and all of them developed roots. The seed that initially sank seems to be doing fine, so I’m giving it a fair chance.
The seeds are now placed in Jiffy pellets with a pH of 6.0. The temperature is maintained at around 24°C (75°F). My plan is to monitor these seedlings closely and select the most vigorous one for cultivation.
Grow Plan
I will be using the Sea of Green (SoG) technique in an 80x80 cm space. To maximize the yield and structure, I intend to extend the vegetative stage to about 6 to 8 weeks, possibly up to 10 weeks.
I’m also using organic nutrients, and the motto "Don't Panic, It's Organic" fits my grow style perfectly.
Dosidos End of Seedling Phase Report
Environmental Conditions:
Humidity: 70-80% initially, adjusted to 60-70% during hardening.
Temperature: 19°C (night), 23°C (day).
Lighting: Lamp positioned 40 cm above seedlings.
Observations & Actions:
All three seeds germinated successfully.
One seedling was removed for poor growth and exposed root.
Greenhouse lid removed on day 7 for airflow; seedlings adapted well.
By day 9, roots fully developed, signaling readiness for transplant.
Transplantation:
Transferred to 7L pots with light watering and BioBizz Root Juice to ease stress.
Performance Feedback:
The two selected seedlings show robust growth, forming a solid foundation for the planned Sea of Green setup.
dein-onlineheadshop.de/
Use my referral code 420Shop at checkout to get a discount on your purchase. By using this code, you also support me, as I receive a small reward for each use. Thank you for your support!

Processing
Likes
16
Share

@Matahierbas
Follow
This week all I wanted to see some kind of growth and I kinda see it, they both still look sad , the first plant looks like it's doing "ok" I do see new roots developing so that's a good sign.
The 2nd plant still some brownin' appears on some leaves I don't know BUT I do see new roots growing on her my question is: should I still keep her going? OR let her get the axe?
The deficiency still appears and I've done everything on the book but don't wonna give up on her (just yet) but I really don't know what to do with her? I wonna give her sometime see what she tells me or if u guys know what am doing wrong I would greatly appreciate

Likes
7
Share


@ChitownCannaChica
Follow
Chopped down. The weather really effected this plants growth. It turned out pretty airy and not a lot of trichomes.
We will see how the smell is after the dry/cure

Likes
92
Share


@biggreens420
Follow
purple queen is a absolute beast she's stacking colas like arms and extra frosty she smells like a potent kush so far and is surprisingly sticky already ,She's drinking 4l a day to get runoff around a litre and half and dosnt seem to be slowing she stunning to look at shaped wicked and just shining with how much frost is there already going to be given a mini flush and few days water and will start back on nutes adjusted some of the ties to keep good air flow and light penetration nothing else to say she's happy and healthy thanks for reading happy growing guys

Likes
5
Share


@CityFarmer
Follow
Hello everyone,
These girls are still flowering!!! Been giving them water thinking they would finish soon. Let's see what happens this week
See you guys next week 🤘🤘🤙🤙👊👊👊


Likes
9
Share


@Green_Friends_Inc
Follow
Commencing week 3 - Day 15 on December 15th
Change has taken place. Switched out COBs for SolarStorm 440. Currently on VEG mode.
BS is a freak. Still has 4 cotyledons and now is displaying Tri-whorled mutation 🤔😄👍
Thanks for your time and attention!


Likes
51
Share


@Dunk_Junk
Follow
Looking at her, you'd say she grew more than 4cm higher... But that's all the vertical height she grew this week.
But she got loads bushier!!!!!!!
Hopefully she's building roots for her future!
Likes
29
Share


@XiggYgreen
Follow
Hi all growers 🌱
She is like she was never in growbox. Beautifully she grows also on balcony..
I will just give her some but little bloom nutrients and watter her when she wants to 🌱 Regulary but I will watch over she
Happy growing I wish for all 🙏💚🌱


Likes
Comments
Share


@Sativ_420
Follow
Vienen creciendo muy bien. Se nota la diferencia de tamaño entre las que están en 30L y las que están en 50(tienen la tierra por la mitad en maceta de 100. Espero en unos días poder transplantarlas también


Likes
18
Share


@swagy
Follow
Cut the leaves on the 8 week of flower. she have very sweet smell and glue trichomes. Very nice plants ✌️🏻.


Likes
26
Share


@TrickzGrowz
Follow
Servus Moin!
Es geht langsam echt richtig aufs Ende zu. Die eine Knolle oben, die so ein wenig gebleicht ist, ist jetzt mittlerweile richtig fett geworden und bildet sich schon sehr schön in alle Richtungen aus. Trotz den Nanners sieht sie immernoch mega krank aus.
Processing
Likes
8
Share


@saintetiennegrows
Follow
I think Zkittlez Auto has two weeks left, including this one. She definitely looks like the ten week pheno and I think she’ll bulk nicely in these last weeks. I loved growing this auto and am so impressed I was able to get these results considering I’m not an auto grower. I’ve already begun flushing and I think she’ll be a nice smooth smoke when she’s done. I’m amazed at how resinous she is. Looking forward to harvesting and then exploring more auto strains.
Likes
37
Share


@masterofsmeagol
Follow
7/9 I armed up for my battle with earwigs. I bought and applied diatomaceous earth and added sluggo plus pellets to the medium and around the bags and cage. Then I covered the stems on petroleum jelly. I raked my hand in the same bag as yesterday and found a bunch of earwigs. This time I was prepared. I killed them with a 50/50 solution of 70% rubbing alcohol. I found a few more that I killed as well and cleaned as best I couod. Weed Wacker wouldn't work. This was after I watered. The blueberry was droopy af. It stood right back up after I watered though. It doesn't look to bad. I defoliated anything too bad. If I see ANYMORE signs of septoria I'm isolating that plant (probably should anyway) and getting a systemic to deal with septoria. I got the wrong organicide I guess. I got bee safe instead of plant doctor. Regalia is what I'd like to get but it's like $90. Anyone have any good advice dealing with pm and or septoria? I know I should defoliate a little more.
7/10 Plants looked healthy and showed no negative effects from the previous application. I have some defoliation to do and I need to go over at night to check out the earwig population. Found a moth larvae and killed it. With all these other problems and medical issues it's hard to get everything done. I believe I watered today. THIS IS WHY YOU AT LEAST WROTE THAT SHIT DOWN EVEN IF YOU FINISH.
7/11 I had a few teeth pulled this morning after a horrible appointment with my doctor. I believe I watered before I reapplied some sluggo plus and diatomaceous earth. I inspected around my structure directly after the extractions while still numb. I found and killed literally 100's of earwigs! At first I was using an alcohol spray. They are in the structure itself!!!! Where the fence attaches to the wood and a bunch of other places. I used what I had filled it again, stomped them left and right then I found a can or roach ant killer. I CAREFULLY sprayed bottom parts of the structure and they would run out and get sprayed. Damn that felt good. Especially since I've noticed some slight interior damage on a couple plants that seem consistent with earwigs. Small leaves turning yellow after munched. New growth being attacked. Ragged holes in leaves. I wanted to go back tonight but I'm hurting. Noticed some dieing leaves on my blueberry. I'm wondering if it's septoria. I'll update tomorrow.
7/12 WATERED THEN FED 3 GALLONS TO THE GARDEN. Large thunderstorm and hail possible tonight Still in pain but I defoliated all the little dead new growth that the earwigs are eating and anything blocking nodes or that looked infected. Earwigs eat the new shoots that grow the buds. People think they are harmless but they are far from it. Just wait till you have an infestation and they chew off all your budsites lol. You'll have a ten foot plant with MAYBE a six inch cola (if the left ya any) that will probably be diseased. I'd rather deal with mites. I can't believe someone said bugs don't spread plant diseases. Well....they do. I've learned more about earwigs the past few years than I would've ever cared to know. I've seen aphids ONCE this year and they were dead from the organicide spray. I did find a few earwigs on the medium dying so something must be working.
I'd spray it with alcohol and it would just spasm but not try to get away. I imagine it's either the DE or the Sluggo plus. After the earwigs eat the shoots the small leaves turn yellow and die. Looking at the plants the look awesome. When you get closer though I can show you branches with no budsites and some other things. I think I'm dealing with it right though. This year pretty much everything is straight up Indica (80/20 or so). Real bushy plants. I'm thinking about whether or not to spend money on regalia or just get plant doctor.
7/13 I had a botanist that teaches marijuana horticulture look at my videos and some leaf samples. No septoria so far! I need to cut some foliage by the forest edge and dispose of it and clean the grow area and be more sanitary. A new pair of gloves each plant or wash my hands after I defoliate. I'm going to spray the shit out of the surrounding area and remove the back tarp like many have suggested. It's a calculated risk but I think it's worth it. I think p jelly is working but some earwigs are dropping on them or flying short distance from plants because I've seen damage. I was going to get the plant doctor but I don't need it if I don't have the septoria. I need to go dig at each corner of my cage and get as many earwigs as I can and dispose of them. I'll kill the ones that rise with alcohol/water or raid.
7/14 I took the back tarp down and put a barrier of DE around the cage and each bag/pot. Added a touch more around the base. I'm finding earwigs dying and I'm really thinking the population is shrinking. I shoveled around the structure and didn't find any. I need my new weed Wacker to show up so I can clean shit up. The other one broke. I've been much more sanitary and am using different gloves each plant before I just started washing my hands in between plants. I'm planning on going back and AT LEAST try using the push weed Wacker to clean stuff up and spray the shit out the treeline and around the cage. It rained hard last night and it's supposed to rain again. If I notice to much more damage I'll do an application of spinosid.
7/15 Rained and stoked hard all night. I weedwacked the treeline back this morning to cut down on vegetation that's infected or could be. I weedwacked around the cage and hunted earwigs. I defoliated what needed it and I can see damage from the earwigs. If you watch the video I made for a friend you can see. I also I sprayed a gallon of baking soda/dawn/veg oil on the plants by the treeline and all around the cage. Used a different bag each plant and washed my hands before defoliating. Things seem to be going good. Plants are stretching. They are in what I like to call the 'asparagus' stage where they REALLY stretch and drop leaves. I'll keep this updated.


Processing
Likes
17
Share


@Elpakkio
Follow
This week will be the last week I make a flush on this girls 5 days ago and I still waiting the day cut! The smell of this plant is amazing

Likes
15
Share


@Taskot_Joe
Follow
The stretch is definitely in effect! The pistols are pistoling and the bud sites are popping up and flourishing with the help of a bit of lst, All signs are looking good to a successful grow / yield hopefully, Not drinking as much as I thought she would but I’m sure that’ll come, Root ball size is starting to fill out the fabric pot, Week by week now 🤤😴🤤
Likes
1
Share

@Nickeluring
Follow
They are growing well. Lemon Cherry Cookies flowers fast. Guava and Apricot have done some good stretching.Their lengths are now:
Lemon Cherry Cookies: 53 cm
Apricot: 54 cm
Guava: 40 cm
I have defoliated all a fair bit. LCC is starting to spread a lovely smell. She is also turning purple.
I have some problems with heat. Some days it's 34 degrees in the tent.
Likes
8
Share


@D4D3DHOMMIES
Follow
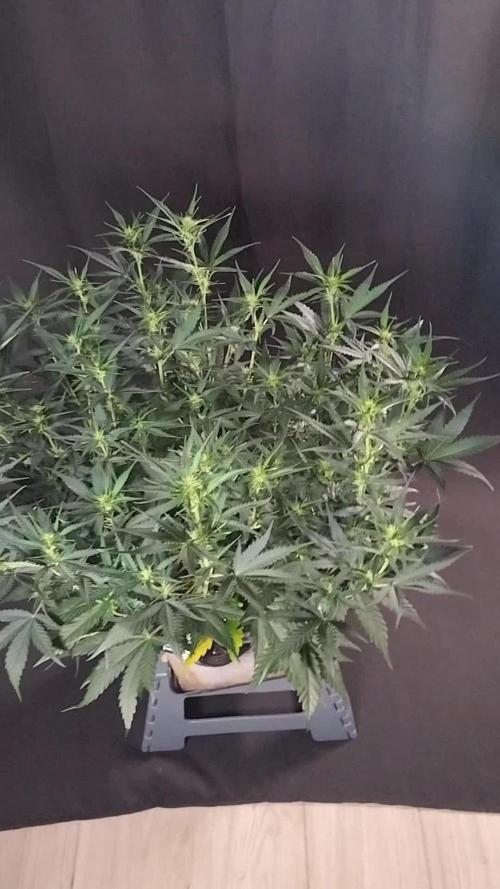
Entering week 7, preparing the plants for flowering. Some will probably need a little more time, so I might give them a little over a week of vegetative growth.
