
Likes
Comments
Share


@CampaCavallo
Follow
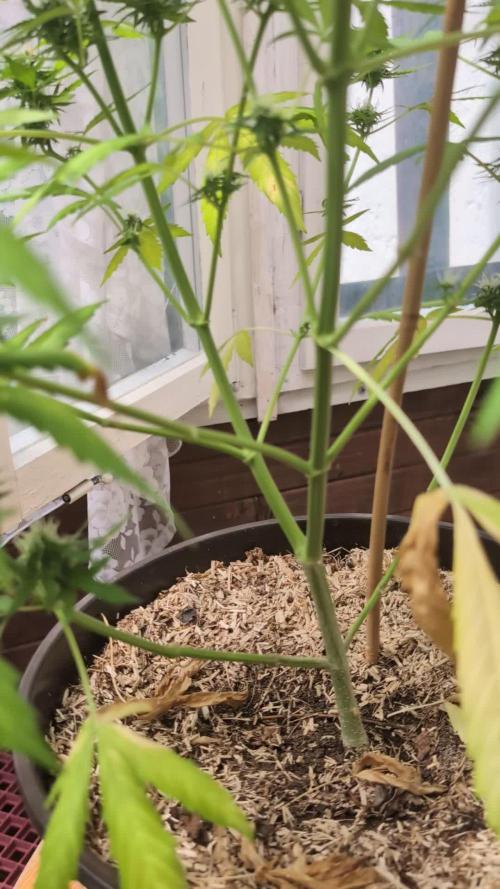
2ª Settimana di Fioritura 💐:
Buongiorno amici della CampaCavallo!
Grandi sorprese in questa settimana! 😶🌫️😵💫😵


Likes
4
Share


Likes
56
Share


@MrGrow
Follow
20.11.2022
139 giorni dal seme alla raccolta
79 giorni fioritura
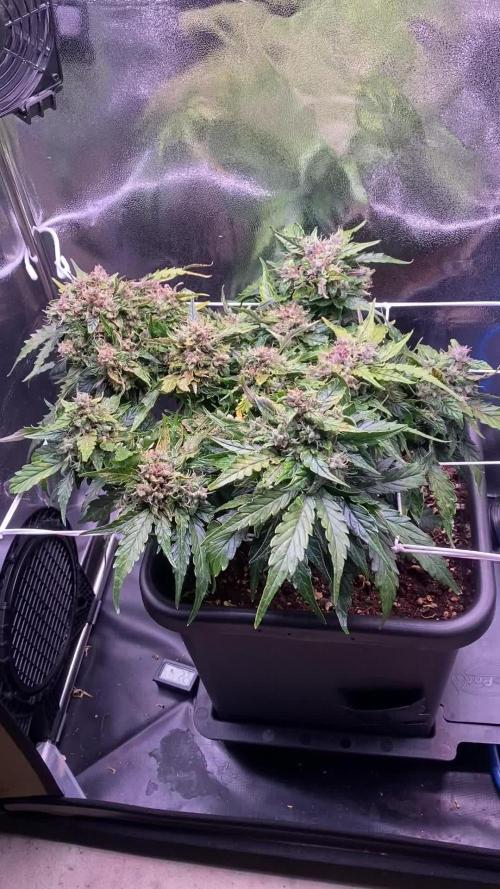
Pianta interessante, ha forte profumo di benzina, formaggio skunk ed erbe aromatiche. Produce cime a coda di volpe, molto belle e appiccicose, il profumo dei terpeni è persistente e molto forte. Sicuramente una varietà interessante, non si sviluppa molto in altezza, ha prodotto folti rami cespugliosi.
Revisione sul peso e sul fumo molto presto🙏💚


Likes
31
Share


@KitaKush
Follow
No more LST...beastie bloomz 1/2 teaspoon and maybe 1 teaspoon each next week....don't see a big difference yet...happy with the growth so far! My biggest plant is finally stretching up towards the light..soon I’ll be able to lollipop her and focus on the top canopy!
Likes
3
Share

@GoodTimesOrganics
Follow
Die Pandora legt allmählich an Dichte zu und die Buds werden immer kompakter. Im Schnitt performed die Pflanze etwas besser als die Skywalker OG Auto.
Es sieht auch so aus als würde die Pflanze etwas mehr Gewicht entwickeln. Dafür benötigt sie insgesamt länger als ihre Kollegin.


Likes
10
Share


@MrGrowthSpurt
Follow
I started by soaking the seeds in a cup of water for 24 hrs, next I switched to the paper towel method and kept them in a tupperware container with the lid attached and sprayed with water for 24 hours, I planted them 7am today 9/29/21.

Likes
22
Share


@RBGreenry
Follow
Start of a new week, week 12!
I was originally going to cut this morning but with using the flushing additive I am using it does contain sugar etc so just to make sure the lady uses up everything, I'll be doing an extra 3/4 days of just plain PH adjusted water to finish her off then pull her down and get her ready to dry n cure ✌️


Likes
5
Share


@BerlinBaal
Follow
October 10th she started her 9th week and got her last nutrition. i will harvest her next week or even this weekend.


Likes
21
Share


@BB_UK
Follow
Brand new amnesia punch Zamnesia and ripper seeds collaboration have made a never to forget strain! There was only 500 so I got me one and germinated a seed to add to my photo tent so I could be one of the first to test and try it!
Started in a glass of water for 48hrs then onto paper towel for 24hrs then potted! I am running them in 12L of soil, I have also put Co2 bags into the tent too
Likes
7
Share

@Fireproof
Follow
Alles gut. Die Blüten werden immer kräftiger. Riecht inzwischen sehr stark, wenn ich das Zelt das im Keller steht öffne riecht es danach gerade noch stundenlang nach Gras im Hausflur 😇


Processing
Likes
2
Share


Likes
7
Share


@GrownyStark
Follow
It's hard to see any upward growth but the buds are getting thicker and ripening. The smell is getting more pungent. The smell eminates and tries to escape the tent when open. The more fresh air she gets the more smell comes out. Idk if I'm burning my trichromes but I have my light at 100 this week but still keeping temps low.
Processing
Likes
12
Share


@GrowGuy97
Follow
Day 28 - These ladies are growing like crazy! 2 of them are already almost as tall as my white widow autos that are about 2 weeks ahead!
Day 30 - Still stretching like crazy, starting to look much better though I have to say!
Day 32 - Ladies are starting to get nice & purple!
Likes
9
Share


@Wilstang
Follow
The grow on my Big Blue Cheese was beautifully satisfying. Not one deficiency or problem to report with her, she loved to eat as much as you gave her. Plus the size of her stalk and branches were on point, a perfect plant from the beginning. I performed LST, super cropping, and topping to create this 12 top beauty. Big Blue Cheese is a 8-10 week flower strain that I harvested on day 64, along with a 6 week veg to create this perfection. Recommended over and over for all growers with that sweet tooth craving 💯🔥💪000

Likes
26
Share


@Melloganja
Follow
The plantas get a little bit struck, I don't know what's going on, I will start a new phase off fertilizer from advanced nutrients.
Likes
39
Share


@SirBudAlotts
Follow
This week basically was just feeding the soil with molasses ( 5ml per 1 litre ). And Reverse osmosis water.
Environment control during this stage is of high importance. Since the plant is moving from its adolescence to teenagehood, so to say lol, it's really vital to keep the conditions steady.
Other than that, this week was a breeze.
Thanks to any and everyone that's viewing my diary, I do appreciate the support. 💚🌿