The Grow Awards 2026 🏆 


Likes
11
Share
@Socal6pak
Follow
Area only has partial sun. Need to move to full sun. For now. Judging from the leaves. Gonna be a normal grow. Nothing odd. So far only 4 sprouted. But I’m sure other 1 just taking their time. Just have to wait.

Likes
13
Share
@FlavourFarmer
Follow
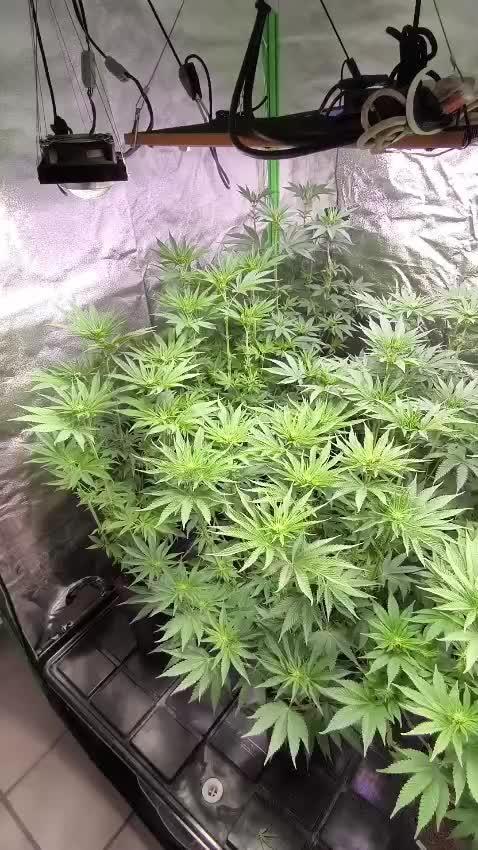
Just recovered/recovering from a overwater rookie mistake but we keep moving! 600w lumii ballast 5” fan and filter and a 6inch fan for passive 1.2 x 1.2 x 2 tent

Likes
3
Share
@Homegrown93
Follow
So far so good, eager to have the auto flowers finish up so I can focus on the photo period. Both auto flowers are being fed full strength with big bud powder added as well.
Trained the photoperiod with plenty of lst hoping to start flowering her in 2 weeks max

Likes
9
Share
@Eastweed2022
Follow
4ta semana dia 17/10/2022
lograron crecer un poco mas cuando cambie a macetas de 1 galon recien regadas hay alguna que estan pequeña pero hay una en especial que es demasiado pequeña seguire observandola o pasare a retirarla para un cultivo en out door.
Por ahora seguiran en crecimiento 2 semanas mas y cambio a floracion

Likes
8
Share
@ZombieKushAddicted
Follow
FC-E 4800 lamp ,
to view this lamp or any other marshydro product go to: https://instagram.com/marshydro_aliexpress?igshid=YmMyMTA2M2Y=

Likes
6
Share
@I_Identify_As_A_Dan
Follow
Week 9 for GMO 8 by atlasseed
The indoor smaller plant is really starting to bulk up on the flower size for sure seems like maybe it has another week maybe 2 before being done. While the other plant is now outdoors because i ran out of room indoors & the bud on the outdoor one looks completely different likely because of the 40+ degrees sun outdoors ATM but doesn't have any burn leaves so that's great. Actually looking forward to seeing how she smokes... maybe she gets ran again in a few weeks? 😎

Likes
6
Share
@SolitudeCorners
Follow
Last week of flowering (72days from the light switch) Gonna cut soon when the dirt is dry. A quite late harvest. Many buds denser more, and stem can’t longer resist.
This season so satisfy. Thank for all mentor and comment. You all are my inspiration for grows.
Feeding
23/1 Water 13.5L+Flawless 20ml ppm80 ph6.2
MDR 3L 2Lx5
Runoff
MDR 1400 /1155
Zkittle 1600/1300/1150
Pineapp 900/600
Purp 1300 /1200
Sapp 2000/1100
Dozdos 1100/1000
25/1 10.42 6L ppm9 ph6 1L per pot
3L+Flawless6ml ppm116 ph5.9 1.5/1.5 Purp, Zkittle
4.5L+ Flawless7ml ppm119 ph6 1.5/3 Sapp,MDR
Runoff
Purp 1300
Zkittle 1500/1200
Dozdos 1400
Sapp1300
Pineapp850
MDR950
27/1 runoff
Pineapp 500
Purp 900
MDR 600
Zkittle 400
Sapp 300
Dozdos 400

Likes
28
Share
@Grow_N_Smoke
Follow
I went ahead a flipped into flower and the girls have responded really well!
I had some issues last week but I think adjusting the PH down to 5.9 helped and diluting my nutrient solution to bring down my EC levels helped as well


Likes
22
Share


Likes
18
Share
@DogDoctorOfficial
Follow
Hey fellow green thumbs! 🌿💚 It’s harvest time for our Auto Fat Pete’s Cookies from Super Sativa Seed Club! After an exciting journey, we’re thrilled to share the details of this unique plant’s final stage. Let’s dive into the harvest report!
🌟 Harvest Details:
Day 75: Harvest Day
• Harvest Date: Day 75
• Harvest Method: Our Auto Fat Pete’s Cookies was harvested yesterday. While the flowers turned out less dense than expected, the amazing smell has us super curious about the final product. 🌿🌸
• Preparation: Before hanging, we meticulously cleaned the plant, removing all leaves without trichomes to ensure a smooth drying process and to enhance the quality of the final product. 🌿✂️
Current Drying Process:
• Method: The entire plant is now hanging upside down to dry. This method helps maintain moisture levels within the buds, allowing for a slower and more even drying process. 🌿🔄
• Environment:
• Temperature: 18-22°C (65-72°F)
• Humidity: 50-60%
Maintaining these conditions is crucial for achieving a perfect dry and preserving the plant’s aromatic and flavorful profile. 🌡️💧
🌟 Plant and Bud Characteristics:
Auto Fat Pete’s Cookies:
• Bud Structure: The buds are not as dense as we’d hoped, but they are still sticky and resinous, showcasing a beautiful array of green hues with hints of purple and orange pistils.
• Aroma: The aroma is incredibly strong and delightful, filling the grow room with a sweet, cookie-like scent that hints at the strain’s name. 🌿🍪
• Trichomes: A generous layer of trichomes covers the buds, promising a flavorful and aromatic final product. 🌿✨
🌟 Care Tips:
• Drying Process: Patience is key. Allowing the plant to dry slowly will enhance the final quality, preserving both flavor and potency. Ensure good airflow around the hanging plant to prevent mold and mildew. 🌬️💧
• Trimming: Once the drying process is complete (typically 10-14 days), it will be time to trim the buds. This is where we’ll shape the final product and get it ready for curing. ✂️🌿
• Curing: After trimming, curing the buds in jars for at least 2-4 weeks will further enhance the flavor and smoothness. This final step is essential for achieving the best possible smoking experience. 🍁
🌟 Genetics Spotlight:
Auto Fat Pete’s Cookies:
• Characteristics: Known for its sweet and cookie-like aroma, this strain has shown remarkable aromatic qualities throughout the grow. Despite the less dense flowers, the strong scent and generous trichome coverage promise a high-quality final product.
• Harvest Expectations: Sweet, aromatic buds with a rich flavor profile. The slower drying process will ensure the best possible preservation of cannabinoids and terpenes.
🌍🌿 Fun Fact:
Did you know? 🌿✨ The aroma of a cannabis plant can be a strong indicator of its final flavor profile. Strains like Auto Fat Pete’s Cookies, with their unique and strong scents, often translate these aromas into delicious, flavorful buds.
For a detailed grow guide and to see this strain in action, head over to my YouTube channel! 🎥✨ I share tips, tricks, and in-depth reviews to help you get the best results from your grow. This week’s harvest has been particularly intriguing, and I’ll be explaining the reasons behind the less dense flowers in detail.
👉 Join me on YouTube Link in my profile 👈
🌟 Conclusion:
Harvesting Auto Fat Pete’s Cookies at Day 75 has been an interesting and rewarding experience. While the buds are not as dense as we hoped, the strong aroma and generous trichome coverage give us high hopes for the final product. With the plant now drying, we’re eagerly awaiting the final outcome.
Stay tuned for updates on the drying, trimming, and curing process, and get ready for a sweet and aromatic harvest!
Happy growing, and see you next time! 🌿💚✨
#SuperSativaSeedClub #HarvestReport #FatPetesCookies #PlantMagic #GardeningJoy #NatureLovers #PlantPower #InspireGrow #YouTubeJourney
Germination method 🌱 @thecannakan
Genetics @supersativaseedclub_official
Nutrition
@aptusholland 🌿
@aptus_world 🌎
@aptus_es 🌍
@aptusbrasil 🌱
@aptus_thailand 🌿
@aptus_portugal 🌳
@aptususa_official 🍀
@aptusplanttechnz 🌺
@aptusplanttechaus 🍃
Ambient controls🎮
@trolmaster.eu @trolmaster.eu.support @trolmaster.support @trolmaster.agro
Soil @promix_growers_eur @promix_cannabis
LED - @lumatekeu
Watering- @autopot_usa @autopot_global
Love and attention- @dogdoctorofficial
As always thank you all for stopping by, for the love and for it all , this journey of mine wold just not be the same without you guys, the love and support is very much appreciated and i fell honored and so joyful with you all in my life 🙏
With true love comes happiness 💚🙏 Always believe in your self and always do things expecting nothing and with an open heart , be a giver and the universe will give back to you in ways you could not even imagine so 💚
More info and complete updates from all my adventures can be found ⬆️link in the profile description ⬆️
Friendly reminder all you see here is pure research and for educational purposes only
💚Growers Love To you All 💚
Discount Codes :
@thecannakan DOGDOCTOR 15% off
@theneutralizer PORKIT7-DOGDOCTROSO 17% off
@kannabiaglobal DOGDOCTOR 30% off
@seedsmangenetics DOGDOCTOR 10%off
@terpyz.mutant.genetics DOCTOR 15% off

Processing
Likes
26
Share
@MG2009
Follow
02/11/2021
Calling it day #1 of veg, she will stay under 1000w MH at least through veg cycle. Going to transplant when roots coming out of bottom of her pot until then watering very little each day(50ml.) and checking pot weight. Going to get some myco for transplanting to reduce stress during transplant.
Ps.
Going to have to raise my substrate temp I think it is fine, but prefer it to be warmer around 68°-70°f
See ya next time. New pic is day #5 of veg getting bigger
Processing
Likes
6
Share
@Ferenc
Follow
Day 61: I left them in darkness for 3 days and just switched on the lamp for 12/12 with today the foirst day of the 9th week.
Fertilization goes on the same days with the nutrients above and water intake approx 250 ml per plant per day.
Nice green color comes they always look nice after darkness :) Lets' go.
Day 66: Growing growing growing...


Likes
13
Share
@userflp
Follow
harvesting due to the beginning of the spring equinox in the southern hemisphere and so the days have more than 12 hours of light. The plant showed signs of revegetation in recent days, the same occurred with two other plants that will make the posts and give continuity to the revegetation diaries of the plants. Att
colheita realizada devido ao ínicio do equinocio de primavera no hemisferio sul e com isso os dias tem mais de 12 horas de luz. A planta apresentava sinais de revegetação nos ultimos dias, o mesmo ocorreu com outras duas plantas que realizarei as postagens e darei continuidade aos diarios de revegetação das plantas. Att
👽
***update on effect after two weeks of healing;
ironically, even though I had harvested early due to revegetation, after 2 weeks of healing the herb shows strong citrus and herbal taste and smell. about the effects ... The wave is insane, almost completely cerebral, too strong. It was a good choice to keep it in revegetation and not pick up the other copy which I also let revegetate and make a diary. Att
Likes
19
Share
@A_Rolling_Stoner
Follow
All plants are fully blooming and create frosty leaves.
Caution! Very Sticky!
Amazing smell from the apple fritter and critical.
Really intense.


Likes
74
Share
@Hou_Stone
Follow
Bonne journée tout le monde 💚
❄️❄️❄️❄️❄️❄️❄️❄️❄️❄️❄️❄️
Intensité de la FC3000: 90%
Ventilation : Extracteur mars hydro 6 pouces avec filtre à charbon puissance : 4/10 (24h/24h) + 3 ventilateurs à l'intérieur ( ON 8/24h). ils s'activent à un horaire différent.
Arrosage : Environ tout les 4-6 jours avec 1.5L d'eau. (+ 1gr de bioenhancer/L eau un arrosage sur 2)
Température & humidité : NUIT : 16°C & 70% / JOUR : 23°C & 50%
Mon instagram 🌱❤️️
https://www.instagram.com/hou_stone420/

Likes
17
Share
@MrbeanTeddyVn
Follow
Chà chà, thời gian thu hoạch của hãng là 63 ngày. Nhưng có vẻ những chồi đã chín sớm hơn dự định, những hạt trichhome cũng đã chuyển sang màu hổ phách. Có lẽ 1 tuần nữa tôi sẽ flush và thu hoạch.


Likes
5
Share
@AestheticGenetix
Follow
7/2/25 plant is progressing nicely. Expecting an explosion of growth soon to fill out the extra space in the

Likes
44
Share
@Hempface86
Follow
All right so I'm starting week one at day 6 it just makes it easier for me to line up with other diaries.. with that being said this girl is happy as you can tell she's praying and not just because it's Church Day 🥁🥁😉 .. big shout out to Zamnesia Seeds for the opportunity to grow this pretty little girl.. I'm looking forward to this more than any other grow because of what her parents are being grape pie x fruity pebbles OG and a 50/50 hybrid split.. this will not be a small pot grow I am going to eventually have her in anywhere between 4 and 5 gallons of medium and I'm going to use my maxi Bloom silica calm mag combo and she's going to be big and strong and I can't wait.. definitely check out Zamnesia Seeds they have an awesome website and have absolutely every and anything you could possibly need.. hope everyone is doing well God bless and happy growing ✌️😎
Day 11 : just wanted to add a couple photos to show that this girl is growing great she has grown so much in the last couple days I have extremely high hopes she is going to be a very good plant!!
https://www.zamnesia.com/us/