


Likes
Comments
Share


@PopsCycle
Follow
Last few days - Day 65 - Fat Monkey Auto from @anesiaseeds
Nutrients: @atami_deutschland / @atami.international / @stefan_atami / @daniel_atami
Soil: @promixgrowers_eur / @promixgrowers_global / @promixgrowers_unfiltered / @promixmitch
LED: @powerlux_spain
Tent: @secretjardin_
Thank you to everyone who follows and supports my work 🙏🏻💚
This means a lot to me and you should know you are a part of it and only with you all this is possible, you are the best community 😎
Growers love, love for everyone

Likes
3
Share

@Growfather1
Follow
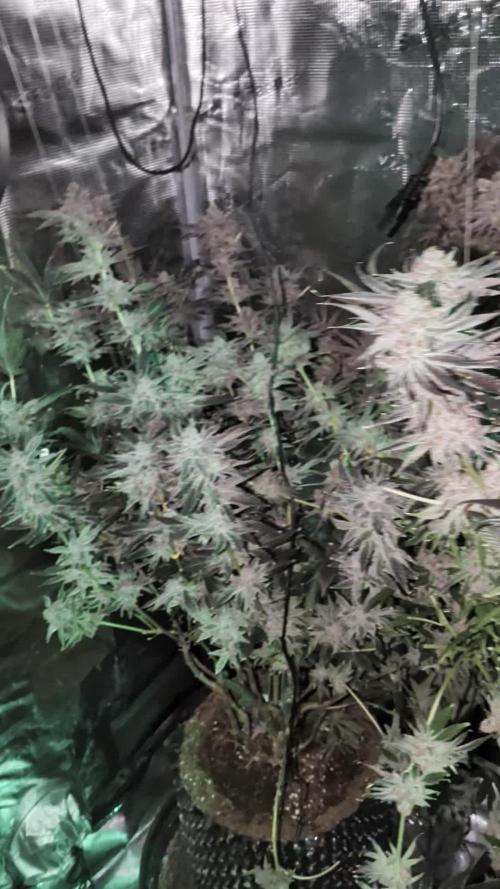
Hello everyone.
This is week 9 since starting flowering.
Today is day 4 of total darkness, and day 18 since the flush.
She has purpled out beautifully, and the branches are hanging mostly down. Thankfully, none of the flowers reached the coco soil.
I will be harvesting her in the coming hours.
Thank you for following me with this journal, and have a nice day.
Best regards,
Growfather.

Likes
64
Share


@MadeInGermany
Follow
Hi Guys :-) .
I haven't done a radical LST this week :-)
I'm going to do a radical topping this week :-)
The only reason is that they are otherwise too high for me because I only have about 40 days in the flower tent 😂.
Don't be shocked next week (it will look fatal).
Type:
Blue gelato 41 clone from mother (Barney's Farm)
☝️
Genetics: Blueberry] Thin Mint Girl Scout Cookies x Sunset Sherbert
👍
Vega lamp: 2 x Todogrow LED Quantum board 100 W.
💡
Flower lamp: 2 x Todogrow LED Cxb 3590 COB 3500 K 220 W.
💡 ☝️
earth:
Canna Terra Professional +
☝️
Fertilizer:
Canna Terra Vega, Canna Terra Terra Flores, Rizotonic, Cannazym, CANNA Boost, Pk 13/14, Canna Cal / Mag, Canna Ph - Grow, Canna Ph-Flores
☝️🌱
Water:
Osmosis water mixed with normal water (24 hours stale that the chlorine evaporates) to 0.2 EG. Add Cal / Mag to 0.4 Ec Ph with Organic Ph - to 6.0
💦 💧

Likes
17
Share


@JL420
Follow
los cogollos estan engordando y el olor ha aumentado tanto que me toco poner el filtro de carbon activo.
Hubo un pequeño exceso y regue un par de dias solo con agua de osmosis ec 0,17 y ph 6

Likes
62
Share


@Reyden
Follow
🔸Davvero una grande notizia! Una nuova collaborazione con @Spiderfarmer è iniziata e sono felice di poter creare dei contenuti per una azienda seria come la loro!!! Questa mattina è stata montata questa bellissima #SF2000 nella tenda da coltivazione più grande dove dovrà lavorare per far fiorire tutte le signorine che passeranno di qui prossimamente 😁😎🔥
Voglio fare i complimenti perché siete riusciti a creare veramente una luce bellissima con materiali super leggeri ed esteticamente geniali ❤️🔥oltre che consumare veramente poco (2.7 Umol/J)per il raggio di copertura ( 4x3 in crescita )(4x2 in fioritura ) e intensità uniforme in PPFD
Mi piace molto anche il fatto che monta anche diodi IR utili per accelerare la fase di fioritura e aumentare la resa 💡
Ci saranno diversi aggiornamenti rimanete connessi e grazie ancora per essere passati a trovarmi 😃
https://www.instagram.com/reel/Cl_EEAbu_vQ/?igshid=YmMyMTA2M2Y=
Funzionalità principali
2022 NUOVA VERSIONE COSTI DI ESERCIZIO INFERIORI E RENDIMENTI DI QUALITÀ SUPERIORE: Le luci progressive a LED SPIDER FARMER SF2000 utilizzano la più recente tecnologia LED ad alto rendimento oggi: diodi Samsung LM301B, alta efficienza energetica con 2,7 umol/J, creano la migliore penetrazione della luce del baldacchino. Copertura vegetale 3 x 4 piedi, fiore 2 x 4 piedi. Potenza estremamente elevata ma consuma solo 200 W di elettricità, rendendola più efficiente delle tradizionali lampade HID e di altre lampade per piante sul mercato.
NUOVO DISPOSIZIONE DEI DIODI E DESIGN DIMMERANTE: Luci crescenti SF2000 aggiornate. Più perline leggere ai bordi, meno al centro. Aiuta a ottenere una PPFD più uniforme. e la manopola di regolazione della luminosità regola liberamente l'intensità della luce. Connessione multi-luce con regolazione unificata particolarmente vantaggiosa per un'ampia area di coltivazione indoor e piantagione commerciale.
IDEALE PER TUTTE LE FASI DI CRESCITA: Eccellente spettro completo: bianco, blu, rosso e IR (3000K, 5000K, 660nm e IR 760nm). Diodi 3000K che forniscono più luce rossastra e 5000K che forniscono più luce bluastra. La luce rossa e IR da 660 nm è particolarmente utile durante la fioritura, dove accelera i tempi di fioritura e aumenta i raccolti. Trasforma i tuoi semi nella tua scorta. E la luce sembra abbastanza naturale, quindi è utile per monitorare accuratamente la salute delle piante.
COSTRUZIONE BEN FATTA E SOLIDA: nessuna ventola senza rumore. Il driver ad alta efficienza, affidabile e staccabile ha un'ottima dissipazione del calore. Il dissipatore di calore in alluminio è spesso e robusto, coperture protettive per i cavi; Imballaggio intuitivo. Componenti di qualità significano che la luce dura più a lungo, SF Light si prende cura di te con un design più attento, puoi facilmente risparmiare denaro senza acquistare frequentemente luci.
In qualità di produttore professionale di luci di coltivazione a LED da oltre 10 anni. Spider Farmer ha sempre insistito per creare attrezzature per la semina domestica più efficienti, adatte e di alta qualità per la crescita delle piante e si impegna a diventare un partner fidato per ogni coltivatore! Riceverai una lampada da coltivazione Spider Farmer SF2000, un manuale di istruzioni, un paio di ganci d'argento, un paio di ganci neri.


Likes
7
Share


@darb35
Follow
The runtz are about 45cm start of this week and the tall LCC is 75cm.
She is also further into flower, but did not spread out so much in the tent.
RAK seems to be very good with high PPFD, for the LCC they need a bit less I can feel.


Likes
88
Share


@PEAKYPLANTERS
Follow
hello to all, fellow cultivators!
my girls are starting to show the first symptoms of pre-flowering ...
they eat regularly and have formed a beautiful and solid structure.
stay on track for the next updates
also follow us on instagram
Likes
21
Share

@XII_XII_MrGreen
Follow
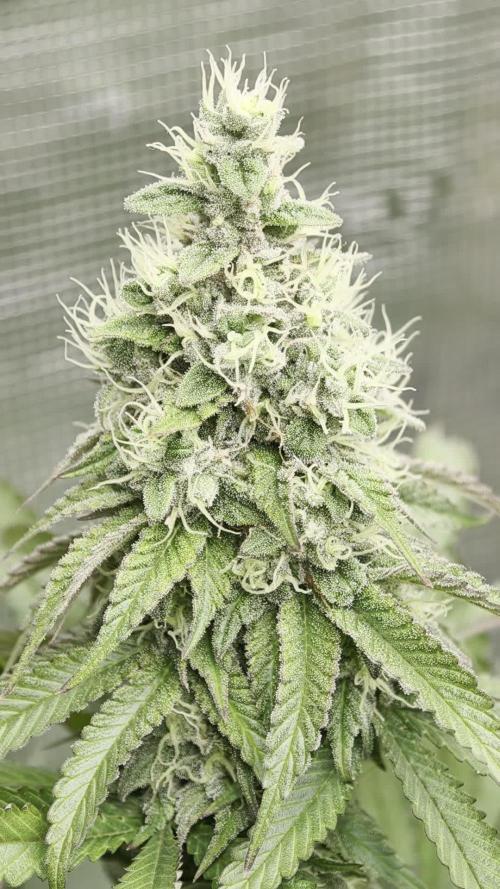
All the beautiful ladies have been put in a bigger tent, can't wait to see how they react😁💚

Likes
16
Share


@TechDCo
Follow
10 /11 Weeks Flower¬¬ It's going to be a long flowering phase!
18/01/2024
Performed a mid-day clean using hydrogen peroxide
Moved Spicy Temp to the flower tent
Noted that the temperatures are a little high
Searching for a new, large heatsink for the CropMaster Pro 1000 to resemble the SK600. Considering modifications to the CropMaster's heatsink as it is currently equipped with a 12-watt fan driver, PC fans, and connected to the LED mains power. It still works well, but planning to replace some LEDs once this grow is completed.
Fed 200ml of organic random feed to 5 plants
Discovered a sprouted seedling beneath the Forgotten Haze and relocated it to the veg tent
19/01/2024
Noted the arrival of the flowers
20/01/2024
Conducted a mid-day photoshoot
Started using natural fertilizer as flowering has commenced, applied 150ml for every 5 liters of water
20-01-2024
Recorded a video of the pre-flowering stage, indicating anticipation of a substantial yield
20/01/2024
Performed defoliation before the onset of substantial flowering and cleaned up the lower growth
Implemented SCROG (Screen of Green)
22/01/2024
Recorded a video of the pre-flowering stage
23/01/2024
No major changes, just observing more leaves and flowers
23/01/2024
Trimmed off the small undergrowth shoots
Missed a few of the lower growth shoots
24/01/2024
Gently stretched the plant within the SCROG setup
I'm aware that I need to reposition the pot more to the left to ensure the plants stretch evenly from both sides, but honestly, I'm feeling a bit lazy to do it tonight. I'll tackle it first thing in the morning, I promise! Originally, my plan was to have two plants in the set-up, but it turns out that Freaky Pablo is male.
And now for a plant-related joke: Why did the Forgotten Haze Cakes go to therapy? Because she had too many hang-ups!
_____________________________________
#IT WAS A RIDDLE YA DIDDLE SEE IT-
"I was so stoned & baked last night and a little bit pebbled and tripped over a rake and then I finally had a ''eureka moment'' of what, ''Banana Shrimps are symbolic of! haha, my innocence is now ruined! The question I'm asking is; will I ever grow up? and leave Mushroom Town"
_____________________________________.
REAL CONCLUSION: The Skunk Of Trutn.
Answer: Not for another 3-4 Weeks, then you get to leave Mushroom city.
"But it's about Forgotten Haze Cake maturity in to woman hood begins. But she still stays in mushroom land, the land of the Forgotten, she's lost amongst the Haze and Cake strains of the cold damp soil where mushrroms grow.
This is a Kind symbolic gesture reminder here, to keep the top soil clean during these colder times. We don't want mould or bud rot.
Some hazes like to see 3 days of dropped temps to change her colours like a psychedelic trip during the start of maturity"
"Shes always tripping over rakes, I have a little baby rake I use to freshen up her top soils"
Allso she was living next door to Freaky Pablo that turned out to be male to where Bananas come from and shes the shrimp. This riddle is told by the perspective of the Plant realising she's a woman going through the stages womanhood"
So, in conclusion, my fellow thinkers and growers, let's embrace the absurdity, cherish our innocence, and ponder the enigma of find a rake to trip over and lead us to that illuminating "eureka moment," no matter how stoned, baked, or pebbled we may be. Cheers to growth, both in the mind and the garden!
_____________________________________
At mid-day on January 25th, 2024, I accidentally placed the light too close to the plants for a couple of hours, resulting in burnt leaves and pistils. It can't be a calcium deficiency since I have been feeding 6ml of calcium to 5 liters of water. The only difference was the proximity of the light.

Likes
9
Share


@KEYSTONER
Follow
Fresh outta darkness. 48hrs of lights out. Chopped and now hang drying in a 2x2 Tent. 70 degrees and 45 Rm. Happy with the results of my first grow.
Likes
20
Share


@CanadianFillmore
Follow
Start of week 7 of flowering. Plant looks good, she recovered well and has shown some nice bud development. Temps have dropped to about 32°c.

Likes
12
Share


@Growing_Spartan
Follow
I’m thinking the girls need another week or two, getting very close but I do prefer indica effects so I’m waiting on that beautiful amber color yield might not be all there but quality is definitely showing 🔥💪 shoutout to 420 FASTBUDS for great genetics!


Likes
47
Share


@blazin_skywalker
Follow
More haircuts this week! I am very aggressively trying to keep up with the canopy growth. I'm continuing to remove the small branches underneath the canopy - more or less stripping the undergrowth, while defoliating around the growth sites that have made it to the canopy surface.
I'm unsure of how much more growth to wait for before I send her into flower. Maybe next week? Who knows! Not me! Hah!
Happily accepting any advice from any experienced main-liners out there! 😉
She's been super thirsty - I have to add a gallon every few days to keep up! I also started adding some p31 Microbes to the reservoir to see what I can see. 😎

Likes
22
Share


@Spliffi
Follow
Week 1👍🤙👍🌱
The fear of non germination!! I gave the Trichome & Cream an extra week. Nothing happened but nature is funny like that.
These seedlings are exploding. Dynomyco is the Bomb.
Jon Dabs
Check them out here:
https://jondabs.com
@jondabs Instagram
The Sponsors
Check them out here:
Dutch Passion
https://dutch-passion.com/en/
Hydroponic.co.za
https://hydroponic.co.za/hydroponic/harvesting-and-growing-accessories/
Bud Juice
https://www.gohydro.co.za
The Best Grow
https://thebestgrow.co.za
Dynomyco
https://www.dynomyco.com
Nuclear Roots
https://www.nuclearroots.co.za
Photronic
https://shop.photronic.net
Special Thanks to Hydroponic.co.za. I buy all my products from them. Best service.
Daily updates coming...

Likes
8
Share


@eldruida_lamota
Follow
Que pasa familia, vamos con la tercera semana de crecimiento de estás Zkittelz de Seeds Mafia.
Pedían el trasplante desde hace unos días y yo dejado de mi las aguante para cortar las últimas del antiguo proyecto.
Ya han sido colocadas en macetas de 7 L
La humedad está alta la mantengo entorno al 55%,y la temperatura la tengo entre los 22/24 grados.
Controlamos en ph en cada riego a 6.2.
Y el agua que utilizo de riego suele estar estancada entre 24 / 36 horas.
El tetra 9 que añadí esta semana fue vía foliar.
Mars hydro:
Code discount: EL420
https://www.mars-hydro.com/
Agrobeta:
https://www.agrobeta.com/agrobetatiendaonline/36-abonos-canamo
Hasta aquí todo, Buenos humos 💨💨💨
Likes
4
Share


@Maximilian1234
Follow
Blütewoche 5
Mir läuft langsam das Wasser im Mund zusammen. Die Entwicklung der Blüten läuft auf Hochtouren! In dieser Woche war eigentlich wenig zu tun. Ein paar welke Blätter unterhalb des Blattwerks wurden entfernt. Alle zwei Tage bekommen die Damen 10l Wasser mit einem Ec von 2,5. Anzeichen für Überdüngung habe ich bisher keine gefunden. Der Calcium mangel ist danke Calmag im Rahmen geblieben.
Ich bin sehr froh das Scrog Netz zu haben, die Blüten werden gegen Ende vermutlich zu schwer werden. Einige kleine untere Triebe die es nicht ganz durchs Netz geschafft haben wurden mit Kordel gesichert.
Lasst gerne eure Gedanken dazu hier!
Dickes Danke an Dutch Passion 😃😅
Der Mülleimer wird eine reiche Ernte einfahren….
Likes
17
Share


@MasterKush714
Follow
HEY GANG UPDATE BEFORE THE FLIP!!!!!
So guys I had the WPM (white powdery mildew) issue with the gelato auto
haven't really seen it coming up elsewhere I'm already using a OMRI 3-in-1 spray for it
will update on that as well, hopefully that'll cure it, otherwise these other girls are doing great!
I have almost finished setting up the tent system and will update that also, see video, thanks for
everyone's help, I cant imagine what I would do without the whole forum here and the wisdom
I'm definitely a lot more knowledgeable about the process and systems that I have for it so again,
THANK YOU!!!!!!!!!!!!!!
LETS FUCKIN GOOOOOOOOOOO!!!!!!!!!!!!!!!!!!!!!!!!!!



Likes
6
Share

@MonstaMurph
Follow
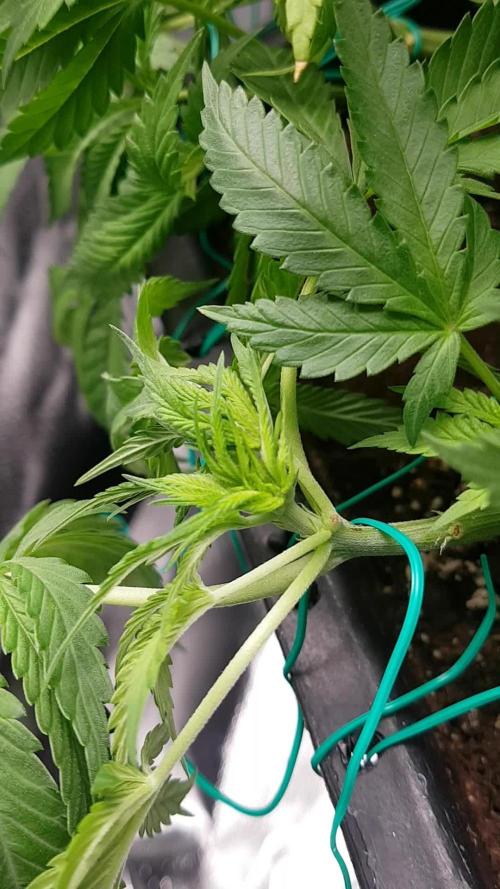
Nach dem erfolgreichen Topping in der Vorwoche hat die GMO Rootbeer ohne Pause weitergemacht. Da keinerlei Stressanzeichen sichtbar waren, wurde das LST direkt fortgesetzt. Die jungen Spitzen und Seitentriebe ließen sich problemlos weiter in Position bringen, sodass die Pflanze zunehmend eine breite, offene Form annimmt – perfekt für gleichmäßige Lichtverteilung und kräftigen späteren Blütenansatz.
Parallel dazu gab es regelmäßige, sanfte Entlaubung. Nur große Fächerblätter, die Licht blockierten oder das LST behinderten, wurden entfernt. Die Pflanze hat auf diese Maßnahmen durchgehend positiv reagiert: keine Hänger, keine hellen Blätter, kein Wachstumsstillstand. Im Gegenteil – sie wirkt extrem vital, treibt schnell nach und zeigt eine kompakte, kräftige Struktur.
Ein wichtiger Fokus dieser Woche lag auf der Umgebung: stabile Temperaturen, kontrollierte Luftfeuchtigkeit und keine extremen Schwankungen. Auch die Lichtstärke wurde eng überwacht, um jeglichen Stress oder Bleaching zu vermeiden. Die GMO Rootbeer scheint die Bedingungen optimal aufzunehmen; die Blätter stehen zu jeder Tageszeit sauber nach oben und zeigen dieses typische „Happy-Plant“-Bild.
Die Gesamtstruktur ist jetzt breit, flach und sehr gleichmäßig. Genau das, was man vor dem Übergang in die Stretch-Phase erreichen möchte. Sie baut derzeit eine perfekte Grundlage für mehrere gleich starke Tops auf.
Woche 5 war insgesamt sehr clean, sehr kontrolliert und extrem effizient – alle Trainingsschritte sitzen, und die Pflanze macht voll mit.