


Likes
Comments
Share


@BushDoctor740
Follow
Lemon cherry cookies,Cherry cola and Ztrawberriez are all getting closer to harvest.They are still drinking heavy and trichomes are almost all cloudy on the 3.I still have a lot more time left with Strawberry pie,Papaya cookies,and Pound cake which they are all starting to show some maturity.

Likes
14
Share


@Bread_n_Buds
Follow
Here we are, ready, after a week of truly fruitful germination we have 20 beautiful plants all marked with the Z of Zamnesia.
We have moved on to autoflowering, unlike many growers I have no prejudices about this type of plant, it is true that they are the easiest to make but it is also true that they have improved a lot in terms of flower quality and if once ease meant lower quality now even the most presumptuous old school flower children growers struggle to understand if a flower is autoflowering or a normal photoperiod plant. There are people who claim to recognize it by the flavor but then never succeed, it's funny how it works. I enjoy making them strip their heads with these magnificent new autoflowering. This one in particular is not brand new but it has always kept up with the times and has the strength of the name and the stability of the historic strains of Zamnesia this is nothing universal strains this is one of the spearheads of the house: Sticky Beast autoflowering. It's really a great plant already grown in the past by me and some of my friends have always loved it like crazy. I think it's the only one or one of the few to have won CUP from the Zamnesia catalog but we hope to find company for it very soon...
---- New Home - The young ladies have almost all been transplanted into 11-liter pots which is my favorite size to get the best ratio of presence of plants in the grow box / yield. Especially if you don't have to do exaggerated topping or you have to grow the plants straight with main cola like I do for catalog needs like I do, 11 liters guarantees you to make excellent plants. Topping with 11-liter pots is recommended up to a maximum of 16 tops (4 main crops) - The pots are square plastic and canvas branded Zamnesia - The soil used is Plagron Promix with peat and worm castings but not fertilized -
--- Start feeding program - A very serious feeding program branded Plagron has begun. We made our own custom table based on the chosen soil (Plagron Promix 100% organic) that you can all do at the link https://plagron.com/en/tools/grow-schedule-calculator and I started giving:
- Power Roots - 1ml/l
- Alga Grow - 2 ml/l
- Pure Zym - 1 ml/l
- Sugar Royal - 1ml/l
- Vita Race - 1 ml/l
- The 100% Organic pack by Plagron can be found on Zamnesia at the link:
https://www.zamnesia.io/it/11457-plagron-easy-pack-natural.html
We are giving a lot of humidity with a humidifier and we oscillate between 65% and 70%.
// Strain Description // What happens when three famous strains come together? Sticky Beast Automatic by Zamnesia Seeds is a pure autoflowering composed of some of the best strains. From this combination, where the delicious flavors of Bubble Gum meet the famous OG Kush and the productivity of Critical Auto, a real autoflowering is born that is extremely easy to grow!
// AWARD WINNING STRAIN // First Prize at Autoflowering Highlife CUP 2018 --
- Get a seed of this amazing strain --- https://www.zamnesia.io/it/3331-zamnesia-seeds-sticky-beast-automatic-femminizzato.html
- Soil and Fertilizers entirely organic --- https://plagron.com/en buy on www.zamnesia.io
- Growbox and air system --- https://www.secret jardin.com/
- Light — P2000 - https://www.viparspectra.com
- Music and sound --- I made my girls listen to 432hz frequencies and music from www.radionula.com
- Z --- You can find these seeds, much more from the world of cannabis, mushrooms and an incredible series of accessories and gadgets on the reference site not only mine but of many growers ---- https://www.zamnesia.io

Likes
12
Share


@Ms_Herbalist
Follow
Did a lot of training and defoliation.
I will move her into a bigger tent now as shes about to start flowering hopefully by end of next week 😍.
Will also be using scrog net and will add Bud Candy along with the other nutrients : PH perfect Micro,Grow, Bloom
Likes
27
Share


@RDWCGrowing
Follow
3/25/2023
Week 6- Day 1 of Veg (Day 52 overall)
Added my first between changes SILICA Top offs. Was worried that when you add it to pre mixed Nutes that it can make the whole thing turn into a gummy looking substance. I was ready to drain the system and start it over for the week if needed, but no issues adding it to the tank. the Silica going into the Res didn't gummy the system up, it did drop my PH by quit a bit causing me to have to bring it back in balance.
36 Gallons in the Tank
Silica
Add .5mil/Gal = 18Mil
I topped some that needed to be topped, I defoliated some that needs to be defoliated. Since I have moved into Week 6 I have increased the light intensity up to just over 500 maxing it out for Veg Cycle. Next increase will be Week 1 of Flower.
3/26/2023
Week 6- Day 2 of Veg (Day 53 overall)
All conditions looked great. Other than me not putting one of the humidifiers back right which means it didn't work last night so Humidity was lower than I like. But got the Humidifier back on it's stand correctly and it is now pumping away. With that I decided to give the plants a day off from any stresses, no topping, no FIMing, no Defoliation for today. Just some good old soaking up the light rays and the ability to get all the Nutes they would like..
3/27/2023
Week 6- Day 3 of Veg (Day 54 overall)
Looking kind of Bushy today, so I defoliated some, and topped some.
3/28/2023
Week 6- Day 4 of Veg (Day 55 overall)
PH was a little lower than I like 5.74 so I added a few Mil of PH UP and brought it back up to 5.94.
Not much else at this stage, just I topped a little and I defoliated a little.
3/29/2023
Week 6- Day 5 of Veg (Day 56 overall)
Topped a little, Defoliated a little Watched them grow!!
3/30/2023
Week 6- Day 6 of Veg (Day 57 Overall)
Main action today was breaking down my old tent and setting up a new tent and getting my second RDWC system setup and ready for clones. I Topped a little, I Defoliated some and started taking a good look at what I would like to take for clones in the coming days. I have a few bottom branches that look every promising for my clone material on each.
3/31/2023
Week 6- Day 7 of Veg (Day 58 overall)
#3 is at 16" Tall
#2 is at 13" Tall

Likes
66
Share


@Hashy
Follow
Week 9 5th week of flower.
Light settings
12/12 on at 9.00am off 9.00pm
Light power= 75% 184w
Radiator settings
LIghts on
Turn on if temp drops below 23c
Turn off if temp goes above 23c
Lights off
Turn on if temp drops below 18.5c
Turn off if temp goes above 18.5c
Dehumidifier settings
LIghts on
Turn off if humidity drops below 60%
Turn on if humidity goes above 60%
LIghts off
Turn off if humidity drops below 62%
Turn on if humidity goes above 62%
Extractor settings
temperature 25c with 1c steps
Humidity 50% with 2% steps
Max speed 10
Min speed 7
VPD aim 0.8-1.2
DLI aim 30
Wednesday 22/3/23 Day 57 (Day 29 flower)
Nothing
Thursday 23/3/23 Day 58 (Day 30 flower)
Autofeed 4 20 minute runs
(last weeks nute schedule)
Feed 12L Ec=1.93 Ph=6.6/6.5
4.5L left
Roughly 2.5L each.
#1 run 0.15L Ec= Ph=
Pump wasn't submerge properly.
Friday 24/3/23 Day 59 (Day 31 flower)
Moved light more over towards the cheesecake.
Big defoliation
Saturday 25/3/23 Day 60 (Day 32 flower)
Autofeed 4 20 minute runs
Slightly less powerful pump
Calmag 0.5ml/L
4 drops ph d
Feed 10L Ec=0.4 Ph=6.1/6.2
1.5L left
Roughly 2.2L each.
#1 run 1.25L Ec=2.14 Ph=6.1
#1 Height= 46CM Dist= 45CM DLI=25.1
Sunday 26/3/23 Day 61 (Day 33 flower)
Nothing
Monday 27/3/23 Day 62 (Day 34 flower)
1.00pm alter heater settings to 22.5c
6.00pm
Extractor settings
temperature 24c with 1c steps
Humidity 50% with 0% steps
Max speed 10
Min speed 4
Tuesday 28/3/23 Day 63 (Day 35 flower)
Feed
(This weeks schedule)
Autofeed 4 15 minute runs
Normal pump
4 drops ph d
Feed 15L Ec=1.75 Ph=6.4
8.75L left
Roughly 2.08L each.
#1 run L Ec= Ph=
#1 Height= 47CM Dist= 46CM DLI=25.
Another week done for the grow. Things are going great.
#1 Wedding Cheesecake FF is pilling on the pistils and is looking good. I can't see her getting much taller now.
Power used for week
Light
(2.22+2.21+2.21+2.21+2.22+2.21+2.22)=15.5Kw
Extractor
(0.57+0.57+0.57+0.54+0.57+0.53+0.54)=3.89Kw
Fans
(0.5+0.53+0.52+0.69+0.9+1.08+1.06)=5.28Kw
Dehumidifier
(1.49+0.34+0.71+1.48+0.0+0.0+0.0)=4.02Kw
Radiator
(2.42+2.47+2.74+3.62+5.24+2.1+1.45)=20.04Kw
Water pump.
(0.0+0.01+0.0+0.01+0.0+0.0+0.01)=0.03Kw
Total for the week=48.76Kw
Back in a week.
Thanks for stopping by.
Likes
9
Share


@GYOweed
Follow
This was the squatest clone and grows thick heavy glowing marshmallow colas. Smells so sweet too soon to tell final taste.

Likes
23
Share


@eldruida_lamota
Follow
Que Pasa familia,Tenemos cambios , 12/12 empieza lo bueno(floración), empieza a oler el cuarto a un aroma especial 😉, os voy a dejar muchos vídeos para que no tengáis ninguna queja.
•primer problema y único , es la temperatura. (Max30 min28 con Luz).
Llevaba varios días comiéndome la cabeza , de mientras tengo medio abierto las compuertas del indoor.
Todo lo demás funciona, se las ve Sanas, veremos las próximas semanas.

Likes
5
Share


@Pureleelove
Follow
This was an amazing experience for my first grow. Was super unsure of what I was going to yield, but I think 27 grams is a realistic harvest and Im looking forward to see if I can get bit larger of a yield on the next run. I want to try main-lining, see for better energy distribution and more equal bud growth. Also investment into a proper reflector and possibly enclosed space.
Note- I trimmed my plant the night before harvest morning. I removed than fan leaves to start, and then proceeded to trim the plant. I pulled out a lot of the leaves with no frost by hand. The sugar leaves had so much crystal on it I thought I would leave the smaller ones on the bud. I gave it a light trim, and used all the trim to make Isopropyl Alcahol (99%) based extract. Got about 1 gram from the run. I also had a nice little ball of finger charas from the trimming.
I harvested it in the morning at about 04:30 am before the light cycle triggered at 7am. She hung and dried for about a week, where I then chopped her into buds. She cured for 2 weeks before i started smoking.
Ask anything you want to know! Or if I can be more clear on any areas of the grow!
One Love!


Likes
1
Share

@rommyu
Follow
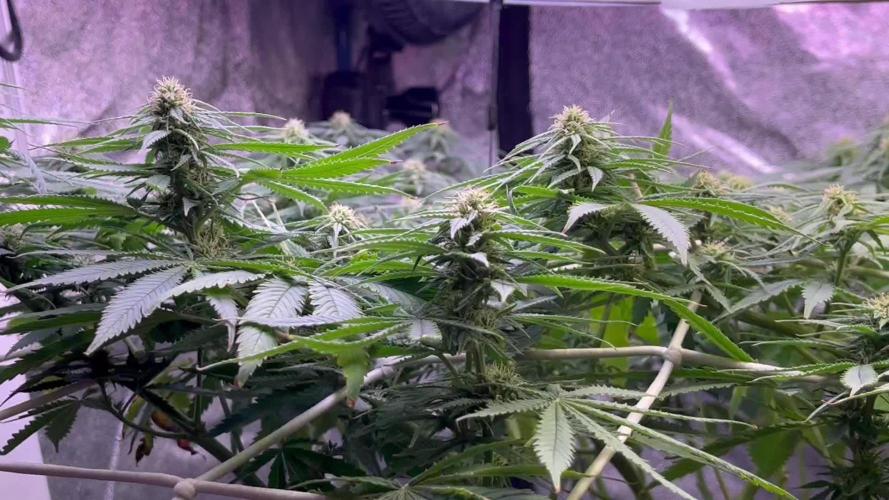
Recovering from a hard week of losing a third of the leaves. I had nutrient lockout from too high ec which results in the roots not drinking eating. I thought I had some mold so I cut all the yellowing leaves which were the plant’s buffers causing it to lose more leaves in a doom loop until I realized what the problem was. It feels like it’s restarting and I have lost some time

Likes
27
Share


@Stickybudz420
Follow
She’s coming along nicely this girl, only wish that I kept her branches tied Down as she’s grown into a bush 🌳 need more light penetrating her! Happy growing 👊

Likes
85
Share


@Grey_Wolf
Follow
How To Make and Use Organic Super Soil
Seedsman Seeds Peyote Wifi Harvest
Well here we are at the conclusion to many months of planning and preparation plus another 23 weeks of Growing.
I Did a lot of reading and researching super soils and how they are made before I decided to actually make some . Then I thought to myself I should document the whole process from start to finish in diary form.
This way any other growers who are interested can have a basic idea of where to start.
and the likely conditions they may face.
All of this began way back in August of 2019
when I first mixed the super soil mix (which can be found by looking at week one)
aproximately Three months after that I started
this grow and 23 weeks later Here we are at the end. Along the way I described the methods I was using to keep the soil fully active and
productive at all times. Plus also some of my pre planning tips for flowering time.
For example in week four....
I innoculated with the Mycorrhizal kit as instructed on the packaging next week I'll give the soil some help by feeding some seaweed solution mixed with mollasses and worm castings. This will provide a boost for both the plant via the roots and also benefit the millions of tiny microbes that live within the soil.
Simply mixing and using the super soil as is will still work fine however by keeping the soil in perfect health as well as the Plant itself will pay dividends come harvest time.
Week Six....
It can pay to plan ahead now for when the plant gets bigger and will need support. With this in mind I am going to use a premade wire Tomato type cage that is 1.5m high.
This will hopefully provide enough support for the plants frame when it goes into Flower Next year.
Planning ahead can sometimes help prevent potential issues from effecting your grow. Some things to think about and plan ahead for are as I mentioned Plant stability and support when it gets bigger.
Week nine.....
Planning ahead still I decided to dig a big hole aprox 1.5 meters by 80cm and to a depth of about 4 foot .
Took a few hours of digging and shovelling but the end result with the plant lowered down into it makes it worth my effort and Back pain that will follow 😏
By doing this I have created a much cooler Root zone by having the pot well below surface level But Ive also knocked 4 feet off the overall plants profile which will aid me in my
other concerns being Security.
Week thirteen....
Diamotaceous Earth acts as a bug deterrent and can't hurt the plant in any way. I also mix some into the worm tea that I feed straight to the soil as Diatomaceous Earth is a fantastic source of Silica which we all know is extremely beneficial to your Plants Health.
As Far as my super soil is concerned , so far I have not needed to feed the plants any fertilisers as the soil is providing everything the plant needs.
All ive been adding is biodynamic food for the soil itself to keep everything under the surface happy and well nourished.
Once flowering begins next month I will need to add an organic Booster to the soil that will replace any depleted resources.
***** But not everything went smoothly in fact I did the most damage to the plant in
Week 17 I decided to be stupid and spray all my girls with potassium bicarbonate thinking it would "mold proof" my plants WRONG all
did was burn the absolute shit out of the leaves.
From then on it was a constant struggle to get this girl to produce anything because along with the foliar burning I also had to contend with next to no sunshine for many days at a
time plus the constant leaf dropping no doubt
reduced my potential yield.
****** Not everything was Doom and gloom either in fact by Week twenty one....
The Quality however is definately showing itself, with every single bud covered in visible frosty looking trichomes.
The smell is really really Funky with undertones of spices. So even tho I'll probably only get around half of what I was hoping for ,the bud that I do get will be straight up fire. 👌
In the Final week before I chopped ....
The Buds although very delicate and light, look very Frosty and Delectable.
As for the super soil it is absolutely chock full of nutritional value so I will use it to Grow a fine crop of Broad beans this coming Winter. The growing of Legumes in the soil will actually benefit the soils health in many ways including making the nitrogen within the soil more readily available.
**** On the 18th of March 2020 I chopped her
down and hung the plant upside down in the
greenhouse overnight. Next day I removed all
the buds and stripped them off the branches.
The buds then went into a hanging drying rack
until adequately Dried for the trimming.
After the first trim the buds went into paper
bags for more drying time (aprox 3-5 days depending on temp rh weather etc) They then got a bit more of a trim and went into the Jars for Curing.
I have had quite a few bongs of this already
and I must say it is Really good hey!!
So in Conclusion I hope that this Diary may help somebody who may be interested in growing
organically with soil outdoors or indoors
as well as provide an insight into how the
use of all natural ingrediants can produce
Good buds. Whilst this particular plant didn't get Big buds the Quality was outstanding and
you only need to check out some of the other
plants I have growing in the same soil mix
as to the validity of of its Fertility.
Now we come to the End of this Grow I'd like to thank a few growers who offered advice and/or support along the way @ROM101
@Med_in_Tropic @F4m0u5 @Shooey @MagicMan
@Spinnnn Thanks guys I appreciate it
Also thankyou you for reading this Diary
and please leave a like at the end if you
liked it
Cheers Grey_Wolf
Post harvest notes ; its now the 1st of May and the Broad beans and Peas that I planted in the super soil are doing very nicely this will not only provide me and my family
quality organic food for our table but also the growing of legumes helps fix nitrogen to the soil and keeps it living and healthy for the next time I need it for canna 👍💪 Best way to be folks
self sustainable and recycling your soil mixes will help reduce our footprint on the planet and save us money too 👍
So what are you waiting for Grab some basic organic ingrediants and make yourself some Organic super soil 👍👌
##### Final update for this diary 31st May 2020
It's been just over 2 months since I harvested this Peyote Wifi plant and the buds have been curing for that time .
Today I chose a bud to test and I am blown away by the perplexity of the high and taste profile , Bloody amazing 👍#######
Thats it folks All over now after 3 months of making the soil then another 24 weeks of growing the plant and then another 2 months of curing to get to here 31st May 2020
It was a great fun grow and I hope I have inspired some of you to try making your own batch of Organic super soil 👍

Likes
14
Share


@DaddyPrime
Follow
6/29 the past 3 days were 112, 115, and then 118 degree days. The plants held up fine but this one had some heat damaged leaves because of it. Also top dressed with a cup of one shot
7/3 watered with slf-100 and recharge

Likes
17
Share

@Hashy
Follow
Week 4
Light cycle=18/6
Light Power=100w
Extractor controller settings
High temp= 25c
Low temp= c
Temp step=0c
High Rh= 60%
Low Rh= %
Rh step=0%
Speed max=5
Speed min=1
Smart controller settings (during lights on).
Lights on=06.00am
Radiator on= below 20c
Radiator off= above 21c
Smart controller settings (during lights off).
Lights off=00.00am
Radiator on= below 18c
Radiator off= above 19c
VPD aim=0.6-1.2
DLI aim=22-30
EC aim=0.8
PH aim=6.2
Fri 12/1/24
#1 (Day 22)
📋 Turned pot 180 deg
Sat 13/1/24
#1 (Day 23)
📋 pot is getting lighter, prob water tomorrow.
Sun 14/1/24
#1 (Day 24)
📋
💧💧💧💧💧💧💧💧💧💧💧💧💧💧💧💧
Method= manual
Feed= veg nutes
Total volume made=12L
Neutralise=0.1ml/L
Silicon=1.0ml/L
Calmag=1.0ml/L
Terra grow=2.0ml/L
Roots=0.2ml/L
Easy Ph down=0.2ml/L
Volume=2L
Ec=1.7 PH= 5.8/6.0
Time=4.30pm
Runoff.
Total runoff=60ml
Ec=4.98 PH=5.3/5.5
💧💧💧💧💧💧💧💧💧💧💧💧💧💧💧💧
Mon 15/1/24
#1 (Day 25)
📋 turned pot 90 deg.
Tue 16/1/24
#1 (Day 26)
📋 opened up the plant.
wed 17/1/24
#1 (Day 27)
📋 removed 1st 3 fingered fan leaves.
Installed the drippers.
🚿 foliar sprayed (cal-mag 5ml/L)
Turned pot 90 deg.
Thur 18/1/24
#1 (Day 28)****
📋 H=30cm D=43cm DLI=25.2
💧💧💧💧💧💧💧💧💧💧💧💧💧💧💧💧
Method= manual
Feed=Water
Total volume made=10L
Neutralise=0.1ml/L
Roots=0.25ml/L
Easy Ph down=0ml/L
Volume=2.5L
Ec=0.2 PH= 6.5/6.6
Time=7.30pm
Runoff.
Total runoff=15ml
Ec= PH=/ no reading
💧💧💧💧💧💧💧💧💧💧💧💧💧💧💧💧
11.00pm Increased light power from 100w to 120w.
She has grown quite well this week, looking quite healthy. Starting to grow more vigorously.
Back soon.
Take it easy.
Likes
2
Share


@koci263
Follow
growing chem pie was amazing from start to finish, he made beautiful buds covered in resin. Every day it was wonderful to go and see how it blooms.
during cultivation I came across two completely different phenotypes. One had rather more open but very firm buds, but the other was more like a crossbow and also firm buds.
During drying, a little mold appeared on one of the bud, but otherwise everything is fine. after a month of curing, the taste of the smoke was very pronounced.

Likes
16
Share

@eldruida_lamota
Follow
Vamos familia, actualizamos la quinta semana de vida de estas Panty Punch de Seedstockers, salieron 3 una se resiste a tirar adelante, veremos cómo progresan.
Empezamos añadiendo varios productos de la gama de Agrobeta.
Temperatura y humedad dentro de los rangos correctos.
Ya realizaré el trasplante correspondiente a 7 litros.
Vamos viendo cómo avanzan estas próximas semanas.
Agrobeta:
https://www.agrobeta.com/agrobetatiendaonline/36-abonos-canamo
Hasta aquí todo, Buenos humos 💨💨💨
Likes
3
Share


@dvr147
Follow
11-25-2024 - All three plants received 2000ml PH'd tap water with a dose of Recharge and Silica yesterday. These plants are in full on stretch mode now and they're growing rapidly. These three plants are already as tall as the last grow I had and we're not even into flower yet. My expectation is this week all three plants will go into flower. I'm seeing pre-flower on two of the three plants and would expect that all three will have signs by end of tomorrow. The Mystery Seed continues to be pushed in ways the other two have not. I top dressed the Mystery seed yesterday with 3 Tbsp Gaia Green Power Bloom and we'll see if that makes a difference or kills the plant. I suspect it'll be ok. If I do not detect any burning I'll probably treat all three with power bloom next week.
Otherwise, things have been going exactly to plan. There are no blemishes on the leaves and they've been maintaining a healthy green throughout the grow. I'm going to be watering a little more frequently as we get fully into flower AND I'll be ramping up the lighting in the tent to between 600-700PPFD. Should top out between 900-1000PPFD within the next couple weeks.
11-27-2024 - At this point I'm the big worry for these plants going forward as I have a hard time not messing with them. Since these are Autos, I'm only performing necessary defoliation to expose bud sites. As these girls head into flower I want to make sure I have light getting to as many as possible. These plants look very healthy and two of three are in pre-flower while the "Mystery" seed continues to stay in veg but is also an inch or two shorter than the other two plants....and has been topped. All three plants right now are as tall as the last three plants when I harvested so I consider this a good sign. Happy Thanksgiving!!
11-28-2024 - Happy Thanksgiving. Today I'm thankful for sites like this where I've learned so much. This morning, my CO2 levels finally are getting over 1000ppm which can only mean that the exhale bag is working now....took about 3.5 weeks. This morning I watered all three plants each with 2 Liters of dechlorinated tap water PH'd to 6.5. My tent conditions are OPTIMAL @ 75F/60%RH/1.1VPD/1000PPM CO2 and PPFD readings at the top of the canopy at 650 or so. The plants are growing vigorously now and are getting ready to go into full flower. I would expect flower sites throughout by the start of week 6 if not sooner. Its flower time!
11-29-2024 - Plants grew over an inch since yesterday and all three are stretching nicely. The Mystery Seed, which I topped, is a couple inches shorter but coming along nicely. All three are healthy, no bugs, no signs of anything except health. The conditions in the tent are still perfect and I'm feeling very confident in a good harvest.
11-30-2024 - Bumped up the lights this morning to 70% which should yield around 700-750 PPFD. Watered Granite Runtz and Frosted Cherry O's 2 liters each but the Mystery Seed was still a little wet so I'll water that one tomorrow. Its still not in flower so water uptake is a little less. CO2 levels continue to hover around 1000ppm and I've bumped the humidity down to around 50-54% since they're heading into flower. I also top dressed both the Granite Runtz and Frosted Cherry O's with Gaia Green Power Bloom.

Likes
24
Share


@3lementa1
Follow
This is the 8th week. Thursday will be 9 weeks of 12/12. Some trichs are amber. They just added a good bunch of girth over the past few days, but most of the pistils are red now. The rest of them have been dropping leaves consistenly but the canopy remains full so they must be putting out more leaves.
I just flushed to 80% runoff and found out that I had 1200ppm. I just got an ec meter but my last reading said closer to 600 so idk what happened there.
I flushed until I had runoff ppm of about 150. Now they're back in the grow tent. I don't want to keep assaulting them with my microscope. I think they're ready. Just gonna let them settle another day or two to dry out a bit.
I took one small branch off the small Wedding Cake plant on Thursday and I've just been watching it dry on my counter. It's been 5 days and the stem snaps but still leaves a fiber connecting. I put it into a small jar with a 64RH thing. I just want to try it. It already smells amazing.
The leaves on the big CBD Blue Shark plant are going really yellow and some other colours are starting to come out as well.
The buds all fattened up and got more frosty again. I was worried they were foxtailing but they got more calyxes underneath the peaks and have been making more of a pyramid shape. They're really close to peak. Harvest day will be March 17 or 18.
March 17 1023pm chopped and hung after lights off all day. RH was 65% before I chopped and 50% after I closed the window and cut the plants off the saturated pots. I did a wet trim to prevent mold. The buds are sticky af. Gonna hang them to dry for 7-9 days before curing in jars :)
March 18 : checked the RH when I woke up and it's chilling at 45% 😎
March 19 : just checked to see how they were drying. There are seeds in every plant. RIP
I'll update when I put them in jars and again a few weeks later for final review. Overall it was a good grow despite the rocky start and a good introduction to the mainline technique and my new grow space. Next grow I should have everything pretty well dialed in.
March 23
They were hanging for 3 days. Rh was around 45, then spiked to 65 overnight when I forgot to turn the fans back on. Temp was high at around 26.they felt wet after 2 days, and bone dry after 4 days. The stems still didn't snap but I put them in jars anyway. A day later, jar RH was 50%. I burped all the jars and there was a smell from the new jars. I took all the weed out, washed out the jars, and did a dry trim on the weed.
One of the Wedding Cake plants must have gone hermie. I didn't see any bananas and didn't even realize there were seeds until the very end. The seed pods looked just like calyxes while the plants were growing. Many of the nugs are unusable. Under the sugar leaves are just layers and layers of seeds. Some weren't hit that badly. The CBD Blue Shark is much better off but still has some seeds.
I'm trying to stay positive. It's a bit of a shock though. I'm anxious to try the finished product. If the flowers at least taste good and have a good effect, all is not lost.

Likes
Comments
Share

@DerTim
Follow
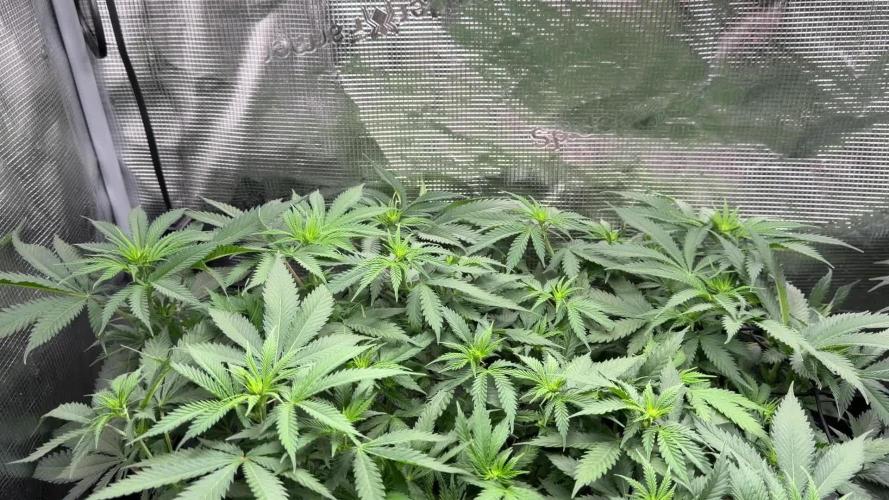
Okay, Freund ich hab mich doch dazu entschieden, dass ScrOg Netz schon einzusetzen da die White Runtz so ungewöhnlich weit in der Blüte ist, und ich glaube, dass von ihr nicht mehr allzu viel kommen wird Sie scheint irgendwie Automatik Genetik abbekommen zu haben oder aufgrund von irgendwelchen Bedingungen dazu getigert worden zu sein zu blühen. Schaut euch den Unterschied zwischen den beiden an. Schon spannend für den achten Tag Blüte 🌸 euch viel Erfolg bei eurem Projekten und bis nächste Woche 🌳❤️

Likes
1
Share


@RezaM
Follow
Everything was going well in the first week, but unfortunately, a mistake caused stress in the plant. The distance between the lamp and the plant was too short. This week, I gave the plants a small amount of root growth stimulant
Likes
34
Share


@Bluntblazer66
Follow
Feb 8th
Starting to learn how to grow with the new system
I have had a couple of learnings so far
1 The PH level is getting to high by the time it’s in the autopot from the res being keep below 6.0
I try to keep the PH in the res around 5.7
By the time it’s in the plant trays it is testing to be around 6.5 and above.
So I’m trying to work that out
Also started LST this week