The Grow Awards 2026 🏆 


Processing
Likes
Comments
Share
@Wicked_Stix
Follow
The grandaddy black is looking happy. Will be switching them to flower in a week or less. I gave them a flush and fresh nutrients. The humic acid really makes a huge difference in the uptake of nutrients. I am at about half dose on nutrients compared to what I would have to feed without it.
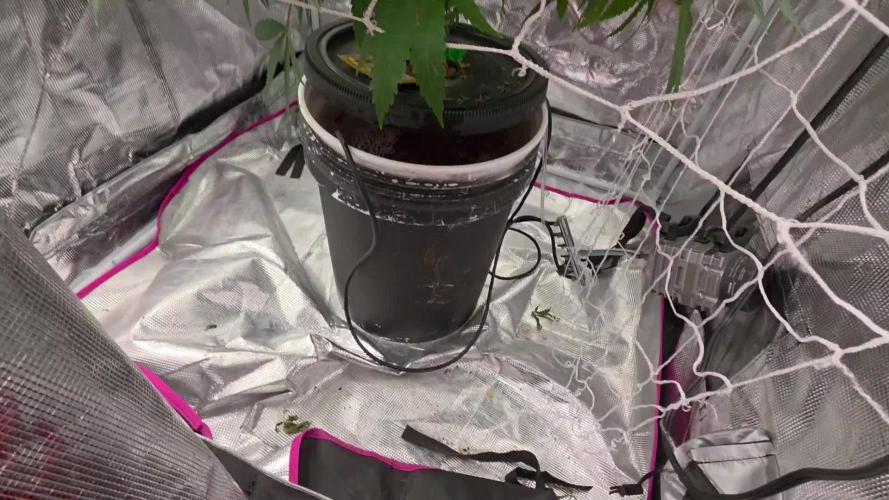
Winter is approaching and bringing the low humidity with it. All of the humidifiers I have tried either dont work or I have to constantly refill the tank. So I decided to use my redneck engineering skills to throw this humidifier together. It holds 4 gallons of water and she pumps like a freight train. I have dubbed her the Steam Queen. I got 2 cool mist foggers that put out about 400ml per hour each and used some things I had around to make them a little float. Added an old computer fan to force the mist out through a 2 inch pipe. She won't win any beauty contests but she pumps out plenty of cool moist air. I also upgraded my exhaust to a variable speed for more added environmental control. Just going to do a little more training over the next week then try to make some buds.

Likes
37
Share
@Aedaone
Follow
The temperatures, humidity, and watering volume(if measured) in grow conditions are all averaged for the week. The pH is soil pH. Any watering done by me is well water which is 7.6 pH and 50° F. Any listed nutrients are ml/gallon of water to be fed.
Day 1 we have high temperature of 91°F with mostly sunny skies. I watered 2-3 gallons from the hose.
Day 2 we had a high temperature of 90°F with clear, sunny skies. I watered 2-3 gallons from the hose.
Day 3 we had a high temperature of 97°F with mostly sunny skies. It was a scorcher. I watered 2-3 gallons twice today from the hose.
Day 4 we had high temperature of 95°, but it felt like 102°. Skies were partly cloudy. I watered 2-3 gallons twice today.
Day 5 we had rain the previous night and early morning. We had cloudy skies, with high temperature of 81°F. I did not water today. I added 50ml blood meal to each pot spread evenly on top of the soil.
Day 6 we had a high temperature of 87°F and mostly sunny skies. I watered 2-3 gallons.
Day 7 we had partly cloudy skies and a high temperature of 86°F. I watered 2-3 gallons each pot
This week was a success. These girls really began to fill out. We've got another month ish til flower begins so I expect these to be monsters.


Likes
62
Share
@nonick123
Follow
Día 15 (04/11) Las plantas se muestran esplendidas después del 1er riego e introducir la 1ª Bio Tab! 😍
Subo a DLI 35
Día 16 (05/11) Las plantas se muestran espectaculares y radiantes!
Un color verde intenso y sano! 😍
Día 17 (06/11) CBD Auto 20:1 #1 tiene un crecimiento increíble!
El resto tiene un desarrollo perfecto para sus días 17 días de vida!
Día 18 (07/11) Mudanza y riego!
Las plantas se mudan al armario definitivo de 60 x 120 cm por varios motivos:
- CBD Auto 20:1 #1 está empezando a tocar las paredes del armario pequeño
- CBD Auto 20:1 #2 ha tenido una ventilación menos adecuada que sus compañeras, ya que el ventilador quedaba justo encima de ella, y el flujo de aire era inadecuado
Esto ha provocado que la maceta de CBD Auto 20:1 #2 no se seque a la misma velocidad que el resto. Espero que no afecte a su crecimiento
- Las plantas pasan a tener dos lámparas a su disposición (230W + 100W) ajustadas con el regulador al 60%
- Mantenemos DLI 35 tras varios ajustes (tener 2 lámparas simultáneamente es más complicado de ajustar!)
- Colocamos dos ventiladores oscilantes para que el flujo de aire sea adecuado dentro de la carpa
Riego: 4 días después del 1er riego, las macetas se muestran "ligeras" excepto CBD Auto 20:1 #2 por la falta de ventilación comentada arriba
Riego con 750 ml de H2O RO excepto CBD Auto 20:1 #2
Día 19 (08/11) Las plantas se muestran esplendidas y creciendo mucho!
Día 20 (09/11) Macetas poco pesadas, pero no lo suficientemente ligeras para regar
Día 21 (10/11) Introduzco la 2ª Bio Tab a 5 cm de profundidad, lado izquierdo
Riego con 750 ml de H2O RO a todas excepto CBD Auto 20:1 #2 que se riega con 1 Litro
Aplicación foliar de Boom Boom Spray 5 ml/L. Aplicar justo después de encender la iluminación.
Aplico LST a CBD Auto 20:1 #2
💦Nutrients by Bio Tabs - www.biotabs.nl/en/
🌱Substrate PRO-MIX HP BACILLUS + MYCORRHIZAE - www.pthorticulture.com/en-us/products/pro-mix-hp-biofungicide-plus-mycorrhizae
"GDBT420" 15% DISCOUNT code for the BIOTABS Webshop https://biotabs.nl/en/shop/
Likes
9
Share
@Carlos1844
Follow
The girls are fine, they have beautiful green leaves, beware of over-feeding. We water with clear water every other time. Do not hesitate to leave a comment :)
Likes
4
Share
@Kominest
Follow
So this week I decided to defoliate and lollipop . I wanted to wait like atleast some more days but I got bit worried they get to bushy and crowded and now I still have the same feeling afterwards but it looks a bit better to me . Next week I will add some bloom booster with every watering . I removed my humidifier now and think about some more and heavier defoliation and lollipopping but I will let them relax now . Super silver haze is stacking up insane while orange bud is forming some more pine like buds I’d say at this point . No big smells except the classic weed smell coming from the super silver haze . She’s qualifying for a solo grow for the next time for me like the gorilla cookies from fast buds wich I also liked a lot


Likes
9
Share
@0JuJu0
Follow
Planted in 25L Pot with pre-fertilized compost soil and a little bit of coco, perlite and little pieces of old woodsticks.
As a fly protection i use spiders and there web to solve this problem because thats the only one i have. So when you see in my tent, webs and the little bit of soil on the bottom what keeps the tentfloor dry and is also good for the spiders, please keep that in your mind.
Likes
54
Share
@GarciasGarden
Follow
(DAY 42)
This week has been nothing but crazy growth on the ladies part!! I’ve actually been adding super small amounts of (GH) flora grow/micro/bloom into my waterings still running my dry amendments in coco and using a little cal-mag as well! So here’s what they look like 3 days from my last post ! ..OHH and washing machine number 5 that I thought I lost to nutrient death came back! After leaving her in the corner of the grow tent and giving her nothing but water her leaves on top are bright green can’t wait for it to be my lil private stash ! Anyways We’re getting really close to switching to flower and getting that smell I’ve been waiting for 👃🏼 Enjoy the video guys! And again any feedback would be awesome.


Likes
29
Share
@Lazuli
Follow
The pistils are still white
Shes very fat now and i think 2 weeks before harvest, i feed less now at 400ppm and starting ripen feed when half of her pustils turned brown
August 18 (mid this week)
I flushed her completely and fed ripen untill runoff got in the 200ppm.
Now she is ready to finish
Harvest will be at august 28th
Likes
15
Share
@Lazuli
Follow
Amazing if u got high humidity this strain does not mold at all
(I had good ventilation ofcourse)

Processing
Likes
23
Share
@NewbieDoobies
Follow
Just potted all these straight into watered soil last week and they’ve all sprouted the photo is 3 weeks old and the plant at the end in the video is a 9 week old auto smoothie which I really messed up ha

Likes
5
Share
@sinfantas
Follow
Lindo crecimiento 3 semana de floracion
debo comentar que tienen muy poco olor creo que se fue perdiendo porque estoy seguro en la semana 5 vegetacion era un olor muy fuerte no se si es uno de los fertilizantes que bajo el olor
comienzo a usar PK de B.A.C


Likes
21
Share
@DreamIT
Follow
-Sponsored by:
AMSTERDAM MARIJUANA SEEDS-💡VIPARSPECTRA💡-💐GREEN BUZZ LIQUIDS💐-🛠️WEDRYER🛠️
🏁18/6 hello growerz, with today I start the resumption of diaries on GD. I have 13 new genetics in germination and as many diaries. I start by putting the seeds in water for 24 hours, after a day I will put the two seeds in two different jiffies, one with humic acid from greenhouseseeds and the other with just plain water. Get comfortable and follow the updates 😉👋🦄
19/6 The seeds were divided and placed in two different jiffies, one with humic acid and one with water only.
21/6 after another 24 hours in the dark the jiffies were moved under the lamp. let's start the dances!
23/6 the seed in the jiffy with only water is sounted earlier and waits to sprinkle, the brother in the humic acid makes me wait longer
24/6 the seed with humic acid is not preparing to rise, but we are confident
25/6 still no second seed, I start to worry :(
30/6 now I begin to lose hope for the unborn even if I hold on and wait 24 hours before looking for the seed in the jiffy. instead I present a new personal logo, created by a friend who I cannot name for obvious reasons
__________________________________________
Personal advertising (contains affiliate links)
__________________________________________
🦄 Professional site, exceptional genetics for over 25 years and a new and very nice mascot!
✅https: //bit.ly/Amsterdammarijuanaseeds
__________________________________________
Did you know that Green Buzz Liquids fertilizers are 100% vegan? A complete line of products ready to give the best to each of your plants! Visit the site and see my journals to see how they work 🦄
🤯 And with the code "dreami t" you will immediately receive a 15% discount on your purchases
✅https: //bit.ly/GreenBuzzLiquidsPro
__________________________________________
👀 Are you looking for a good lamp to start with? 👀
🌞Viparspectra has something more than the others, take a look at their site.
⏩ Use "GDVIP" for an extra discount or "DREAMIT3" for an extra 5 %% discount
👀 Search for it on Amazon
✅Amazon USA: https://amzn.to/30xSTVq
✅Amazon Canada: https://amzn.to/38udUVe
✅Viparspectra UE: bit.ly/ViparspectraUE
✅Viparspectra USA: bit.ly/ViparspectraUS
______________________________________________
🌈 Tired of blowing on your weed hoping it dries quickly? Check out the Wedryer website! You will find a well-made accessory that will help your weed dry in just 8-10 days without the annoying risk of finding mold or other annoyances! (no affiliate links)
✅https: //bit.ly/Wedryer_
______________________________________________
📷🥇Follow the best photos on Instagram 🥇📷
https://www.instagram.com/dreamit420/
Backup
https://www.instagram.com/dreamit4200/
🔻🔻Leave a comment with your opinion if you pass by here🔻🔻
🤟🦄💚 Thank you and good growth 💚🦄🤟

Likes
2
Share
@Daidai
Follow
The plant has been drinking and growing faster then i expected. The plant has gotten away from me but its nothing i cant get back on track once I figure out where to start defiliating. Ive been enjoying the mess I created lol.
Likes
6
Share
@Mismatas
Follow
MI MEJOR COSECHA HASTA AHORA, 425 GRAMOS EN SECO DE FLORES PERFECTAMENTE MANICURADOS, DUREZA DE COGOLLOS, INCREIBLE EFECTO Y SABOR, INCREIBLE PRODUCCION, GRACIAS SENSI SEEDS !!!!!

Likes
12
Share
@ChiTaN
Follow
I am very proud of this girl ! Despite the fact that she is younger than the rest by two weeks, she caught up with her friends in height and even surpassed them :) The giant fan leaves are surprising 😃

Likes
24
Share
@Aleks555
Follow
Our journey with the Sticky Orange XXL Automatic strain from Sensi Seeds has come to an end, and it’s time to share the results! 🌱 This was an easy-to-grow strain with no major issues. However, out of three seeds, one didn’t sprout, and another one, although it sprouted, grew abnormally: in just two days, it stretched 10 cm with a thin stem that broke. But our main girl grew from the start with a thick stem and sturdy branches. After 76 days, we harvested 110 grams. 💪
This strain pleasantly surprised us with its strength and unique flavors. The aroma is unforgettable, and the effect is absolutely explosive – it literally pins you to the couch. It feels like you’ve been shot out of a cannon and are flying into space! 🌌 The effect is strong and long-lasting. After just one hit through a water bong, you start considering a second one, but after a minute, you’re thankful you didn’t take it! 😅
Of course, Xpert Nutrients played a big role in our success – thanks to them, we grew such powerful and tasty buds. Thank you for the great results! 🌟 #StickyOrangeXXL #SensiSeeds #XpertNutrients #GrowDiaries


Likes
1
Share
@Frampt
Follow
its 56 days. 4-9 days till harvest (i hope) filled the buckets with water and ph stabilisator
