
Likes
Comments
Share


@Sider79
Follow
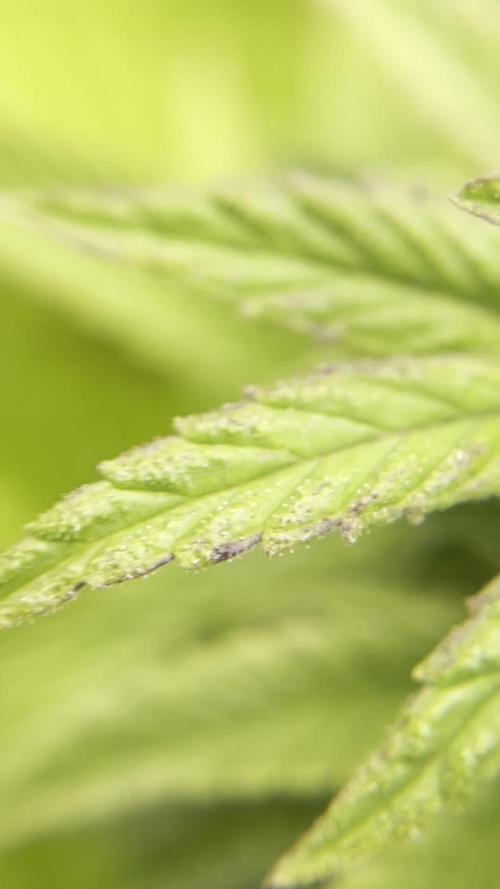
Didn't get the potential. Very happy with the look of the finished product , so far I'll give this particular strain 9.3. In it's best stability this would be my go to phenotype cause of the overall potential and ratio. Very happy for it being my first auto grow experience now I'm hooked. Definitely would suggest this bad girl for a first time auto enthusiast and for the connoisseur . I've been looking into that Purple Lemonade by Fast Buds and very excited to purchase also that Black Berry cause they remind me of the Blue Dreams large flower to plant ratio. For now and my next auto grow will beee......🥁
FB.Six Shooter,
VS.Super Xtra Skunk,
Seedsman's Northern Lights
Seedsman's Limited Edition
Strawberry Cheesecake.
I decided to do multiples this time because of finish times I feel will never be the extact either way
I'll try to get a rotation going .😃

Likes
62
Share


@balansa
Follow
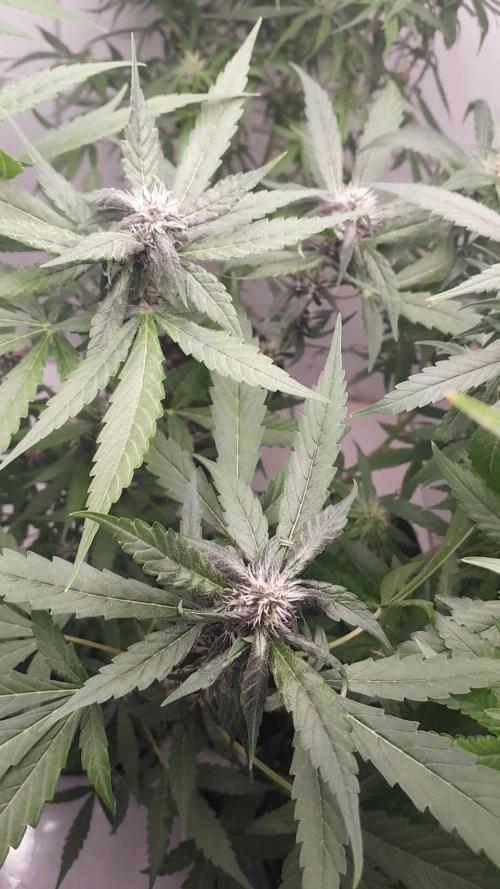
she is a monster she is not going to be harvested :) i thing she will need 2 weeks more )) she is smth!!!!!


Likes
7
Share


@Car1bGrow
Follow
The growth cycle was pretty short, realizing that I planted it late in the year with the sun setting way sooner. Overall great experience
Likes
37
Share


@RickJames_Mcdank
Follow
Well this week I start to increase Green sensation and Alga bloom. She is responding really wel to it and fatten up really good. She is getting frostier and frostier. So far so good.

Likes
38
Share


Likes
4
Share


Likes
136
Share


@Qutro
Follow
Hi there,
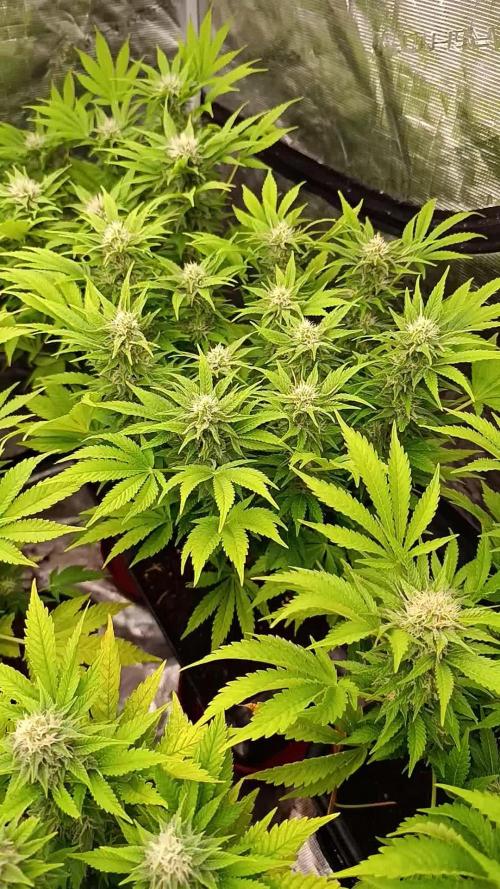
We have definitely seen some good growth since last update. Patient and the longer veg period paid off as many bud sites appeared. I mean 4 plants filled the whole 120*120 tent.
Genetic traits are starting to show. Marshmallow Og has thicker stems and has grown taller during the stretch while Candystore RBX is a much darker green has a medium-long internode spacing. It was necessary to use a plant trolley to lift the Candystore for a uniform canopy level. The tallest Candystore is 67cm, Marshmallow 73cm.
On day 21 after the switch to 12, I took off a bunch of leaves to get more light on the lower nodes. At first I was afraid I had gone a little too far because I had also done an aggressive lollipoping on these girls. Next week we'll see how offended they are haha.
They became hungrier and we started supplementing their watering with the Booster. The above mentioned units except the Silica are grams not ml.
They drink like 5 litres every four days. Running the light on 80% , 44 cm above the canopy.
Par.: 540-770 Ppfd
Vpd.:1,05-1,2kpa.
Happy with how everything looks, until next time.🌱🌞


Processing
Likes
3
Share


@Grownewgenetics
Follow
These amazing genetics are after 12 hours on the ground, comming out these strain's cream caramel auto is the second faster after the dark devil auto.
Likes
46
Share

@Purrple_Haze
Follow
Purple Hints & Tent Transitions 🌸🌿
Week 4 of flower has arrived for my big Red Hot Cookies, and she’s now two weeks into her new life under the LED lights. After battling unpredictable weather out on the balcony, I made the call to bring her inside—and honestly, I don’t regret it one bit. The transition may have slowed her down a little, but it’s a much safer bet than letting her face another round of rainy chaos. 🌧️☔
She shares the tent with two Divine Seeds autos from the contest, so the light schedule remains at 16/8, which isn’t ideal for photoperiod flowering—but I’m curious to see how she handles it. Despite the slightly delayed bud development, I’m seeing some beautiful structure forming and her leaves have started to take on those signature purple hues. 🍇💜
Here’s her care routine this week:
🔸 Fed with BioBizz Grow, CalMag, BioBizz Bloom and BioBizz Top-Max
🔸 Effective Microorganisms to keep the soil biology strong
🔸 A dose of homebrewed compost tea midweek
🔸 Silica foliar spray was stopped when flowering began
🔸 pH: 6.5
🔸 EC: 2.2 mS/cm
I also did a round of lollipopping on day 21 (July 10th), and she’s stayed nice and airy underneath since then. Still waiting for the upper buds to really start packing on weight, but there’s plenty of time—and I’m loving the color shifts and her elegant frame.
Let’s see what the next few weeks bring as she fully settles into bloom under the tent glow. 🌞✨
Likes
1
Share


@Elguacho420
Follow
Buenas a tod@s....🏻♂️ Bueno esta fue la última semana de gestación para las red cookies gelato, es verdad que crecieron mas q las otras dos variedades, se adaptaron bien y todo, aun así eh tenido algunos fallos con esta variedad, manchas en las hojas y hojas malas q tuve q quitar, eh pasado mal rato al verlas así medias pochas pero con un poco de cariño y mucha fe se van a poner muy bien y fuertes, es verdad q ahora están mejor q antes, pudo haber sido algo estrés, x el cambio de temperatura o la comida imagino, cuestión q ahora se las ve bien. 🙌🏻Tanbm controlando mucho la temperatura en esta época del año q hace más frío, lo demás van muy bien... Ahora cambio de siclo y vemos a ver q tal van... Buen fin de para tod@s y buenos humos... 💨💨😎👍🏻 🇦🇷🤝🏻🇪🇦


Likes
12
Share


@CanarianGrow92
Follow
Week 6 for the Oreoz from Super sativa seeds club.
Amazing strain, the buds are hard as rocks and explode in trichomes. This strain is a must! I hope super sativa seeds club add this one to their catalogue after they completely finished their testings.
Likes
4
Share


@1guy2plants
Follow
Lots of LST this week, and as always, from the moment I turned on the autopots, they start flying. The recover on the topping and fimming is finally over, from now on I'll just give them another week and flip. the jungle is coming


Likes
13
Share


@Robeeriegenetics
Follow
Week 15 going good…not bad …switching to bloom nutrient… and did a ton of defoliating to loosen up the canopy hopefully they won’t grow too much when I flip them to 1212 in a week I’ve seen these plants three times the size. Hopefully I can stunt that growth during the initial stretch by switching to Bloom nutrients early. Defoliating a week before flipping. I may decide to top them more but I probably won Do I have to type here for it to be green this is crazy. I’ve done more than a paragraph now at this point it’s kind of weird that it’s not green be green what the hell can it still not be green
Likes
30
Share


@TragicTerps
Follow
We are currently working on the recovery from the initial stem split on plant A. She's almost all the way recovered with only a slight crack still remaining. Hopefully that split and the overwatering won't disrupt or stunt the growth of this lady too much.
For the sake of experimenting I pulled off the first set of fan leaves that were stunted and discolored in hopes the energy used by the plant will be directed more towards the new growth.
Plant C is looking great and loving the increased Par values from our light as we are getting good vertical growth and the main stem is looking super healthy.
As we get through to the end of the week we will start transitioning plant A for LST in the form of tie down. The fan is currently applying pretty good stress to the already week stalk of plant A, but she again is almost 100% closed back up. The whole purpose of the fan is to strengthen the stalk with very light stress.
Plant C will see LST beginning in 2 weeks as she is 1 week behind Plant A.
Many people ask me about the LL on the guage and I will remind everyone, I live in a high climate desert around the 49th parallel so it's cold and dry. When the tent is closed I usually see rh values near 40% where the normal RH (Relative Humidity) is around 10%. It's just dry here. That said the grow community here and the quality of bud is top shelf as it gets. Rh doesn't necessarily impact the end results.
End goal is still 360g harvest out of this tent we will see if we get it.

Likes
15
Share

@420DeepGrow
Follow
📆 Semana 6
El cultivo avanza con fuerza en la fase de engorde. Los cogollos continúan apilando cálices y empiezan a ganar densidad, con erizos cada vez más formados a lo largo de las puntas.
La resina aumenta de forma visible y las flores comienzan a mostrar más carácter, mientras la canopia sigue trabajando de forma uniforme aprovechando bien la luz.
Las hojas grandes siguen cediendo parte de su energía hacia las flores, algo natural en este punto del ciclo, mientras los aromas empiezan a intensificarse dentro del armario.
Seguimos creciendo fuerte 💪!

Likes
4
Share


@homerjgangia
Follow
Mikromachine Auto
Brand Kannabia
Genetics Northern Lights x (AK-47 x Critical) x Ruderalis
Flowering Type Autoflowering
Flowering Time 10-11 weeks from seed to harvest
THC 15%
CBD Low
Height (Indoor) 60-70cm
Height (Outdoor) 85-150cm
Yield (Indoor) Up to 600 gr/m²
Yield (outdoor)Up to 600 gr/m²
Sex Feminized
📆 23.04-25 (Day 1 )
💬 just borned
💦 6.5
🍼 0.5L
📏 0.5cm
🌡️ 25c°
📆 24.04-25 (Day 2 )
💬 👽
💦 6.5
🍼 0L
📏 1cm
🌡️ 25c°
📆 25.04-25 (Day 3 )
💬 👽
💦 6.5
🍼 0.5L
📏 1cm
🌡️ 25c°
📆 26.04-25 (Day 4 )
💬 👽
💦 6.5
🍼 0L
📏 1.5cm
🌡️ 25c°
📆 27.04-25 (Day 5 )
💬 👽
💦 6.5
🍼 0.5L
📏 2cm
🌡️ 25c°
📆 28.04-25 (Day 6 )
💬 👽
💦 6.5
🍼 0L
📏 2.5cm
🌡️ 25c°
📆 29.04-25 (Day 7 )
💬 end of firstweek... Amazing💪👽
💦 6.5
🍼 0.5L
📏 3cm
🌡️ 25c°
Equipment: Unbeliveble
Masterseeds 100W (veg-bloom)
Masterseeds growbox 0.25x0.25
Plagron (Veg & Flower)

Likes
7
Share

@Jardineiro_Br
Follow
Todas as 3 plantas estao bem , uma ja esta bem colorida as flores , outra esta começando a dar um tom roxo e uma ficou bem pequena e está com os pestilos bem brancos e ficou pequena , foi com certeza uma falha que cometi no preparo do solo. Perdi duas plantas por isso.


