
Likes
Comments
Share


Likes
13
Share


@Kenpowarrior
Follow
She is still small but lots of flowering. Her ruderalis side is really showing. Have to watch out for that next time. Not so much fan of that. 🤔 so no🌲🌲🌲for me 😔 but love her shape.

Likes
35
Share


@McBubatz
Follow
3. Woche Wachstum startet wieder tip-top, Fatty ist gesund und munter und wächst wie wild 😁.
19. Tag
Wurde bisschen entlaubt, nur unten 4 Fächerblätter. Oben die großen soweit möglich unter die Seitentriebe gebogen.

Likes
30
Share

@valiotoro
Follow
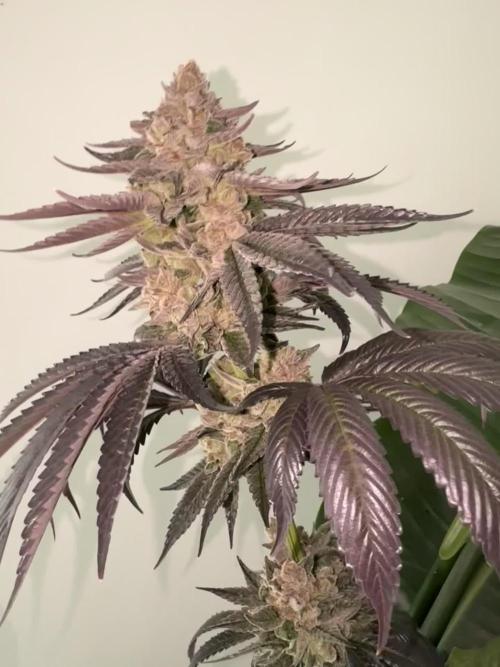
The buds are huge, absolutely covered in trichomes everywhere.
This is the kind of strain I keep for special occasions only.🔥🔥

Likes
6
Share


@Burneracct
Follow
Mine stretched pretty severely and never recovered so I pulled it.
My dads seems to be doing very well though! A bit overwatered but 🤷♂️🏼

Likes
47
Share


@Jimmy89
Follow
Decided to give these a few more days, was planning to chop them on day 56 but I’ll let them go till day 60. They have had over a week with no nutrition, just water. Photos taken day 59 of flower, they’re coming down tomorrow!!

Likes
28
Share


@GodZilla_Owner
Follow
The Bruce Banner showed a nutrient deficiency (potassium) this week.
I have just learned that organic fertilizer should always be applied at 100% of the recommended rate and not at 50% as I did in the first few weeks.
However, it doesn't look too bad yet and I have now increased the fertilization.
Next I discovered 2-3 small pollen sacks on S.A.D. #3 & #4... I don't know why both plants were slightly twittering but I simply removed these bananas :-)
We will see!

Likes
16
Share


@willertex
Follow
📅 D85- 26/01
📜 Only fresh water from now on. She's not yet ready - 3-4 days more I think.
✍️ 0.1 EC
♒ 6 pH
🌊 10 L
📏 95 cm
📅 D90- 29/01
📜 Not yet Ready
✍️ 0.1 EC
♒ 6 pH
🌊 10 L
📏 95 cm
Likes
31
Share


@Chubbs
Follow
SuperSativaSeedClub
PurplePunchOGauto
Week9
What up grow fam. Weekly update on these three. Two of the three seem to be growing good as the other has been fighting me since the beginning. I decided this week to transplant from 1gal pots to 3gal to see if maybe it'll fix my leaf burning issue. Over all super excited to see what the next couple weeks will bring. All in all Happy Growing

Processing
Likes
30
Share


Likes
3
Share

@Thedibber
Follow
Bottom left is the badazz og cheese she's smelling dank and hopefully gives me some dank medicine


Likes
12
Share


@Budking420
Follow
Hope you are enjoying this diary it's really been enjoyable & a learning experience. This is why I always run different soils. I from now on will probably be running autos with less soil but using mostly fox farm ocean forest. It's been a blast watching these plants thrive under ac infinity controls. The only thing I can mess up is watering and feeding (easier than you think). I'm also finding autos can deal with less light intensity overall. I hope you are enjoying these diaries please use them as a tool to learn from any mistakes I have made. Check back next week to see just how fast she buds. & remember its 4:20 somewhere!!!!!!
Likes
15
Share


@XperencdGmanXG
Follow
looking good the 2nd week into flower, added some more uptake acids and some bloom top dressing along with a banana tea recipe that I have recently created. Seems to be working well. I basically just added banana peels to my microbe tea brew and I no longer use fish shit because it is high in N and that is what we really do not need right now.
Likes
1
Share


@DmbTexasRanger
Follow
Don’t want to scrog I’m hoping weeks 2-3 with rhino skin will give more confident stalks. I have bamboo stakes ready as a back up

Likes
27
Share


@Reaper
Follow
90. something grams dry bud. grown in a 9liter pot with soil and 1:3 perlite.


Likes
29
Share

@Reaper
Follow
at this week u can compare the stems and bush in the videos, keep in mind this is my first hydro grow and i messed the PPM and PH a few times..
also snapped a whole branch of the hydro plant around week 4.
still the hydro plant looks bigger and fatter stem. lol
Processing
Likes
35
Share


@Ganjagrandaddy
Follow
Hi all. A good week of growth for the Amnesia haze lady despite the crazy temps in the UK the past few weeks. 31°c heatwaves daily have had some negatives on the recovering 2 girls . The amnesia is a huge plant now for my room dimensions and I would love to see the results from an outside grow of this amazing strain. I took a lot of lower growth tips out and wish i could have took clones as they were such good strong examples of her. I cannot sing her praises enough at this point and she jas took to her training with no issues at all. I am hoping to give them another 2 weeks max which will give the other plants time to recover and get some size back on.
The Red hot cookies has remained yellow except a few lower growth points , she had some very damaged roots from the root rot and temps but still managed to add some height and side growth. The tank changes and new res mix should hopefully support her to keep the new roots healthy and growing.
The Sweet Afghani Delicious has been trying really well to keep herself growing too. Her ability to overcome such a hit with root rot and keep going gives me a positive note on this strain. Her recovery is expected soon now so should give her a good chance to harvest well.
Overall I am happy with what is here following such a difficult attack by heat and pathogens. Watch those res tanks in the heat above 21°c guys , pathogens thrive at this temp !.
Likes
11
Share


@TheSlimeGrows
Follow
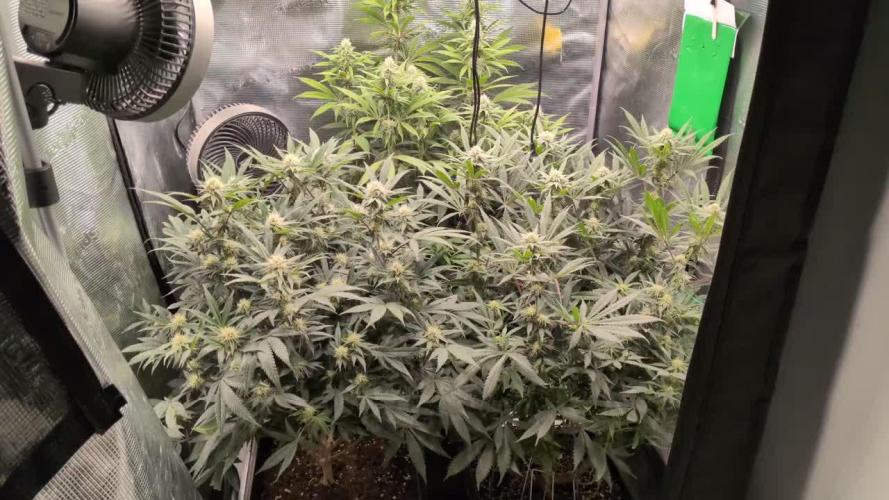
2 plants left after I harvested the first one that flowered earlier than these 2 - got 94g dry off that plant but the nugs are pretty loose.
seeing some issues on the top-most leaves on plant 3, the bigger one. plant 1, the smaller one also has some nute issues but I'll stop feeding for a week or so and see if that helps. Buds seem to be fattening up tho.
Also seeing some weird brown/rust spots on plant 3 at the top-most leaves on the buds, almost like they're drying from the inside out. Anyone help with that? is it Potassium Toxicity!
