
Likes
Comments
Share


@Growshh
Follow
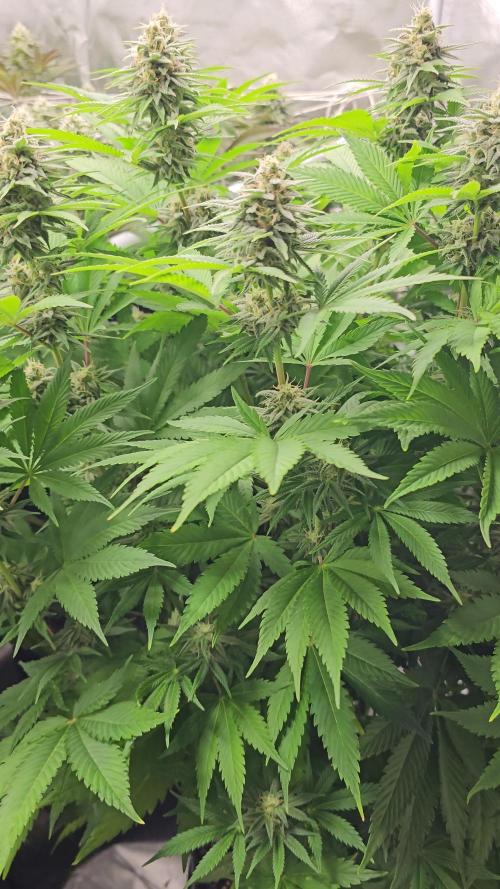
Final day of Veg. 12 hours darkness starts tonight! Watered with hybrid bloom, calmag, silica and brix to start it off.

Likes
6
Share


@JeyGanesha
Follow
3° settimana di fioritura sta sviluppando dei grandi fiori profumati,e compatti come poche

Likes
5
Share

@AsNoriu
Follow
Day 94. Girl is okeish, in my eyes she recovers from all stress and packs some mass. Had WPM allert on other plant, so extraction fan is on max.
Happy Growing !!!

Likes
8
Share


@BuzzingHighAbove
Follow
Critical Purple Kush was an effortless grow. The plant beside her got spider kites but they didn't like that CPK so much. She had a few show up on lower leaves, never any webs. I treated for them twice and they never resurfaced.

Likes
1
Share


Likes
12
Share


@CookieSadpralad
Follow
3 are really flowering, one is pre flower and one is still veg. Still all are quite healthy, no signs of seeds so lucky I seemed to have culled the male soon enough. The one I topped once is 2.3m but the ones I topped twice are only about 2 meters and started flowering first. Finally it is sunny and the plants are loving it. Looks like I have another 4-6 weeks of flowering before I can harvest
Likes
23
Share


@Bread_n_Buds
Follow
The first harvest of the spring session is ready: we are talking about the very fragrant, very resinous and delicious Fruit Punch Automatic naturally branded Zamnesia.
** We remind all users that we are growing two plants per strain, one worked with techniques and the other left to grow freely and beautifully to preserve its speed.
Description // This plant has not had any techniques applied, it has had few human interventions but always useful. Letting the plant grow does not mean "doing nothing" but you must always keep an eye on the color of the leaves, clean up the bottom while the plant grows and let only the last 20 cm or so of each branch flower. Of course there is a range of possibilities in this but know that the more stuff you leave below the more the stuff above will be weakened, so learning to find the right balance between cleanliness and size of the buds will make you better growers. I am very satisfied with this plant and one is coming with the main lining, low but with very large flowers and even more beautiful than this one.
Trichomes and Maturation // We made a careful observation in micro at 10x (and 10x x 1.6) and we noticed a good percentage of amber trichomes, the majority milky and few transparent, for us it is a great time to harvest. I do a lot of day use so I do not want to over-mature the plants, oxidize the THC and make them become relaxing. Even the best sativa matured on palal becomes more indica. I need to control the day use effect a lot.
Fertilizers and Soil // We used the organic line of Plagron fertilizers the whole time, all the recommended additives and the unfertilized and organic Pro Mix soil. Calculate everything according to your needs on the site ------ https://plagron.com/
Fertilizers are available in convenient packs on the Zamnesia website
--------- https://www.zamnesia.io/it/11457-plagron-easy-pack-natural.html
One of the best in recent years with a very high THC level
------------------------------------------------------------------
https://www.zamnesia.io/en/10965-zamnesia-seeds-fruit-punch-automatic.html
Zamnesia Brief Description // Sativa strains are very rewarding to grow, but their long flowering times and greater susceptibility to disease and over-fertilization can make them a little more difficult to manage. Additionally, their imposing heights are less suitable for indoor use and can attract unwanted attention when grown outdoors. However, with the arrival of Fruit Punch Automatic, growing sativa strains at home has become a lot easier. Combining Skunk #1, Haze and ruderalis, Fruit Punch Auto is 70% sativa dominant and produces up to 21% THC, along with a delicious blend of terpenes. Additionally, it can be grown indoors, outdoors and in greenhouses. With its bright shades of green, golden pistils and thick layer of resin, Fruit Punch Auto buds always have a great appeal. When you smoke her, you will be amazed by her flavours, aromas and effects! As the name suggests, Fruit Punch Auto boasts delicious tropical aromas reminiscent of banana, pineapple, mango and citrus. When you open the jars you will feel like you are in a tropical cocktail bar on an exotic beach. Fruit Punch Auto will delight your palate with pungent fruity notes followed by light notes of Skunk and spice on the exhale. Within minutes of taking the first hit, this powerful sativa will stimulate your mind, leaving you in an energetic and carefree state, ideal for morning or daytime sessions as well as social settings or creative pursuits.
The whole world of growing and much more is on Zamnesia: just take a look at the site and you will find "all the best that nature has to offer" in various shapes and colors.
---------------
www.zamnesia.com


Processing
Likes
13
Share


@DoDrugs420
Follow
NOTE: THE COUNTING OF DAYS STARTS FROM THE DAY THE SEED STARTS ITS PROCESS, IN THIS GROW DAY 1 WAS THE MOMENT THE SEED GOT INSERTED INTO THE EASY START (i do not recomend this method for experienced growers, but higly recomend it to unexperienced growers that might accidentally damage their seedling's new root as they move them from the germination zone into their next or final pot, with easy start you can just pick up the small cube of soil and place it inside the next pot GENTLY).
NOTE: For strain informations, soil recipe and nutrient's stock please do check "Germination Week" as you will find all the information there. (Do not replicate nutrient dosages as these are higly variable depending on the conditions within the grow room or tent, so you may end up damaging or killing your plants even if they are the same strain from the same breeder).
--------------------------------------------------------------------___________________________________________________________-----------------------------------------------------------------------_____________________________________________________________________----------------------------------------------------------------
03/11- All watered with 950ml of water per plant with dilluted nutrients in the rates specified above.
Light schedules changed to 19/5 and will be further extended to 20/4 to allow for more hours of heat from the lights as we progress into winter.
06/11- All watered with 1,4l of water with 2ml/l Bio Rhizhotonic + 0.45ml/l of Ancient Earth.
Lollipoped.

Processing
Likes
38
Share


@ETgrows
Follow
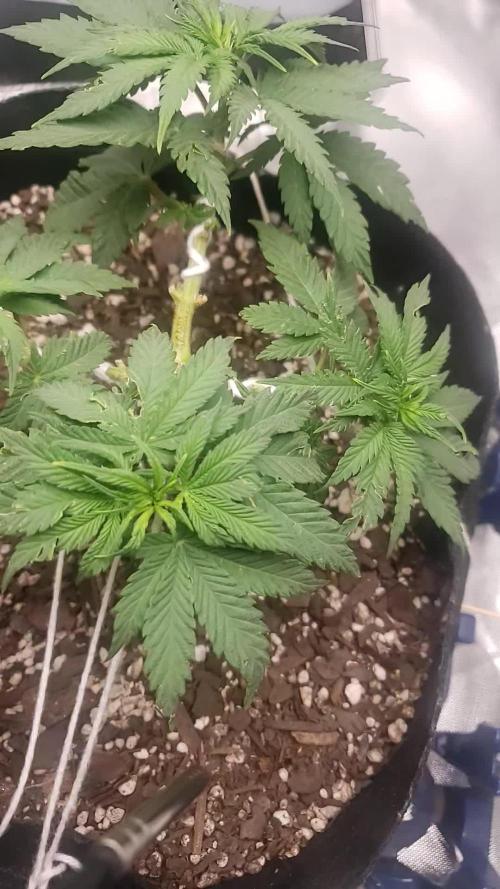
They seem to be looking great I’d appreciate any feedback on what you guys think
Likes
10
Share


@Ieiogrow94
Follow
Eccoci qui!!!
Tutto procede per il meglio, i pistilli sono usciti e ora si va dritti dritti alla maturazione, NE VEDREMO DELLE BELLE!!!
Che dire se non WOW, due bimbe in salute e dalle quali mi aspetto molto!!
Reagiscono molto bene alle fertilizzate e già emanano un odore veramente incredibile, OTTIMA GENETICA!!
Grazie a tutti per il supporto ❤️🔥🌲


Likes
21
Share

@Caertner
Follow
Die Ernre war mal der Wahnsinn!
Also erstmal: Ich habe 3 Paar Handschuhe verbraucht. Normalerweise reicht ein, max. zwei... hier war ich kurz vor Paar 4!
Harzig wie blöd, überall Trichome! Was aber bei dieser Genetik auffällt:
Es bilden sich sogar Blüten auf den Sonnensegeln!!! Bei ganz frechen Genetiken habe ich mal Trichome auf den Stielen und Blättern... aber nicht ganze Blüten.
Safe the fan leafs, they carry!!!
Der Geruch ist zu 100% Skunk... aber mit einem kleinen Twist. Die Cherry kommt schon etwas von der Farbe durch.

Likes
30
Share


@valiotoro
Follow
Let’s jump into 2025 with the Papaaaya Cookies🍪🌴
100% germination rate as always with Fast Buds💥
24h in a glass of water with hydrogen peroxide💧
See you next week😎
Likes
55
Share


@nonick123
Follow
Día 64 (17/03) Riego con 500 ml H2O EC 0,45
Estamos en el día 36 de floración y empieza a mostrar una senescencia preciosa 😍💥
Día 65 (18/03) Riego con 500 ml H2O EC 0,45
Día 66 (19/03) Dia 39 de floración y la senescencia empieza a avanzar en algunas hojas. Unos colores preciosos!
Riego con 150 ml H2O EC 0,45
Día 67 (20/03) Riego con 500 ml H2O EC 0,45
Día 68 (21/03) Riego con 500 ml H2O EC 0,45
Día 69 (22/03) No riego (vacaciones)
Día 70 (23/03) No riego (vacaciones)
🚀 Khalifa Genetics - https://khalifagenetics.com/product/lemon-blanco-v3/ @khalifa.genetics
💦 BioTabs 15% DISCOUNT code "GDBT420" biotabs.nl/en/shop/ @biotabs_official
🌱Substrate PRO-MIX HP BACILLUS + MYCORRHIZAE @promixmitch @promixgrowers_unfiltered
💡2 x Mars Hydro FC1500 EVO Led Grow Light (2024 NEW FC 1500-EVO Samsung LM301H 150W LED) - https://marshydro.eu/products/fc1500-evo-led-grow-lights/ - https://www.amazon.de/dp/B0CSSGN5D8?ref=myi_title_dp

Likes
17
Share


@VovaFarms
Follow
Cheese creates an unforgettably pungent aroma and distinctively cheesy, skunky taste and It induces a very potent mind and body high. I am very happy with this strain and i would recommend it to everybody.
Likes
25
Share


@eldruida_lamota
Follow
Bueno familia ya finalizamos con el proyecto de las Runtz de seedstockers, son una cepa bestial.
La verdad que el secado muy bien 9 días en Malla y a los botes, 40% humedad y 21 grados es la temperatura ambiental que han tenido en el secado, aparte deshumidificador enchufado 24 horas al día.
En resumen la cepa es muy fácil de cultivar, el germinado se me resistió igual es complicado el germinado pero el resto es simple resistente fácil de alimentar pienso que es rápida los tricomas ya estaban hechos y se me hecho el tiempo encima.
Por lo demás de miedo os la recomiendo.
Gracias a Seedstockers, Agrobeta y Mars hydro, sin ellos este proyecto no sería igual 🙏.
Agrobeta:
https://www.agrobeta.com/agrobetatiendaonline/36-abonos-canamo
Mars hydro:
Code discount: EL420
https://www.mars-hydro.com/
Buenos humos 💨💨💨

Likes
62
Share


@Reyden
Follow
Riparto con un altro ciclo only @Fast_Buds con 2 loro Fast Flowering e 2 Auto Fiorenti di cui una CBD 20:1🙌la SF2000 lavora al 60% della sua potenza con una distanza dalla punta delle piante di circa 30cm. Ieri ho effettuato la miscelazione del terriccio con il 4 componenti Dogma Organics che è una miscela di diversi guani, letame bovino, rocce triturate meccanicamente, ceneri arboree e febacee tritate, acidi umidi e fulvici, kierisite e fosfato nat. Tenero,


Likes
4
Share

@ohcibi
Follow
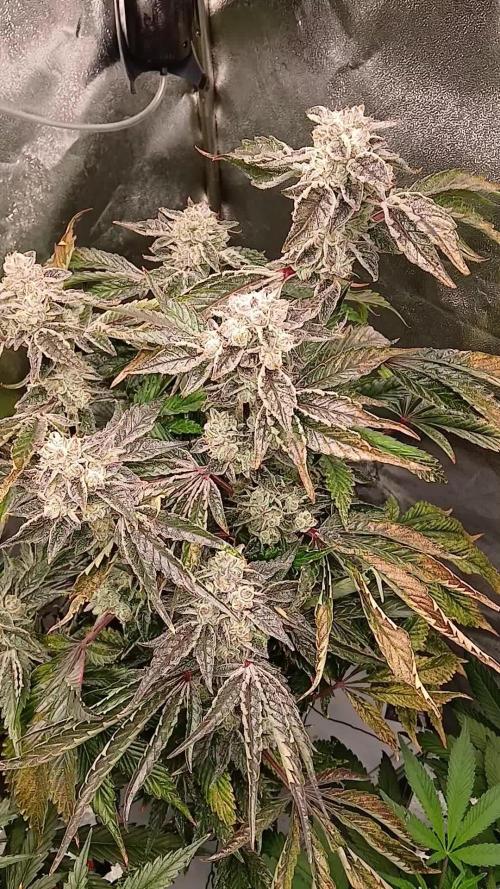
Second to last week started. Those damn gnats came back although I thought I had fought them. But I’m not to worried at this point. Put a few more yellow cards up and that should maintain the number low to none.
Smell is great. And it really is sticky icky. Trichome coverage and density is very strong. Those are remarkably long trichomes. I’m excited how the bubble hash from the trim will turn out.
Fingers double-u'd to not have happen anything bad in the final two weeks now.