
Likes
Comments
Share


@Roberts
Follow
Northern lights grew great in the Pro-mix medium size hp bag. She had a struggle through the grow. She really wanted more space to root. I did have a salt build up towards the end of vegging. A few minor issues beside that. She did fill the little Spider Farmer tent. She turned out great. Thanks again Pro-mix, Medic Grow, Spider Farmer, and Divine Seeds. This wasca slightly different style grow compared to my usual methods using the Pro-mix. I really enjoyed it. 🤜🏻🤛🏻🌱❄️
Thank you grow diaries community for the 👇likes👇, follows, comments, and subscriptions on my YouTube channel👇.
❄️🌱🍻 Happy Growing 🌱🌱🌱
https://youtube.com/channel/UCAhN7yRzWLpcaRHhMIQ7X4g.

Likes
63
Share


@TheBudWhisperer
Follow
Medium: 🥥🥥🥥🥥
Coco remains as the most manageable medium in our arsenal. It’s simplistic, similar to conventional soil but as a nutrient neutral medium, it’s also much more tailored to the growers preferences in terms of feeding. It’s best attribute is excellent drainage and consistency - a lot fluffier than soil which definitely translates to faster growth rates. It’s a damn shame that this particular grower forgot the cardinal f$&@king rule when it comes to any grow - always water to run off and pay attention to the strength of the feed in relation to the plants growth stage. If we had followed these basic principles we wouldn’t have run into the serious late stage burn that almost toasted the whole plant. On the flip side of that, coco flushes out incredibly well and if not for this attribute, the whole grow would’ve been an unmitigated disaster.
Method 🎚️🎚️🎚️🎚️
Uggghhh - hindsight f$&@‘n sucks sometimes. Best descriptor for how we grew this girl - imagine having the dinner table set with your finest china, a bottle of the most expensive red wine you can find, a brand new top-o-the-line BBQ, and then burning the absolute f$&k out of a $40 prime rib. That’s exactly how this grow feels...
We were looking to scrog it the whole time and this went perfectly. The plant helped quite a bit with longer than expected internodal spacing. This allowed for a really even canopy/bed of buds. Again though, the vipar 450w (truly a 200w~) shit the bed mid veg. And we needed a replacement. Went with a 100w SpiderFarmer QB. While I truly am pleased with the purchase I do believe that we should’ve upp’d to the 200w model (or 2, 100w models) to achieve a similar output and result - @silverback_guerilla was right on point with the lighting advice (*again). Given the reduced yield it just feels like the nodal spacing and overall bud quality may have suffered with the reduced power. This, despite the better light spectrum and overall coverage in general. As an aside - an additional Fixture is now on the way😉👍. Worst part about this is we’ll never really know what the true limiting factor actually was due to the nute burning. Probably the single most stupid, rook mistake I could’ve made was not watering to runoff.... just too much shit going down in the world (and in life) these days and I started to treat the grow like it was on auto pilot🤬🤬🤬. The whole worlds a cluster f$&k right now so why should the grow be any different right? 4/5 for the method, losing1 point because the grower is a lazy moron.
Yield/Harvest🌴
The final numbers are better than expected, 2.26oz of usable bud. Not overly fluffy and not overly dense. Not glazed in frost but not without a little shimmer. All around mediocre unfortunately. What it coulda? Shoulda? Woulda been??? Note sure 🤔 but we’ll take it👍.
On a more positive note - There was still another new addition to our grow cycle. This time on the back end. Everyone knows that trimming just plain sucks. When we’re spitt’n out 3-4 plants every few months, the exercise is a dreaded necessity if were gonna maintain the vast array of choice that we’re used to🤙👌. The whole process just for one plant can take hours unless you have help. We prefer to wet trim too so for those that don’t require a commercial size trimmer, the only option to save some time is a trim bowl. We bit the bullet, dropped the cash on one - have NOT been disappointed at all! Not only did it cut the chop process from 2-3 hours down to a mere 45 minutes, the buds literally came out rack ready. There was no need to do any touch up trimming and the bud photos you see are as-is, right out the bowl🤩. Really coulda used this last fall and I would recommend this to anyone who chops more than a handful of plants per year. Just awesome and worth every penny!👌🤙👍
At times like these, we should all just be thankful that we still have both the opportunity and ability to grow our own✌️. Best be to all of you and stay safe out there.👊
Background
For those not in the know, SSSC has been around for 40 years. Out of Amsterdam, they are the 2nd such breeder to market their genetics worldwide and can lay claim to the origins of their beans better than most (if not all) others.
They’ve produced here an indica hybrid cross of M33/Friesland Indica with an elite clone of Lava Cake. We’re hoping to encounter one of the purple phenos but only time will tell. She’s supposed to be super strong too and not for the faint of heart 👍.
We’ve been wait’n on this one awhile and she’ll be getting individual treatment in the small cab - 5gal. Coco w/perlite and the typical nute regimen. Advance props for the best packaging I’ve ever seen (although you may need to be an 80’s baby or older to truly appreciate it😉). See week 1 photos.

Likes
3
Share


@Deweythesavage
Follow
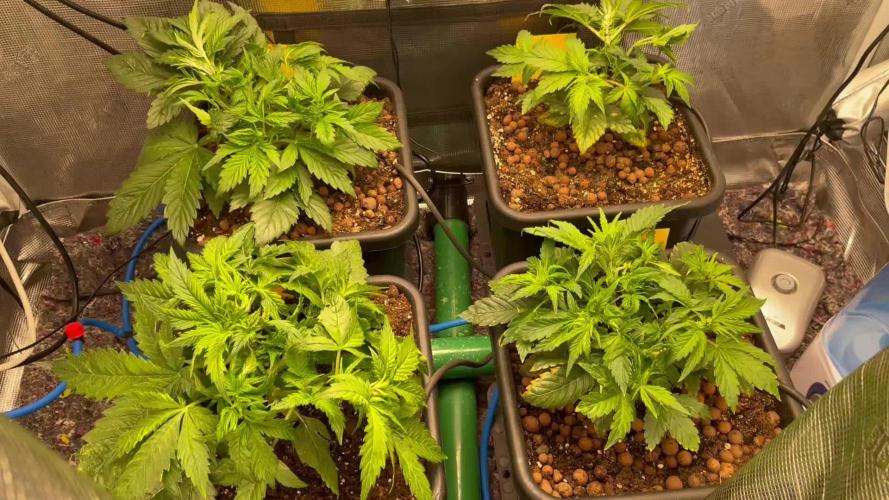
My first indoor grow, some plants are more than 6 weeks in but 6 weeks ago I got the light. There are a lot of plants but some might be male, I already pulled a male and a hermie. Im Kinda hoping they're all female but I wouldn't know what to do with so many. I want to flip to 12-12 but I still don't have an inline fan or carbón filter and I'm scared itll smell strong. Will try to and more pics.
Likes
13
Share


@Farmerskr
Follow
Este es el avance finalizando la 3ra semana, tienen 21 días, ahora les haré una defoliación y una poda de bajos, van maravillosas las Gorilla Banana de BSF Seeds. Planeo pasarlas a floración el día 31 para cerrar con 30 días de vegetación.
Saludos
@farmer.skr 🤙

Likes
2
Share

@LST420
Follow
Week 4 The main stalk of the OG Kush so far seemed to have survived after it snapped for at least 50% and I applied duct tape around the stalk as an emergency measure. 🙏


Likes
12
Share


@Siriuz
Follow
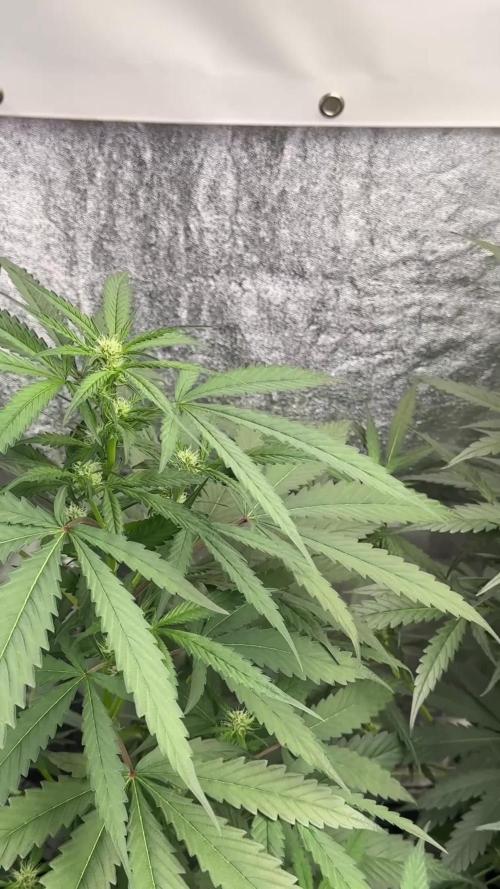
Pretty good pretty much doing great
Hopefully we get to see this lady hgge very soon, we gonna continue to feed her well and make her feel comfortable at all times
Likes
5
Share


@HowtoBubatz
Follow
The Lemon Haze Auto is cruising along nicely this week! 🌿
She’s looking healthy overall and seems to be fully focused on doing her thing – stacking up trichomes and building those buds.
The smell is really starting to develop too – classic hazy notes with a zesty lemon twist in the background 🍋🔥
Likes
27
Share


@Dedon
Follow
Hi !
10 days after i switch to 12h/12h they have grown well. Trunk are massive and roots are impressive, they continue to grow, i guess they'll colonize the whole tank ^^
Plants are drinking a lot and EC is lower everyday. i have to add nutrient 2 or 3 times a week to increase EC to 1.2/1.3 again ( EC drop from 1.3/1.4 to 0.8 in 2 days )
I wonder if I had to cut some leaves to light the bud sites because there are lot of leaves ( it's a dense bush )
What do you think ?
See you next week 🙏


Likes
13
Share


@smokeycropping
Follow
Regando solo con agua ya 2 semanas, sin necesidad de lavado el cultivo probiotico me lo permite las flores ya están maduran y se nota una densidad enorme en las special queen y en las green gelato de royal queen seeds


Likes
43
Share


@Wicked_Stix
Follow
Not much to report. Just chugging along. Been on 12/12 for a week but I consider it veg until I see pistils on the tops. Waiting for them to start popping pistils.
Nutrients per gallon
.5 tsp maxigro
.25 tsp maxibloom
.25 tsp armor si
.5 tsp calimagic
.1 tsp 90/10 humic/fulvic acid
Ph to 6.0
Pumping nutrients 24 hours
Likes
20
Share


@Ganja_Victoria_Aus
Follow
Amazing, incredible smell. Purple Red Sativa 😎🔥 is drying quickly due to cold temperatures and low humidity. Conserving that flavour 💯❤️🌈🔥


Likes
18
Share


@Grower_Of_Persia
Follow
week intel:
we getting close to end of ripening , this week i raised drought , Nitrogen and E.C stress by feeding them 2 times per week and raised e.c to 3 to cause real stress that will help increase terpenes production
stresses :
Nitrogen deficiency Stress by removing the fertilizers that has N in them
Drought stress via removing one meal in week
high E.C stress around 1.7 and the other feeding day 3.0 , 2 times a week
feeding:
no more Nitrogen
i feed them 2 times this week with this order :
day 1 : i feed them high with Bio-Bizz Top-Max + Feeding Booster about 850 ppm - 1.7 e.c to cause a medium e.c stress.
day 3 : no more feeding this day
day 5 : i feed them very high dose of Bio-Bizz Top-Max + Feeding Booster around 1500 ppm - 3 e.c to cause high e.c stress
guide of the week :
be patient in the last weeks, never hurry for harvest because its the time of ripening in last 2 weeks you should let plants to do their work
last weeks of ripening is the time to break the limits we should cause 3 stresses as i said above Nitrogen stress , Drought Stress , E.C Stress

Likes
6
Share


@Mr_nugs_lover_David
Follow
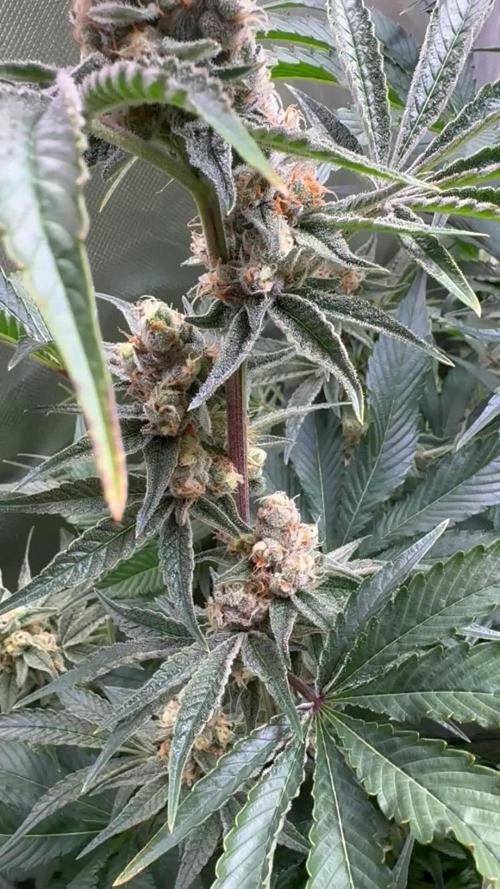
It was such a nice experience for me with this strain, first time ever growing her, she had a little bit of long internodes and thought she wasn't gonna be very productive, however the nuggets are so so hard and compact and the quality is just brutal, doesn't even look like she's s been outdoor grown, I love this strain for the rare strong smell like very sweet and floral with that strange diesel notes mix the sweet tones, I would love be growing her my whole life, I definitely will keep growing this lady FOR SURE!. thank you so much and hope you guys enjoy! 💎🙏🔝💚


Likes
3
Share

@DogDoctorOfficial
Follow
🚂 Cash Express – Pheno B
Week 6 | Elegance in Every Leaf
Welcome back to another chapter of the 8×8 Adventure!
One of the greatest joys of a phenotype hunt is discovering that every plant has its own personality.
Some demand attention with explosive growth.
Some race toward the finish line.
Others quietly develop into something special without ever asking to be the centre of attention.
Cash Express Pheno B belongs to that last group.
She isn't the tallest plant in the room.
She isn't the fastest.
She isn't trying to compete with anyone.
She's simply growing exactly as she wants to—and every week she becomes a little more beautiful because of it.
🌿 A Plant That Speaks Through Her Leaves
One of the first things that catches my eye every time I visit this lady is her foliage.
Large, perfectly formed seven-finger fan leaves stretch confidently toward the light, creating one of the cleanest leaf structures in the entire room.
They're deep green.
Healthy.
Symmetrical.
Every leaf almost looks like it was carefully drawn before nature decided to build it.
For me, leaves tell an important part of a plant's story.
Long before the flowers reach their full potential, healthy foliage tells us that the engine driving everything underneath is working exactly as it should.
And this engine is running beautifully.
🌼 The Flowering Story Begins
Flower development is now becoming more obvious throughout the canopy.
The first clusters of white pistils continue multiplying, and what were small pre-flowers only a week ago are now beginning to resemble true bud sites.
This is one of my favourite stages of cultivation.
Every day the changes are subtle...
Yet when you compare photographs from one week to the next, it's amazing how quickly those tiny flowers begin stacking into something much more impressive.
She's still directing a good portion of her energy toward the final stretch, but you can already see that her priorities are changing.
Less focus on producing new branches.
More focus on building flowers.
Week by week, she'll continue shifting her energy away from growing taller and toward creating the dense blooms we're all waiting for.
🍃 Sometimes the Best Training Is No Training
This week has been wonderfully uneventful.
No defoliation.
No heavy training.
No major adjustments.
Just a little gentle leaf tucking whenever a fan leaf decided to shade a developing flower site.
I've learned over the years that these early flowering weeks are often best approached with patience rather than scissors.
The plant is making enormous hormonal changes during this transition, and I prefer disturbing her as little as possible while she settles into her new rhythm.
Sometimes growers feel the need to do something every day.
Sometimes the smartest decision is simply to observe.
This week, observation was more than enough.
🍽️ Feeding
The nutrition program continues supporting both the final stretch and early flower development.
This week's feeding included:
• Terra Bloom – 1.9 ml/L
• Pure Zym – 1 ml/L
• Sugar Royal – 1 ml/L
• Power Buds – 1 ml/L
Along with small pH adjustments using Lemon Kick and pH Plus whenever necessary.
Unlike some of her sisters, Pheno B isn't asking for much more just yet.
A few older leaves have begun naturally giving back some stored nutrients, but nothing suggests she's under stress.
It's simply another reminder that plants recycle energy where it's needed most.
For now, she's happy.
And so am I.
🌡️ Environment
The flowering room continues running exactly as planned.
• Day temperature averaged 29°C
• Night temperature remained around 25°C
• Relative humidity averaged 60%
• Solution temperature stayed close to 24°C
• Root zone remained near 21°C
• Atmospheric CO₂ averaged 639 ppm
With stable environmental conditions and consistent feeding, the plant can dedicate nearly all of her energy to flower production instead of constantly adapting to changing conditions.
Consistency is often the secret ingredient behind healthy gardens.
📸 Behind This Week's Photos
This week's photographs highlight something I absolutely love about this phenotype.
The architecture is incredibly elegant.
The internode spacing is balanced.
The branching remains clean and open.
And those beautiful seven-finger fan leaves frame every developing flower site almost perfectly.
The close-up shots reveal fresh pistils reaching confidently into the light, while the full-plant photographs show a structure that should provide excellent airflow throughout flowering.
There's a calm confidence about this plant.
She isn't trying to impress anyone.
She simply looks comfortable being herself.
Sometimes those are the phenotypes that surprise you the most by harvest day.
🔍 Looking Ahead
Next week should mark another exciting step in her journey.
I expect the stretch to begin slowing as the flowers take over as the plant's primary focus.
Those small clusters of pistils should begin stacking together, giving us our first glimpse of the colas she'll eventually produce.
We'll continue with the same philosophy:
Minimal interference.
Gentle leaf tucking when necessary.
Careful observation.
And letting the plant decide the pace.
Sometimes the best growers aren't the ones who do the most.
They're the ones who know when to simply watch nature do what it has perfected over millions of years.
💚 Thank You
A huge thank you to everyone following this adventure.
Whether you've been here since Germination Week or you've only just joined the journey, your encouragement, conversations and shared experiences continue to make these diaries incredibly rewarding to create.
Special thanks to:
💚 GrowDiaries for bringing growers together from every corner of the world.
🌱 Zamnesia for providing the Cash Express genetics that continue revealing a unique personality with every passing week.
? Plagron for supplying the nutrition program supporting every stage of this grow.
💡 Future of Grow LED for delivering powerful, consistent lighting throughout the flowering room.
🌿 TrolMaster for maintaining the stable environment that allows every phenotype to perform at its best.
And finally...
Thank you to every grower, supporter, silent reader, friend and curious visitor who stops by these diaries. Every comment, question and discussion makes this project even more enjoyable to share.
I'll see you all next week as Cash Express Pheno B continues writing her own story—one leaf, one flower and one beautiful week at a time.
Growers Love, and happy growing everyone. 🌱🚂💚

Likes
5
Share

@Kokothegrower
Follow
Heute Blütetag 45 seit Umstellung auf 12/12
Alle Pflanzen sind sehr gesund und riechen wunderbar.
Die Papayana werde ich vielleicht sogar als Mutterpflanze behalten, eine herausragende Genetik.
