
Likes
Comments
Share


@Ciocanna
Follow
The plant started drinking a lot of water, but the flowering is going well. 🌸

Likes
9
Share


@NordicCropz
Follow
Day 8, this pheno got a rough start.. Very weak stem, it was flopping way over 90° at the weakest point, so I chose to try to support it with something. All I can do now is hope it survives.

Likes
2
Share


@eldruida_lamota
Follow
Que pasa familia, vamos con la cuarts semana de floración de estas Gorilla Cookies Fast Flowering, de FastBuds.
Agradezco a Agrobeta todos los kits obtenidos de ellos 🙏.
Hasta aquí veis que llevan buen progreso y el color que se marcan es espectacular.
Vamos al lío, el ph se controla en 6.2 , la temperatura la tenemos entre 22/24 grados y la humedad ronda el 50%. El fotoperiodo a 12-12. Estás próximas semanas veremos cómo avanzan.
Agrobeta:
https://www.agrobeta.com/agrobetatiendaonline/36-abonos-canamo
Hasta aquí todo, Buenos humos 💨💨💨

Likes
10
Share

@Thedibber
Follow
2 strawberry banana didnt make it sadly so ive replaced with 2x fast buds - Strawberry gorilla. Hopefully they work out but will be 7-10days behind the 2 poundcake and 1 sour crinkle
Update
2x strawberry gorilla have been planted into their forever home Poundcake 1 is on day 3 and Poundcake 2 and sour crinkle are day 2 😁
2x Strawberry gorilla just had their helmet taken off 😂 15/07/25
From what I can tell spiderfarmers PPFD maps are way off. Even ramping up the power to 50% at 12" has only just stopped them from reaching for the stars... I wondered why my last turned into jack and the beanstalk 😂 Its a shame because the lights promise much more than they offer. I was planning on buying a full spiderfarmer setup and godknows how many more in the future but I think they have lost me as a buyer.

Likes
16
Share


@ChewiesGrow420
Follow
It is day 30 and we are finally seeing some growth starting after a few days of being locked out due to what I believe is from nutrient burn. Won’t go as heavy next top dress. I have ordered a soil ph pen which will be arriving tomorrow so that I can’t test my soil ph and the run off. Until then I have ph'd the water to 6.0 to hopefully stimulate more growth before flower. These plants are very short but stacked! I can’t wait to see how big they are at pre flower. After it’s 3rd week stretch. Reach for the skies bitches! Watering less aswell. I believe iam overwatering because I go days without seeing these girls. Exhale c02 bag doing well. Resembles mould at the moment. I want to take a moment to thank everyone who’s visited my diary. I hope to bring you great content! Always open to helpful suggestions. Stay tuned!
Day 34 and we are at pre flower. See those hairs comin. Now they all gonna streeeeeetch. Drop a comment, like, or just offer me some advice. We’re all family here ✌️. Doin a little LST now that the space between the nodes are far enough for me to feel comfortable doing so. There was no where to put them no matter how slow I tried haha. Also have each girl in something that resembles the cross face chicken wing from the WWE. Little fan on fan action. It’s like the leaves were meant to stuck together. The knotches in the leaves interlock I mean. I stretch the upper fan leaf to the one directly below it. Opening up both shoots. Hope they made sense lmao.
Likes
11
Share


@SintrexGrow
Follow
Plant is showing fast growing and responded well to my diy setup and diy lights 💪

Likes
16
Share

@TrickzGrowz
Follow
Servus Moin!
Die Pineapple Slush XL macht im Stretch ihren Namen alle Ehre. Ich habe das Gefühl, sie will gar nicht mehr aufhören in die Höhe zu wachsen. Langsam geht die Budentwicklung los. Bin gespannt wie sie mit den heißen Sommertenperaturen klar kommt.

Likes
38
Share


@Aedaone
Follow
This week started of good except for ph and iron. I'm phing feed and water to 6 but my naturally 7.6 ph water is raising ph. I've realized my water and organic soil don't have iron in them. It's keeping these from greening up properly. I do have blood meal in the soil but not enough. I'll be adding an iron supplement next week when it arrives. Until then I'm going to feed a little masses and blood meal with the ph water. I've had a difficult learning curve switching from coco and salts to organic and soil. #2 got topped on day 1. I'm going to clone this top so I'll have this plant for the future.
Processing
Likes
6
Share


@daybreaksky
Follow
topped above 5th node, trying to figure out when to switch to flower, may be another week.
Likes
10
Share


@Barcelona_Farmers710
Follow
Buenas Farmers!
Otra semana más y pasaremos a Flora, esperando a ver si podemos obtener nuevo equipo de @todoGrowled para llevar el verano más llevadero... Después de recuperase de las Plagas empieza coger buen color esto.🍁

Likes
23
Share


Likes
283
Share


@love_2_grow
Follow
FD22 - So...ummm... I forgot to update this diary for days. I even forgot to take pics today before the lights were out, so I quickly opened the tent and snapped a terrible picture. lol
We're off into the fourth week of flower, and the girls are rocking it in the tent. They. Smell. AMAZING! They are the best smelling plants that I have ever grown. It's a pure joy to open the tent.
FD23 - Took a bunch of pics
FD24 - Watered each girl with 2.5-liters of water @ pH 6.3, with 50 ml of EM-1.
FD28 - The end of yet another week and not much to report. I did deploy Green Lacewing larvae to combat the thrips since the predatory mites weren't up to the task.

Likes
2
Share


@Mr_nugs_lover_David
Follow
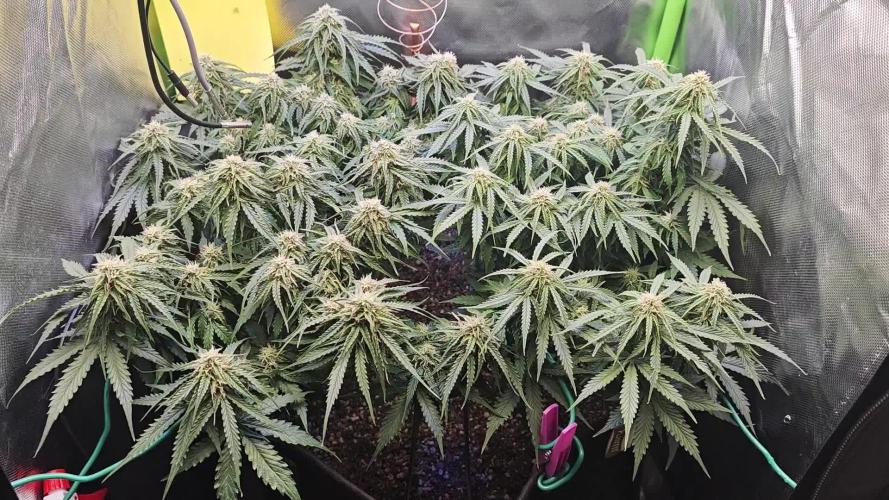
This week went pretty good,she looks very healthy and strong ill force her into flower once she starts the 7th week.

Likes
37
Share


@Cheeba_Inu
Follow
After 1 week of growing, the Blue Dream'Matic is doing well. I am going to slowly increase its nutrient solution strength and lower the lights to dial in some stronger growing conditions. It has been enjoying 1-2 times a day fertigation so I think the coco medium is draining well.
I have included a time lapse of the first week of growth. I am working out the kinks of the setup, so the video is a bit messed up towards the end, but it shows potential that I am going to keep working on!
Day 8: transplanted to a larger pot as a significant number of roots were growing out of the seedling bag.
Day 9: It looks like there has been a cal-mag or root issue affecting the first set of leaves, which grew in while there was a lower nutrient EC. The new growth has not been showing the same issue, so hopefully the issue has been resolved.
Thanks for reading, and happy growing!


Likes
2
Share

@BenandLippisfinest
Follow
Sehr schöne Geste buds. Nicht all zu groß, aber das ist genau was ich für den Cup wollte, normal große, Feste buds voll mit Trichome und Terps die einfach wild sind. Zum Geschmack kann ich nichts sagen, nach der Mary Jane wird es eine review geben
Likes
2
Share


@ryanthegrower
Follow
week 9 is officially done, site calls for 8-9 weeks of flowering time, sadly the one on the right got revegged and has 2-3 more weeks to go. the one on the left however is full of trichomes,almost quartz like, mostly cloudy with a bit of amber, i’m thinking about chopping her this weekend, smell is like if you combined mothballs and sherbet (sounds weird but smells just like it) this grow as been one of my easiest grows so far, all the problems i’ve had with it has mostly been user error (i.e dog stepping on timer and day temps reaching 87)
Likes
6
Share


@starke
Follow
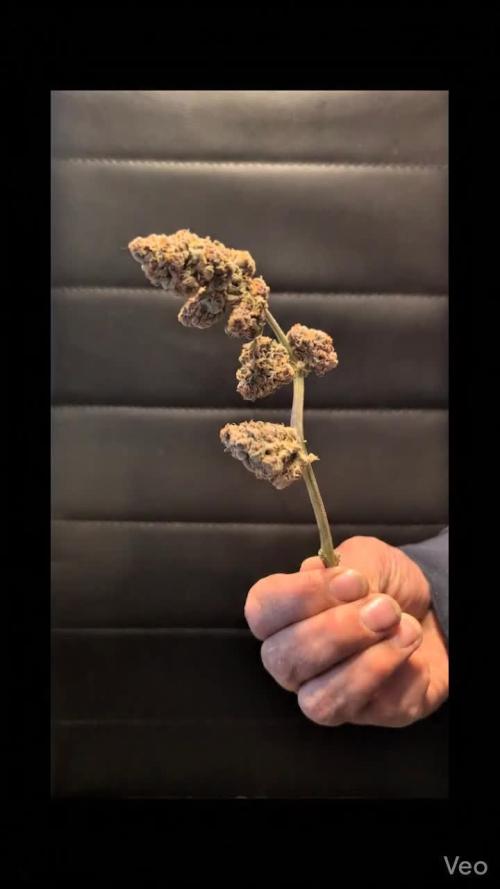
UPDATE - 24th of February 2020 - DRY WEIGHT & LOVE
56g total dry weight, after I gave them a very nice trim. They started curing in glass jars on 19/2/2020 and are currently between 63-68%RH inside. Burping every other hour for couple of minutes.
While trimming some dried buds yesterday, I came across a seed, I couldn't believe it, between 😕and 😆, first time experiencing this, interesting, hopefully she didn't lose a lot of her potency and it only happened late. Learning from this: don't change light cycle. I changed from 18 to 21 hours, thought that was a good idea...
All this aside, I am sooooooo in LOVE WITH HER 😍I have never grown such a beautiful plant, excuse the photo spam, she deserves a stage, at least for me 😉I can't wait to try her properly cured and get to learn her whole taste spectrum with the low and slow dried buds. Some of them will be processed to oil and edibles. If I find time, I might document some more. Until then, happy growing everyone, peace 🙏
Tried 2 different drying methods:
1. Regular hang dry: For 7 days in small grow tent, darkness at 50% humidity & 20°C/68F - she was almost too dry after 7 days.
2. Low & Slow dry: after washing & hang-drying for 4 hours, she went into the fridge for 7 days in a paper bag, followed by several jar tests until she was at a steady 68% outside; She dried like this in the fridge for 8 days. I didn't trim her too much, since I want to preserve everything for oils.
More details:
16. Nov. 2019 - 13. Feb. 2020 - 88 Days - Grown from Seed
Smell of Berries; Pink & Yellow tips; Lots of long curly brown hair; Pink tiny leaf tips on top of buds. I’m in love whooooooooooaaaaaaa.
Chop on 13. Feb 2020 - 461g
Put in vase with PH water for 2 days in Dry Tent
darkness at 50% humidity & 20°C/68F
14. Feb. 2020 Darkness Day 1 - 469g
15. Feb. 2020 Darkness Day 2 - 452g
Total wet - no trim - 452g
Total wet - slight trim - 386g
//Regular dry in tent - 50% humidity & 20°C/68F // 281g with trim went in
Total dry - no trim - 43g
Total dry - trim - 40g
//Low and slow dry in fridge // 96g went in
Total dry - trim - 16g
Check 420magazine for “Low and Slow”-Dry. They are lovely.
Happy day to you all


Likes
1
Share


@ActionJosh
Follow
one of the plants was eaten by snails 😕☹️ i have a spare of the same strain that hatches in pellets
Likes
17
Share


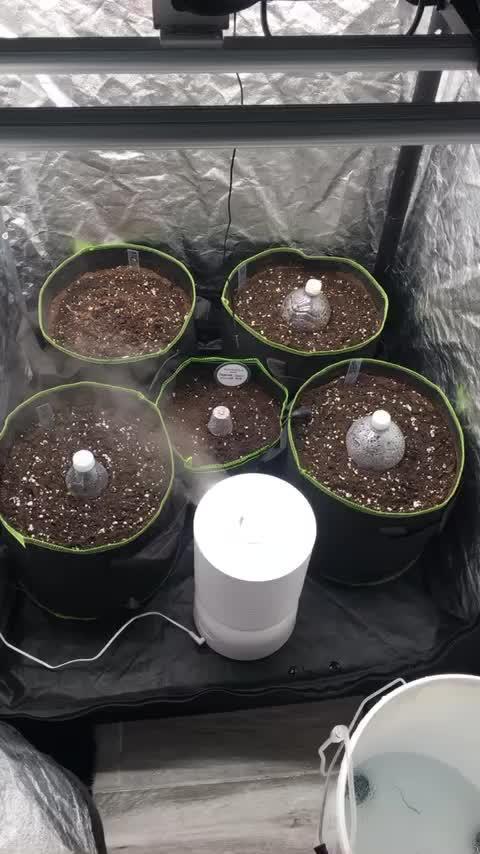
@RDWCGrowing
Follow
Week 1 Day 1 - 8/12/2023
1st Water change Day! Such a special time it is when you remove the little bit of Nutes that you gave them as an appetizer and you give them their first real meal.
Added
39 Gallons of Water to my system
SILICA= .5mil/Gal = 19.5 = 20mil
Root Drip = 1mil/Gal = 39mil
Cal Mag= .25mil/Gal = 9.75 = 10mil
FLoraMicro= 3.0mil/Gal = 114mil
FloraGro = 2.0mil/Gal = 78mil
FloraBloom = 2.0mil/Gal =78mil
ORCA= .5mil/Gal = 19.5 = 20mil
Week 1 Day 2 - 8/13/2023
Everything is looking good the roots are making their way to the water and the new grow is looking nice and green.
Week 1 Day 3- 8/14/2023
Everything is right on track, they are looking beautiful and in the praying position all leaves happily lifting towards the light.
Week 1 Day 4- 8/15/2023
A little worried today her birth Twin the BA I am growing out is looking great and is raised towards the light and this one is just slightly under.. Will keep an eye on Her.
Week 1 Day 5- 8/16/2023
Walked in and the humidity was under 60.... ohh noooooo.. So I added 2 humidifiers to the tent and attached them to my InkBird controller which is set to 62.
Also looking at the roots and she has some poking out the bottom but just not in the water yet.. Luckily we are set for 14 days before next water change so the system will stay stable and her sister already has roots in the water so she should only be a day or two behind.. we will just keep tracking but she is delayed.
Week 1 Day 6- 8/17/2023
Roots in the Water!!! Huston, we have a successful launch. This grow is on!
Humidity was a little low this morning so I refilled the humidifiers. Other than that the temp looks great, the PH looks good, the PPM looks good the plant is in the praying position and all damage from the little drowning from over filling the cloning machine seems to have been fixed. Happy Happy.
Week 1 Day 7- 8/18/2023
Yay.. week 1 in the books, roots in the water growth has started. Everything for growth and environment is looking good and on track, there are a couple of mutations with this Lady will keep an eye on those leaves.
IMO this grow is going A lot during this week 1 then week 1 of the last grow when I had them drowning.
Really excited on how this grow is going to come out.