The Grow Awards 2026 🏆 


Likes
Comments
Share
@TTerpz
Follow
She’s stunted but new growth still pushing through
Might just end this

Likes
41
Share
@UnorthadoxDude
Follow
Welcome to week 6.
Day 36: Took off a few fan leaves today and gave water only.
Day 37: Height 28cm
Day 39: Fertigated with an extra strong mix, I'm going to up the nutes now until I find her maximal tolerance, she is starving.
Day 40: Still starving. I'm keeping her constantly topped up with quite high strength nutes but it's not enough. I think 200ml may have been an overly generous estimation of her root space volume.
Day 41: I knew this would be a challenge but it is proving more difficult than I expected. I hope the effort is worth it! At least so far I have learned more about autoflower flowering triggers with this grow.
Day 42: in trying to get enough food in to her I have nute shocked. Need to somehow flush and hope for the best. I may have dealt her a fatal blow.
Alright so to end up this week I have flushed the ever loving crap out of this lady. I've burned her with too much nutes, I didn't think it was possible but I went really over the top. So I have used a combination of a straw and 2l of PH corrected water and a lot of time and patience to repeatedly saturate and then upend and allow to drip out (with the aid of blowing bubbles in there with the straw). Eventually the run off stopped being dark brown. Then much later it became clear. I do not know if I can save this plant now I have really hurt her she looks in BAAAAD shape. Let us see what happens over the next week.
I have adjusted the timer such that the main tent is now getting 20/4 upped from 18/6. After monitoring DLI at 18/6 for a week I am unhappy with the overall level but because of the varying heights of the plants I am limited in what I can do in adjusting the light height. Some areas were only getting 20 DLI. So I have rearranged to have the taller plants on the edges and the lowest in the middle and doing it this way all plants are getting between 35 and 50 DLI at 20/4 - although one or two cola tips here and there are getting 55. Will monitor for a week.
Likes
8
Share
@johnnybuds
Follow
Las plantas asimilaron bien el calcio y siguieron adelante, se realizó un trasplante en el día 20, de 300cc a 5lts airpot con solo coco, ahora solo queda esperar a empezar el lst💪💪💪

Likes
6
Share

Likes
2
Share
@Saintvicious
Follow
Leaves starting to brown. First thought was over fertilizing but guessing calcium. Did add powdered oyster shells to dirt mix but needing alot more.
Likes
13
Share
@gr3g4l
Follow
De esta semana destacaré el cambio de luminaria, los Cob por el ATS Pro 300W. al 75% que vendrian a ser 225W. áprox. Algo menos de W de lo que estaban pero al tratarse de una nueva luminaria con más umoles no creo que se me estresen mucho. Más adelante cuando ya estén floreciendo subiré al 100% 300W.
Riego cada 3 dias , a final de semana 900ml / planta.
Último dia de la quinta semana poda de bajos , añadido unos tutores y el esperado 😜CAMBIO DE FOTOPERIODO a 12/12h. 🙏

Likes
27
Share
@w33dhawk
Follow
03.08.21 Moin Growmies hab mir in der letzten Woche Gedanken gemacht zu meinem Vorhaben mit den Tomatenringen und mir ist aufgefallen das die Ladys nicht Grad gleichmäßig wachsen ,das liegt sicherlich daran das ich Depp wieder schlauer sein wollte und ein paar Seitenäste dran gelassen habe sprich beim ersten topping hätte ich alles entfernen sollen bis auf die 2 Triebe von der 3. Nodie und ich hab die 2 nodie mit stehen lassen weil ich dachte ich bin schlauer 🤬🤬🤬🤬🤬🤬🤬🤬🤬🤬🤬🤬🤬🤬🤬🤬🤬🤬🤬🤬ich könnte mich selber schlagen für die Dummheit naja Ergebniss des ganzen ist ungleichmäßiges Wachstum somit kann ich die Sache mit den Tomaten Ringen vergessen.......... Hab jetzt aber mein System noch einmal überarbeitet andere Topferhöhung ( 2x alte Bilderrahmen aus Holz auf Paletten Balken geschraubt und mit Hühner Draht bespannt das ganze auf Steine gestellt damit ich ne Wanne darunter stellen kann für abtropfwasser) den Rahmen vom scrogg netzt wieder raus gesammelt und neu bespannt ( Rahmen
90x90 cm aus nem alten Pavillon Gestell zurecht gesägt und mit Zaun bespannt die Abstände zwischen den einzelnen Rauten beträgt 6 cm sollte ausreichend Platz für die Triebe sein) habe das ganze gestern auf einer Höhe von 16 cm über dem Topfrand eingebaut mit Kabelbindern an den Zeltstangen befestigt somit hängt es an seiner Position fest und kann nicht von den Pflanzen hoch gedrückt werden wenn sie in die Blüte geht. Also is nun doch wieder ein sqrogg draus geworden aber den Ladys geht es insgesamt gut sie wachsen und gedeihen und wirken insgesamt gesund in den nächsten Wochen werde ich nun die Ladys in das netzt weben und Mal sehen was sie von scrogging Alla Milchschnitte halten.
Ach ja die purps aus dem Garten sind anscheinend direkt nach dem umtopfen in den Stretch zur Blüte gegangen war ein bisschen spät dran fürs raus setzten
aber lässt sich jetzt nicht ändern Mal sehen was draus wird,vll ja ein Gummibärchen Baum 😏😉 hab den outdoor Ladys gestern nen kleinen Regenschutz gebaut, is nicht der schönste aber er sollte seinen Zweck erfüllen damit der Topf Mal abtrocknen kann das Wetter ist seit fast 14 Tagen hart wechselhaft und der Topf noch nicht 1x richtig trocken gewesen das war's eigendlich was bis heut passiert ist cu Growmies und euch noch viel Erfolg........

Likes
43
Share
@Esoteric_growing
Follow
Light is at its maximum height and could do with being raised another inch or so, going to try and tie the reflector directly to the top of the tent. Stretched more than anticipated lol.
Slight tip burn so backed off the nitrogen and added the pk, I think they are a touch too dark green but will rectify during this week. Surprising considering the EC is only 1.4

Likes
4
Share
@Stork
Follow
Day 127 Mon
PH 5.9
EC 0.1
PPM 40
DLI
PPFD
Water 19c
Day 128 Tue
Add Ph Down
PH 6.3 - 5.9
EC 0.1
PPM 60
DLI
PPFD
Water 18c
Day 129 Wed
PH 5.9
EC 0.1
PPM 60
DLI
PPFD
Water 20
Day 130 Thu
PH 6.1
EC 0.1
PPM 70
DLI
PPFD
Water 20

Likes
15
Share
@JUNGLE_B4RNS
Follow
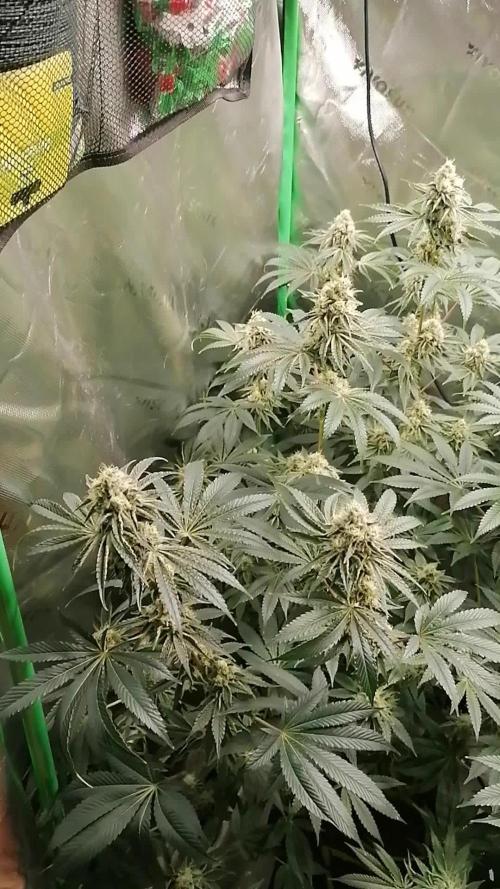
Hello fellows growers ✌️
First week of flowering, plants started their stretch after 5 days of 12/12 lights cycle. And some plants showing their first white pistils. I gonna start to cut some shoots at the bottom of the plants, I already know these small ones won’t reach the top. And will start to unplug some few big fan leaves, that are covering shoots just below the canopy to give them some light.
✅New Growers Tips ✅
✅Switch to 12/12 light flowering cycle when your lights are half way to the ceiling.
✅Stick on your Veg. nutrients to give them Nitrogen to support the stretch and avoiding any dieback situation (plants yellowing from the bottom, moving their Nitrogen to save the top) around week 4 of flowering.
That’s all for this week folks 😉
Stay tuned 👍


Likes
29
Share
@Tmasm
Follow
Saudações.
Menina está linda. Mais 1 a 2 semanas e entra em flor. Só esperar um pouco por companheiras de sala, que entraram agora.
Pequeno treino da semana passada fez bem, ela está esticar seus rebentos inferiores.
Ver se começo dar slguma comida, para ficar forte na sua floração.
Saudações até breve 🤜👍
Likes
16
Share
@hydro78
Follow
This week it started to grow nicely, lots of blooming areas) the amount of irrigation also increases at the same time. Come on grow up girl!🤙

Processing
Likes
27
Share
@Silverback_Guerilla
Follow
1/14:
This morning, I did a foliar application of big bloom and fulvic acid, then about 5 hours later I watered them with about a half-gallon of rainwater each and added armor si, humic acid, endoboost myco/tricho, liquid molasses, and a bunch of cal-mag. Today, I also I wired up and mounted my new samsung sun board strips (660nm/730nm) and my Solacure FlowerPower UVB fixture.
I'm running the deep red/far red bud boosters a few hours per day right now, but will run them for the entire photoperiod once I start flowering them. I'll run the UVB for 4 * 15-minute sessions a day for the full flowering cycle, and if they don't protest too much I'll increase each session by 5 minutes and evaluate again. Some strains are more forgiving than others and I've got 5 different strains in this space...so really not sure much time I'll get away with exposing them to the deadly rays without damaging them too much...😈
1/15:
I received one of the rapid led/growmau far red initiator pucks today. With the placement of my UVB light, I'm realizing I'll need another far red puck to have even and intense far red coverage, so I'm ordering another with Prime delivery and waiting to start flowering until I receive it.
I sprayed them down really well with ph adjusted rainwater tonight to rinse off nutrient build-up from foliar applications.
1/16:
I'm really excited to try flowering under 14/10. I grew photos indoors on an off for 15 years before I semi-retired. If I added up all the additional flowering time I could have done through the years if LED technology existed, I'd have had an extra truckload of bud to smoke.
I did another application of Axiom Harpin a|b Proteins this evening, right before dark. I'm expecting a big growth burst this week, leading up to the flower stretch. I really need them to trigger under 14/10 within 4 or 5 days🙏
...if not, I'll switch to 13/11 and wait a few more days🙏😟..if still no pistils are poppin, I'll go to 12/12 and chalk it up as bad luck or varietal indifference to Pr and Pfr manipulation.
1/17:
I fed each of them about 3/4 gallon of full strength veg nutes. This will be the last. I'll go with half-strength veg and half-strength bloom for a week, then go with full strength bloom nutrients until I start flushing them in 6-8 weeks.
1/18:
I installed the second far-red flowering initiator today and got all my timers configured for flowering:
=========================================
timer#1 - power strip with qb's and red boosters
10:00am -12:00am
timer#2 - (dual/independent setting)
sideA- 3-way cube with uva bars
10am - 3pm
7pm - 11pm
sideB- flowerpower uvb
1pm - 1:15pm
4pm - 4:15pm
7pm - 7:15pm
11pm - 11:15pm
timer#3 - far red pucks
11:00pm - 12:15am
timer#4 - sub-canopy tube
10am - 1pm
3pm - 6pm
8pm - 11pm
========================================
I also did some testing on the timers and sealed myself into the closet to check for any light leaks. All good.👌
1/19:
Looks like the FIM job didn't take on one of them..but she's got perfect symmetry. WIll probably have to just top her again next week...gonna be a tall one I think. Tonight is their first long night. It's ON!👍
1/20:
I watered them today with about a half gallon each. I'm seeing calcium and magnesium deficiences here and there, so added some boomerang and heavy cal-mag-Fe along with liquid molasses, humic acid, and endoboost myco. I also foliar fed with big bloom and fulvic acid.
That's it for week 4-


Likes
3
Share
@BonusPackage
Follow
Day 8 - She has sprouted and looking healthy.
I have decided to use a 20/4 light cycle for this grow.
Day 11 - She fell over after the water so I have used a cable tie to prop her up. Still looking healthy, just top heavy
Day 13 - She's looking great and she can balance herself

Likes
38
Share
@LittleBigTrees
Follow
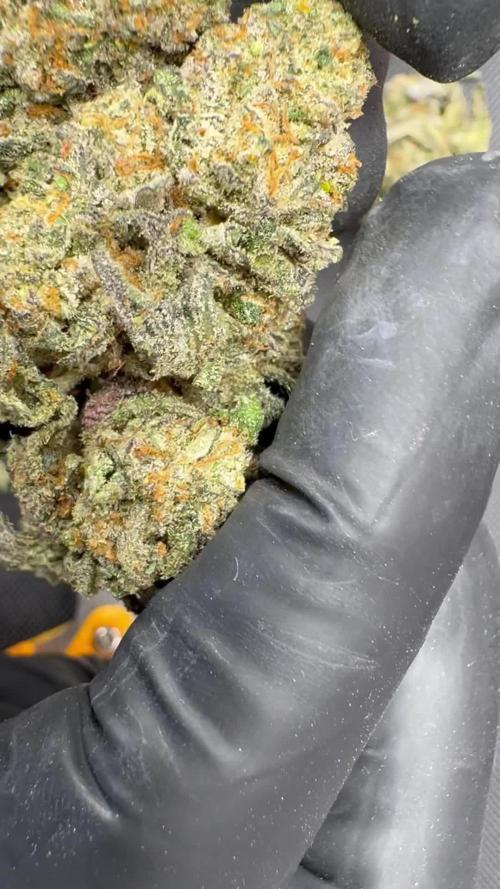
The tallest pheno is ready and being flushed for a couple of days now, rhe others are close but still consuming nutrients at a strong rate , I think they will take at least 1 more week.
They smell very much like gelato as a group but are all very different from one another .


Likes
37
Share
@Brujha77
Follow
Beginn Woche 7 Blüte
Langsam legen die Buds an Masse zu.
Außer Tank füllen ist nix zu tun als Abwarten😉
Die 50l reichen so 4-5 Tage dann muss wieder nachgefüllt werden.
Likes
16
Share
@Dr_Rook
Follow
Han aguantado a la perfección los errores de un novato en interior cómo yo😌 tuvieron un ciclo vegetativo un tanto turbulento con estrés lumínico, estrés por frío, hídrico también ya que las llevabas demasiado cortas de agua y causa de esto un ataque de araña roja 🕸️ a pesar de todo han florecido a la perfección dando 95g en seco de un producto de muy buena calidad 🤩
Ha sido un placer compartir mi primera experiencia en interior con vosotros. Con ganas de empezar el siguiente y seguir aprendiendo y mejorando
Likes
4
Share
@GLOrganics
Follow
Rains came. Plants protected as flowering was about to start. Mesh to prevent moths from laying eggs. They are a big problem were I live and I amb not a big fan of foliar spray during flowering as we live in a very humid area. Some defoliation was done.

