
Likes
Comments
Share


@MediciGrade
Follow
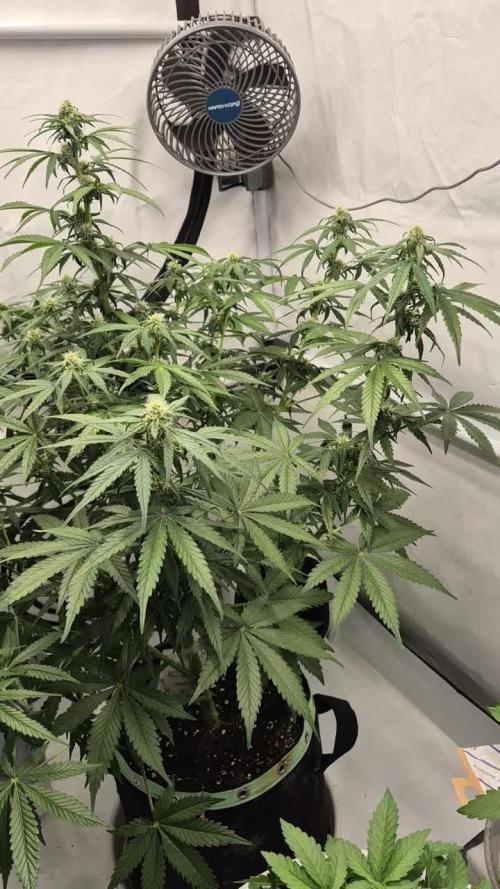
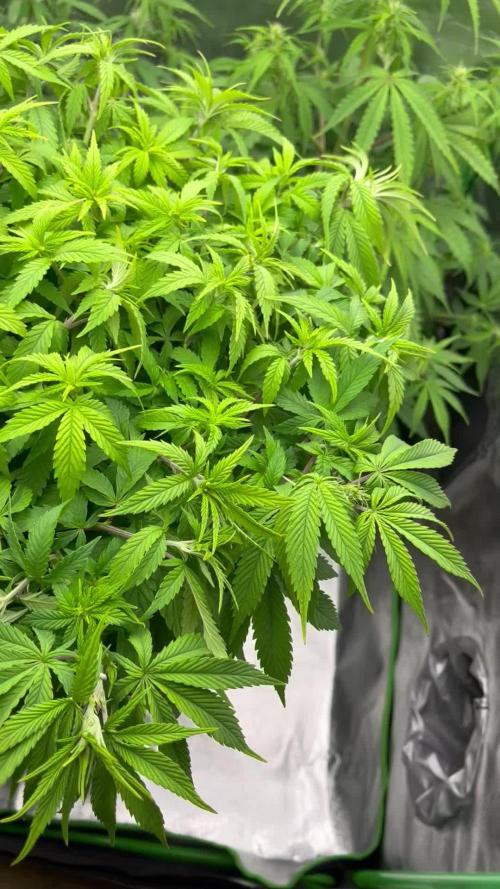
11/15 - Day 43 - I've changed the light schedule on the timer from 20/4 to 18/6. I will be heading out of town for 10 days on December 25th and so I'll need to harvest and hang to dry by the 24th at the latest. I've read in a few forums that decreasing the lights on/lights off ratio can speed flower maturation on auto-flowers. The other growers also mentioned that the decrease in light also reduces yields, but on such a tight timeline I'd trade total yield for more fully ripened buds any day of the week. Would certainly be interested if anybody has experience/knowledge that contradicts what I've read. Plants stretched another 2 inches in the last 24 hours putting them 22 inches from the light. I still have room to raise my light another 2 inches, but if these girls stretch more than 6 more inches they'll be < 18 inches from the light which I'm assuming would cause light burn based on the research i've done on this 600W ViparSpectra reflector series. Here's hoping they don't stretch more than 6 inches from here.
11/17 Day 45 - Haircut day. Left a few fan leaves on the shorter/lower shoots, but took almost everything else. Tallest tops had stretched another 4 inches in the past 48 hours, and were 18 inches from the light. I raised the light the final 2 inches I had available, which places it back to 20 inches from the tallest bud sites. Hopefully the haircut I gave the plants slows down the stretch, but either way it looks like I'll have to do a lot of retraining before I head out of town tomorrow for 5 days.
11/18 Day 46 - Fed nutes. Cal mag + advanced nutrients (micro, grow, bloom), and MKP. 4 Litres of water per plant. A lot of runoff in the saucers, but I'm out of town for the next 5 days so I'm leaving it to be absorbed throughout the week.

Likes
2
Share


@fabialien
Follow
Semana sel 9 al 14 de septiembre 2024.
Vemos un desarollo bastante vigoroso en todas, esto también se puede adjudicar el hecho de la nutrición que han estádo llevando esta tanda se fem y regulares, la mandarine qué nació con apical va bastante bien.


Likes
7
Share


@Meksi2790
Follow
flush week 2 weeks worth of photos saved the best till the end nothing but water the water in the UK is coming at 300ppm cant get it lower. the difference in phenos in this run was ridiculous everything you see is purple punch amazing colours and sweet smells

Likes
4
Share

@Borberad
Follow
Die volle Blüte
Die Blüte ist in vollem Gange! Die Pflanze streckt sich kräftig und entwickelt schöne Blütenstände. Der DLI wurde sukzessive auf 40-45 angehoben. Der Düngeplan bleibt unverändert.
* Zustand der Pflanze: Kräftiger Blütestretch, erste Blütenstände sichtbar.
* Wichtige Ereignisse: Anhebung des DLI.
* Düngung & Messwerte:
* Gießwasser: pH ca. 6,3. Leitwert 1,4 bis 2 S.
* Drain: Wir stellen sicher, dass der pH-Wert nicht unter 5,5 und nicht über 6,8 liegt und der Leitwert die +/- 500 S Abweichung einhält.
* Anpassungen: Wir haben die Blume diesmal einfach nur ohne jedes Training wachsen lassen. Ein Arm ist jedoch beim trainieren diese Woche geknickt und wurde mit einem Strohhalm geschieht. (ungewolltes HST).

Likes
25
Share


@GODSGIFT_2005_JM
Follow
🍼Greenhouse Feeding BioGrow
⛺️MARSHYDRO
The ⛺️ has a small door 🚪 on the sides which is useful for mid section groom room work. 🤩
☀️ by VIPARSPECTRA (models: P2000 & XS 2000)

Likes
81
Share


@Mrs_Larimar
Follow
Started on Christmas and ready before Easter. It felt like a very fast Grow. I had no Problems at all.....................They were sitting in my Soilmix,
and during Vegetation NO NUTRIENTS--- ONLY AZOSPIRILLIUM
In Blooming I started with Composttea. Iam very excited how she Tastes after curing.
In flower she smelled Orange/ Grapefruit and flower. Just like a Lady should smell^^
I will ad a smokingreport as soon after curing as possible............................ Its a"to grow" Strain highly recommended
Thank you @James for beeing one of the First to grow this Strain...
Smokingreport
Taste: they taste very Yummy like friuts , oranges lemons and a little Flowery
Effects:
Definitely no Daytime smoke for me.... She hits after a nice cerebral high for around 20 minutes with a nice stoned body effect.. but never to hard, you can act listen music.. and have anice Sleep. Very recommendable Strain
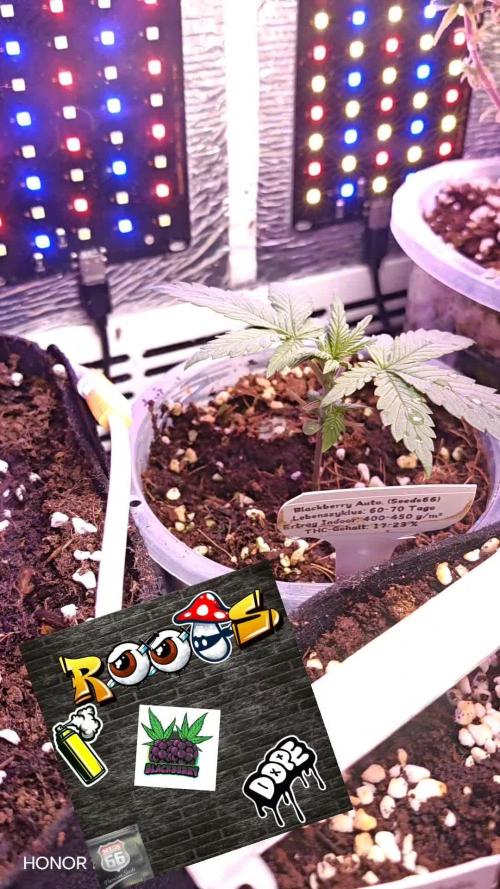
REGISTER OF THE GUIDES
WEEK 1- Strain Info
WEEK 2- How to Mix your own Soil
WEEK 4- How to prepare Benefical "Drinks" for your Plant ( HULKMIX)
WEEK 5- Information AZOSPIRILLIUM
WEEK 6- How to prepare Plant and envoirementfriendly Pestremedies ( Neemoilsolution)
WEEK 8- How to prepare Infused Grapeseedoil
WEEK 9- How to make Candys with Cannaextract
WEEK 10- How tp prepareInfused Coconutoil
WEEK 12- Infused Gums ( Gummibears- with Video)
WEEK 13 - Infused Cocolate
WEEK 14- Infused Icecream
WEEK 15 - "Green Gin"
Week 16 - My curing Method


Likes
8
Share


@Inceptionist
Follow
Look at this...
Look how fucking beautiful these plants are looking. It's really unbelievable that I am growing something like this at my home.
This is their last week before harvest.
The second round of photos are taken on the day before harvest. After that, I give them 24 hours of lights on to increase the trichome production even more but I'm too scared to do 48 hours on. They start to get a bit ugly, so I'm not sure if 48 hours of light would be too much


Likes
14
Share


@Snickelfritters
Follow
11/15
Coming along but not without problems. 3+ weeks in now I'm in the stage where I'm just trying to push all the right buttons and guide it to harvest. They've all demonstrated some level stress but bud formation is coming along well. I dont know if I'm just used to the smell but it hasn't really gotten much stronger. I'll try to take some more pics later on. The past week has been a little busy.


Processing
Likes
12
Share


@Tazard
Follow
We have a very full tent! Taz’s jungle 😂🤣. Check out the purple purple photos from day 20!!! Everyone looks absolutely beautiful I’m hoping that the white critical will be ready in 4-5 weeks. She’s going to have some fat colas!

Likes
3
Share

@Lvnsource
Follow
Bloom is approaching for this one, this week I’m going to focus on getting her well fed before flipping to 12/12 , before I’ll very likely grab a clone or two


Processing
Likes
1
Share


@magicjohnson
Follow
So This week was the same as the last really, It seems all I have to do is sit back and watch these ladies do their thing!
Ive not gone full on with the bloom supplements or PK yet as only 2/5 of the GG are seriously flowering.
The other 3/5 GG are now Finally showing some signs of flower and some tops are starting to build and lowers producing more pistils each day!
The Stardawgs continue to explode, even some friends who were sceptical about the performance of the Quantum board LED's have been flow away by the results.
All of the buds seem to be building dramatically top to bottom which no shortage of frost!
Macro shots on the way!!

Likes
21
Share


@QueenOfTheKind
Follow
She’s looking good, still growing her buds more frosty and dense. She smells citrusy and piney so far.
She’s continuing to fatten and frost.


Likes
54
Share


@TheWeedaltor
Follow
I harvested the bigger strawberry banana who grown under the CMH all time, I will updated next week once dried.
I put the second one (after a vegetative fase with sun from windows and sea breathe, following than the others plants on the border of the garden) in the room where I finished the photoperiod strains and gave her 2/3 week of 400W HPS all for her 💪🏻
Now I will let her finish the flush under the CMH since I set free one place 🤙
The Runtz Muffin got poor light because Skywalker grown as a monster, the scrog net for sure didn’t helped me to raise up the pot nearer to lamp 😬
Next time I will use scrog net only if I grow same strain but I think I will not use it, I prefer have plants free to move in the garden 🤷♂️🏻
Happy smoking to all growers 💚
Likes
35
Share


@farahweed
Follow
I flushed the pots once this week.
And use once with enhancer and a very small dose of shrot flowering fertilizer.
And I tried very hard to lower the humidity and make the daytime temperature not more than 25 degrees
💐🛸👽💥1


Likes
39
Share


@Hazecat_420
Follow
Las altas temperaturas han persistido es por esto que el riego ha sido más seguido variando siempre entre fertilizante y agua. Esta vez ya se utilizó Flawless Finish para este último proceso, una vez secándose el sustrato se comienza con la cosecha. Ha sido un buen cultivo. Veremos como termina esto. Seguimos ! 👽💪
Likes
20
Share


@eldruida_lamota
Follow
Vamos familia que ya actualizamos la cosecha de estas lava Cake de Zamnesia .
Y es que me han sorprendido para bien , vaya flores que se han marcado repletas de tricomas y las flores se marcan aromas dulces
Temperaturas máximas en 28 y mínimas en 25 y una humedad estable en torno al 36%.
Os comento que tengo un descuento y para que compréis en la web de Zamnesia de un 20%, el código es ZAMMIGD2023
The discount 20% and the code is ZAMMIGD2023
https://www.zamnesia.com/
Agrobeta:
https://www.agrobeta.com/agrobetatiendaonline/36-abonos-canamo
Mars hydro:
Code discount: EL420
https://www.mars-hydro.com/
Espero que lo disfrutéis, buenos humos 💨💨💨

Likes
21
Share

@Mrs_Larimar
Follow
2024-06-06
Finally Weather turned to sunny and warm
So i placed the Outdoors 2 days ago.
they are quite stressed because of the changed conditions, but ia sure they will look fine soon
i kinda under watered them the last 10 days and i fertilised them,
so not enough water and fertiliser- they are burned.
shit happens
iam sorry Girls.
next update in a few days because this pne is 11 days from the last, big Progress on the plants, as they already show good Flowers.
Fatso GMO F1 Auto, a feminized hybrid strain, emerges from the crossbreeding of two autoflowering varieties: Fatso Auto and Cotton Candy Auto. This California-derived cultivar leans slightly towards sativa, offering growers a straightforward cultivation experience coupled with impressive yields, robust THC levels, and a delightful palate featuring sweet, candy, and fuel undertones.
Thriving both indoors and outdoors, Fatso GMO F1 Auto exhibits above-average resistance to mold, while still benefiting from adequate ventilation, particularly in environments with higher humidity levels. Its exceptional resistance to pests and pathogens ensures hassle-free cultivation. While indoor plants maintain a compact stature of around 100cm or less, outdoor specimens can stretch a bit taller, reaching heights of up to 130cm when grown in open ground. Completing its entire lifecycle within a maximum of 75 days from germination to harvest, Fatso GMO F1 Auto delivers yields considered average yet impressive for an autoflowering strain. The combination of high resin production and elevated terpene levels renders it an excellent choice for cannabis extract production.
Its terpene profile presents a sweet and funky aroma with savory hints of Skunk complemented by pine and floral notes. On the palate, it delights with flavors reminiscent of sweet candy underscored by subtle fuel undertones. With THC levels reaching a high of 24% and minimal CBD content, Fatso GMO F1 Auto delivers a balanced and uplifting effect, appealing to enthusiasts seeking a satisfying and harmonious experience.

Likes
105
Share


@BioBuds
Follow
One was more bushy and was a little behind. As I said, they had some heat stress and I think the 15-liter pots are too small when the environment is hotter.
Still, they are totally worth growing and joy to smoke. They don't need much curing and the weed is very very strong.
Going to try this strain again very soon!!