




Likes
27
Share


@RDWCGrowing
Follow
1/20/2023- So much to do pre grow and over the next 16 days, absolute first order of business is that I have to take down my current Grow---TIMBER-- Then I have a list of things I have to get done in order to be ready to start this grow 1 Feb.
With that said
T - 2 days until start 48 hour Flush
T - 2 days until Start 48 hours of Light
T - 4 days until TIMBER!!!
Items that need to be done before 1 Feb 2023
1. I need to clean the tent out
2. I need to clean the equipment- Proper Sanitization between grows in Hydro is a must!!!
3. I need to get the hole in the ceiling above my tent repaired- For my last grow I had a deep sink installed in my grow room, to make Hydroponics a little bit easier and have a water source in the same room. The seals on the pipes they were installing broke and leaked through the ceiling causing some damage all the way across my grow room, I was already weeks into my grow and couldn't risk them working above my tent and it would have been very awkward positon for them to be working in as well, so have to get this done quickly between chop and germination.
4. I have to install my new light- I was using a Vivosun 4000 and for this grow I am switching up to a Spider-farmer SF 7000.
1/20/23- For this upcoming grow I am working with M/F photo seeds so I ordered 4 Sex determination kits. I recieved my my 4 Sex determination testing kits from Rimrock Analytics today. I will be using these to test my plants at week 2 of Veg so that when/if I take clones I know I am taking them off females. As well as I don't want to accidently pollinate my tent during this grow I am looking for big beautiful buds not seeded buds. :-)
1/24/2023- Harvest of current grow- Started at 2:00pm and finshed wet trim and firt batch into the freeze dryer.
1/25/2023- Next batch into the freeze dryer and cleaning all my equipment for this Grow.
T-1 Day until the workers are supposed to be here to fix the hole in the Grow Room.
T-3 days until I instll my new Gorilla Grow Tent and my New Light Spider Farmer SE-7000 for this grow.
T-7 Days until Start of Germination
1/26/2023- Harvest is done ran through the Freeze dryer and dry tim completed.
1/27/2023- Grow Room repairs completed. Hole is gone Letting the paint dry before I install the new tent.
T-2 days until Install the New Gorilla Grow tent and the new Light
T-3 days until I put the hydro equipment in the new tent
T-5 days until Germination
1/29/2023- Day 0- Final Pre Germination activities
Germination Start T-3 days
The paint on the ceiling was dry and it was time to finish prepping for Germination. I got the following items knocked off my list.
New 4X4 Gorilla Grow Tent is up and ready
New Spider Farmer SE-7000 Light is installed- Thanks Moony Grows for the suggestion and for the Code that got me some money off and free shipping (Moonygrows)!! I turned the lights all the way up to max and set the timer to 18/6 0600-0000. I will keep an eye on the temperature and humidity without my plants and see how hot it gets with the new light.
I put my Hydro system back together and put in 40 gallons of water into it, time to monitor for leaks the next few days.
I Setup my cloning machine for Germination Days 3-11
1/30/2023
let me break down the situation, ROOM in the TENT.. Enough said.. No really I tried putting my exhaust system up in the new tent with my new light, The light is so big corner to corner that it really didn't give me enough room for the lights be be raised, with the exahust hanging the buckets my plants are Starting in are 2 and 1/2 feet off the ground, great for plenty of room for roots but not so great for upwards space for the plant to grow. In a 6' 11 tent with the exauhst in side and hanging that only gave me a little over 4 feet of grow room to play with. My last grow if you saw my diary, anyone could tell I was struggling to keep the buds off the lights. No good, Since space was such an issue I was running my carbon filter inside on the ground but It really needed to be up sucking the heat out not shooting the cool out. With that setup I was sucking air through the filter and pushing it out the tent at a bottom exhaust hole cold out. Wasn't doing me any good for my heat. I was hitting temps of up to 85 degrees. I bought a portable AC unit and have been running it in the grow room to try and keep temps below 85 and I have had to lower the power on my lights during grow also not ideal.. With that said a friend of mine MoonyGrows (Check out his diary) took the time to look at my issue send me a picture of my grow tent setup with detailed instructions on how to suck the air out from the top but putting my filter and fan on top of my tent so no room issue and I am sucking the air out from the top where the heat is instead of pushing the air out from the bottom where the cool is... THANK YOU MoonyGrows For taking the time to help me get this straightened out.. Now I have room and I have the exhausts working right and now my temps with everything at 100% are topping out at 80 this dropped the temp by 5 + degrees at 100% max.
T-2 days until Start of Germination
Prepped my seed tray with humidity dome
Prepped my Rapid Rooter plugs. I Used RO water, and I added a few drops of Hydrogen peroxide to Oxygenate the water. I then PH balanced between 5.7-6.0 the same that they will be getting in the Cloning Machine and when they get to thier final grow pod. I perfere the 5.8x range and I hit 5.84 for these rapid rooters. If you want to see a complete video on the process HowWeedGrow has an amzing video that shows step by step how to do it and explains it better than I ever could including how to plant the seeds. Which I will cover when I get to that step on Wed. https://www.howweedgrow.com/how-germinate-weed-seeds-cannabis-rapid-rooters/
1/31/2023
T-1 day until Germination Start
All set and ready have my Rapid Rooter plugs ready to go have my seeds out.. Have my seed tray warming up tonight. Tomorrow morning right into the Rapid Rooter then strait into the tray. I will spray the dome to start the humidity in there.
2/1/2023
Germination Day!!
Let the games begin!
0600am Put the seeds into the Root Riots. And then put the seeded Root Riots into their first home the Seed tray. I have them under the light 24/7. Sprayed the dome
7:30pm Sprayed the Dome to keep humidity going on the dome.
2/2/2023
Day 1 of Germination
Sprayed the Dome in the morning
Sprayed the Dome in the evening
2/3/2023
Day 2 of Germination
Roots are starting to come out the bottom of the root riot plugs and the heads are slowly popping out of Number 4 just below the surface.
Afternoon- Number 4 has popped up
Evening- Number 3 has popped up as well. Happy Dance!!
2/4/2023
Day 3 - Germination
Surprise Surprise Surprise- all 4 have now poked their heads up.. Happy day!! 100% Germination succeeded.
Now major milestone to track is how many are female and how many are male.
I will take look at the roots this afternoon/evening and see if they have enough root to go into the cloning machine for the next 7 days before they go into their Hydro Pods.
Day 3 - Germination - Evening..
Roots looked good and they were tall enough to make it into the cloning machine.
Now that they are all in the cloning machine I have switched the lighting to veg state 18 on 6 off.
2/5/2023
Day 4 - Germination - Morning
All the Ladies (fingers crossed) looking great stretching nicely and look nice and green, Photo synthesis underway....
UPDATE!! After a very interesting POD cast on FSTS by Dr. Bruce Bugsbee from Utah University, I have shifted my lighting to 24 hours on through seedling and then I am going to shift to 20 hours on the rest of Veg.
2/6/2023
Day 5 - Germination
While Checking on my conditions inside the new tent last night, I found that the Humidity was down to 39 Percent. I added an AquaOasis Cool Mist Humidifier, the reason I selected this humidifier is that I needed one that could be turned on and off utilizing my Inkbird Humidity Controller IHC200 that I have my Pro Breeze Dehumidifier currently running with.
Root structures are starting to get there about 1/4 of an inch.
2/7/2023
Day 6 - Germination
Everything seems on track more roots poking out of each today. They are each getting a little taller as well.
Checked in the evening and number 3 was drooping the Root riot plug on the bottome was dry and the roots were not in the water yet. I raised the water just enough that the longest root that was sticking out is now hitting the water.
2/8/2023
Day 7 - Germination
Everything looked good while checking in on them this morning number 3 is now full up and no droop again.
2/9/2023
Day 8 - Germination
T-2 days until Plant into Forever Pods and we start week 1 of Veg .. :-)
Surprising thing to me is that number 1 and 2 were later in popping then 3 and 4 but the roots are growing longer in 1 and 2.
2/10/2023
Day 9 - Germination
Number 1 and Number 2 are definitely ready for transplant today.. Based on how they were yesterday and where they are today I am hoping by tomorrow 3 and 4 are ready. Today they look to me where 1 and 2 did yesterday.. I really hope 3 and 4 catch up by tomorrow since..
T-1 day until transplant to new/ final home for grow.
Need the roots long enough to have some clay down in the basket to keep the root riot out of the water and only roots in the water..
2/11/2023
Day 10 - Germination
Today they got placed in thier forever Home, 7 days from Sprout and 7 days until Week 1 Start.
PPM- 180 this is water out of the Tap
Temp Water: 70.7
Temp Tent: 77
Humidity: 40% I have a humidifier going 24/7 to try and bring this up.. I also have Humidity Domes on each plant.
2/12/2023
Day 11 - Germination
Sprayed the domes, all are looking good.. Nothing much to do at this phase but Keep monitoring the PH level in the system and making sure they have a comfortable home.
T-6 days until Week 1 start
2/13/2023
Day 12 - Germination
Sprayed the domes, They were looking a little yellow today so I moved the light down to assist. Nothing much to do at this phase but Keep monitoring the PH level in the system and making sure they have a comfortable home.
T-5 days until Week 1 start
2/14/2023
Day 13 - Germination
Sprayed the domes, They were looking a little Florissant yellow today, with what looks like slight burn on the tips, I talked with a fellow grower and we agreed that It was probably that I was drowning them, Yes you can drown you plants even in Hydro, but only early on.. :-) It usually happens with the water being too high, which soaks not only the roots but the medium (root Riot plug in this case). I lowered the water from touching the bottom of the pot to about 1" away. This will probably take 3-4 days to resolve. I will continue my daily monitoring.
T-4 days until Week 1 start
2/15/2023
Day 14 - Germination
Sprayed the domes, continue my daily monitoring they look a little darker green instead of lime green now that I lowered the water levels in the system, so I think that I might have resolved the issue but it will take a few days for recovery to happen.
T-3 days until Week 1 start
2/16/2023
Day 15 - Germination
I looked in on them this morning, 3 and 4 look like they are doing well and recovering nicely. Number 1 not so much it has brown spots on the leaves, this very well can still be a side effect of the overwatering but I decide to go ahead and add Nutes earlier than I was planning just incase. I was going to wait until Saturday but I think intervention is necessary now especially after drowning them early on.
I added 1/2 what I am planning on adding for week 1 start. I also think I am going to adjust my chart to add 1/2 2 days after plant from now on. I don't think it would hurt it to have some Nutes to pull from.
.25ml/Gal Calmag = 12.5ml
1ml/gal GH FloraMicro= 50ml
1ml/gal GH FloraGro = 50ml
1ml/gal GH FloraBloom = 50ml
T-2 days until Week 1 start = I will drain the system and start it over on Saturday with Week 1 Nutes.
2/17/2023
Day 16- Germination
I didn't even want to post today after looking in on them this morning, 3 of the 4 are now showing signs of dronwing.. Brown spots on the leaves, the water levels were still too high.. I drained about another inch out of the tanks.. Will see how quick they recover.. I start week 1 tomorrow and will have to ensure my water levels are at least 1" away from the basket on this round.

Likes
13
Share


@NordicClosetGrower
Follow
Thought I would have harvested already, but from the little I'm able to see, there still aren't really many, if any amber colored thc crystals, so I might wait some more days.
The second plant remains 1 week or so behind but might soon catch up and they could come down at the same time.
Still only flushing with water, some leafs are starting to curl and dry off. I'm just a bit paranoid that it is time to cut, I'm just not seeing the amber color because the camera can't pick it up. ¯_(ツ)_/¯

Likes
58
Share


@Wastent91
Follow
Ehi ragazzi come va! A me tutto bene! È appena arrivato il nuovo impianto Mars hydro più grande e spazioso in cui potrò far crescere nel modo più libero possibile ogni ragazza che cresce, il mio obbiettivo è ridurre i training al mi imo i dispensa ile e testare davvero la potenzialità genetica della ragazza senza troppe manipolazioni, vabbè comunque ognuno ha il suo metodo.. Sono proprio felice di avere un 100x100x180 almeno ora ho lo spazio "vitale" per dare il meglio alle mie ragazze! Ora siamo solo all inizio ma a giudicare dalla professionalità e qualità dei componenti, penso proprio che faranno la differenza anche nella qualità delle cime!! 🧑🌾👊 Speriamo! Bene ringrazio Mars hydro per questa opportunità di collaborare e crescere assieme! Vi lascio qua sotto i link ai quali acquistare questa bellezza!
https://marshydro.eu/products/mars-hydro-100x100x180cm-grow-tent/
https://marshydro.eu/products/4-inch-inline-duct-fan-and-carbon-filter-combo-with-thermostat-controller/

Likes
16
Share


@The_green_room
Follow
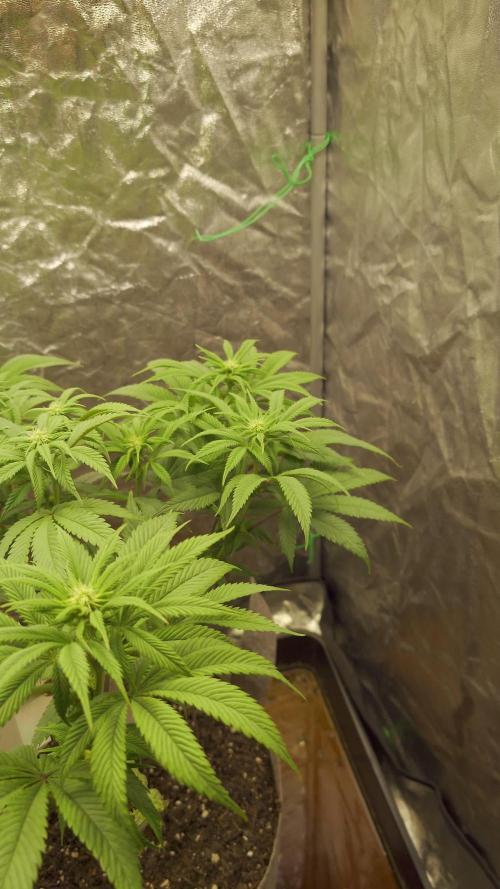
At the start of my first proper week of growth she seemed to be doing really well. I noticed her stretching quite a bit, so I moved to the light a bit closer. This seems to have done the trick.
Thanks to everyone on Grow Diaries who answered my question about burying some of the stem when transplanting. I decided to move to a slightly bigger pot (from 1litre to 3.8 litres) so that I could bury some of her stretchyness. This was based on advice from you guys - so thank you! She seems to have taken to the transplant well. I made sure the EC and PH of both mediums were very close.

Likes
6
Share

@Growtopus
Follow
Ende BW 3 sind wir nun. Die Blätter sind etwas matt und die hatte Lichtbrand, davon hat sie sich jetzt aber erholt und fängt an schöne Blüten zu bilden. Es gab noch etwas zusätzlichen Blütendünger von Wizzy's Garten aufs Substrat, sie wurde ordentlich entlaubt und lollipoped und jetzt kann es weitergehen.

Likes
40
Share


@Ganjagrandaddy
Follow
Day 9 :These 3 ladies have been behaving well and settling in nicely to their new homes. I have initially only given them all a tea of boosts until yesterday when I started adding a little silicon and calmag and a few drops of superthrive. Today I further fed a half strength feed to the coco twins as well. The Los girl is showing a paler growth going on and I am hoping this sorts itself out now they have been fed a little. The charge and ecosystem take a couple of weeks to hit production from fresh potting so the teas will give them a kick start. Once she gets feeding on that scrummy Los grub below , I think she will fly. All in all they have not faltered for their 1st week and considering their surgery done well. I can certainly see a few front runners already among these Fast Bud beauties so let's watch the race hot up now rhet are on both Mars lights.The sp250 will be going on at the 1st signs of flowering so they have 600w full spectrum draw of led to veg with.
Likes
11
Share


@Shrek2onDVD
Follow
I've had some trouble since transplanting. Seemed to be either, root rot or perhaps a potassium deficiency issue. The leaves were all yellowing from the outside moving in, starting on the lower leaves, growth didn't stop though. Anyway, I watered with natural liquid-based fertilizer and it seemed to have corrected itself.

Processing
Likes
5
Share


@Greenbean15
Follow
Bud development going strong this week, seeing lots of sugar leaves and new bud sites forming each day. Hoping to see the buds stack a little more soon.
All seven plants are in flower now, this purple trainwreck plant being the furthest along. She should have another 4-6 weeks left before her chop.
Likes
8
Share


@BruWeed
Follow
☘️ 03/11 - Hidrate la semilla 24hs con agua y 3 gotas de agua oxigenada. (Uso el mismo metodo siempre antes de germinar)
☘️ 04/11 - Coloque la semilla en papel humedo para que comience a germinar.
☘️En menos de 24 hs germino.
☘️05-11 - Ya tiene 1.5cm de crecimiento y la coloque en una maceta de 3L, utilice el producto que uso siempre "AEGIS MICORRIZAS" ya que ayuda mucho en esta etapa de germinacion.
☘️Por el momento se ve bien, su proceso fue muy rápido y hasta el momento todo perfecto.
☘️Voy a dejarla dos semanas en etapa de enraizamiento y estare utilizando cuando la plantula salga "DEEPER UNDERGROUND" de Top Crop.
☘️07/11 - Broto
☘️09/11 - Ya le agregue el estimulador de raiz, Deeper Underground. 1ml por litro de agua, obviamente no le agregue todo, solo lo suficiente.
☘️09/11 - Tiene 5 días de vida.
☘️14/11 - Cumple 10 dias de vida desde su germinacion.
☘️21/11 - Cumple 17 dias de vida.
☘️23/11 - Entra en etapa de crecimiento.
☘️En estos dias subire imagenes de como viene.
🇦🇷😶🌫️☘️Podes seguieme en Instagram como @bruweed_arg🍀🇦🇷😶🌫️


Likes
2
Share


@EtnoGrow
Follow
bueno se hizo una por primera vez una cosecha por partes, como indicamos en el post anterior, se cosecho los cogollos donde la luz pegaba mas al parecer y estaban mas desarrollados, la cosecha fue con tricomas blancos tendiendo a transparentes con pocos ambar, en opinion ya luego de una semanas y una segunda cosecha, es que cosechamos pronto por temor al pasarnos al ser primera vez, entonces posiblemente nos apresuramos un poco ligeramente o confundimos los tricomas tendiendo a ser transparente por los blancos que es lo que indica la teoria el punto de corte, pero no nso quejamos quedo genial! subiremos el segundo punto de corte luego de 2 semanas . LAS ULTIMAS FOTOS LAS DE LAS 2 SEMANAS MAS 2DO CORTE.


Likes
24
Share


@Kountryboi90
Follow
Day 44 since flipping and this girl is getting close to finishing. No more feeding for her. Just some Cyco Supa Sticky today and next watering and water from there on out. Got about 75-80 percent cloudy. The sweet orange citrus smell is PHENOMENAL! Got about 2, maybe 3, weeks left and she'll be done. Had to tie up a couple branches because she's falling over from putting on weight! I love her!
Likes
9
Share


@ScouseCityLX
Follow
Week 6 for grape glaze we see some colour starting to come through real nicely. Trichomes popping out of the buds, they will really stand out when all trimmed up. Will be running this again 100% have 6 more seeds to pheno hunt.

Processing
Likes
8
Share


@GrownwithLED
Follow
Both Barbarian (=AK-47 x Barbara Bud) plants continue to grow and now start to develop the first flower clusters. They both have a healthy green color and love the Advanced Nutrients feeding schedule. The Barbarian plant#1 is still shorter than plant#2, but both have bushed out fine now and continue to grow more budding sites. After this week I will take off the biggest fan leaves for defoliation in order to let the light penetrate better thru the canopy.
Likes
1
Share


@Green_Peace
Follow
Buds are fattening nicely and the 2 plants are receiving nutrients well. Will stop the PK in the next few days before scaling back on the A/B next week before fluching for the last fortnight. looking forward to harvesting this clone as I've just ran out of the bounty from her mother. These plants are at the front and to the right in the timelapse videos.
Likes
10
Share


@FlavoursUk
Follow
Last day of week 4 and the girls are looking well, growing and thickening up well. No problems so far. If you're following along make sure you follow my Instagram and YouTube for more in depth details on my grows. Both links can be found on my profile. Instagram.com/flavoursuk_v3
Processing
Likes
24
Share


@Cogollo_eu
Follow
**Encontrarás la traducción a español al final de la descripción**
If you like this week, please hit a like, it costs you nothing! 👊. Thanks in advance 😉!
From/Desde: 12/08/19 || To/Hasta: 18/08/19
From day/Desde día: 21 || To day/Hasta día: 27
-----IMAGES & VIDEOS-----
V1: She's still turning with this size, but is lowering the total angle/week, of course she has stopped turning once topped. You can see at the end of the videos the clones i've taken from her. Anyway, 4 days after taking the clones i decided to kill them because i had to grow another 4 plants in September and it's going to bee too much work @time.
P4: I did a foliar irrigation this day, and i'm not going to add it to watering calendar. I'm using non PH adjusted water with BAC Foliar spray + BAC Plant Vitality Plus + BAC Pro Active.
P9: Pruning and topping time!!. I toped her at 10 cm exactly, abobe the 4th main internode. Also I pruned the first and second main internodes, so I'm leaving 4 main branches to create the plant, i will try to keep them all at the same height. Also i must admit that i don't like nothing the cable i used to fix them to the floor as it's potentially danger for the branches, it cuts like a knife!. Asap i will buy a good rubber covered cable for do the job. Also i will put one of my training structures in the floor, top supported by the 2 horizontal 6 mm aluminium rods i used to LST @images.
-----WEEK SUMMARY-----
Well well well, prunning & topping time 😋!!!. This week temperatures raised a lot in my country full direct to 35º along day due to warm winds coming from inside land, what's called here "Terral", while it's a name, it can be translated as something similar to "Sandwindy" 😰😰😱😷😷.
It's impressive how the Alice Kalashnikova (I de love more Alice than Avtomat 😂) did support those high temperatures like nothing.
-----WATERING CALENDAR-----
15/08/19 - 4,000 ml with all week nutrients @ 1 E.C. PH5.8
*****ESPAÑOL*****
Por favor, si te gusta esta semana dale un like, no te cuesta nada 👊. ¡Gracias por adelantado 😉!
-----IMÁGENES & VÍDEOS-----
V1: Y ella sigue girando a pesar de su tamaño, pero está reduciendo la cantidad de giro semanal, por supuesto parará de girar una vez le realice el topping. Al final del vídeo se pueden ver los clones que tomé de ella. No obstante, 4 o 5 días después de hacerlos decidí matarlos ya que tengo que plantar otras 4 plantas en Septiembre y se me iba a acumular mucho trabajo.
P4: Realicé un riego foliar este día, ya que no voy a añadirlo al calendario de riego os digo lo que he usado. Agua sin ajustar PH con BAC Foliar spray + BAC Plant Vitality Plus + BAC Pro Active.
P9: ¡Tiempo de poda y topping!. la he podado a exactamente 10 cm del suelo, justo por encima del cuarto nodo principal. También he podado los 2 primeros nodos, así que estoy dejando 4 ramas principales que intentaré mantener a la misma altura. Debo admitir que no me gusta nada el alambre que he usado para atarla a las barras ya que es potencialmente dañino, corta como un cuchillo. En cuanto pueda compraré un cable con cobertura de goma para hacer le trabajo. También pondré una de mis estructuras de entrenamiento sobre el sustrato y las mantendré fijas con las barras de aluminio horizontales de 6 mm que he puesto y que se ven en las imágenes
-----SUMARIO SEMANAL-----
Bien bien bien, ¡tiempo de poda! 😋. Esta semana las temperaturas han subido directamente a 35º debido al terral, es insoportaaaaaaaaaaaaaable 😰😰😨😨.
Es impresionante como Alice Kalashnikova (me gusta mucho más alice que avtomat😂) soporta estas temperaturas como si nada.
-----CALENDARIO DE RIEGO-----
15/08/19 - 4,000 ml con todos los nutrientes semanales @ 1 E.C. PH5.8
