
Likes
Comments
Share


@DESERT_DANK_FLAVER
Follow
ENDING WEEK 4, THEY SEEM TO BE HAPPY. QUESTION? WHEN SHOULD I TOP THESE GIRLS. ?
Likes
25
Share


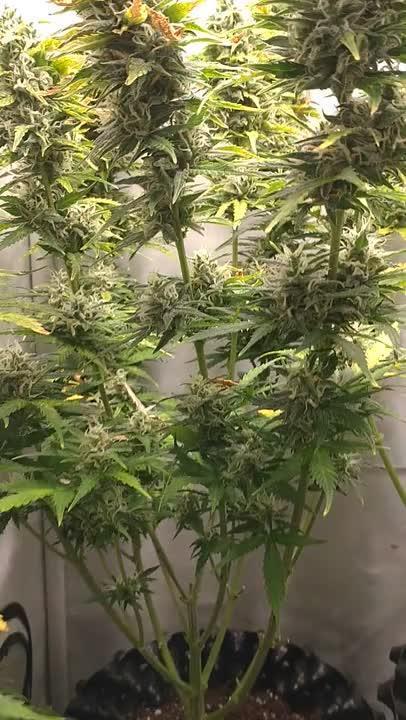
@Grower_Of_Persia
Follow
my dry and cure style is this:
4 days of hanging upside down to get water activity lower to around 0.6 in 50% humidity and 26 C temp (i know its a little high but we are in a hot summer right now and i cant get it lower even with air conditioner) and then after 4 days of drying i remove leaves and stalks, trim buds and move them to jar for the rest of their life :D . and in the first 4 days of curing i open the jar door and let hem get some fresh air in the jar for about 5 minutes and close the jar door again, after 4 days of curing like that buds are smokable but they will get better as they getting cured about 1 month.
buds are one of the hardest as fucking rocks type of buds! very dense , compact , sticky , smelly , amazing at every aspect
growing stage was 60 days and flowering stage was 70 days total (harvested tops at day 63th)
the total weight of dry buds was : top buds 174 G + lower buds 55 G = 229 G
my overview of strain with details:
the seeds:
unfortunately i only got 1 seed cracked out of 5 so i will not know how much this genetic can get different but at least i got the chance to grow once of this wonderful strain
the plant :
in every stage you can ensure that you are dealing with a high level plant ,
she will get big so you have to control her height LST and SCROG highly recommended , will grow very well with tick stalks and big fan leaves , has good resistance for stress and will respond very well to stress trainings , she really has gorilla power in herself ,
fresh buds on plant :
buds are very compact and dense even from start , fresh blossoms smells like pineapple and mango , 2 different shades of sweet smells like you hold 2 junks of pineapple and mango in your hand and you smell them together, she is a trichome and resin factory , very very sticky , very oily , strong smell
dried buds:
very compact and dense , hard as rocks , has dark colors with purple hues inside it , it smells sweet
smoke :
very smooth and sweet like lollipop , pineapple , mango like , after 2 minutes it'll kick in and you'll get higher and higher with every breath , has a strange and especial high mind high mostly


Likes
Comments
Share

@PhinolaGreen
Follow
10. Woche
Die knusprigen Blätter habe ich ein bisschen Entfernt für die Optik. Denke sie braucht noch ein bisschen Zeit und die gebe ich ihr auch 😌

Likes
Comments
Share


@TheBulldozerSicily
Follow
Iniziamo un altro ciclo, la bella stagione è alle porte, anche quest'anno iniziamo indoor in idroponica e preparo 2 in vaso da passare in outdoor

Likes
Comments
Share

@hassehujasse
Follow
Working Hard. One by One. All the way UpFinal destination transplantation to 19 l pot using great white and bat guano. en 7-10 day light sheduale will be changedAnother week with best condicions and elevated Co2

Processing
Likes
18
Share


@Darkwing101
Follow
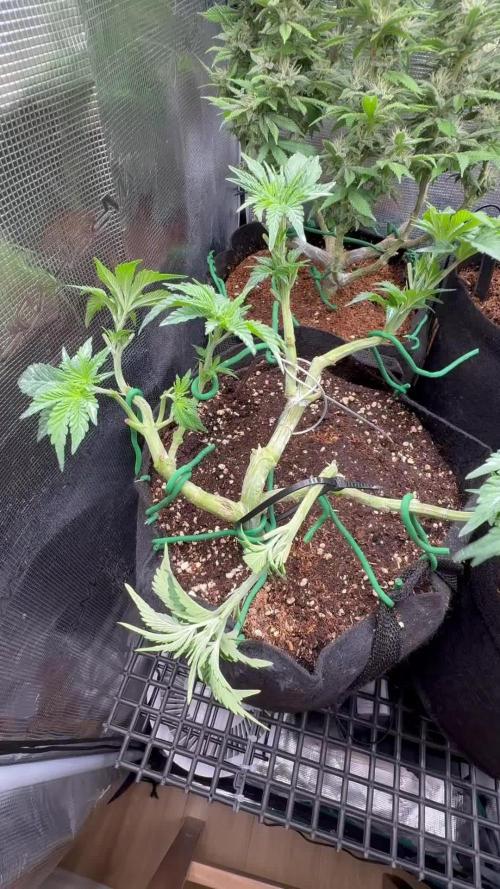
C and D dont seem to be doing much growing. E is doing well.
Fruit flies are still around. Bought a fly sticky trap last night so hopefully that works. Not an easy thing to find when its snowing outside.
Likes
46
Share


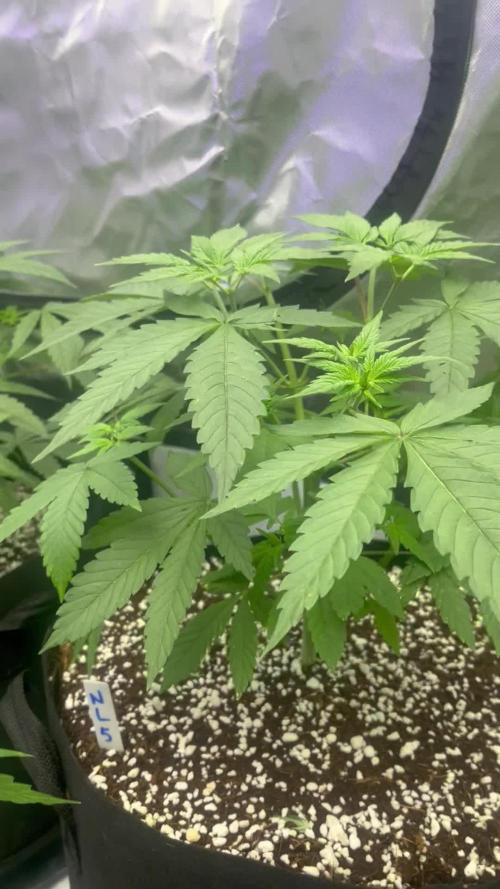
@Smokwiri
Follow
Welcome to my bubblegum xl, genetics by Royal Queen seeds
Looks great, topped/fimmed last week, i think it a bit more than a top, but less than a fimm.
Lets wait for this to grow a bit larger...
-+update added easy boost nutrients to the substrate
50grams easy boost organic pellets
Likes
9
Share


@GrowPassionItalyChris
Follow
Sono felice di tutte e 4 le banche semi che mi hanno regalato qualche seme alla fiera canapa mundi di Roma, già in passato ho sempre provato casualmente tantissime varietà,sono affezionato ad una banca semi in particolare ma voglio bene a tutti. Queste varietà sono fino ad adesso perfette per le mie esigenze perché crescono facili,rapide e molto resistenti e sono già in fioritura! Ogni varietà si sta sviluppando in maniera impeccabile e sono molto felice perché hanno resistito ai cambiamenti climatici e stanno resistendo benissimo la presenza di afidi sotto le foglie, ogni settimana stiamo utilizzando olio di piretro ad azione rapida e sta funzionando. Il colorito della piante ed il vigore che hanno nel crescere e fiorire è dimostrato nel video e nelle foto! Hanno avuto una crescita molto rapida in questa settimana. Il clima è migliorato e le temperature sono di tipo estive quindi non faranno che migliorare. Io coltivo in maniera biologica e non uso potature particolari e queste varietà sembrano ideali per me. Affinché avrò la passione di coltivare sicuramente useremo anche queste varietà perché questo 2023 in Italia il clima è stato pessimo durante le prime 3 settimane di vita di queste varietà e hanno resistito a grandine,pioggia e sbalzi di temperatura. Iniziano a fiorire ed il caldo estivo ormai è arrivato! Un abbraccio a tutti


Likes
32
Share


@Sejnik
Follow
Holky opět dostaly čaj. Tentokrát jsem ho vařil 36 hodin.
Květy mi přijdou poněkud malé na to že ukončily 4. Týden květu ale snad jeste překvapí 🙂 mám v ně víru. 🙏🙏
Začíná se objevovat velmi příjemná vůně sladkého citrónu 🤤
Blumat závlaha funguje jak má. Springtails si dál vesele poskakují v substrátu a rostliny nevykazují žádný stres takže nemám důvod jim ubližovat 😉
Likes
22
Share


@MasterKush714
Follow
------=======😎👹👺👌12/12/2023 YOOO UPDATE GANG!!!!!!!!!! WEEK 14 IN FULL EFFECT GROMIE LFG!!!!!!!!👌👺👹😎=======------
------------------------------------------------------------------------------------------------------------------------------------------------------------------====================================================================================================
👹👽👺***12/12/2023 8:44 AM DAY 97***---YOO WHATS BRACKIN GD FAM!!! HAD TO STOP BY N' GIVE YALL AN UPDATE FOR THIS VERY LAST WEEK OF FLOWER!!!!!
12/9/2023--- STRAIGHT UP STABBED MY PLANT.....IN THE MAIN STEM....SHOCKS IT ON THE FINAL LAP AND MAKES IT SQUEEZE OUT W.E ITS GOT!!!!! SUPER STRESSED!!!
SO I DID A FEEDING SUNDAY NIGHT, 1.2 GAL FEEDING TO BE EXACT SPLIT BETWEEN INTERVALS OF 15 MINS TO HELP PROPER ABSORPTION PH'D TO 6.3,
WATER ONLY!!!, NEXT FEEDING WILL ONLY BE JUST WATER AS MENTIONED BEFORE, BUT OTHER THEN THAT SHE'S LOOKING GREAT SMELLS AMAZING LITERALLY
LIKE RUBBING GRAPES TOGETHER IN UR FINGER TIPS HAHA REALLY AMAZING STUFF, GOING TO GET HER READY FOR CHOP THIS WEEK AND THEN
THE HANG PROCESS BEGINS!!!!!!!!!!!!!!!!!! STAY WELL GROMIES AND STAY TUNED!!!!! THANKS FOR STOPPING BYYY!!!! STAY UP!!!!!!👽👌👺👹😎
=============================================================================================================
👹👽👺***12/14/2023 8:44 AM DAY 99***---YOO WHATS BRACKIN GD FAM!!! HAD TO STOP BY N' GIVE YALL AN UPDATE FOR THIS VERY LAST WEEK OF FLOWER!!!!!
--------------------------------------------------------------------------------------------------------------------------------------------------------------------------------------------
👹YOOOOOOOO WHATS GOOD FAM HAD A NICE WEEK EXCEPT ONE OF MY TENT CLIP FANS FROM VIVOSUN BROKE ON THE OSCILATTOR MECHANICSM ASSEMBLY AND
SO I HAD TO REMOVE IT FROM THE GROW, I WILL LUCKILY ONLY NEED IT TO FINISH OUT THE GROW BUT IM GLAD IT DIDNT SWING RIGHT INTO MY PLANT MY GOOD
OL MIGRO LIGHT WAS ABLE TO CATCH IT SLIGHTLY AND IT HELD IT THERE A COUPLE HOURS FACE DOWN, WHILE ON LOL WHICH WAS AMAZING PROPS AND SHOUTOUT
TO MIGRO AS ALWAYS LOL, BUT YEA GUNNA JUST RUN ONE FAN, UPDGRADING MY FAN SETUP NEXT GROW FOR SURE.
👽ALSO AS FAR AS THE GIRL GOES, SHE IS TURNING HUES OF PURPLE FOR SURE AND EATING THROUGH EVERYTHING SHE HAS RETAINED AFTER FLUSH, HAVENT WATERED
HER SINCE SATURDAY AND SHE IS STILL MOIST TO THE 2 INCH FINGER CHECK SO JUST GOING TO TURN LIGHTS OFF IN ABOUT AN HOUR OR SO AS SCHEDULED BUT IM
GOING TO KEEP THE LIGHTS OFF AND IM GOING TO LET HER SIT FOR 2 DAYS LIGHTS OFF, IN THE COLD BREEZE OF THE TENT WITH INLINE FAN ON, IM GOING TO DIAL THE
CHOP AND HANG PROCESS TO BEGIN SATURDAY ON 12/16/2023 AND SHE WILL HANG FOR 10 DAYS WITH SMALL BREEZE UPSIDE DOWN WITH TEMP AT 65-70F AND HUMIDITY
AT AROUND 50% AND THEN WHEN CHRISTMAS TIME COMES ITS BUCK AND TRIM THEN, JAR AND BURP FOR 2 WEEKS AND IT WILL BE DONNNNEEE!!!!!!!!!!!!!!!!!!!!!!!!!!!!
👽STAY TUNED FOR THE TIME LAPSE ITS GUNNA TAKE ME ABOUT A WEEK TO COMPILE AND EDIT IT BUT ITLL BE WORTH THE WAIT I WILL UPDATE MY IG ALSO IT WAS HACKED!!!
LOVE TRUST AND RESPECT FAM STAY UP AND LETS GET IT BRACKIN!!!!!!!!!!!!👺👹😈😎👌💪🙏

Processing
Likes
13
Share


@ladyjane
Follow
Gave the ladies their first dose of nutrients. I made sure they were very diluted. they loved it. When I came to check on them, they were all praying. Yay.

Likes
12
Share


@auto420
Follow
Selam Kankalar bir haftayi daha bitirdik hersey gayet stabil EC1.0 Gubrelerini verdim ph 6.2 Herkeze slm dumaniniz bol olsun.
Likes
8
Share

@Greybeardbud
Follow
Defoliation happened mid week before a trip away for a few days got home today to see they have just popped. Growing very nicely even the little one that was pegged down to spread it out. Plants ranging from 20cm to 35cm and all looking very happy with themselves. They have also been getting some 90’s grunge music that apparently they dance along to
Likes
20
Share


@CampExotic
Follow
Fukushima should be done drying this week. Daddy MAC is coming along with the fade.

Likes
39
Share


@GrowWiththeBro
Follow
Mild flushes last week.
Day 54/ Day 1 of Flowering. Fed and light defoliation.

Likes
24
Share


@Captensmokey
Follow
And another week beyond the hesi nutrition is just good. Still works now. But we rinse the potting soil for a few weeksAnd another week beyond the hesi nutrition is just good. Still works now. But we rinse the potting soil for a few weeks. 😁
Likes
11
Share


@TheMeltCorporation
Follow
Havrested a bit before just becouse i needed to have a harvest before the full one
Likes
19
Share


@valiotoro
Follow
Wonderful color😈
The smell is divine🤩
The trim was super easy & the buds are dense & super sticky👌

