The Grow Awards 2026 🏆 


Likes
4
Share
@KhaVigga
Follow
now im start to using many kind of sugar till harvest, beer-fpj-molasses-coconut water...


Likes
142
Share
@MadeInGermany
Follow
Hi everyone :-)
This week the buds developed super ;-) All are beautiful 😍.
Super genetics 👍.
Blue Cheese pheno 1 is slowly coming to an end :-)
This week I will start to use up the remaining nutrients and harvest in 10-14 days ;-)
Everyone else needs something else :-) have fun with the videos, stay healthy 🙏🏻 and let it grow 🌱


Likes
7
Share
@RealGrowDiary
Follow
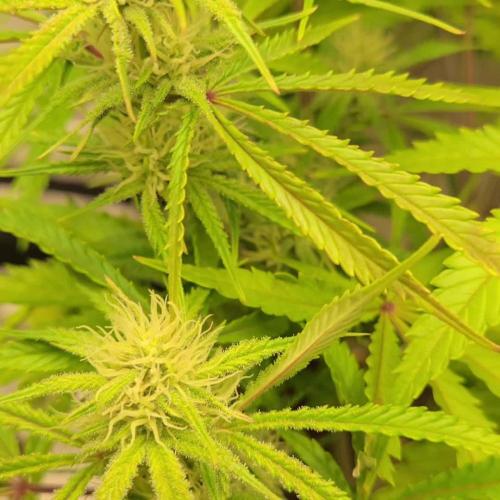
Day 49
Flower development is clearly advancing, with buds getting noticeably denser and stacking nicely along the branches. Trichome production has increased significantly, giving the flowers a frosty appearance.
Pistils are still mostly white, with a few beginning to darken, indicating mid-flower progression. The leaves remain healthy overall, with good color and no major signs of nutrient deficiencies or stress, Minor fading on some lower leaves is normal at this stage.
The plant maintains strong structure and stability, and the canopy remains well managed inside the tent. Aroma is becoming stronger day by day, showing good genetic expression. Overall, the plant is healthy, on schedule, and showing great potential as flowering continues.
Likes
11
Share
@HighHolly_Wellness
Follow
Put into paper towel June 4/21,
Popped June 8 and put into soil.
Humid and hot conditions, high 20-30s •C. Rained overnight and into the morning of June 8th. Very humid day.
Placed into plastic cups with slits for easy transplanting.
Grow baby grow!!
June 9th- poor girl got trashed by vermin overnight. Transplanted back into soil and topped with worm castings. The jerks….
Showing great signs of life after… about to pop the seed off the sprout 💪🏼
June 11th- not sure if it’s because we’ve had less sunlight and cooler temps, or if she’s having difficulties popping her shell off but she’s looking kinda droopy. She’s well enough hydrated…. Or seemingly so. Humidity also dropped after several days of high temps and humidity. Shock from the vermin transplant? Tell me girl, how can I help you grow to your most majesticness??
Last pic update- June 12… she didn’t make it RIP sweet girl


Likes
5
Share
@AUTOBUDDHA
Follow
Very strong bud growth this week! I have 1 out of the five that its quite a bit ahead of the others, I will post a photo of her main cola.
Otherwise, they are looking fantastic. Smelling amazing also.
Today is day 77. So the end of week 11.
Looking forward to going to space on these mango beauty's!
Introduced them to black strap molasses tonight in their feeding.
Ph water to 6.2 with 5ml of mollases per gallon.
This will be my first go with mollases, hoping it helps build bud density!

Likes
22
Share
@Weedbadk
Follow
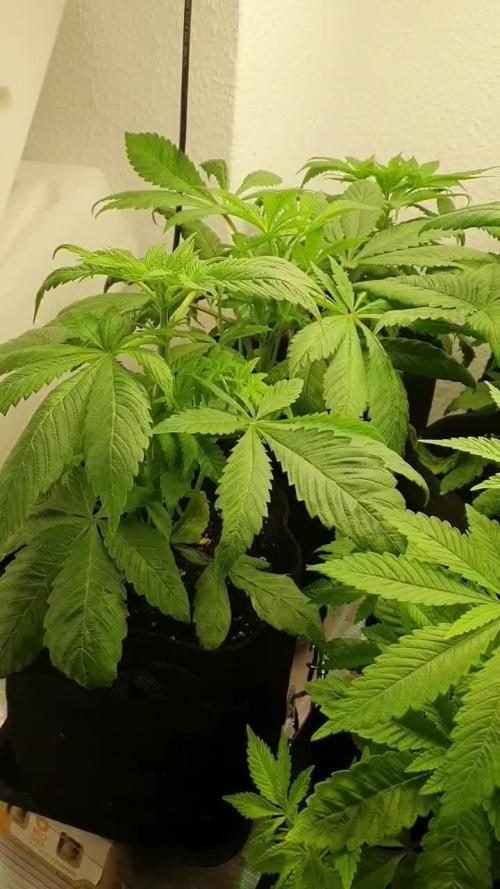
Día 1 y todas germinaron súper rápido 3 días
Día 5 desde puesta en sustrato
Ya todas están arriba
Estoy solo pulverizando el sustrato
Temperatura 23c humedad 75%

Likes
8
Share
@Sativa763
Follow
Day 14 of Bloom today 14 (May).
Still Stretching a bit more I hope, but looks ok so far.. considering previous problems I had.
next week I will brew my first compost tea as booster and few days after that some defoliation/lollipopping will be done..
Happy growing 👌

Processing
Likes
43
Share
@biggreens420
Follow
dawgstar is doing awesome stretched out nice and focusing on flower production gave her a little strip and tucked some branches she's drinking like a horse 3l daily will start using bud candy next week at 0.5g perl very happy with her so far thanks for reading happy growing guys

Likes
95
Share
@Only4passion
Follow
Hi 👋 growers !!
This week ad new light I received from marshydro the amazing ts 3000 girls seems to enjoying their time with this new light ✨🔥
I strongly recommend this model the light spectrum is complete and the value for money is really incredible👌🌱
Flowering time now just ad 2ml/l of calmag.
Northernlight she’s really fast all ready forming buds !!🤩
Tente ⛺️ : marshydro 120/120/2m
Light 💡 : marshydro ts 3000
Genetics :
- 5 girls scoot cookies auto, Seedstocker
- 3 runtz auto, Zamnesia
- 2 northernlight auto, Seeds Mafia
Soil : coco mix 50%
Cannaterra light mix 50%
Promo code zamnesia 10%off:
🔥🔥⭐️✨ GROWITGD✨⭐️🔥🔥
Marshydro discount code :
⭐️⭐️🔥Only4passion 🔥⭐️⭐️
Thanks all for the likes n comments happy to share with you all growers 🙌🍀💪💪🍀👊


Likes
4
Share
@Phatlad187
Follow
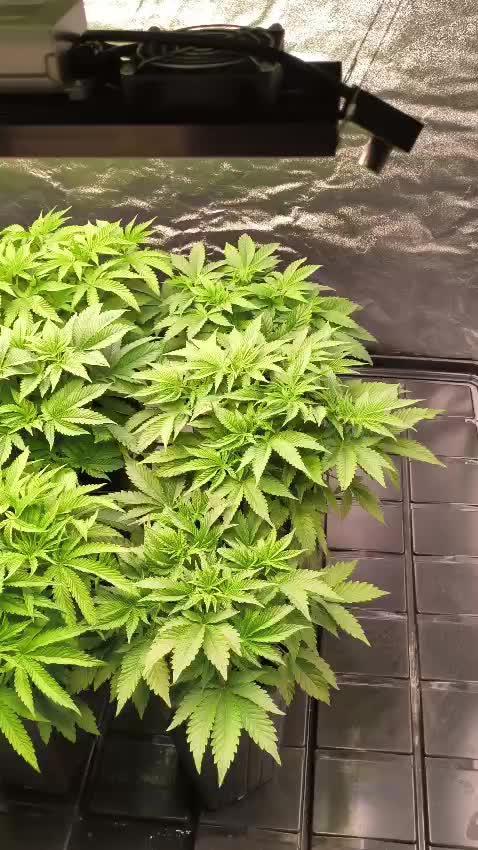
Week 3 all is fine growing as they should be and responding good tonthe 24 hours of light

Likes
43
Share
@Jack_Greenstalk
Follow
I made a few big mistakes. most notably not flipping early enough. I vegged til 13 inches hoping theyd stretch to 26-30 inches and have adequate space away from light, well I underestimate them way too much! despite stretching a ton, these girls were both amazing to grow. bounced back to every training, with a lot of lst and topping and defol, they never stayed down long. they eat a lot, and once i got my feed dialed in they grew healthy and strong thru harvest. i chopped at all milky trichs, decided to harvest all in one go. so lowers have a tiny clear trich but mostly milky, tops are fully milky and after dry have a tiny touch of yellow or amber at tips. effects are ranging from 70-30 sativa (on lowers with clearer trichs) its high energy. very distinct feeling of relaxation all thru body from neck down feel loose in joints and relaxed. in mind i feel very sharp, focused and productive. at the same time i noticed i was more creative. i teach tennis classes and i was better able to describe what I was trying to convey to my student who is a teen, creativity helps. both our games improved, definitely a nice productive smoke, tastey as hell in vape or bowl. grinds up and smells like blueberries soaked in gasoline, topped with a big squeeze of lemon and dash of spicey red chili peppers! ooooh eeee! this stuff is amazing, and the bubble hash i spun looks like its going to be top quality once it dries! will post more pictures of buds once they cure up a bit more. should mention as a hash / rso maker, i also pulled over 1,000 grams of wet fan leaf, and a few hundred grams of trim which yields great medicine not accounted for in harvest #s00
Processing
Likes
20
Share
@Hawkbo
Follow
Couple got a little burn I think maybe a little too much soil in there with the coco on top of the light feed? I got all the final pots filled up today they will go in 3 gal bags either today or tmm. It's a Greentree pro ultra coco/perlite mixed with some roots organic soil about 70/30.
Likes
101
Share
@Ferenc
Follow
Day 73, 25th of November 2020:
Hi! Well they are getting nice maturing buds getting bigger and all good.
I love the red colour of the Red Hot Cookies. Unfortunately, Tropicanna Poison and Red Mandarnine does not show any signs of purple or red colour.
Kalini Asia neither albeit, the bonsai version gets purple.
Gelato is little beauty. So yes, basically not much to say.
Fertilization is still the same every second day with the ratio and mixture above stated.
The lamp is on 11.15 min and off 12.45 min.
Last week was 15 min longer light cycle....
So every week 15 min shorter light cycle until the 5th week. So far -45 min. It switches on at 6 am and off at 17.15 pm.


Likes
11
Share
@Madman2020
Follow
Week 1 Aiming for:
Generative steering VPD 1.18
DLI=44
37-53luxx
Day 3
Irrigation system did not produce runoff. I will hand water them all untill runoff.
Dripper uses 4.224gl per day
Plants are 14-18inch tall
(4 minutes is a shot)2%= 220ml
4minutes to hit 220
8.64*110=950
4 events of 220=880
Early flower schedule
(Generative 4 minute water)
6:30 220 P1
6:49 440 P1
7:09 660 P1
7:24 880 P1
7:43 1000 P1
03:00 1220 P3
36.8klux(40.8DLI)is minimum(940umol)
40klux (44.37DLI) is Perfect(1027umol)
53.2klux(59.18DLI) is maximum (1370umol)
They say PPFD of at least 800-1100 (800-1100) micromoles/m2/s-1 for perfect optimal lighting without additional CO2.
PPFD of at least 800-1500 (800-1500) micromoles/m2/s-1 for perfect optimal lighting WITH additional CO2
Day 6
Plants are good for LST
Day 7 looking like we need to defoliate. 4 plants still look sick
WAtering is going well
Likes
12
Share
@GizaWRZ
Follow
Ladys growing really well. Only what issue i have its some of them are taller And smaller, other than that they looking fantastic ✌️
