The Grow Awards 2026 🏆 


Likes
Comments
Share
@eldruida_lamota
Follow
Que pasa familia, vamos con la cosecha de estas Black Muffin F1 de Sweetseeds.
Esta variedad me resultó bastante sencilla de cultivary es bastante resistente, si no la maltratáis crece mucho y bien sana, la flor se ve increíble, tiene una cantidad de resina considerable y unos tonos rojos oscuros muy peculiares, se ven genial.
El olor que desprende es bastante frutal con toques cítricos, no pinta nada mal, las flores están prietas.
No da mayores problemas, el ciclo no es largo, cuiden con la altura ya que se desmadran un poco.
IMPORTANTE destacar: En las fotos comprobaréis que ya no hay botes de cristal con sobres de bóveda, ahora hay Grovebags.
Que son una especie de sobres o bolsas que retienen el peso, previene la aparición de moho y mantiene intacto el terpeno, para que el curado sea más óptimo.
Hasta aquí todo, Buenos humos 💨💨💨

Likes
14
Share
@CanadianFillmore
Follow
Week 6 begins with a 3 liter feeding and removal of a few dead leaves. Buds are developing nicely and frost is present, woo hoo!!
Thanks for stopping by.


Likes
61
Share
@WhiteEdge
Follow
23.04.2024
Continue into week 8
Replaced all filters in the system and cleaned them.
Mixed a new batch with the following components:
20+25ml AN Connoisseur Bloom A+B
Total volume: 34 liters
Electrical Conductivity (EC): 1.0
Target EC for this week: 0.8-1.0. Adjustments will be based on plant observations.
Performed one long misting session (3 minutes).
Environmental Conditions:
Outside temperatures going up, today is raining but this week start higher temps and humidity
Wedding Cheesecake: One girl is gonna finish in this week, Two others probably in next. Frutti terps in this, Two pheno in total from 3 girls'
Tropicana Cookies: Phenomenal strain; One girl is going to finish this week and second couple days after . Two pheno in Tropicana's girls
Purple Lemonade: Tall plants, massive producer, all three girls will be in 9 week provably. Here so far all three girl share same characteristics and bud structure
Beautiful and high odor in the room!
Lighting Parameters: PAR Map: Maximum PPFD is 950, minimum PPFD is 650.
VPD: Ranges from -1.1 to -1.2.
Daytime Temperature (DT): 23-24°C.
Nighttime Temperature (NT): 19-20°C.
Leaf Temperature: 21-22°C.
Light Distance: 45-55 cm from the plants.
CO2 Levels: 700+ ppm.
HLG Scorpion Diablo: Set at 70%, positioned at a 45-55 cm distance.
Girls drink less water, so for this week and till the end of flowering new misting timing's
Daytime: ON for 70 seconds, followed by 30 minutes OFF.
Nighttime: OFF for 70 seconds, followed by 35 minutes OFF.
Nutrient Tank (NT):
pH: Maintained between 5.80 and 6.00. Stable PH, small drifting up and downs
EC: 1.05.
Temperature: 19-21°C
25.04.2024
TrolMaster toys arrived! Purchase new DST2E, DSP2E, DSH2E, AMP3+probes. Another DSH2E and DSP2E ordered to complete this grow box!
Replaced all filters in the system and cleaned them.
Mixed a new batch with the following components:
25+30ml AN Connoisseur Bloom A+B. Total volume: 17 liters
Electrical Conductivity (EC): 1.05
Tomorrow Tropicana Cookies harvest! Put bucket with this girl on separate line for flushing
Wedding Cheesecake also finish soon, probably in next week, Wednesday think...
Purple Lemonade still need full week or more...Exceptional odors
Temps and humidity outside start to raises, hope i will finish this run before Tropical heat
Lighting Parameters: PAR Map: Maximum PPFD is 950, minimum PPFD is 650.
VPD: Ranges from -1.0 to -1.1.
Daytime Temperature (DT): 23-24°C.
Nighttime Temperature (NT): 19-20°C.
Leaf Temperature: 21-22°C.
Light Distance: 45-55 cm from the plants.
CO2 Levels: 700+ ppm.
HLG Scorpion Diablo: Set at 70%, positioned at a 45-55 cm distance.
Daytime: ON for 70 seconds, followed by 30 minutes OFF.
Nighttime: OFF for 70 seconds, followed by 35 minutes OFF.
Nutrient Tank (NT):
pH: Maintained between 5.80 and 5.95. Stable PH...
EC: 1.05.
Temperature: 19-21°C
26.04.2024
Connect TrolMaster components into the Tent-X system. Program DSP2E, Temperature DST2E, Humidity DSH2E, as well as the AMP3 sensor with PH and EC probes, are all in place.
After calibrating the probes, AMP3 module works perfectly! It has a quick response in measurements, is accurate, and I am very happy about the possibility of online monitoring of liquid values.
After day off use i can tell that all readings are very consistent, compared with Milwaukee, totally without all over the place measurements. Perfectly steady and on spot receding!
The Program device runs flawlessly all day, and I hope it has solved all the problems I had with DH48-S timers.
The humidity control operates without errors throughout the day, and it’s nice to see in the app when the module is active.
Raise light as much as i can..50-55cm from canopy. Set off misting time from 30min to 35min @ day time , and from 35min to 45min @ night time
Flush Tropicana Cookies' for one more day, tomorrow harvest, prepared tent for drying with humidifier , ventilation and temperature and humidity controllers
PAR Map: Maximum PPFD is 850, minimum PPFD is 500.
VPD: Ranges from 1.0 to 1.1.
Daytime Temperature (DT): 23-24°C.
Nighttime Temperature (NT): 19-20°C.
Leaf Temperature: 21-22°C.
Light Distance: 45-55 cm from the plants.
CO2 Levels: 700+ ppm.
HLG Scorpion Diablo: Set at 65%, positioned at a 50-55 cm distance.
Daytime: ON for 70 seconds, followed by 35 minutes OFF.
Nighttime: OFF for 70 seconds, followed by 45 minutes OFF.
Nutrient Tank (NT):
pH: Maintained between 5.80 and 5.95. Stable PH...
EC: 1.05.
Temperature: 19-21°C
28.04.2024
First harvest in this run! Tropicana Cookies No1 is a winner.) First Tropicana Cookies is harvested on 89 day from seed. Total 55 days off flowering.
Fast flowering indeed as fast in vegetative stage. Cut this girl in branches and hang upside-down in smaller tent for drying
Set RH @ 55% , temperatures not able to control so they will be something around 20-21 in drying tent
Second Tropicana will be chopped within a couple off days. Checking trichomes with microscopes can tell that one Purple Lemonade is also going to finish in next days
Somme lady's will take full 9 weeks or so..
Lowering light intensity, EC in tank start to raise slowly so i will start to adjust according to condition. Currently 0.85EC is perfect strength i think
PAR Map: Maximum PPFD is 850, minimum PPFD is 550.
VPD: Ranges from - 0.9-1.0
Daytime Temperature (DT): 23-24°C.
Nighttime Temperature (NT): 19-20°C.
Leaf Temperature: 21-22°C.
Light Distance: 45-55 cm from the plants.
CO2 Levels: 700+ ppm.
HLG Scorpion Diablo: Set at 65%, positioned at a 45-55 cm distance.
Daytime: ON for 60 seconds, followed by 30 minutes OFF.
Nighttime: OFF for 60 seconds, followed by 35 minutes OFF.
Nutrient Tank (NT):
pH: Maintained between 5.80 and 5.95. Stable PH...
EC: 0.85.
Temperature: 19-21°C
Week 8 off Flowering in Summary
80 litter off RO water,
120ml+150ml AN connoisseur A+B
45kW electricity in total for light, Pumps and AC Infinity Fans. 42kW for Light + 2kW Dehumidification + AC Infinity ventilation
Week start @ 1.1EC, nutrient strength., week finish with 0,87EC
Tropicana Cookies is first harvested on day 89 from sprouting , week 8 off flowering
Purple Lemonade is on second place with harvest on day 91, last day off 8 week off flowering
PH was stabile and move from 5.70 min to 5,9 max.
Light distance for this week - 50-55cm from tallest top , PPFD levels around 900 in center, trough whole week. Lowest reading 500 @ corner
Temperature are from 20c at start off day to 24.5c max at some points.
Night temps around 19.5-20c. Outside humidity is generally low
This week i have install TrolMaster AMP3 sensor and humidity, temp and program devices
Day RH is moved from 45% to 55% max, at night times drop to 45-48%
Lighting Parameters: PAR Map: Maximum PPFD is 900, minimum PPFD is 650.
VPD: Ranges from -1.0-1.1.
Daytime Temperature (DT): 24.5°C.
Nighttime Temperature (NT): 20°C.
Leaf Temperature: 22°C.
Light Distance: 45-55 cm from the plants.
CO2 Levels: 700+ ppm.
HLG Scorpion Diablo: Set at 65%, positioned at a 45-55 cm distance.
Daytime: ON for 70 seconds, followed by 25 minutes OFF.
Nighttime: OFF for 70 seconds, followed by 35 minutes OFF.
Nutrient Tank (NT):
pH: Maintained between 5.8 and 6.1
EC: 0.87-1,1.
Temperature: 20-21°C

Likes
7
Share
@Naujas
Follow
wow, she's amazing:) with the conditions she has, this is a super result :) the weather is not spoiling us - every day, little sun - lots of clouds + almost half a balcony :D :D she has 3 more weeks - then I'll go on a long vacation :) everything didn't go as planned,:) I think she needs more time:) there will be a renewal until the finish :).

Likes
13
Share
@Northern_Ent
Follow
June 24: decided to tie down more branches and also the smaller plant that had lost its root as a baby but kept going. With tie down it’s starting to look like a single plant. It’s also starting to flower after 8 weeks of slowish vegetative growth, and this is likely due to the overnight temperatures.
It has been a cool and wet June here.
June 27: this plant is doing great and it is really responding well to the tie down. I always figured this was more an indoor technique but it certainly is working great outdoor on this auto White Widow. I love growing weed. Endless variations and techniques to be applied.
Likes
3
Share
@DrBud420
Follow
21.06.
Wedding Cake 1# Day 56#
This plant is doing better than anything I have, and it gets the least sun...what a champion.
Wedding Cake 2# Day 50#
This plant got very hungry, it started pulling food out of the leaves violently.
The soil it's in is a bit stronger than it would be suitable for, so I thought it would have longer food and if there was nothing to do with each other, but it turns out that in a week there is less than the case with the 1# plant, which is in a much better soil.
With a little delay because I'm a lazy stoned person, and in addition the responsibilities regarding the plants are already starting to grow, and I also have a lot of work around the garden and then I don't always arrive in time to release the update.
The plants are progressing well, but now they are already hungry, so the next watering is for food.
Two days ago they were topped for the third time, I also topped the two highest side branches.
Yesterday was the end of their eighth week, the pictures are also from yesterday.
Last night I sprayed them with SMC for prevention, but none of those pests can harm the plant outside as well as inside..first of all, the plants are much bigger, and therefore have much more leaf mass, and secondly, it is nature, there are many of them in nature, the only thing that can destroy them all are caterpillars during flowering and mold when the humidity is too high or when there are frequent rains, everything else does not worry me at all.
Tomorrow I will move them somewhere where there is a lot less grass because now they have already filled this space and they can't expand any further, so in order for them not to get too long and to go wider I have to move them where the grass and other plants won't bother them.
Stay High and Keep Growing!!!

Likes
183
Share
@OrganicNature420
Follow
Germination date 🌱 12/07/2021
Day 120 12/11/2021
Strain 🍁 Ethos Genetics Banana Hammock R1
(Mandarin Sunset x Grapegod)
THC% • Unknown
💡 Mars Hydro FC4800
• Power draw 480W + 5%
• Max coverage 5 x 5
• LED 2070pcsSamsungLM30B1&Osram660nm
• Max Yield 2.5g / watt
• Noise level 0 DB
• Removable Driver +2m cable
• Daisy chain (multiple lights)
https://marshydroled.co.uk/products/mars-hydro-fc-4800-led-grow-light-samsunglm301b-commercial-greenhouse-medical-indoor-kit 🇬🇧
https://www.mars-hydro.com/buy-fc-4800-480w-4x4-energy-saving-full-spectrum-commercial-led-grow-light-mars-hydro-for-sale 🇺🇸
PROMO CODE • (ORG420) DISCOUNT 👍🏻 marshydroled.com
⛺ Mars Hydro 120 x 120 x 200cm
📤📥 AC infinity 6inch
💧 10lt dehumidifier
❄️ 3.1kw air con system
💉 Nutrients GreenBuzzLiquids
Organic Grow Liquid • 1-4ml until 2wk flower
Organic Bloom Liquid • 2-4ml flower stage
Organic More PK • 2-4ml +wk3 of flower
Organic Calmag • 1-2ml/lt whole grow
Fast Plants Spray • first 3days at night lights off
More Roots • 2-5ml veg +2wks flower
Fast Buds • 5ml +wk2 of veg until 1wk flower
Humic Acid Plus • 2-5ml whole grow
Growzyme • 2-5ml whole grow
Big Fruits • 2-5ml flower stage
Clean Fruits • 5ml flush 1wk
Ph powder
Root Gel
Living Organics
PROMO CODE • organicnature420 15%off ✌️🏼
https://greenbuzzliquids.com/
🥥 Growing Media • Coco Coir
Notes 📝
And we are DONE 🌱🍁.. In my opinion the worse one out of the 4 but still smells incredible and is coated in tricones. Green buzz liquids smashing it out of the park. All 4 smell different and potent 👃🏼 great nutrients 👊🏻 Organic proving why its the future of growing.
FC4800 is a beast of a light and for those wondering this out does the equivalent sf4000 from spider farmer hands down. Colours are unreal and the buds are nice and dense 💚 Marshydro gets my vote 👍🏻
Remember PROMO codes for both GreenBuzzLiquids and MarsHydro.com in the grow bio above 🖕🏼
Happy growing fam ❤️🌱🍁👍🏻

Processing
Likes
29
Share
@Canadian_Bud
Follow
28-10-2018
Filling in quickly, nice blend with the Gorilla Glue, managed to make a few clones last week before changing to 12 cycle. hope they can stand the wait until this round finishes in 8 weeks if not i will just re clone again off the clones lol
31-10-2018
Halloween and the girls are wearing their best costumes. GG are really starting to beef up, There are quite a few buds under the screen, would have been a ton better had i started training earlier on.
Some new pics of the progress. Enjoy!
1-11-2018
White Widows are showing signs of flowering and the Gorilla Glue are pumping it up

Likes
2
Share
@fabialien
Follow
Lunes 26 de Agosto 2024, segunda semana de vida de estas preciosas, siguen en giffy, próximamente trasplantar a macetita de cartón, iremos a Walmart a comprar sustratito para ese trasplante.


Likes
3
Share
@tony_kiffton
Follow
Es wurde in einen 3 Liter Transplanter Stofftopf von Gronest umgetopft - Natürlich in die gute Rosenerde von Floragard -
Die Wurzeln sind schön weiß und super vital -
Gleichzeitig wurde die Lampe auf 12/12 umgestellt. 😎


Likes
36
Share
@TaterheadJohnson
Follow
7/19: Started new nutrients today. Filled gallon jug with new nutes. Poured half of new nute mix in half gallon jug. Poured the entire half gallon jug into reservoir.
7/20: Bumped light intensity to 50%
7/21: Filled reservoir to the 2nd line today. Added a total of 1 gallon to res to get it to that line. Poured the rest of the mixed nutes for this week (half gallon) and then another half gallon of just plain water.
7/24: Bumped light intensity to 55%
7/25: Sadness today 😞.. While in the process of doing more LST today I accidentally snapped the main stem. I Panicked! Moved plant back in opposite direction to counteract the split. Will be monitoring very closely! 🙏🏾
***** For this Grow******
“Day Air Temperature” will be the max temp of tent for the week.
“Substrate Temperature” will be the average temp of tent for the week.
“Night Air Temperature” will be the lowest temp of the tent for the week.
Likes
25
Share
@Kakui
Follow
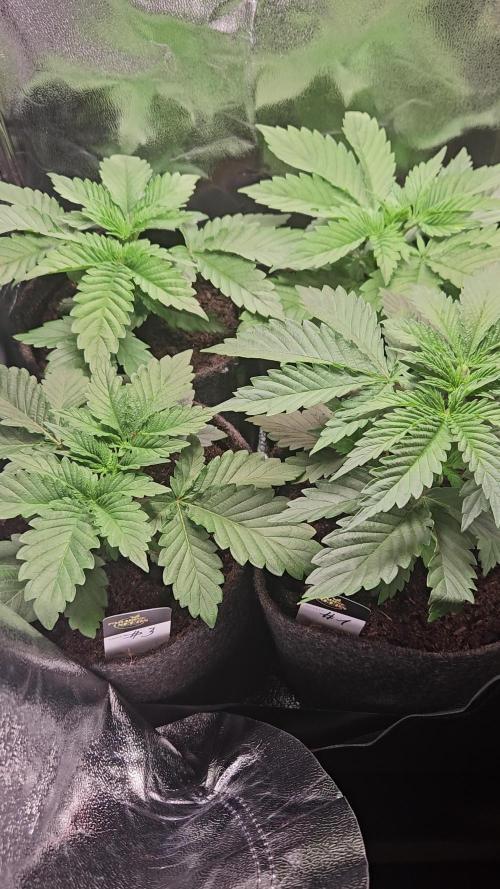
Veg54, riego con 6.2 pH y EC 1.5, drenaje de 2.0 EC y pH 6.3, todo ok. Las plantas ya alcanzaron entre 25~30cm, en 2 días más comenzará la pre floración.
Veg56, están casi de 30 centímetros de altura, último día de vegetación, mañana entrarán a pre floración, necesitan una defoliación.

Likes
6
Share


Likes
2
Share
@Hydro_sweetness
Follow
Hey welcome back in the 7th week of flowering with the Dutch Passion’s Brooklyn Sunrise.
This week the ladies are doing pretty well after giving giving them some PK 13-14 extra.
You can really see that they are also finaly swelling and some of them just exploded!
I will continue the normal feeding schedule from now on again.
That’s it for now see you all next week!
Likes
14
Share
@Zengrower
Follow
The CBD has now fully recovered from her water logging adventure. The new leafs look very healthy and no signs of stress from the topping. I have to fix the ScrOG rack as the heat in the greenhouse caused the 3D printer clips (that hold the stand in place) to expand and loosen. Probably some binding wire will do the trick.
Until I find a solution for the ScrOG rack, I applied an LST clip to the main branch. This will keep her from growing vertically too much. The next day the main branch was already pointing up. I attached some binding wire to keep the top horizontal and give the side branches a chance to grow taller. I bought some new clamps to keep the scrog rack in place. More on this in the next few days!
Likes
13
Share
@Robeeriegenetics
Follow
Ooooooweeeeeee they’re all doing so good even the extras that I threw in flower with out cloning are doing great .. in just 2 more weeks I’ll throw the donor plants into flower
Likes
12
Share
@GREENPHOENIX6262
Follow
Week 1 Flower 09/04
Everything is running smoothly
Introduced NPK Phosphorus - Potassium
Scrog net dropped - Flowering evenly.
Veg nutes stopped.
*Mimosa (1&2) end of week recap -09/09
Both plants are in early flower and proceeding accordingly.
Nute feeds remain the same.
Plants have grown in height approximately 5inches.
Moderate defoliation on the bottom half of both the plants
Will LST to trellis next coming week.
Likes
30
Share
@ArtisticGrown
Follow
Sooooo this has been an amazing and exciting week! Ive been patient with this last plant and really checking the trichomes i inly wanted a few amber caps on the nugs, was looking for milky on this one! Shes smelling amazing and the color change was such a sight to see! She did so well with the nutrients and loved the 2 week flush i did! I cut her down did a wet trim and have em in the drying rack! Im excited to see how she cures and drys ready for the smoke reveal! Much love and happy growing!!!
*check out the examples of the rewards from the traing i did with lst, hst, desolation love seeing this!!* learning this craft and style of growing is a blast! And everyone should try it!

Likes
19
Share
@cubansoldier
Follow
I guess when I topped the girls I left a little i piece of the cola on some of them so a few of the plants have extra colas growing from the main stem that was topped which is a good thing cause enjoy who doesn't like more colas! They start out looking like mutants but after a while they start looking more normal.

