


Likes
Comments
Share


@burnout
Follow
Day 14 of flower, looking good, lots of budding sites. Papaya Bang Bang stretching nicely, White Gold not as large of a plant. Made some cuttings and waiting for them to root, will be giving some to a friend that does hydro and to a friend that will grow these outdoors.

Likes
37
Share


@Master_weeda
Follow
Bonjour à tous les padawans et les maîtres jedis
La semaine 4 va être décisive pour cette demoiselle car je vais pratiquer sur elle un main-lining et un LST
Je précise que le main-lining n'est pas recommandé pour les autofloraisons car son cycle de vie prédéfinie ne lui permet pas de ce remettre pleinement. Cela aura forcément un impact sur son rendement, pour des raisons esthétiques et un espace de culture restreint je n'ai pas d'autre choix.
Pour ce main-lining j'ai attendu le jour 24 et l'apparition du septième noeuds.
Une fois le main-linning terminé je pratiquerai la technique du LST ce qui me permettra d'avoir une canopé plus homogène donc une meilleure pénétration lumineuse et par conséquent un meilleur rendement.
Vous pouvez voir une vidéo de mon main-lining qui détaille la manière dont je procède pour réaliser cette technique.
Petit rappel et explications sur cette technique:
Le main-lining a toujours été une technique très populaire parmi les cultivateurs, puisqu'avec des ajustements simples pendant la première étape de croissance, vous vous garantissez des récoltes plus que productives. Il s'agit de faire pousser la plante de façon verticale et symétrique afin de profiter au maximum de la lumière et de l'espace, des aspects très recherchés dans les cultures d'intérieur. En guidant les branches avec des cordes et une série de tailles initiales, vous établirez des patrons de croissances vigoureux pour vos plantes.
COMMENT METTRE EN PLACE LE MAIN-LINING
En partant de la graine, attendez que votre plante ait au moins développé 5 nœuds. Lorsqu’ils seront formés, taillez la plante au niveau du troisième nœud. Retirez tout ce qui s’est développé en dessous du troisième nœud(Moi j'enlève que le premier et garde le deuxième et troisième). Cela formera le Y ou le T initial que vous recherchez. Permettez à votre plante de se remettre de ce stress imposé durant quelques jours avant de passer à l’étape suivante.
Votre plante comporte désormais deux pousses principales(ou 4 si vous gardez le deuxième noeud). Ces dernières devraient être attachées avec du fil ou de la ficelle(ou du fil de fer). Cela dirigera la croissance de manière horizontale. Faites bien attention en attachant les branches, ne les brisez surtout pas. Soyez doux.
Une fois que la plante s’est un peu développée, vous vous retrouverez avec 4 tiges principales. Vous pourrez répéter ce processus autant de fois que vous le souhaiterez, accédant ainsi à de plus gros rendements. Rappelez-vous tout de même que plus vous répéterez ce processus, plus la période de croissance sera longue.
Sauf pour les autofloraisons car étant donné le temps additionnel qu’il lui faut, le main-lining n’est pas compatible avec les variétés à autofloraison. Les autofloraisons ont des cycles de croissance très rapides, et d’ici à ce que la technique soit mise en place, la moitié de leur développement sera déjà passé. Cela pourrait potentiellement endommager les récoltes et cela influe sur le rendement
Dès que vous aurez produit la quantité désirée de séparations, il ne sera plus qu’une question de temps avant que des têtes uniformes commencent à apparaître. Une légère défoliation régulière durant le cycle de croissance vous permettra également de vous assurer d’une distribution égale de la lumière, et empêchera votre plante de gâcher de l’énergie avec de grandes feuilles superflues. Retirez ces feuilles dès qu’elles commencent à prendre trop de place.
Que la force soit avec vous 💪

Likes
39
Share


@LilCeeDaWeedGod
Follow
Week 10
December 13
-Had to super crop P4 again as this one is growing straight into the light
-water every other day and top dressing every two weeks
-not sure how long she’ll go but we looking decent

Likes
13
Share


@GrandmasBoy2021
Follow
Week 10,
Week 10 has been fun. The buds are becoming denser and starting to almost look like a finished product. I am planning on harvesting the plant the first week of next month, so three weeks or so and counting!
I am adjusting the tie downs twice a week trying to get the buds as much sunlight as possible.
I am watering every 3 days with 6.0 ph water. I have been putting a teaspoon of FloraNova in the water with a tablespoon of molasses mixed in but it appears she received a little nutrient burn. I'm not to worried about it because I wanted to make sure the flower sites received enough nutrients to make some dense dank buds. It isn't a huge burn but a little. As a result I started mixing only half a teaspoon of FloraNova in the water to make sure any future burn doesn't happen.
I am excited about the plant, she is starting to look like a thiccy ha I am probably going to starting flushing in three weeks.
Let me know if you have any questions/concerns/comments. Happy growing Growmies 🙌

Likes
12
Share


@Jays_Not_Here_Man
Follow
Had some very good growth this week. Days 14-21. The girls have been dialed in at about 63-65% RH and 76-79 degrees F.
On day 18 I dialed up my BP2500 to about 165 watts at the wall, and kept my small tent heater in place for the time being, nights have gotten cooler. The girls seem to be ❤️ the extra light, without causing any harm.
Switched from distilled water to tap water that has been dechlorinated for 24 hours mid way through the week, no issues shown. Added 1 ml of Micro, and 1 ml of Cal/Mag to 1/2 gallon of water, PH’d to 6.2 and watered approx. 1/2cup of water per x2 throughout the week, and about 1 cup once transplanted.
On day 21 they were all looking so healthy, with some roots coming from the bottom of my starter pots, I decided to transplant into 2 gallon nursery pots. My final pot will be a mix of 5 and 7 gallon fabric pots, try and see if any differences can be had.

Likes
21
Share


@Peggers
Follow
Been on the straight water halfway through the week going to be keeping a close eye on them in order to time a 2 day darkness period and I would like them to be close to dry at the roots also so it's all watchy and trying to balance and time things together. One thing is for certain tho some of the buds smell like lemon cleaning products! Crazy. Should be Harvest before next week so I might pop on with some decent pictures if I can get any. Will reupdate once dried also.


Likes
14
Share


@Ross1988
Follow
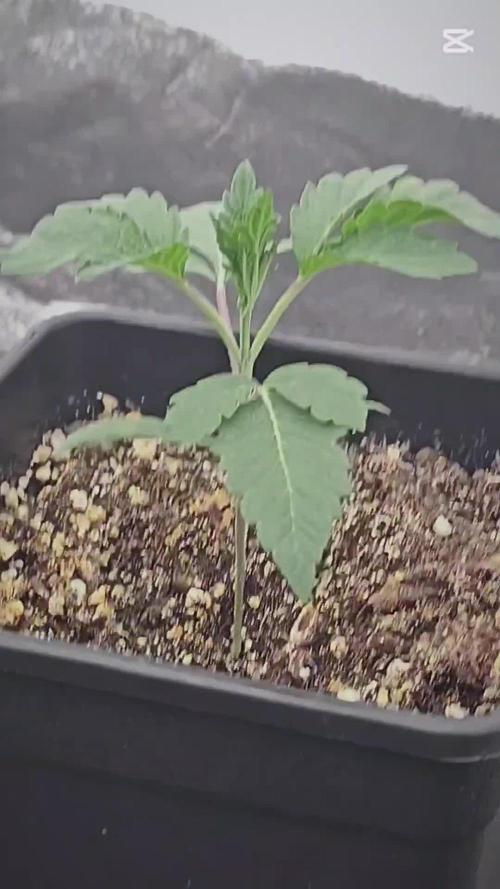
Update 14 days after going into soil Looking healthy but abit slower than expected but my first time doing autos so not to sure🤔 i started them on small amount of nutrients today let's see how they do🤞 lights set to 25 percent power at 24" above canopy


Likes
20
Share

@Flavors
Follow
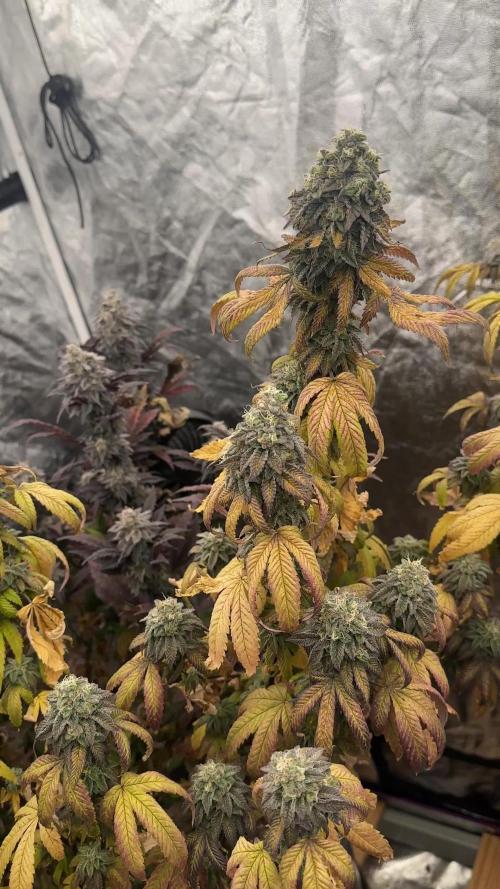
🌸 Week 25 Update (Early Flower – Pistils Arriving!)
This week marks the official start of the show — pistils are popping and both plants are settling beautifully into early flower 🔥🌸.Red Hot Violet is stretching with confidence now. Node spacing is ideal, and those early white pistils are lighting up each site like tiny fireworks 💜✨. Her structure is going to pay off big as she starts stacking.Amaretto Sour is smelling sweeter each day — that lemon-blueberry aroma is getting louder 🍋

Likes
8
Share


@Mahali
Follow
Going into flower on 4/10. Plants have been growing and inch or two every day. Suspect front middle and back middle to be males.

Processing
Likes
1
Share


@Nvchods3
Follow
se realizo una 2da poda apical a una de las plants la otra solo quedara con la poda apical inicial y se transplanto a maceteros de 11lts.


Likes
7
Share


@Scoota710
Follow
This plant has been a pain in the A**... it started doing LST on itself prior to me topping it. Leaning to the side but growing upwards? Really odd to see.
Likes
39
Share


@Hempface86
Follow
Yes ANOTHER week of veg and probably 2 more atleast..I just chopped 2 girls today and have another 2 coming down sometime next week so she'll have the whole tent to herself and I will have her in a bigger pot atleast a 4 gallon ... this grow hasn't had the love and attention she deserves and it shows... 1 gallon pot .. minimal lighting and poor diet but now that room is clearing up big changes are coming for her.. she WILL be glorious when she done probably around week 22 🤣 .. Happy growing ✌️.
Day 60 we transplanted her (4 gallon )and will give her a couple days then another round of topping so we'll be at 32 .. gonna top there so gonna veg another 2 weeks then flip

Likes
5
Share


Likes
11
Share


@BelgianBudtender
Follow
Hey hey growmies!
another longer week, as I wanted to show these girls bouncing back from some problems I ran into with my Kratky experiment.
about halfway through the week my plants started drooping and showing signs of overwatering, my guess is either the plant outgrew her air roots or the reservoir was too hot, inhibiting the plants ability to take up oxygen.
either way, a quick peek at the roots showed some very healthy looking noodles, so I decided to not take any chances and come up with a solution that would solve both those problems.
I took a 3 litre container, put a coat of primer and black paint on it to keep light out, then a layer of plumbers tape to bounce some of the grow lights off of the container, theoretically keeping the heat out, some other things I could have done was paint it white, or put some wall insulation around it.
I could have also kept my jars and tried some troubleshooting, fill them less and more often. but I am happy with the roots created by Kratky, that's the nice thing about that system, it forces the roots to grow more horizontally, the roots have now created a sturdy foundation for low stress training and are perfect for placing into DWC.
so that's what I did, I added a tiny pump and air stone, and for now both plants will sit in this tiny container, The Runtz will be moved to the tent as soon as possible, hopefully before these girl's roots get entangled, If that does happen, I will have to trim back some of the Runtz roots, I don't want to hurt the autoflower.
now you've likely wondered what is up with the host of deficiencies the plants are showing, honestly that's just neglect on my part. I can tell there's damage from overwatering, pH fluctuations and even some lockouts. I am more on top of it now, the pH is more stable, the plants are getting oxygen and will recover plenty before flower.
Plus I get to show off how hardy ruderalis is, look at the auto-flower compared to the photo period, she barely cares about the high temps, pH fluctuations all she appears to want is more food, so I have increased the ec to 1 ms, but most importantly, ill keep the pH in a range where they can actually take up the nutrients now
That's it for now Growmies,
Thanks for checking out my diary.
Would you like to grow Runtz by Zamnesia yourself? Be sure to use the Growdiaries discount code "GROWITGD" on their website for 10% off. 😉
this is a sister diary to my Zamnesia Wedding Cake Automatic grow over here: https://growdiaries.com/diaries/121785-grow-journal-by-belgianbaboon
Stay safe and keep growing!

Processing
Likes
27
Share


@Hawkbo
Follow
Day late on the update, pics/vids were taken on time tho just been a crazy week of harvests and trimming and keeping up with these. I linked up with Rain Science Grow Bags on Instagram and got them to offer all my followers and friends a discount of 10% off entire order from their site with the code ' bangdang ' so if anyone is in the market for a pot upgrade use that code. I got them in the mail 3 days after I ordered. Reason I went with Rain Science is because they offer identical air flow for rapid growth as the radicle bags, just using a different material and a tighter knit so water doesnt flood out the sides during feeds and when you pick these up when the coco is dry, it wont fly all over the tent like with the radicles. They're the optimal bag for autoflowers especially. I figured out why the one stayed so short compared to the others, the base of the stem did a 360 so it's like a loop then it grew vertical.
Likes
325
Share


@Metatronix
Follow
Hello to You all my familly and usual visitors 👋Thank you for stopping by and all the likes and comments....you are the best!
Everything runs smooth, the girl seems in good condition and fattening nicely.
The bright2.32 Mars Hydro TS 1000 is kept at 33 cm from the top of my plants is is running on full power.
TS 1000 gives a full spectrum of light to the plants and you can see that...the leaves are lush green and develop without any hindrance, Mars Hydro did a very good job producing this lamp.
Thanks to Mars Hydro for supplying the necessary equipment for this grow.
That's it for this week folks, have a wonderful week and please come beck visit in three days time.

Likes
11
Share


@Heregrowsnothing
Follow
These girls where a joy to grow and even more of a joy to smoke! It really is a weed that has delivered in every department the colour, the smell, the taste, the yeilds. I'm off to binge watch prime and order an obscene amount of takeaways 👋🏻✌️🏻