Likes
Comments
Share
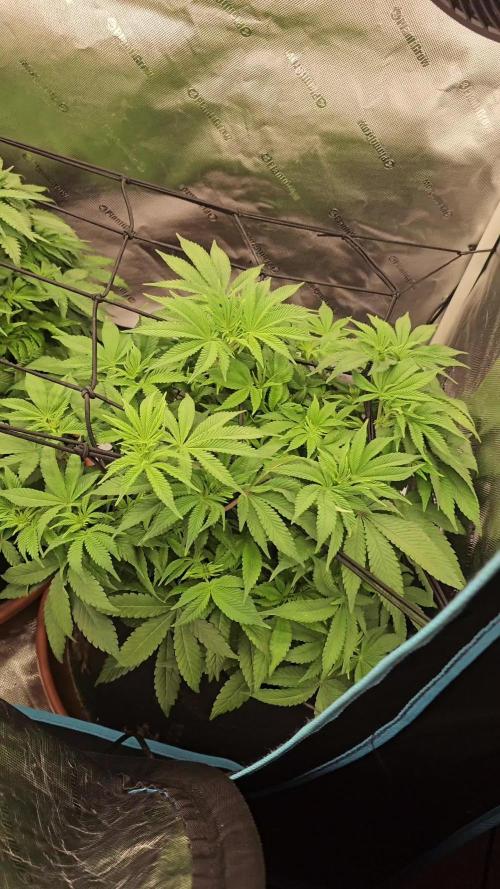
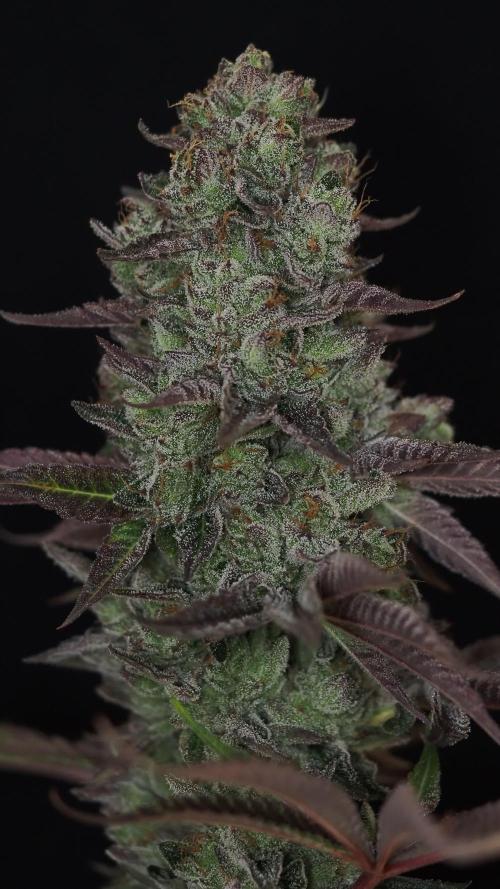
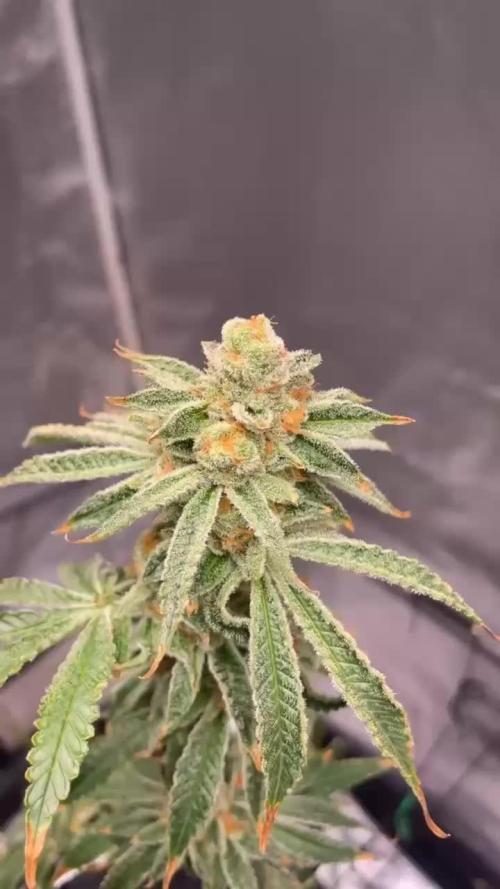
No added nutrients in flower let’s see how she does…so far the bus structure is looking good the colors are excellent.
Likes
5
Share
@Gfiles
Follow
Likes
4
Share
@SWITCH420
Follow
Hi folks, I'm coming here to start the process of ending this grow journal. I harvested about three months ago and the weed is definitely cured. Photos are about to come — I'm doing a real studio photo shoot for those buds, they deserve it! While waiting for the shots, I made some pretty damn dank hash temple balls using the iced water extraction method (solvent-free) with my little washing machine. It's a mix of the 8 strains I grew here — never ideal to mix different kinds of resin... but man, this is some serious dedicated work, so I'm making myself happy with that 14g shiny temple ball in the end 😉 Here are a few details about my process for you guys (and don't forget — you can do it with fresh material! Fresh frozen is always tastier. Also, the drying process is much more efficient and faster with a freeze dryer, but... you need the budget for that. I don't, so I go with the air drying method — check it out below): 1. Get your dry trim, then cure it properly for at least a month (I did 3 months). Smell it — mmh, sweet, dried to perfection. ✅ 2. Freeze it, delicately wrapped in a freezer bag. 3. Let a large amount of tap water sit for at least 24h to remove chemicals like chlorine, then use it to make plenty of ice cubes — don't be shy, especially if you're not working in a cool environment. 4. Prep your washing machine: add trim between two layers of ice, fill up with clean water (as much as you can, large vortex is better than a smaller one), then make it seat for 30 min (45 min for thicker buds) the time that the dried green material gets wet again. 5. Prep your filtering tools: catch bag, different mesh bags, spoon, etc. 6. Wash as many times as you can before green contaminants appear, as these lower the quality of your hash — don't hesitate to go up to 8 to 12 washes if the resin still looks clean! Important: each wash has its own specific duration, and they get progressively longer as you advance through the process. Frenchy Cannoli (a true hash legend) provides a detailed timetable for this — from as little as 30 seconds to 1 minute for the first wash, all the way up to around 25 minutes by wash 8. Make sure to follow that schedule rather than using the same duration for every run or running it too long the first wash !! It could breaks to quickly your precious material before you collect all the trich's and the quality would be lower in the end. 7. Collect the wet resin in the mesh bags with a frozen metal spoon, make patties with the resin, and let them sit over some towels in order to drain as much water as possible (place a tissue made for hash collecting over the towel). 8. When the patties are a little dry to the touch, wrap them as they are in the tissue and place them in the freezer for 48h or more. 9. With an iron strainer, microplane your patties over the biggest flat surface you can get! It's important that your micro pieces of hash dry widely and don't get too compacted. Any failure in the air drying process will nucleate rot, ruining your hash in the end and making it a poor product — eventually something to throw away. Sad when you think about all the phases of the process to get to this point! 10. So, in order to air dry properly, you must — it's not optional — lower the RH of your dry room to 35% or slightly below, never above and let it dry as long as needed until the material feels like dry sand. For myself, I found 10 to 15 days is ideal. The room must be very lightly ventilated (not directly on your resin!) and in complete darkness — the goal is to preserve all those delicious terpenes! Ideally, temps around 60°F or 16°C 11. Now that it's dry, collect your resin with a large thin spatula! Make a little mound between two layers of PaperHash, boil some water, and fill up a wine bottle with it! ⚠️ From this point on, to avoid exposing your carefully dried resin to a more humid environment — which could ruin all your hard work — everything must happen in the same drying room. Keep working at 35% RH until your temple ball is tightly and airtight wrapped in PaperHash. (And don't forget to drink water — it's dry in there! 💧) 12. Start to slowly press your resin. Magical moment. Finally.... 13. Press 3 times for 10 to 15 minutes in order to really decarb your hash — because that's what it's all about! Between each press, try as best you can to shape a patty... until the final press, when you'll be able to form that magical shiny temple ball (it only shines with gloves on, guys 😄) 14. You are now allowed to try it — for quality control purposes only, of course! 15. Because you want to age your hash for the sweetest 5-star smoking experience: wrap your temple ball in a large piece of PaperHash — if you can get that brand it's ideal, or another kind (check https://thepressclub.co) as long as it's organic! 16. Place the wrapped temple ball in a glass jar and store it in a dark, cool place. 17. Wait a minimum of 3 months before opening it. 18. Open, smell, touch — you'll be amazed. Roll it up with some weed or tobacco or both (I do both) / Or get a Hooka... you are smoking some true primo aged hash made by yourself! Taste the difference and realize all the path from choosing the seeds online until this first amazing puff ... 🙏 I want to credit my inspiration for making this kind of hash to the great Frenchy Cannoli, who has shared all his knowledge through amazingly rich tutorial content that you can find online with a bit of searching. 😉 Peace Frenchy 🕊️☮️
Likes
13
Share
@Lfuego22
Follow
Lollipop Added 3rd net Removed male
Likes
10
Share
@RFarm21
Follow
Semana 12 agosto - 18 agosto 14 agosto - only water
Likes
27
Share
Vamos familia, hora de cosechar estas Biscotti de RoyalQueenSeeds. No veáis que pinta que tienen las flores están bien formadas y repletas de tricomas. Después de 70 días de floración obtengo estas flores tan increíbles que huelen pfff. Es una variedad un poco complicada de cultivar pero, que al final si da sus frutos. Bastante contento con este primer cultivo de la temporada de indoor. Dar las gracias a james por las genéticas dé RoyalQueenSeeds, y a todo el equipo de Agrobeta, que sin vosotros parte de estos proyectos no son posibles 🙏 Agrobeta: https://www.agrobeta.com/agrobetatiendaonline/36-abonos-canamo Mars hydro: Code discount: EL420 https://www.mars-hydro.com/ Hasta aquí es todo , espero que lo disfrutéis, buenos humos 💨💨.
Likes
21
Share
@Freddd
Follow
The Jedi came down at 11 weeks. The other blackberry came down at 8.5 weeks, for a total production of 2.5zips plus 7.5 zips. I've had to estimate the Jedi at the moment, there was 1050 gm wet weight of trimmed bud on minimal stem. I would expect the dry weight to be 21% of that but I will update the numbers next week. She is a spacious plant and very branchy but you can continually trim branches as you defoliate throughout the grow, she responds well to both. Floats like a butterfly and hits like a steam train. It's been over two weeks since the Blackberry was harvested and she's all gone now, never even got a chance to dry properly. Basically she kept me going while waiting for this Jedi, who I already knew was going to be soaking with resin. I was hoping for 8 zips total with 4 for each plant but I ended up only getting 2.5 on the blackberry but I got an easy 7.5 of mostly grade a bud so a total of 10 zip for both plants in the same pot. They were expected to mature together but the black berry was a week or so early, so as you can see in the root shots her roots had died and made the Jedi roots rot as well but this shows you the resiiance of the Shallow Water Culture as I do it because of added redundancy, I could not even tell there was a root problem didn't after the Jedi at all but it's good to be away of, I'm back to single pots for a while now.
Likes
23
Share
There are a few problems with limp leaves I start train her, hope everything will be fine
Likes
4
Share
@Oldwied
Follow
It grows compactly. Unfortunately, not all shoots are growing evenly. This could be due to the Indica dominance. What do you think? I haven't been able to find any real pre-flowers yet. At first, I thought I had found some male ones, but under the microscope they looked like leaf buds. Fingers crossed that the plant is female. I don't want all that training to go to waste. The SCROG frame is in place, with waxed hemp cords. Light Power: 60% Day 45 Photoshooting
Processing
Likes
2
Share
@Kelly420
Follow
She has shown her first couple hairs , not sure if with autos if that starts week one flower but I'll continue veg until I see more than just a couple, then moab or sonic bloom to week one flower. I've used moab and sonic bloom and I can't tell which is better honestly. Thinking of making my own just without the extra b1 they put in.
Likes
12
Share
A little trim and nutes. She's filling up my little make shift grow tent. Growing great!
Likes
19
Share
Let’s Go!! Today is day 31 from seed an these lil baby girls are shooting pistols an showing female productions!! Over the past couple weeks these girls been feasting up an building nice thick structures,building themselves up to get ready for pre flower pretty soon !! Everything is going just how we want it, everything is working properly, our air temp an humidity is stayin on point around 70-75 degrees trough the day and a humidity of 55 - 62% ! Always great! I hope you all enjoy an y’all have an amazing productive day! Peace , love an positive vibes to y’all Cheers 😶‍🌫️💨💨💨💨🤙🏻Keep them eyes peeled for next week !!🤘🏻🔥💯
Likes
25
Share
@squalino
Follow
Journal de Culture : Frost 1 (Semaine 5) ​Génétique : Frostbanger (F2 Perso) | Système : Autopot 20L ​📣 Remerciements ​Un immense merci à toutes les personnes qui suivent ce journal depuis le début ! Un merci tout particulier à @MIA_BIOTABS et à Mrs_Larimar pour leurs précieux conseils qui m'aident à mener cette session au mieux. Merci à tous pour votre soutien constant ! ​🛠️ Configuration Technique ​Éclairage : Lumatek ATS 300W Pro (réglé à 75%) ​Distance lampe/canopée : 55 cm ​Climat : Jour : 25°C / Nuit : 21°C ​Humidité (HR) : 50% ​Tente : 1m80 de hauteur ​📅 Évolution & Floraison : La phase sérieuse commence ! ​État de la plante : jour +35 La structure est maintenant bien établie. La phase de stretch semble se stabiliser, laissant place au développement des sites de floraison. ​Hauteur actuelle : 68 cm (+22 cm) ​Stade : Floraison confirmée. Les pompons commencent à se former et la plante change d'allure pour se concentrer sur la production. ​Travail sur la plante : ​Entretien : Je n'ai pas touché à la plante depuis une semaine. Après le travail d'aération et de palissage précédent, j'ai choisi de la laisser tranquille pour ne pas la stresser lors de son passage en floraison. Elle s'épanouit d'elle-même. ​Structure : Le palissage à la ficelle fait toujours son office, maintenant une canopée ouverte où l'air circule parfaitement. ​Gestion du système Autopot : ​le 12/05 Nutrition : Fidèle à la méthode Biotabs, la plante n'a reçu que de l'eau claire via le système Autopot. Sa couleur vert foncé et sa vigueur prouvent que le substrat est parfaitement équilibré pour cette phase de transition. le 14/05 apport de 50 cl de tea compost preparation tea compost : LE MELANGE : 15 grammes tea compost avec 5 ml d'orgatrex pour 1 litre d'eau ( 4 plantes donc ×2. 50cl par plante ) . mélanger le tous dans un sceaux. LA PREPARATION materiel : 1 sceau 1 pompe à air pour aquarium. ( 15 euro ). je vais utiliser pour 18h00 la pompe de mon aire dôme de l'autopots. j'ai acheté aussi 2 petit diffuseur d'air à 4 euros . ustensil utiles pour aérer le tea compost . mettre les diffuseur dedans allumé la pompe et laisser pendant 18h00. normalement le température idéal pour que les micro-organismes se développent est entre 18 degrés et 22 degrés. pour ma part le mélange était dans ma salle de culture à enciron 24 , 25 degrés. voir video et photos ajouter 18h00 après filtrer le mélange pour éviter touts dépôts susceptible de moisir et ramener des champignons. donner au plante 50 centilitres . Le tea compost se garde mal donné dans l'heure qui suis le stop de l'aération ​Résumé : On arrive à un moment charnière. Avec 68 cm de hauteur, elle occupe l'espace de manière idéale. Les fleurs commencent à se dessiner nettement sur chaque sommet dégagé lors du dernier LST. La plante est sereine, le cultivateur aussi ! ​À bientôt pour la suite de la floraison !
Likes
57
Share
Likes
Comments
Share
6 weeks in veg from seedling
Likes
15
Share
@Gympaddy
Follow
The plants look healthy, without any defects or anything like that. A smell is slowly starting to develop... I'm curious to see how much more volume they'll gain in the next few weeks.
Likes
6
Share
Girls have settled into summer camp nicely. Worries about not taking the transplant diminish more each day and I am gaining more confidence in strong roots with each passing day as well. I had to build a supplemental lighting system for the greenhouse. Here at home we are experiencing a wetter than usual summer so far and with that brings clouds. So I needed to do something. So I built a new greenhouse light. It cranks out some light. Currently at canopy I’m measuring around 600 PPFD. Plants are loving it. All three plants sexed and all are females. Didn’t think otherwise. So the formula 707 is performing better than expected. Water retention is crazy. Watered the plants on Sunday with a gallon each , today is Thursday and no water needed. Going to try and get to Sunday for a whole week between watering. *** update, added a short video from 7am this morning. The girls really do like the homemade light.
Likes
2
Share
I have begun with the nutrients. Still using my old general hydro liquid nutrients. Experimenting with a phosphite nutrient to help with root health. PPMs= 265 PH = 6.3