
Likes
Comments
Share


@SessionMeister
Follow
Overall very pleased. All the leaves are dark green and the plants are looking very happy. I’m giving them a couple more days before they are flipping into flower. All of them handle defoliation really well but Somango is a little to bushy to really do any organized Lst. I will try after Defoliation next week and give her a bit more surface area.


Likes
8
Share


Likes
10
Share


@yamadafakka
Follow
Deze week werd verstoord door een stroomstoring van een dag (oorzaak gelukkig niet in de kweek apparatuur!) Er zijn inmiddels veel meer lieveheersbeestjes, erg leuk om ze te zien hoe ze hun eigen gang gaan.
E.c. zit inmiddels op 1,3/1,5 Dit lijkt misschien wat hoog, maar de stekken kunnen best wat hebben. De dames groeien zo hard dat ik nog een keertje blad heb moeten wegknippen om de boel niet t laten verstikken bij de Powerplants.De Runtz begint al topvorming te laten zien.
Ook een irrigatiesysteem aangelegd. Dit is later handig als het bader dek te dicht is en je niet meeer overal bij kan komen.
Regeren is vooruitzien !
UPDATE!!!
Vraag aan de gemeenschap die ervaring heeft met cree cobs:
Ik heb begrepen dan de cobs een kleine 20 cm door het blad dek kunnen penetreren als je goed hebt ontbladerd.
Aangezien mijn scrog maar max 40 cm hoog word, heeft het dan zin om de boel in week drie te dieven? Het licht bestraalt immers de hele plant?
Antwoorden graag in de comments!

Likes
13
Share


@Arkain_Jenetics
Follow
All but the cpie auto has germed. I didn't like using the rockwool. I realized I like to see Taproot. Before just putting it in medium. So I put all of the seeds out of the rockwool and put em in their forever home. But the cpie had not even begun to open and it still hasn't and I can't find it. So I'm putting another one of my bx2 skunks in called temporarily called skunk v3. I got seeds from five different back crossed with Mexican and afghan phenos I created from breeding the original seeds my gpaw got in the late 80# after my gpaw came back from war he started growing
So yes I have og genetics. But I'm creating my own line of f1s -f4s and bxs.
Skunk v3 grew really short. 2 foot gallon fabric pots and after 14 weeks at chop ( I know it's early for a photo but I did this grow natural to see had the best natural traits I'm looking for. And it only grew to maybe MAYBE a foot. And yielded the most densest and biggest colas out of all of them despite being more than a foot shorter than the rest of the phenos I had going. So now I will have two bx F1 skunks growing instead of just one.
MY GOAL IS TO IDENTIFY THE SKUNKIEST OF THEM ALL. AND ENHANCE IT WITH SOMETHING GASSY ANNNNND SOMETHING LEMONY. HENCE GROWING THE CRITICAL THUNDER. AND THE SPECIAL QUEEN AND THE Royal GORILLA
I HAVE HORROBLE MEMORY SO I APOLOGIZE IF IM LATE ON WEEKLY UPDATES. BUT I TAKE PICTURES AND JOT DOWN IN MY HAND WRITTEN JOURNAL EVERY TWO DAYS.
THANKS FOR LISTENING TO ME YAALLL.

Likes
16
Share

@BlaKX
Follow
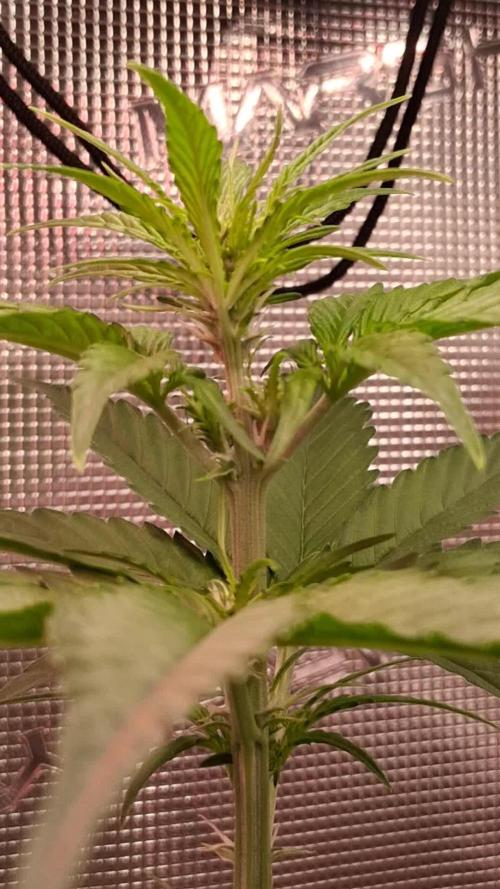
Grüße Growmies wir sind am Ende der 3 Woche!Die Spargel Stange hat leider als einzige Pflanze so extrem in die Höhe geschossen!
Werde sie so lassen und nur leicht entlauben.
Likes
2
Share

@HeavyHittah
Follow
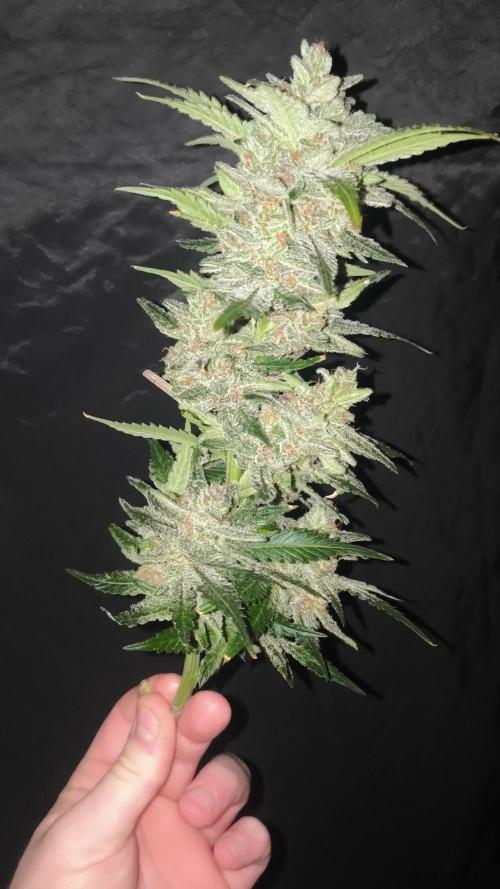
Chopped the second Frostbanger after a week's flush. As you can see from the pics she is a beauty. Very good leaf to bud ratio will be easy to trim. Smell is strong.
Next up will be the gorilla zkittles. Which is the biggest in the tent by far. But it's taking a while to ripen up.
Then that's just leaves 1 frostbanger which I planted a couple weeks after the rest.
The Frostbangers are just like photoperiods. Even for F3s they have been very stable. I can't wait to try the F8 banana purple punch 😳.
This will be the last update unless I decide to add a week for the plant that's behind. Which also looks very good.
If not I'll do a review and give the final weight in the next update. Very happy with this run. 🌱❄️💨
Likes
19
Share


@BLAZED
Follow
Week 15 Harvest
21-2
Temperature: 29.7 degrees (lights on) 19.9 degrees (lights off)
Humidity: 67% (highest) 44% (lowest)
Watering: None.
22-2
Temperature: 29.9 degrees (lights on) 19.9 degrees (lights off)
Humidity: 65% (highest) 41% (lowest)
Watering: None.
Today is the last day, tomorrow i will harvest her.
I removed all large fanleaves and took some pre-harvest pictures.
23-2
Today is harvest day! I left the buds on the branches and hang them to dry.
Temperature: 18.1°c to 19.9°c
Humidity: 57% to 72%
24-2
Temperature: 17°c to 18.8°c
Humidity: 56% to 64%
25-2
Temperature: 16.8°c to 17.9°c
Humidity: 57% to 69%
26-2
Temperature: 16.2°c to 18.1°c
Humidity: 56% to 61%
27-2
Temperature: 16.2°c to 17.5°c
Humidity: 55% to 61%
28-2
Temperature: 16.3°c to 17.6°c
Humidity: 57% to 64%
29-2
No info.
1-3
Temperature: 17.8°c to 18.7°c
Humidity: 56% to 61%
2-3
No info.
3-3
Temperature: 16.5°c to 20.3°c
Humidity: 46% to 62%
After 8/9 days of drying the buds are dry enough, so lets start trimming!
The buds are pretty airy and foxtaily, but very resinous, she smells good, but i think the buds are a bit overdried.
End results:
Trim: 18.12 Gram.
Popcorn buds: 37,11 Gram.
Normal Buds: 70,98 Gram.
Total buds: 108,09 Grams.
I will post the progress of me making bubble hash in this diary very soon, so if you are interested make sure to keep an eye out!
Likes
32
Share


@BigBomber
Follow
Last week was a bit of a challenge for my little plants.
There was a big storm here and they handled the windy and rainy situation way better than I expected.
This week I almost didn't even water them because of the rain every 2 days.
But I thought it wouldn't be bad for them to get a few nutrients instead of rain water only.
They got a little higher and stretched a bit.

Likes
49
Share


@Roberts
Follow
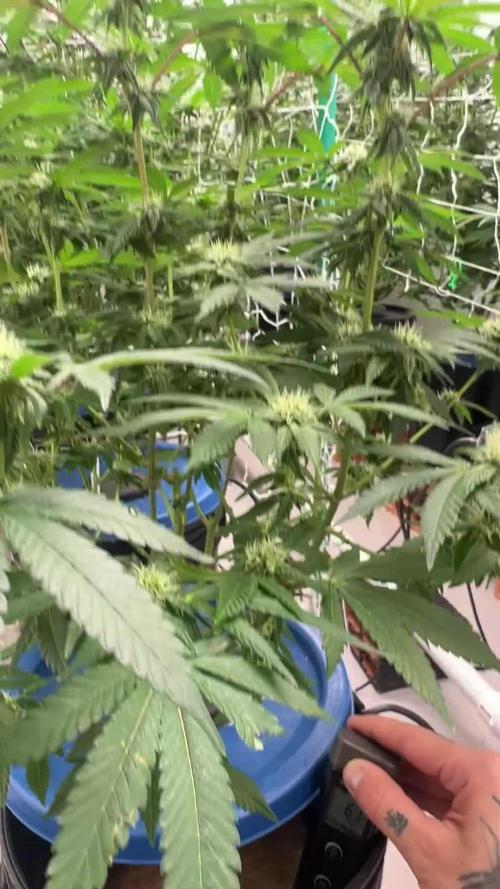
The Mandarin Squeeze sisters are making good progress. I did a neem oil treatment on everything in the grow room 4 days ago. I am doing it again today. I have a pest but have not seen it directly. I find super tiny white clear sacs on the leaves. Might be eggs. Regardless I have everything on a treatment plan that I can treat. The video was done after all treatments, and training for the day. Thank you Terpyz Mutant Genetics, and Spider Farmer. 🤜🏻🤛🏻🌱🌱🌱
Thank you grow diaries community for the 👇likes👇, follows, comments, and subscriptions on my YouTube channel👇.
❄️🌱🍻 Happy Growing 🌱🌱🌱
https://youtube.com/channel/UCAhN7yRzWLpcaRHhMIQ7X4g


Likes
39
Share


@J_diaz420
Follow
Día 14 primer riego fertilizante vegetativo.
Día 15 riego foliar con estimulador de floración delta 9.
Día 18 riego con vegetación, floración y se cambia fotoperiodo a floración
Total días vegetativos: 18
Comienza la floración 💪👌🍀
Likes
18
Share


@DeepRootsGrowTrees
Follow
PURPLE KUSH / KANNABIA SEEDS
WEEK #16 OVERALL
WEEK #4 FLOWER
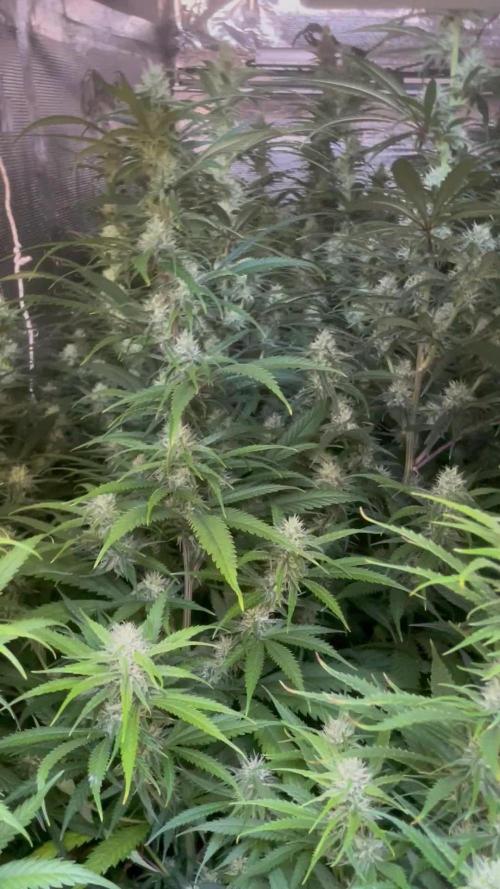
This week she's doing great 👍 no issues buds are growing and getting nice trichome coverage!! She's looking healthy 👌!! Stay Growing!!
Thank you for stopping by and taking a look it's much appreciated!!
THANK YOU KANNABIA!!!
KANNABIA / PURPLE

Likes
9
Share

@HUMO_Cultiva
Follow
Update of Goofiez 2 !! It’s incredible this strain is so strong and fast grow !! Stay tu ed


Likes
260
Share


@love_2_grow
Follow
D15.
Week three, and slowly things are starting to happen. She is stretching out and getting wider, and her root development looks good.
I increased the DLI to 22 and plan to raise it further over the week.
------------------------------
D16.
Transplanted, added worms, and watered with 1 liter of water @ pH 6.4, with one teaspoon of myco/kelp mixed in.
------------------------------
D18.
Yesterday, a few of her leaves were drooping but have sprung back. (Maybe a tiny transplant shock or slight overwatering after the transplant...?)
In any case, she is now growing along and looking healthy.
I increased the DLI to 24 yesterday and 26 today.
She doesn't need any more water yet, but I will continue to hand water until her roots have developed enough to drink from the reservoir.
------------------------------
D21.
End of the third week, and all is well in the tent. She loves her new home, although I've spotted yellow tips on two new leaves and burnt tips on a couple of old leaves, so it seems that this super-soil might be a bit "hot."
I'm being a bit unfair since I had to use a magnifier to spot the burnt tips. That's how minor the damage is.
I increased DLI to 30, and still, no water was needed.
------------------------------
Likes
33
Share


@zera1337
Follow
Week 4:
I somehow managed to overwater 2 of my cuties. Having a humidifier + the fan not being properly positionend kinda lead to this. However, they are now looking stronger again and back on track.

Likes
35
Share


@ISCA_Abi_In_Da_HOoD
Follow
Im Come back .
Je suis de retour comme Gandalf .
Fillere selam .
Sweet Seed
Mandarine Zikittlez Fast
Strawbery Cola Sherbet Fast
Non game no pain

Likes
12
Share

@carlitospiratahaze
Follow
Hoy día 20/4/26 hemos añadido el primer riego de monsterbloom.
Tengo que decir que e metido dos riegos desde la última vez hasta ahora muy suaves con calmag y purezym rebajando con esto la ec ya que tenía muchos puntos salinos y algunas plantas quemaron sus hojas
Después de este riego en dos días intercaló 20l de calmag más purezym y a los otros dos días vuelvo a meter abonos así iré intercalando para no subir más la salinidad y preparando el terreno para el lavado de raíces.. tengo que añadir que el último riego con power roots se acabó hoy.
Penúltimo día de la sexta semana de floración,
Un aumento en altura ya que las puntas siguen creciendo en densidad ,aumento de resina considerable para el poco desarrollo de las flores.
Espero llevarla hasta el día 72/75 de floración.


