
Likes
Comments
Share


@TowersD
Follow
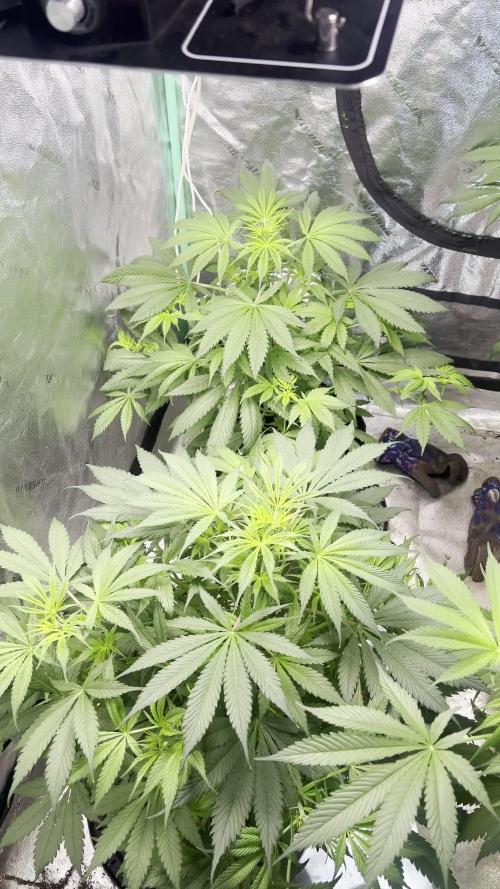
The plants are in the 2nd week of flower and the pistols are staring to show it. That confirms that all of the plants are female.

Likes
4
Share

@AbbyCat
Follow
We lost the sick on this week, knew it was coming. Also the RH was staying around 65 to 68 so I pruned a bit on the taller plants which brought it right back down to a happy zone. Also all 5 plants are growing great but my tent is too small so I took the runt out and she is living with my plants in my plant room. We are getting about 12 hours of light a day now and it is good temp and RH in that room. So I hope she will still grow like a weed. This is actually week 3 of flower I misclassified week 6.

Likes
19
Share


@4Haut
Follow
Finally the end of the sixth week. I had very bright, slightly yellow leaves because i had given too much light and too little fertilizer.
The lamp was then turned down to 80W and raised to 50cm height, so that the plant could calm down again. I also corrected the amount of fertilizer. Now she looks happier again 😇
Thanks also to @Seedler, I "tucked" the leaves under the buds and it worked very well. 🌱🌱🌱
Grow Hard. Go Pro.

Processing
Likes
2
Share


@ajglover217
Follow
the girls are struggling a little bit. One is yellowing because its about to flower, but one is just not growing much and the other is very lanky.


Likes
6
Share


@Bakeryguy420
Follow
3 mother fucking bears og :)
All smiles for this one , started showing sex so hopefully another week she starts flowering :) lady bugs have been doing such amazing work along with my predatory mites:) been dealing with thrips and fungal gnats !! Been also feeding them weekly with compost tea by xtream:)

Likes
5
Share


@CannaIGrow
Follow
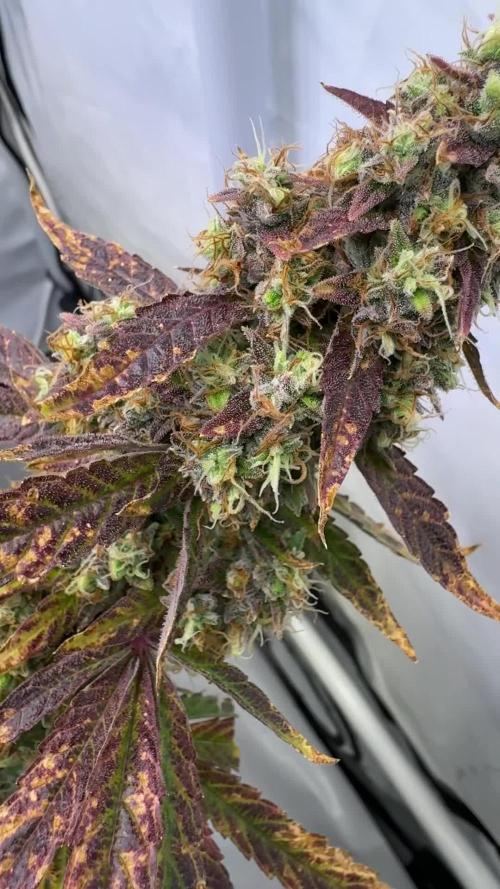
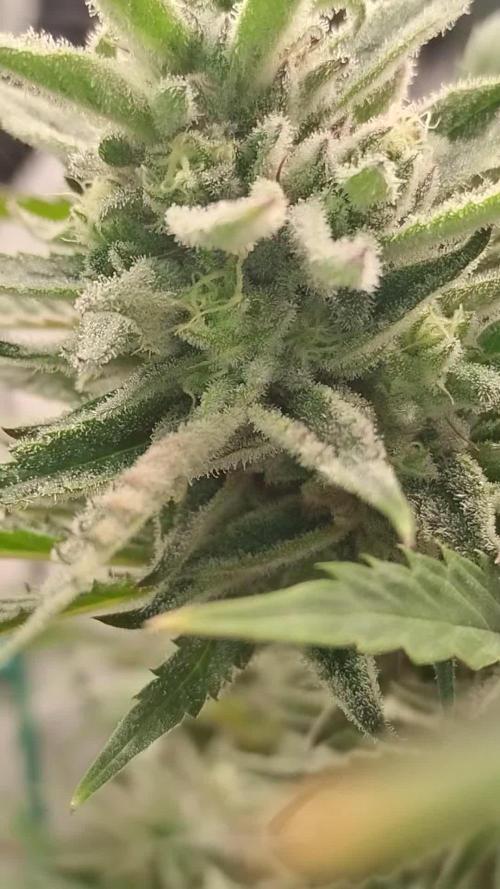
Very few white pistols left. I have started checking tricomes now for peak harvest time (hopefully) lol. 11/9/22 Added tricome pics and video to this week. Starting to turn milky, which is what I want, so I'll be keeping an eye on her.
Likes
16
Share


@GreeneScene
Follow
This week was a good one . Stellar initial growth this round after upgrading lights & using homemade super soil. My 3 day old plants looked like 9 day old plants of my last run to give an idea . I watered for the first time since planting on 5/17 .
I had to itch to test the runoff since it’d only take a sec right? All the ph’s came out almost 2 points lower than when they went in so I decided on a flush even though I’m using Dry amendments.
Honestly I didn’t have the problem of fluctuating ph’s before I added that Peat Moss to my supersoil in hindsight I wish I would have just ordered 1 more 11lb brick of CoCo Coir .
I had the idea that I may need to flush a day or two prior to watering when I noticed all my stems purple.
I get it could be genetics but ALL of them where purple . Here today it is 1 full day since I flushed & all of the stems are now Green with the exception of my Runtz seedling.
3/17 will make day 7 for Runtz & #1 of the GDP
3/18 will make day 7 for Zkittlez & the 3 remaining GDP.
I intended to transplant these ladies day 13 preferably into their forever homes of 3g fabric pots . Fingers crossed day 14 they’ll be ready to start some LST.

Likes
4
Share

@FeebleSnane
Follow
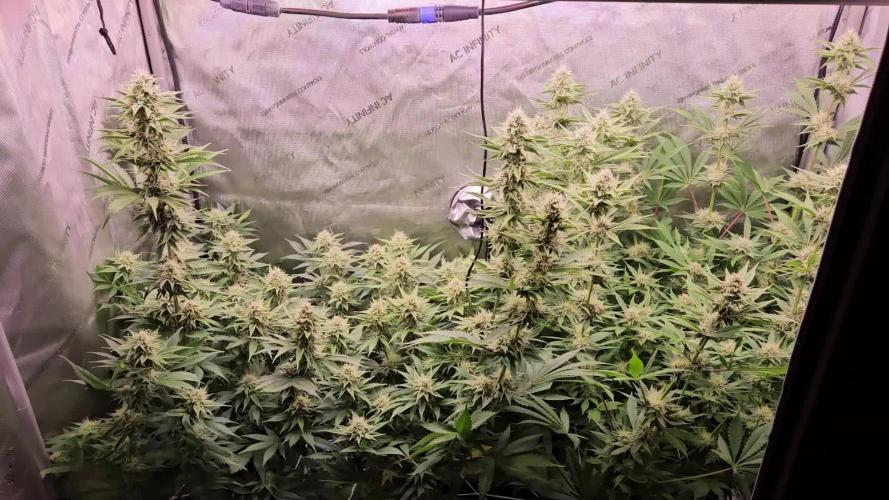
Today is day 84 since the plants sprouted, and day 45 (I think) of flower.
I'm going to shout out Autopots again because this grow has been super easy, and this past week has been hands-off for the most part. I defoliated a little bit to give some light to the buds just under the canopy, but other than that I'm still just feeding according to the nutrient schedule, and the plants are happy with that.
Still looks like these plants have a ways to go before harvest, but we'll keep on truckin'.
Likes
10
Share


@WorldPeas
Follow
Wormcasting tea diluted and fed at the start of every second day (was previously added after every flush)
Im aware I dont want too much nitrogen this late in flower, I compensated by lowering the dose of B1 which is high in nitrogen.
Explosive results. Highly recommend reading about the benefits 👌
Ran my microscope over the canopy quickly and noticed about 60-70% milky with the odd amber here and there so we're a ways off yet.
My plan for harvest is to flush her hard to pull on the brakes, just water for a few days reducing amount each time then lights out for 3 days prior to chop.
Likes
7
Share


@OG_NordGrow
Follow
Die Blüten fangen an sich schön zu bilden Geruch kommt auch langsam. Im Moment noch muffig

Likes
8
Share


@Chris42081
Follow
Well this is getting out of control pretty fast as they are now in preflower. And holy crap big with a lot of time left.


Likes
12
Share


@carlitospiratahaze
Follow
Hoy día 20/4/26 hemos añadido el primer riego de monsterbloom.
Tengo que decir que e metido dos riegos desde la última vez hasta ahora muy suaves con calmag y purezym rebajando con esto la ec ya que tenía muchos puntos salinos y algunas plantas quemaron sus hojas
Después de este riego en dos días intercaló 20l de calmag más purezym y a los otros dos días vuelvo a meter abonos así iré intercalando para no subir más la salinidad y preparando el terreno para el lavado de raíces.. tengo que añadir que el último riego con power roots y silick se acabó hoy.

Likes
69
Share


@Hempy_The_Kid
Follow
4/28/21 week 7 of veg 8 of life. Plant is getting to be a beast. Last week ended up topping more then I planned, and from the looks of things I will probably top at least one more time. I am going to up the nutrients to 550 ppm this week. I am also planning on giving recharge 2x per week. I am increasing irrigation to 4 gallons per. She is drinking about a gallon every 2.5 days.
4/29/21 gave final trim under canopy before flower cycle. Plant looks like a table 😃
4/30/21 I topped 4 more spots to keep my canopy even. I harvested my Super Skunk (you really need to try this strain) so now big Oggie has her own tent. For now she is under 1200w Growstar (250w actual) LED. She looks like she will engulf my tent.
5/1/21 gave 2 quarts recharge
5/2/21 backed nutrients down to 450ppm plant showing a little nute burn on a leaf.
5/3/21 set up self irrigating system. 8 gallons (holds max 14 gallons) water ph 6.01. With nutrients at 470ppm. Plant is now irrigating itself 2x per day 15 minutes each watering. Will be doing daily checks on ph/nutrients.
Likes
11
Share

@MarriedwithMJ
Follow
Der grow geht dem Ende zu. Der Geruch beim öffnen des Zelts ist mega gut. Die Radical und die gushers sind doch des zeitweise zu hohen VPD. Jetzt. Die Main Cola der gushers gefällt mir sehr. Kein Schimmel, was will man mehr.


Processing
Likes
4
Share


@Winged_Grower
Follow
Long time no post! I’ve been lazy about it, my bad. I’ll try and catch up before harvest in a week!! All going excellent, think I had a calmag issue early on because of how big these ladies got but they are finishing very strong! No issues with heat or humidity, all pretty controlled this time!!
Likes
9
Share

@Phaleg
Follow
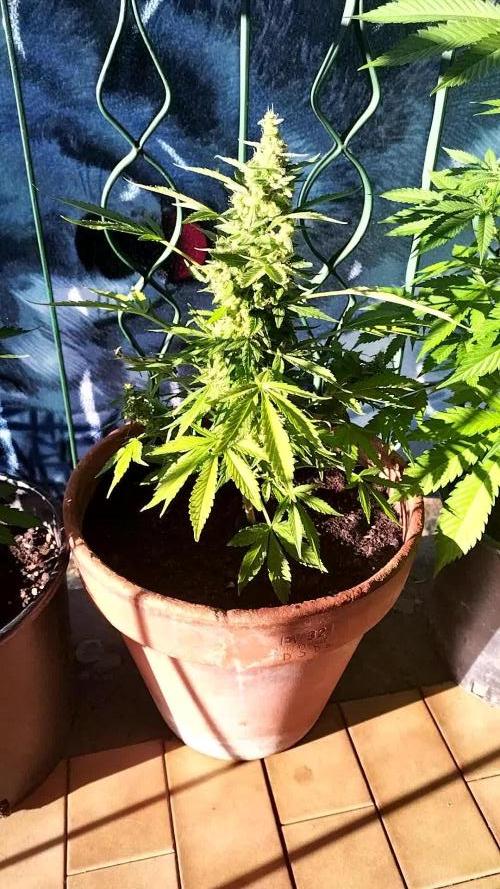
After a previous fresher week, heat is back and daytime temperature reach 25-27° C again, plants are now flowering and the only automatic is close to be ready (about 2 weeks left I think). I will inspect triconomes with my lenses and microscope.
2x ICE 78cm (+6cm) & 69cm (+2cm) === No idea why this difference!
White Widow 85cm (+5cm)
Cookies Gelato 90cm (+5cm)
Do-Si-Dos Automatic 39cm (same as last week)
Likes
4
Share


@TS_Greens23
Follow
It’s been a routine week of feeding,,after having a couple of late stretching branches flowering a week or so behind the majority of the canopy,,which has made me stop and think about cutting her food down yet,, and see if the late comers can swell quickly to catch the lead bunch,,,,,,chugging along,,,👍💚🍊

Likes
7
Share

@AestheticGenetix
Follow
Day 35 and everything looks freaking great. I'm still struggling with the aphids though. They keep being tricky. They started hiding under leaves now. Before they were hiding on the stems and the stems have been clear.
Anyways these plants are great. I want them to finish building seeds so that I can harvest and clean the tent and get rid of them already
Likes
91
Share


@Salokin
Follow
Hi Growmies,
So far she is developing very nicely. Had someone from the community suggest plant success orca and Rezin to me, sp these were added for the next weeks feed to prepare the pre flower. The roots have started to nest themselves right above the airstone. As of now I think I’ll give her two more weeks and then flip her, as she is stretching a bit slower than I thought she would.
Thank you all for passing by and see you next week.