


Likes
Comments
Share


@DogDoctorOfficial
Follow
🌱 White OG - Week 11 VEG
Strain: White OG by Seedsman Seeds
Stage: Week 11 Vegetative
Grower: DogDoctor
Medium: PRO-MIX HP Mycorrhizae + Bacillus
Pot: 30L Fabric Pot
Lighting: Future of Grow LEDs
Climate Control: TrolMaster
Nutrients: Aptus Holland Clean Program
Environment:
🌡️ Temp: 18.3°C
💧 pH: 6.0
⚡ EC: 1.0
⸻
🔄 The Last Week Before the Flip
Week 11… a moment of calm before the bloom storm. A critical phase in our girl’s journey. This is the week we prepare her for greatness. 💪
✅ Defoliation Madness:
This week, we defoliate the hell out of her. That’s right—removing those large fan leaves that block light, those unnecessary suckers that won’t make it to the top floor, and freeing up her inner structure to breathe and expand.
Why now? Because right before flipping to flower is the perfect time to help her redirect energy to the strong tops and main branches. It reduces the risk of mold, improves air circulation, and ensures even light distribution. Plus, it gives us a blank canvas for the flower stage to explode onto. 🌸💥
✅ Clamp Release & Scrog Setup:
We gently remove the training clamps, and in she goes into the SCROG net. But not in a rigid way—we’re inviting her to stretch, encouraging her to reach out and take up space. She’s a big mama now, and it’s time she gets the full stage. Each branch is dancing through the net like a diva ready for her solo performance.
✅ Roots on a Mission:
She’s hungry for life. Roots are peeking out from the fabric pot, diving toward the light, the floor—everywhere. This PRO-MIX soil is magic, and with the help of the Aptus Clean Mix, she’s thriving. Her root zone is bright white and packed with potential. Healthy roots, healthy shoots, happy fruit.
⸻
Feeding This Week
We’re still rolling with the Aptus Clean Line for this stage. Simple, effective, elegant.
🔹 Regulator – Helping her stay strong and stress-free.
🔹 RO Water Conditioner – Stabilizing and prepping our base.
🔹 All-In-One Liquid – Feeding her exactly what she needs without overcomplication.
⸻
🌐 Shout Outs & Love
Forever grateful to our amazing partners and supporters:
💚 Seedsman Seeds
💚 Aptus Holland
💚 Future of Grow LED
💚 TrolMaster
💚 PRO-MIX Soil
💚 Cannakan
💚 GrowDiaries
💚 The entire community—lovers, haters, followers, and the in-betweeners—you’re all part of this journey. 🌍
Come say hi on Instagram [@DogDoctorOfficial] and check out the Dognabis Cup – First Edition—open now! 🎉 Let’s celebrate passion, plants, and positive vibes.
⸻
🌸 Let’s Bloom
White OG is ready to bloom. She’s strong, structured, and full of fire. Next week begins a new chapter—the flowering stage. Let’s see what she has in store.
🌱 Stay kind. Stay curious. Stay growing.
Much love,
DogDoctor 💚🐾
#GrowDiaries #WhiteOG #ToppingMadness #AptusHolland #Mainlining #PlantTraining #GrowersLove #SeedsmanSeeds
As always, this is shared for educational purposes, aiming to spread understanding and appreciation for this plant.Let’s celebrate it responsibly and continue to learn and grow together!
💚Growers Love 💚 🌿
DISCOUNT CODE - SeedsmanSeeds - DOGDOCTOR 10% off
As always thank you all for stopping by, for the love and for it all , this journey of mine wold just not be the same without you guys, the love and support is very much appreciated and i fell honored and so joyful with you all in my life 🙏
With true love comes happiness 💚🙏 Always believe in your self and always do things expecting nothing and with an open heart , be a giver and the universe will give back to you in ways you could not even imagine so 💚
Friendly reminder all you see here is pure research and for educational purposes only
💚Growers Love To you All and remember to keep that smile big and alive 💚

Likes
24
Share


@Buerofrau
Follow
They smell very strong, but good 😎😍😬
I think this is the last diary week before harvest.
i can´t wait to enjoy this buds!!! 😁😁

Likes
48
Share


@AsNoriu
Follow
Day 117. Trim jail and heavy upload session for 24 hours at least. Don't like to keep photos, so ill upload each plant separately and will delete them. Phone camera is still cracked and off-focus, but they are all nice !
Day 128. I knew that those plants will be smallest, but Mini was in centre and her buds were still not nuggy nuggy ... sadf .....
#1 67, #2 68 , #3 75 , #4 56. 266 total .
836 from 720W is good, not my best, but good, just that airy quality ....
Happy Growing !!!

Likes
35
Share


@eldruida_lamota
Follow
Vamos familia con la décima y última semana de floración de estás Cereal Milk de RoyalQueenSeeds.
La temperatura está en 22 y la humedad actualmente está en 45%.
La cantidad de agua cada 48h entre riegos no cambia, y por supuesto controlando el Ph entre riegos alrededor de 6.5 - 6.2.
Ya se ven bien sanas estas 5 cereal milk, tienen un color y una salud espectacular, y ya están desprendiendo buenos aromas, vemos como han madurado las flores, ya estallaron.
Ya llevamos 2 semanas solo con agua, les daré machete ya en que acabe secar la maceta.
Mars hydro:
Code discount: EL420
https://www.mars-hydro.com/
Agrobeta:
https://www.agrobeta.com/agrobetatiendaonline/36-abonos-canamo
Hasta aquí todo, Buenos humos 💨💨

Likes
6
Share


@Nickeluring
Follow
She was topped at day 16. I topped her above node 4 and removed node 1. She will have 6 main branches. She is doing very well. All my 4 plants on the terrace look almost the same, and I take that as they all grow to the best of their abilities.
Likes
28
Share


@WEED_SPACE
Follow
Day 24
Watering 2L/plants, first watering 1L /plants, second watering 1L/plants and mix fertilizer 🌈
Day 27
Watering 2L/plants, first watering 1L /plants, second watering 500ml/plants and mix fertilizer, third watering 500ml/plants 🌈

Likes
17
Share


@chapadux420
Follow
Day 64 beginning of week 10, looking for a small but decent yield.
14th, day 66 budding up, prob a week for harvest.
Day 68 will have to water soon, going to slow down nutes now. Zoom on the bud photo to see trichomes getting amber
18th Day 70, watered without any nutes yesterday, had some runoff.
Likes
6
Share


@Naujas
Follow
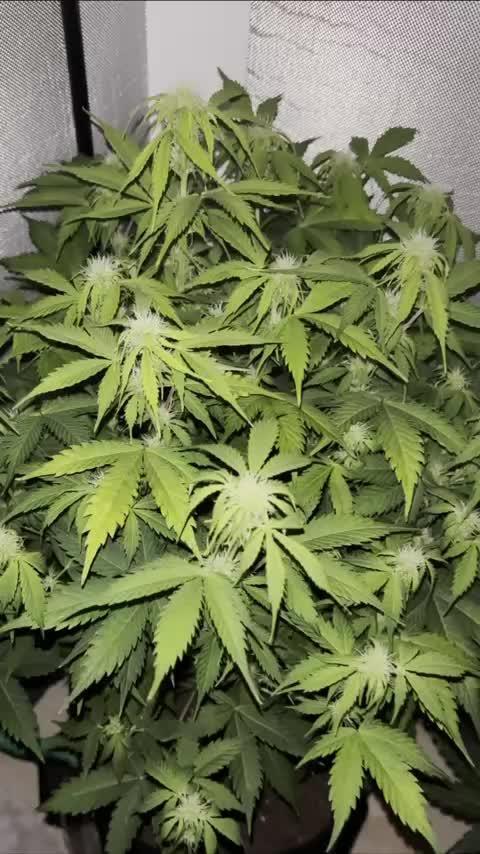
The girl is fantastic :) she looks strong, healthy and happy :) next week, I will defoliate her to give energy to the flowers, and at the same time improve air circulation closer to the stem :) everything is going smoothly and well :).



Likes
16
Share


@DrShotzUK
Follow
SUGARLATO - GREEN HOUSE SEEDS - week 8
Already flushing due to her not taking up the water as fast now.
She’s turnt out to be a quick little stunner. Week 8 and already flushing because she’s ready to go.
This strain is new but will definitely be done seed to harvest in 8-9 week max.
Smell is amazing of earth undertones with a gassy pastry smell. Big sized golf ball sized nuggets that are pritty dense
DRSHOTZUK

Likes
31
Share


@Reaper
Follow
next time i wont Veg under fluorescent lights, needs more power from the start for bigger stem and root system, i cant complain by the end result lol
Likes
19
Share


@RDWCGrowing
Follow
Week 1 Day 1 - 8/12/2023
1st Water change Day! Such a special time it is when you remove the little bit of Nutes that you gave them as an appetizer and you give them their first real meal.
Added
39 Gallons of Water to my system
SILICA= .5mil/Gal = 19.5 = 20mil
Root Drip = 1mil/Gal = 39mil
Cal Mag= .25mil/Gal = 9.75 = 10mil
FLoraMicro= 3.0mil/Gal = 114mil
FloraGro = 2.0mil/Gal = 78mil
FloraBloom = 2.0mil/Gal =78mil
ORCA= .5mil/Gal = 19.5 = 20mil
Week 1 Day 2 - 8/13/2023
Everything is looking good the roots are making thier way to the water and the new grow is looking nice and green.
Week 1 Day 3- 8/14/2023
Everything is right on track, they are looking beautiful and in the praying postition all leaves happily lifting towards the light.
Week 1 Day 4- 8/15/2023
Looking beautiful today and looked like she could use her first haircut.. gave her a TOP off. Roots are laying in the water everything is looking right on track..
Week 1 Day 5- 8/16/2023
walked in and the humidity was under 60.... ohh noooooo.. So I added 2 humidifiers to the tent and attached them to my InkBird controller which is set to 62. She had roots nicely in the water.. this grow is on!!!
Week 1 Day 6- 8/17/2023
Humidity was a little low this morning, so I refilled the humidifiers. Other than that, the temp looks great, the PH looks great, the PPM looks good the plant is in the praying position and all damage from the little drowning seems to have been fixed. Happy Happy.
Week 1 Day 7- 8/18/2023
Yay.. week 1 in the books, roots in the water growth has started first hair cut given and both side nodes are growing. Everything is looking good and on track.. A lot better than week one of the last grow when I had them drowning week 1.
Really excited on how this grow is going to come out.
Likes
Comments
Share

Likes
76
Share


@BB_UK
Follow
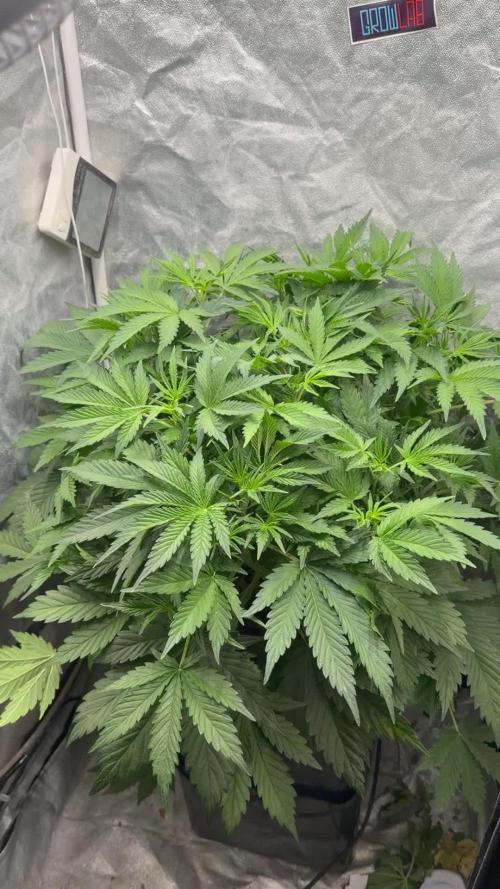
Took a while to get there but OMG little note quick! So I started her in a 1 litre pot and stuck her on top of a 1.5L Pepsi bottle with the top chopped off! And she yielded heavily for that amount of soil a whopping! 224.63 wet weight so can’t wait to see what she holds dry because them buds were like boulders! So dense! I will be back to document her dry weight and then a couple of weeks later with the update on the smoke report! But I know it’s going to be so loud! She has deep pungent aromas like gassy and sweet! She’s going to be a powerhouse! She was a little over as today a banana developed but that just tells me “well done” timing just right! She’s a little long for my taste of auto but I do suggest anyone grow her she’s amazing! In the end!

Likes
4
Share

@NoProbation4Weed
Follow
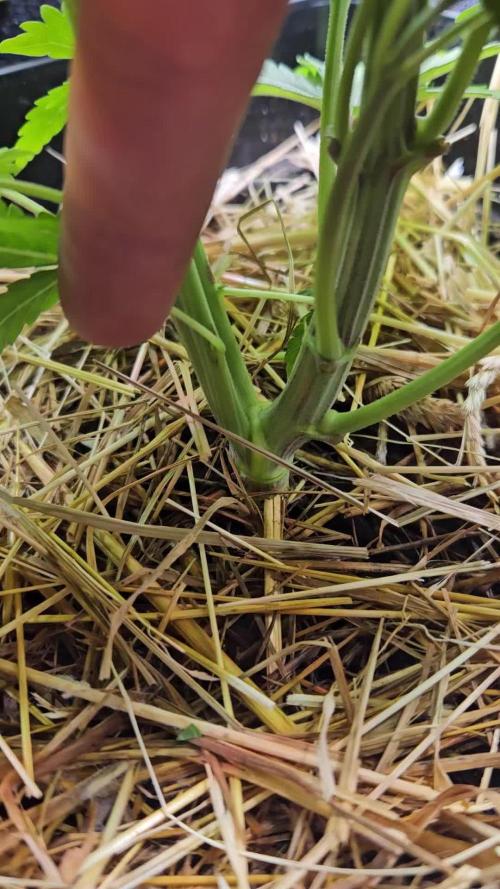
The Lemon Orange has a crazy mutation. She topped herself and the leaves are growing strange from the main stem. The Top gets Fluffy like it has topped itself multiple times.
Unfortunately, during my absence, the ladies were under-watered and could’ve used a bit of nutrients as well. I’m optimistic they’ll bounce back and recover.
I topped and defoliated them.
Light is hitting the leaves with around 500 PPFD.
Likes
9
Share


@LilCeeDaWeedGod
Follow
Week 9
November 4
- Okay 10 days into flower and she is doing good. Started showing pistils a couple days ago so here we go
-a lil bit of a stretch happening but im not too worried about the tent size as the other plants should be ready to flip this coming week and that tent is a bit bigger
-already smell sweet and floral in the tent didn’t expect the smell to come thru this early

Likes
17
Share


@HowtoBubatz
Follow
Week 6 of flowering, and things are heating up—literally with the scent! 🌬️💨
Both plants have significantly increased their aroma, and every time I open the grow box, I’m greeted with a strong and delightful smell that fills the space.
The non-LST plant is much further along in its development. Its buds have progressed beautifully in color, and I’ve already noticed the first amber trichomes appearing. 🍂✨
This, along with its overall appearance, is signaling that it’s nearing maturity. Because of this, I’ve started flushing the plant with clear water to prepare it for harvest.
Speaking of the LST plant, it’s about a week behind. 🌱
While it’s not as far along, it’s still thriving with strong trichome production and a stunning Lemon Haze aroma that’s sharper every day. 🍋💚
Both plants are doing great, and the differences in their timelines make this grow even more interesting. I’m excited to see how the LST variant catches up in the coming weeks! 😊🌟
Likes
52
Share


@Santica_Garden
Follow
So all the ladies are being flushed now, so just waiting for harvest day to come now, gonna make sure I give you guys a nice accurate review on the ladies 👍🏾


Likes
220
Share


@CRiSPrGrow
Follow
These had a pretty good life. I actually only fed NPK the one time . Germinated them in a Zambeza propagator, i really recommend getting one of those propagators, they're reusable and really take the heat off those first days when you're sweating. Pooped them into their plugs they sprouted out strong, germinated 5 kept 3. transplanted them no problem. Veged these for 4 weeks, then they shot up. during veg they stretched out a bit early on i should have been giving some specialised micro i had on had but for some reason on the other i didnt. They needed extra support for their first three weeks, so i decided to LST them around week 2. Two camping hooks one anchor for the main stem and one to keep the plant down. Once i dialed in my lamp to plant distance they benefitted by slowing down on the stretch a bit. they all took to LST extremely well, bushing out and creating an nice even canopy. They pushedout these thick indica leaves, one of my plants was a lighter colored leaf pheno, the vertafort one. The Six Shooter genetic really stretches, if just off the top of my head it seems that the plants quadrupled in size over an 8 week period, completely eclipsing their neighbours and creating a thick dense canopy throwing shade down below. Each turned into a bush with three or more mains sticking out the top by week 6. IThe results start to look real pro around week 8. Before that though I hadn't been defoliating. This and simple lack of light means that I had loads of undevellopped colas. If I'm honest I should have tried to harvest in stages but by colas. Anyway these kind of grew like a gorilla glue but with much different and much better flower structure. The plants started pushing out flowers and pistils and preflowers etc early, but then took a while to gear up towards towards getting fat. The flower branch out in a spiral pattern up and down the main and secondary colas evenly, creating this misssile shaped colas, but they branch out once sometimes twice, which means less branch to nug ratio than a gorrilla glue by a full multiple. They started smelling like lemons around the time they were fattening up. Then they started getting buff, really little by little, what did rippen rippened evenly. Some colas was basically waste especially the colas stuck on the sides of the tent and some of the colas where for some reason or another there was no light there due to the dense canopy. Truly a BEAST OF A PLANT, HIGH POTENTIAL, great BRANCHING, if you look carefully each plant has more than a dozen colas,
Timed it so the harvest was on a day the plants were chock full for plain water after ten day's worth of additive aided flushing. hung to dry slowly in the tent, got it around 55RH inside the buds over 12 days then trimmed and jarred in miron glass with boveda 62. The trim was a great experience, took a while but not that long because the flowers were so nice in the way they are. you do have to trim every sugar leaf one by one though if you're doing it by hand, broke these sizzors that @Mrs_Larimar sent me because of the resin lol. so I pull these plants out my tent and I just kinda look at them and they're basically dark green because of all the sugar leafs, i'm thinking to myself "shit i messed up this isnt even that frosty". well, what i found out is every time i clipped one of those trademark long sugar leafs off it revealed absolutely resious white frost. That's what can keep someone motivated. ! Once jared, if there's boveda in your jar, you dont really need to burp it daily, or even weekly i just let it sit there, obviously i've been smoking it and following the cure, let me tell you this one needs longer to cure than you're used to maybe, at least two more weeks of cure after a slow dry. Four weeks after the chop , it's a strong weed !
Didn't smell all that loud, but I have a 1300M3/H exhaust so... i'm not surprised. I will say though that my neihbour said she could smell weed even when I wasnt home and she could smell weed in the corridor, from the times I was trimming and basically every time I open my jar. Gonna need a new carbon filter for the next grow. I retired my lightbulb too. Hard to put my finger on the taste because the smoke is so smooth, and when i saw GD had a tag for Woody, i knew right away this was that taste i felt. I will say this though, cure this correctly, dont rush, dry it real slow, then cure it, citrussy tastes, usually those will evaporate, leaving this distinguished terpene heavy hitter much better tasting. So what can i tell you, this weed is white weed, so frosty. Bag appeal is great too, this strain pushes out pistills like no other, maybe even more than the gorilla glue. that means this is a chill weed right? One of the phenos I grew had more pistils than the other two. Mr. B's did, but i dont know if you can really tell from the close ups, i'll try to put some more pictures up. I got two maybe three phenotypes in terms of taste. Mr. B’s is much pine-ier than the others, and when the joint goes out and you light it again, it’s even more piney … I’m actually really happy about that reminds me of white rhino from the east coast back in the day but way piney-ier than that even. When you smoke the other phenos the smell is incense and the taste is really really smooth & woody. Sometimes I find different after tastes on the exhale like coffee, pepper, and maybe sweet/fruity sometimes too depends on the pheno I'm toking on. It is LOUD THOUGH, always have a spare filter on hand IT’S NOT WORTH IT get it !
Well at the end of my first grow, i'd like to quickly review all of Bulbi's own :
Bulbi"s Own Early VegMicro: Fine green powder with calcium and all the rare metals in it. I didnt use it ! Damn, next time I'll amend my soil with it like i did this time on the FBT1
Bulbi's Own Cal Mag : Organic fine white powder with calcium and magnesium, i used it in the feed and sometimes as a spray. I didnt know how much to put in because these things dont come with instructions so i ended up putting 1/4 doses most of time. The correct amount should have been 2.5G/L.
Bulbi's Own Flower Micro : Organic fine beige powder that I used mixed in with the sulfur. I think this one's a keeper, really helped my plants make it through the stress of bottom feeding and all that heat.
Bulbi's Own Mag Sulfur : Organic fine red powder that I used mixed in with the Flower Micro I used this one in my spray too , to great effect, in my opinion
Bulbi's Own Beneficials Trio : This was the base beneficials mix I had, you need to put 7.5 to 15g/l , watch out for clumps, use at the night fall, or when still dark.
Bulbi's Own Anti Afid : I threw it in there i think just in time to protect my plants when I intentionally overwatered when I went on my trip. There were some white flies that emerged, because... well that's what they do isnt it. but there were just a few of them and they ended up flying around wierdly, and within four days, no more white flies, didnt even use yellow sticky tape ! You mix this one with the trio for even more effect. I used these in a spray I think , also.
Bulbi's own Anti-Worm : This one is more directed against larvae, and can be combined with the base trio. I was weary of using it, but I'm glad i did to give my soil matrix that full spectrum of biological protection.
Bulbi's own Humic Acid : This one i loved, looking back I'm regretful not having used it more. the dry humic acid is a great experience, the quality of it was impressive, clumps would seperated into more clumps ad infitum the feed slowly turning completely ink black. definituely using this once a week from now on
Bulbi's own Amino Acids : this one is just amino acids, maybe next time I'll use it at the same time as the humic acid, but I'm not 100% on that. What i did do was spray the top layer of the soil with amino acids when I accidently ran into some issues from spraying kelp all over the place. So in that sense it's an absolute life saver and a must to have on hand.
Bulbi's Own Kelp Extract Concentrate. Loved this one too haha, so thick, and green, check out the video of when i pour it lol. Worked great, raises the pH some so be careful, i used this one as a sprat aswell to get those plant growth hormones pumping during the seeding and veg stage.
Bulbi's Own CO2 : well part of what I set out to do was to test the CO2 theory. Like roots do absorb CO2 but at a lower efficiency than leaves say 15% vs. 85% the theory being enriching your water or feed with CO2 would ultimately benefit the plant. So i enriched water with these ceramic based co2 tablets, because CO2 is a soluble gas, it stays in water. Then i fed the plants in this manner in the feed and also as a spray. The idea behind that was that co2 enriched water would come in direct contact with the plant allowing for absorption of some quantity of CO2 through the leafs. Someone explained to me that these are actually old school techniques. Well I know i started late and didnt follow a regular schedule like i wished for but the plants didn t die, or show any immediate negative upon innoculation, so what can I say? I'm doing this again, perhaps. Only problem is that these things are really a pain to pH correctly
General Hydroponics Dry pH Down : GREAT PRODUCT, hard to find but amazing – not registed on GD for some reason
I still have to make my bubble hash so any advice welcome ! 🚀