
Likes
Comments
Share

@ProlificGrowth410
Follow
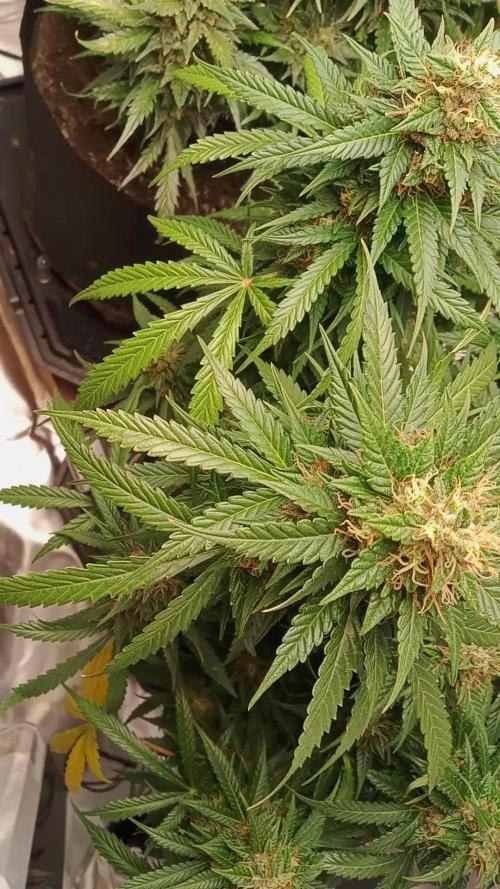
Day 100 from seed by far the healthiest most stacked plant in the tent, very dense nugs, strong citrus and berry smells kinda like blueberry lemonade, I'm very impressed to say the least.
Likes
38
Share


@Wicked_Stix
Follow
Shes been chopped. Took some early samples and it is some sweet dank bud. Will update harvest soon
Likes
8
Share


@jaydee702
Follow
She has been a pig drinkin al the water every 6 hours in this tiny spam DWC. she grew another 12 in this week alone bubba cheesecake is groing like its onsterods and workin out


Likes
13
Share

@All_our_small_plants
Follow
Bewässerung: 1000 ml alle 2 Tage
pH-Wert: 6,1
EC-Wert: 1,2
Temperatur: 22ºC
Luftfeuchtigkeit 62%
Schädlingsbekämpfung:
PPFD: 500 µmol/m²/s
DLI: 33
Düngemittel: Mineralischer Dünger 3.5-6-6 PK 13/14
Besonderheiten: Wurden direkt in die erde gepflanzt in einer Kokos-Quelltabletten.
-Tag 51 Heute haben wir sie wieder gegossen und Dünger gegeben
-Tag 53 Heute haben wir mit effektiven Mikroorganismen und mit Plagron Power Buds gegossen 😜
-Tag 55 Heute haben wir sie mit Wasser und Dünger gegossen, sie entwickelt so langsam ihre Blüten und sieht sehr gut bis jetzt aus 😍

Likes
16
Share


@CheeRz
Follow
Time is flyin' by and the ladies already in flowerin' week 6. Buds are startin' to get thick and lookin' damn yummie 💚💚💚. This is why we doin' this growmies 👆🏼👆🏼👆🏼

Likes
Comments
Share

@TheFamilyShire
Follow
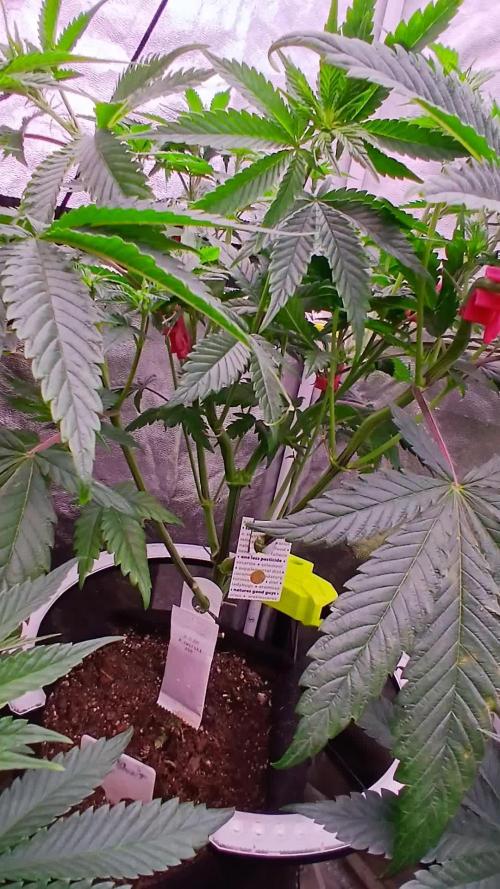
So I fed them 1/2 veg and 1/2 bloom nutes when I flipped the tent. I also keep training her to keep her level canopy. I did some lollipopping and took the lowest branches to clone. Im cloning in rockwool for my 1st time ever so wish me luck with that.
2 B Blunt is still the biggest in the tent. Ive grown 2 b blunt maybe 4 or 5 other times. Can't find the seeds online anymore. This was my last seed. I did cross 2 b blunt x red runtz s1 from exotic genetix. Ive grew one out from the cross and wow she was good and different terps.
The original 2 b blunt is just to amazing so I hope my clones take. I would like to make some s1 seeds if I can. Well stay tuned to see how much she stretches.....
I won this light giveaway on Instagram. 650 watt big full spectrum LED and 4x 25w under canopy lights. I moved these plants into the 4x4 with the new lights. Super cool Christmas gift.

Likes
2
Share

@Maindrugger
Follow
Завтра харвест. Я бы дал может ещё чуть чуть но не хочу. Поливал только водой давал по 5л. Последний полив был 3 дня назад. В последние 3 дня открываю окно чтоб ночью было холодно так что у него последние 2-3 ночи было градусов 15

Likes
Comments
Share


@Earthsower
Follow
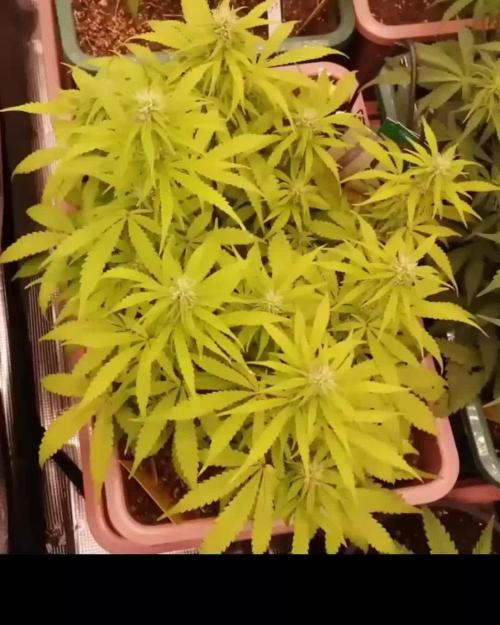
She looks a lot better than three weeks ago least she’s back moving again with further growth I fed her 100ml of phd water due to a very light pot. I am still holding her in natural sunlight!

Likes
19
Share


@Sato_Growing
Follow
Watering this week 0.6-0.7 L per plant
Did some more Lst to my plants and the seem to luv it. Also did some pruning to help the lower brunches to catch up
Some of the plants started to flower already. Running 20/4 day/night.

Likes
10
Share


@CampaCavallo
Follow
4ª settimana di fioritura alla CAMPACAVALLO per la Black Muffin di SweetSeeds 💚🐘🔝
Di piccoli peni 🍌 non se ne vedono più...
Ed i bud si stanno gonfiando alla grande😛🎈
Beve 🍺 propio tanto in questa fase di crescita 🐫
🖤La CampaCavallo manda un grande abbraccio a Valencia ed alle persone colpite dalla maledetta alluvione🖤


Likes
17
Share


@BlumenBot
Follow
2/8 - first flower feeding after 24 hours of being promoted. She was thirsty and I think I'm going to have to feed almost daily to keep up as the pot isn't big enough for a full gallon watering...mistake made. Need to defoliate and prune out some small sucker bud sites. Tomorrow or Wed for that.
2L distilled water
Bloom 2g
Phosphorus 0.44g
Kelp 0.38g
Cal/Mag 0.58g (too much)
Microbes Bloom Stage 0.98g
Amino Acids 0.69g
Enzymes 0.27g (too much)
6.0pH
68.5*F
760ppm
2/10 - feeding today, removed all rubber wire restraints, minor defoliation of bigger fan leaves on top, removed some sucker shoots from down below and I am wondering what else to prune out. This thing is going to be a 2 foot x 2 foot monster!
2L distilled water
Bloom 2g
Phosphorus 0.38g
Kelp 0.39g
Cal/Mag 0.32g
Microbes Bloom Stage 1g
Amino Acids 0.68g
Enzymes 0.15g
6.0pH
68.5*F
660ppm
Oh and it's a girl!
2/12 - feeding and mass defoliation with sucker shoots pruning...removed about 20% or more. Now she has room to breathe and good light penetration to the soil. Also tied her down gently to open up the canopy and spread out the tops a bit.
2L distilled water
6.0pH
675ppm
69.4*F
Bloom 2.1g
Phosphorus 0.41g
Kelp 0.44g
Cal/Mag 0.34g
Microbes Bloom Stage 1g
Amino Acids 0.65g
Enzymes 0.13g
2/14 - flush feeding 2L distilled water, 6.0pH, 69.5*F

Likes
19
Share


@nonick123
Follow
Día 34 (27/05) Riego con 750 ml H2O + Regulator 0,15 ml/l + P-Boost 0,5 ml/l + CaMg-Boost 0,25 ml/l + TopBooster 0,2 ml/l - pH 6.2
Día 35 (28/05) Riego 750 ml sólo H2O pH 6.2
Día 36 (29/05) Riego con 750 ml H2O + Regulator 0,15 ml/l + P-Boost 0,5 ml/l + TopBooster 0,2 ml/l - pH 6.2
Día 37 (30/05) Riego 750 ml sólo H2O pH 6.2
Día 38 (31/05) Riego con 750 ml H2O + Regulator 0,15 ml/l + P-Boost 0,5 ml/l + CaMg-Boost 0,25 ml/I +TopBooster 0,2 ml/l - pH 6.2
Día 39 (01/06) Riego 750 ml sólo H2O pH 6.2
Día 40 (02/06) Riego con 750 ml de Té de Compost de Floración
💦Nutrients by Aptus Holland - www.aptus-holland.com
🌱Substrate PRO-MIX HP BACILLUS + MYCORRHIZAE - www.pthorticulture.com/en/products/pro-mix-hp-biostimulant-plus-mycorrhizae
Likes
4
Share


@Erich2025
Follow
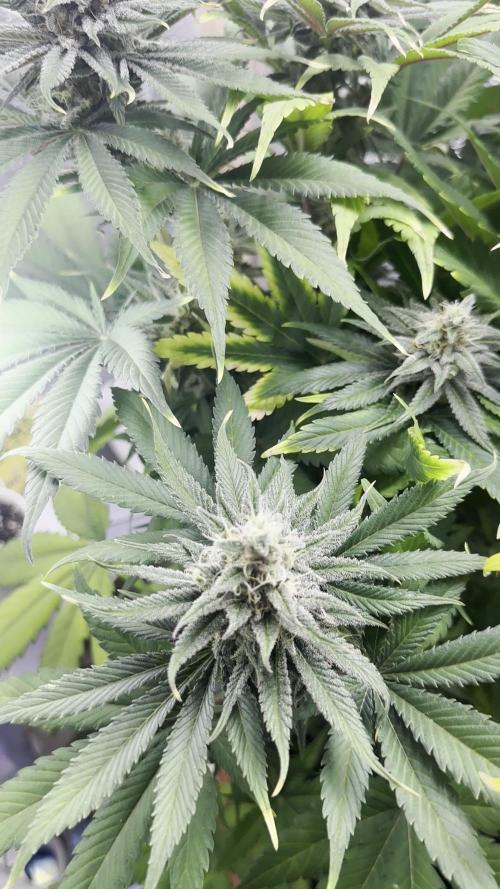
I really enjoy growing these plants. They change every day. The 2 bigger onee start to have purple all over the leafs. The tallest is craaaaazy frosty. When I open the growbox there comes a smell like a punch in my face. They smell very strong and they smell amazing. 3 different phenos, 3 different smells and structures. It is like growing 3 different strains but all 3 of them seem to be special.
I hope the grow finishes as well as it went till today.🙏🌴🍪
🌴🍪🌲🍊⛽️🔥


Likes
12
Share


@Alluvionated
Follow
They're very beautiful, so proud of them. I'm putting the photos of the most larger, but the next week i will upload also the photos of the other 2 girls, they're a little smaller but still very fit. This week is the hottest of this year, so I'm a little scared
Likes
20
Share


@SkunkyDog420
Follow
Hallo zusammen 🤙.
So das war es für sie wir sehen uns in 2 Wochen.
Sie erhalten 25 Prozent Rabatt in unserem Shop
Mindestbestellwert beträgt 75 Euro
https://greenbuzzliquids.com/en/shop/
Code: GD42025

Likes
3
Share


Processing
Likes
11
Share


@Newbie5648
Follow
Growimg well. Just didn't know what to compare it to till I found this app.