


Likes
Comments
Share


Likes
4
Share


Likes
100
Share


@AsNoriu
Follow
Day 30. Girls are perky at the beginning of day, but 20 hours looks like pain for them, I tried 20/4 and was running only 18/6 after, 24/0 even worse for esthetics.
Girls got first feed 400 ppm a week ago, so I went with 800 .... It's was way too much for them. Need now 3 pure water waterings to bring food levels to normal ;)))
Stemps are thick, branches growing, so I am happy and don't worry. Diesels would eat all by the way and they look best ;)
Day 33. Install second wall fan , trimmed bottoms a bit, took few leaves here and there and positioned them for last time .
Next watering feed finally !!! ;)))) I think they recovered and are ready for more !!! ;)))
GC looks worst, NL very unstable with size, AD smallest plant lost one branch by my clumsiness, but still are looking like I love plants to be.
Happy Growing !!!


Likes
26
Share


@pifflestikkz
Follow
Day 106
14/10/24 Monday
Their colours are really coming through now 🤩
Nearing their end now, possibly another week after this ✌️💚
Picture and video update 📸💚
Day 108
16/10/24 Wednesday
Another run through of de-chlorinated tap water and flawless finish all to pH 6.3.
Giving 0.3L again daily as there not drinking half as much now.
Picture and video update 📸💚
Day 110
18/10/24 Friday
Divine Seeds Overdose has been Harvested. Check her own diary on my page for full results.
I moved the others into my now cleaned down 1.2m x 80cm under 660w hps to finish off.
Day 111
19/10/24 Saturday
De-chlorinated tap water and flawless finish at pH 6 today.300ml
Day 112
20/10/24 Sunday
De-chlorinated tap water and flawless finish at pH 6 again 300ml.
I have had an extremely busy week. I'll upload videos and pictures tomorrow on a fresh week... Wait and see the colours 😋💚


Likes
50
Share


@Mr_Motalovah
Follow
Hello growers and tokers! 👋 👩🌾 🧑🌾.🔥💨
Hope you had a great week because these ladies sure have! 😍
They're starting to get that sweet aroma this strain gives off, her aroma will be over powering my tent in full flower. Love it!
Pictures and info were taken on day 12 of flower.
I put 71cm tall because that's the average between the three girls.
CC 1: 78cm
CC 2: 68cm
CC 3: 68cm
CC 1 is killing it with the double main colas. 💪 💪 🤩
CC2 is my favorite. She's got a perfect shape, nice evenly distributed canopy. Took LST great.
For me that's the goal when I do LST.
CC3 doesn't fall behind in any way, she's looking great.
There's a bunch of new growth everywhere so after 21 days i'll be doing some pretty heavy selective defoliation.
Feeding 1,5L each, every other day. Will be increasing as they ask for more.
How do they ask for more?
When feeding if the soil is drier than normal I give a 150-200ml increment of water.
I do that until they stop feeding so much then i just maintain that amount.
I start reducing if it takes longer to dry.
That works good for me. The old finger in the dirt trick. 👍
Nothing like knowing exactly what your ladies need first hand.
They've got a lovely green lush color.
It's a delight growing this strain.
I'll have to get me some more seeds for next run because this is a strain that will always have a spot in my garden. 😍 😍
Hope you enjoyed this week's update and stay tuned for next week.
If you like what you see check out the other strains in the garden. 😁
Take care and stay safe!
One love!

Likes
1
Share

@direx
Follow
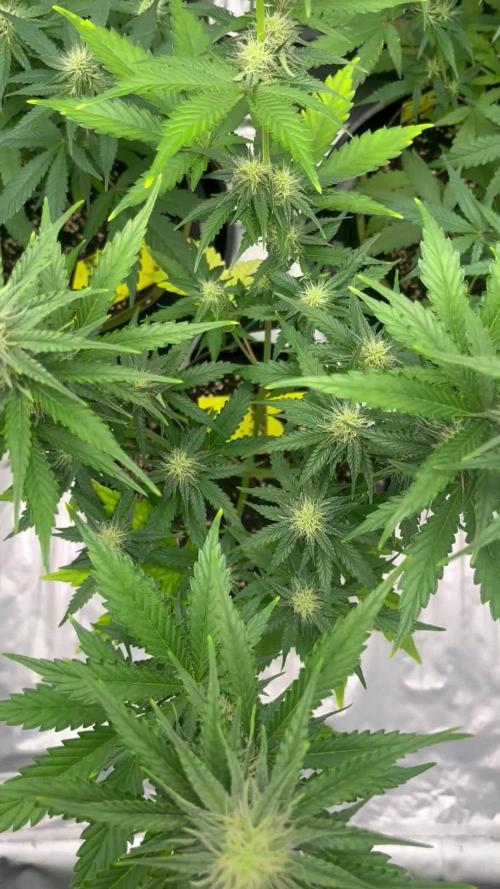
Woche 6 : Drizl Pickl 57cm , FishyZoap 54cm , F*cked Up Hippy 44cm
Substrat: Mix aus Lightmix (75%), Coco (15%) und Perlit (10%)
Gefäß: 11L Stofftopf
Licht : 70% Flowering / 40cm abstand
Düngung nach Biobizz-Schema 2020 (Light-Mix Woche 6) 2x 1,5L pro Pflanze
Die Strains:
🥒 Drizl Pickl Auto (Whopper with Pickles x Granny's Home x Mack and Crack Auto)
Fishy Zoap Auto (Fish Piss x Zoap x Super Boof Auto)
✌️ F*cked Up Hippy Auto (Maui Wowie x Fat Bastard x Panty Punch Auto)

Likes
30
Share


@SooSan
Follow
12/12 + 35 jours
1️⃣
🏠 90x60x90
☀️ FC-E 4800 => puissance a 75%
🍁
1x Black Bomb / Philosopher Seed
2x Amnesia Lemon / PEV Seeds
1x Blueberry / PEV Seeds
1x Blueberry / 00 Seeds
1x Wappa / Paradise Seed
1x Dark Phoenix / Green House Seed
1x Quick Sherbet / Exotic Seeds
1x Mango Cream / Exotic Seeds
1x Banana Frosting / Sensi Seed
1x Hindu Kush / Sensi Seed
4x Fast Mix / Sweet Seed
📎 https://growdiaries.com/diaries/122084-grow-journal-by-soosan
📎https://growdiaries.com/diaries/124052-grow-journal-by-soosan
2️⃣
🏠 30x60x50
☀️TS1000 => puissance a 100%
🍁 4x Quick Sherbet - Exotic Seed
📎 https://growdiaries.com/diaries/122080-grow-journal-by-soosan
Sponsorisé par Mars Hydro
Likes
22
Share

@ElBrujoTHC_Official
Follow
✂️ Harvest Day – Jealousy Diesel Auto (Octogenetica)
Cosecha de las autoflorecientes.
Llega el momento de cosechar las Jealousy Diesel autoflorecientes de Octogenetica.
Aunque sobre el papel esta genética indica un ciclo más corto, en la práctica se ha decidido respetar completamente su ritmo, permitiéndole alargar su ciclo hasta alcanzar el punto de madurez que buscaba.
La cosecha se ha realizado cuando las plantas han mostrado señales claras de maduración real, priorizando calidad y efecto por encima de tiempos teóricos.
🔬 Motivo de la cosecha
La decisión de cortar se ha tomado tras una observación constante de tricomas y del estado general de la planta:
-Tricomas mayoritariamente lechosos.
-Aparición progresiva de tricomas ámbar.
-Pistilos mayoritariamente oxidados.
-Cogollos completamente formados y resinosos.
-Aroma intenso con notas bien definidas.
Aunque podrían haberse cosechado unos días antes, se ha optado por darles el tiempo extra necesario para que la resina terminara de madurar correctamente.
🌱 Estado de las Jealousy Diesel en cosecha
Las autos han llegado a cosecha:
-Tras completar el lavado de raíces.
-Sin signos de estrés.
-Con hojas perdiendo color de forma natural.
-Energía enfocada completamente en las flores.
Este comportamiento confirma que la planta estaba cerrando su ciclo de manera natural y sin bloqueos.
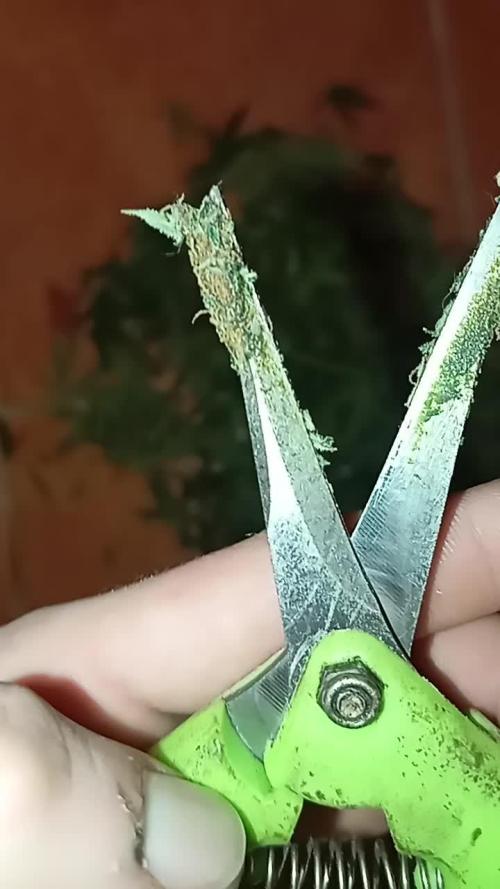
✂️ Proceso de corte
La cosecha se ha realizado con cuidado, respetando la estructura de las flores y minimizando la manipulación para proteger la resina.
A partir de aquí comienza el secado, fase clave para conservar el aroma y la calidad obtenida durante el cultivo.
Muy contento con cómo han respondido estas autos, demostrando que la paciencia también tiene recompensa 🌿🔥




Likes
14
Share


@Lol_You_Looked
Follow
FINAL WEEK?
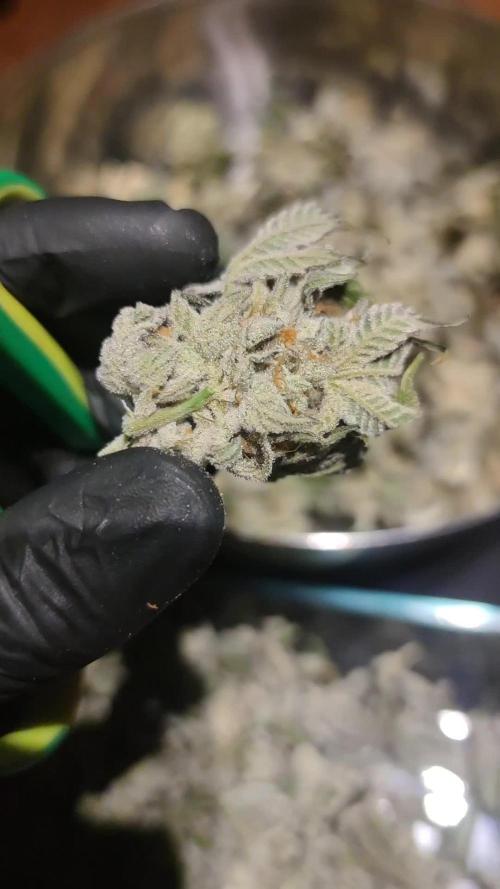
Feb 28th - pH 6.0, PPM 400, 0.8 EC, Temp 77f, Humidity 50% - What changed! 3 gals, hoping this to be the final week. The trichomes look good, just want to ensure all are sufficiently done and ripe.
Mar 1st - pH 6.3, PPM 400, 0.8 EC, Temp 81f, Humidity 70% - Adjusted pH from 5.0, added water to adjust PPM from 550.
Mar 2nd - pH 6.4, PPM 420, 0.8 EC, Temp 80f, Humidity 55% - Adjusted pH from 5.4, added water to adjust PPM from 550.
Mar 3rd - pH 6.4, PPM 460, 0.9 EC, Temp 77f, Humidity 62% - No adjustments.
Mar 4th - pH 6.2, PPM 460, 0.9 EC, Temp 83f, Humidity 80% - Adjusted pH from 5.7, VPD is ass, no idea on how to change or fix it. I have 2 intakes and one exhaust, the room the cabinet is in is not high in humidity, just the 1.5x2.5 cabinet. :/ I have tried a dehumidifier, but in the end, it didn't collect anything after a few days, so truly at a loss, I've also tried defoliation, but I'm always afraid of doing too much, I mean I guess it's the last week/week and a half so it shouldn't be too bad to cut leaves off but damn, what about the earliest stages, shits going to be tough to dial in...
Mar 5th - pH 6.3, PPM 430, 0.9 EC, Temp 85f, Humidity 70% - Adjusted pH from 5.7, seeing more purple on the buds, maybe I'll go another week just to see if any more color comes out.
Mar 6th - pH 6.3, PPM 530, 1.1 EC, Temp 83f, Humidity 75% - No adjustments


Likes
22
Share


@Azielly
Follow
Hi everyone,
I feed this little beast twice a day 1/2 gallon (total 1 gallon) per day with the shown above nutrients every time.
- Always on a 18/6 Daylight schedule
- Gives me a runout of .80/L
- Use Coco Coir an perlite only
I transplanted here directly into final container (5 gallon fabric pots).
Final week before harvest , i am very excited 😎
Have i nice week to all growers.
Feel free to comment, i can use all the help.👍

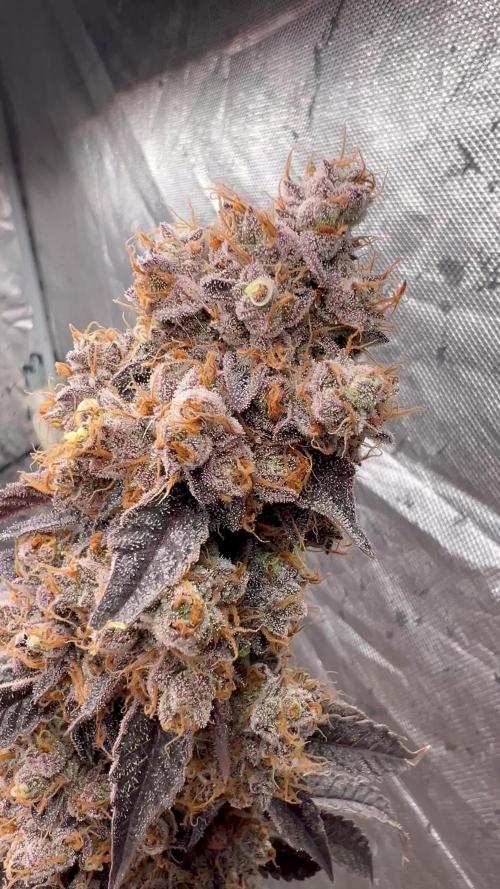

Likes
27
Share


@Salokin
Follow
Hi Growmies,
Again another very uneventful week. The plant is doing what she is supposed to do, getting ready to bulk :) For the coming week PK 13/14 will be added so she can use that to fatten and ripen properly. So far I am quite happy with the results, she is much leaner than her mother and basically only consists of stems and buds.
Strangely enough some friends of mine who took cuttings are actually tickling out a bunch of purple hues on the leaves and buds, wonder if this could be temperature related. Guess I will see once have a temp controlled fan …

Likes
7
Share


@Jschnabs
Follow
I highly recommend LST and topping the plant at least 2 weeks prior to flower. This strain reacts very well to it and getting an even canopy of big frosty buds is great. I must say that in the past 2 weeks the smell has become very steong. Be sure to seal whatever air leak you have in your flower space if you are concerned about smell. I use a 6 inch AC infinity long filter and it handles the 2 plants decently. As soon as you open the door to the flower side a wall of fruity-ish smell hits you.
The resin production is amazing. I have never had a plant produce so much.
Likes
11
Share


@DankeyeBeaverjuice
Follow
Cal-def on 1 plant of 6 (tallest)
Color fade beginning
Overall good health

Likes
3
Share


@Purplepassion
Follow
Finally there is a new week.
She's getting pretty nice and also the trichome are not bad.
2/3 more weeks more to go 🙏🙏
Likes
Comments
Share

@DogDoctorOfficial
Follow
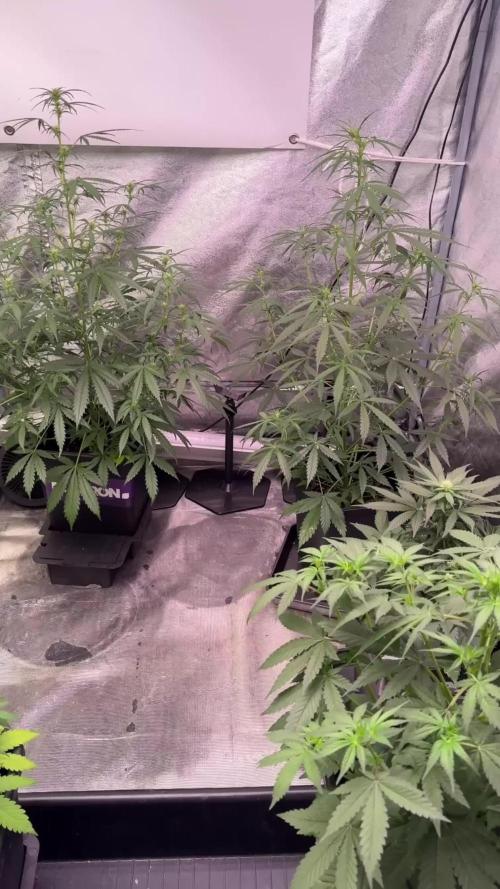
? Blueberry Muffin – Pheno B
Week 5 | Letting the Plant Choose Her Own Pace
One of the reasons I love growing multiple phenotypes from the same seed pack is that they constantly remind me of one important lesson…
Genetics always have the final word.
Even when plants share the same parents, the same environment, the same nutrition and exactly the same lighting schedule, each one develops its own personality.
Blueberry Muffin Pheno B is proving exactly that.
While her sister is already comfortably stepping into flowering, this lady is taking her time, continuing to build structure before fully committing to bloom.
And honestly…
I’m perfectly happy to let her decide.
⸻
🌱 The 12/12 From Seed Journey
For anyone joining this diary for the first time, welcome!
This entire project is being grown using the 12/12 from seed method, meaning the lighting schedule has remained at 12 hours of light and 12 hours of darkness from the very beginning of the grow.
Unlike traditional cultivation, where growers decide exactly when flowering begins by changing the light cycle, this method leaves much of that decision to the plant itself.
Each phenotype transitions when its genetics decide the moment is right.
That’s exactly what we’re seeing here.
Although the first pre-flower signs are beginning to appear, I still consider this another week of vegetative growth.
She simply hasn’t committed enough to flowering for me to officially change the diary yet.
It’s a perfect example of how two sisters can follow completely different timelines while growing side by side.
⸻
🌿 Building Structure Before Flowers
Rather than rushing her into bloom, this week focused on preparing the strongest possible foundation.
Pheno B naturally grows with an extremely compact structure, producing very short internodal spacing and dense foliage.
That beautiful compactness comes with one small challenge…
Light struggles to reach the interior of the canopy.
To help with that, I spent the week using gentle Low Stress Training together with regular leaf tucking to expose developing shoots hidden beneath the large fan leaves.
Toward the end of the week I also performed a very light defoliation.
Nothing aggressive.
Just removing a few carefully selected leaves to improve airflow and allow more light to reach the inner branches.
Sometimes less really is more.
By the end of the week the results were already becoming visible, with several lower shoots responding by stretching upward and beginning to develop into future flowering branches.
Exactly the response I was hoping for.
⸻
💧 Hand Feeding Continues
Unlike her sister, Pheno B remains completely hand-watered.
For now I want full control over how she receives her nutrients while continuing to observe how this phenotype develops naturally.
Hand watering also allows me to monitor her appetite closely and make adjustments whenever necessary based on her individual needs rather than following the same routine as the AutoPot system.
As always, every plant earns its own management strategy.
⸻
🍽️ Feeding
This week’s feeding consisted of the complete Plagron program, including:
• Terra Grow – 1.8 ml/L
• Terra Bloom – 1.8 ml/L
• Pure Zym – 1 ml/L
• Sugar Royal – 1 ml/L
• Power Roots – 1 ml/L
• Power Buds – 1 ml/L
The introduction of Terra Bloom and Power Buds marks another exciting milestone as the plant slowly begins preparing for reproductive growth.
Although she’s still spending most of her energy building structure, it’s the perfect moment to begin supporting what’s coming next.
Solution parameters remained stable with an EC around 1.78 mS/cm and a pH of approximately 6.02, providing a balanced nutrient profile while keeping the root zone healthy.
⸻
🌡️ Environment
The room continues running under intentionally warm conditions.
Day temperatures averaged around 31.1°C, nighttime temperatures remained close to 25°C, relative humidity stayed around 72%, and atmospheric CO₂ measured approximately 693 ppm.
Those humidity levels are still intentional.
At this stage I’m encouraging vigorous vegetative expansion and allowing the plants to establish as much healthy biomass as possible before gradually reducing humidity later in flowering.
It’s all part of preparing for healthier flowers in the weeks ahead.
⸻
📸 This Week Behind the Lens
This week’s photographs beautifully capture the personality of Pheno B.
She’s noticeably shorter than her sister, yet incredibly dense.
The studio side profiles reveal a stocky plant packed with tightly spaced growth sites, while the bird’s-eye photographs highlight just how compact her canopy has become.
Several close-up images also document the early effects of leaf tucking and the gentle defoliation, showing new shoots beginning to emerge from areas that were previously hidden beneath large fan leaves.
Watching those branches respond over only a few days is one of those quiet victories that makes plant training so rewarding.
⸻
🔍 Looking Ahead
Next week should answer one of the biggest questions of this grow.
Will Pheno B finally commit fully to flowering?
Or will she continue investing another week into structure before stretching?
Either outcome is perfectly welcome.
If she continues vegetative growth, I’ll maintain gentle training and keep opening the canopy to encourage even more secondary branching.
If flowering officially begins, the focus will shift toward supporting the stretch while maintaining an open, evenly lit canopy.
Whatever she decides…
I’ll simply help her become the best version of herself.
⸻
💚 Thank You
Thank you to everyone following this journey and taking the time to grow alongside me.
Every comment, every question, every shared experience—and yes, even every constructive criticism—helps make these diaries more valuable for growers all around the world.
Special thanks to:
💚 GrowDiaries for providing a platform where growers can document every success, mistake and lesson.
Zamnesia for these wonderful Blueberry Muffin genetics, already demonstrating just how unique individual phenotypes can be.
🌱 Plagron for supplying the complete nutrition program that keeps these plants healthy from seed to harvest.
💡 Future of Grow LED for delivering the consistent light that powers every stage of this adventure.
And finally, thank you for following this 8×8 project.
Whether you’re here to learn something new, compare techniques, cheer the plants on, or simply enjoy the journey, I’m genuinely grateful to have you here.
Growers Love and see you next week… where we’ll discover whether Blueberry Muffin Pheno B finally decides it’s time to bloom, or keeps reminding us that nature follows its own schedule. 🌱💙


Likes
30
Share


@Velk1
Follow
This week was spannabis Barcelona had such a great time met some great people and Made some good friends I also managed to get my hands on some fire genetics from a buddy who hooked me up from the states and was also judging the monsters cup! Even got to sample the entry's man that was some dope smoke and chill can't wait till October in Madrid 👌🏾🙌🏾
