


Likes
Comments
Share


@bbs42
Follow
Day 23, been QCing the buds and lots defoliation the past 2 days. Getting caked in Trich and some nice bright orange hair poping out. Added trimmed buds to mulch layer. No fan leaves in mulch

Likes
10
Share


@Naturalist
Follow
First week of flowering coming along slowly.
Decided to get a second SF-2000 as it is really needed to flower what I have decently, on order hopefully I can get it before next week.

Likes
27
Share


@adam_pawloski87
Follow
Let’s go day 43!!!! Week went real well , girls started preflower so sometime this week I will be switching up the nutrients for flowering! We are stable and looking super healthy! Can’t wait to see what these ladies do this week! Hope you all enjoy !

Processing
Likes
8
Share


@eldruida_lamota
Follow
Que hay familia, volvemos con malas noticias, un ejemplar salió hermafrodita y toco sacarla de su hueco os dejo fotografías de algunas ramas.
Las 2 que quedan no pintan mal , se me fueron mucho de altura pero bueno XL.
Ph controlado en 6,5 temperaturas máximas 28 y mínimas 19 , sin problemas aparentes. Variedad algo difícil para principiantes.


Processing
Likes
15
Share


@GanjaFarmerGrow
Follow
Amazing genetics from BIG Seedbank!!!
Great plant overall up till now..
Needs verry little nutes..
almost organic but still Bio...
Very BIG buds for this phase...
Hope it goes like this untill the end..
Fingers Crossed..
🙏

Likes
6
Share


@sa2_gr
Follow
Hey guys !
What a blast !
10 days drying at 55-60% RH and 15-18°c.
45gr/plant.
3 plants, 2 differents phenos
1 pheno is realy Kushy, with specials notes that remind me some sort of GMO terps, with no real notes of permanent marker.
The second one definitly have permanent in it, smells realy special, like medical products.
Thing smoke realy nice, realy terpy

Likes
14
Share


@GronkLeague
Follow
Nothing too crazy to report from this week; her smell is potent and shes covered in trichomes.
Touching the plant covers my hands and arms in sticky resin-like glue. 😁😁
I am very happy with the state of my secret garden. Considering this is the first shot; the internet and others in the grow diaries community have really put me onto the right course. Thanks!
Ive been defoliation both plants as and when needed and from the trim i have been making cannabutter for baking :)
Ive also taken some pics in the dark to highlight the trichome production :):)
RQS northern lights has had a better start than QO and its really starting to show; she's overtaking QO and just starting to flower now... she is massive! Far far bigger than I was expecting. Shes almost 80cmx80cm in canopy area.
Similar nutrient mix used as last week barring the change to 15ml/10L of PK13/14 from 10ml/10L
40ml/10L of a+b
15ml/10L of PK13/14
1 drop of superthrive
ph ~6
ppm ~1150
Likes
9
Share


@Canna420uk
Follow
Laughing Buddha is a long growing plant but will reward well, true to form, smells incredible, very sticky, neurtured from seed, low humidity - worked very well.

Likes
170
Share


@Master_weeda
Follow
Bonjour à tous les padawans et maîtres jedis jour84 arrosage avec 25 centilitres d'eau ph6.3
Jour87 arrosage avec 30 centilitres d'eau ph6.3
Jour88 pratique de la techniques du tronc fendu (videos explicatives) et arrosage avec 20 centilitres d'eau ph6.3
COMMENT FENDRE LES TIGES DE VOTRE PLANT DE CANNABIS
Pour fendre les tiges de votre plant de cannabis, il vous faudra :
Une lame propre et aiguisée (une lame de cutter fonctionne bien)
Un mètre ruban
Une ficelle ou un adhésif pour marquer les coupures que vous ferez le long de la tige
Un crayon, une baguette ou une brochette pour séparer la tige une fois fendue
1. Tout d'abord, commencez par mesurer la partie de la tige que vous allez fendre. Il faut faire une incision d'environ 10–20 cm juste sous la branche la plus basse de votre plant. Utilisez un ruban adhésif ou de la ficelle pour marquer le début et la fin de l'incision.
2. Ensuite, prenez votre lame et faites une incision en travers de la tige, en commençant par le haut. Attention à faire une coupe propre, jusqu'au centre de la tige.
3. Utilisez votre lame pour tailler en descendant vers le bas, jusqu'à la marque inférieure de la mesure que vous avez prise auparavant. Essayez de tailler aussi droit que possible. Une fois que vous avez atteint votre marque du bas, laissez la lame au centre de la tige, puis utilisez un crayon/baguette/brochette pour ouvrir la partie coupée, puis sortez votre lame.
QUEL EST LE MEILLEUR MOMENT POUR FENDRE LES TIGES ?
Il existe de nombreuses théories sur le meilleur moment pour passer votre tige au couteau, mais la plupart des cultivateurs suggèrent de le faire à la dernière semaine de floraison. Même si certains cultivateurs recommandent de le faire dans les 3 derniers jours avant la récolte, nous recommandons de le faire un peu plus tôt (7–10 jours avant la récolte).
QUELS SONT LES RISQUES À FENDRE LES TIGES ?
Fendre les tiges est une technique à stress élevé très agressive que nous ne recommandons qu'aux cultivateurs expérimentés. Nous ne recommandons également pas de fendre les tiges sur les variétés à autofloraison, car cela peut être bien trop intense pour elles.
FENDRE LES TIGES, ÇA MARCHE VRAIMENT ?
Il existe un solide ensemble de cultivateurs expérimentés qui déclarent que le fait de fendre les tiges peut produire de bons résultats. Malheureusement, peu de données qualitatives le prouvent. Cependant, il semble que la fente des tiges soit originaire des Pays-Bas, où elle est pratiquée par des cultivateurs néerlandais experts depuis les années 1970.




Likes
5
Share


@BB_UK
Follow
This girl is amazing! She Held out another week before flowering and could be the biggest because of that but only time will tell as the Lemon pie and forbidden runtz are topped 😊 so stay tuned! Will tidy the fan leaves and lower unnecessary stems away next week! Thanks for stopping by gromies! Fastbuds are the best hands down!
Likes
68
Share


@Hawkbo
Follow
Day 56
There's only 9 plants left on the microdrip getting straight full tilt and slf100, the rest are being flushed using the water wand to give the longer running strains enough time to mature. The Polar Vortex 6's , trop juice 1, garlicane 2, garlicane 5, Polar vortex 4's, platinum silk and platinum gushers are gunna come down this week.


Likes
15
Share


@OrganikTek
Follow
The summer is here.
Black cream showing some colors but not what i imagine. But with out a dought some of the best buds i Have seen. Shes know senescence. Just let the lower buds get some power in 2 more weeks shes done.
Im liking a lot the way CoshKush is going Very promissing branchs and a inner purple color to the picilis. Lets se as she fatns.
Weeding Cake its looking like shes reduced grow speed. Like the tick piscilis now starting to go orange
Bomberry looked so promessing in vege and now not so much. Late as allways.... Shes late but very hairy.....Promessing again :D
Chear BrotherHood
Likes
33
Share


@Weird_Jimmy
Follow
Cream Auto Summary
Wk 1: Germination, game plan, equipment, and prepping the room.
Wk 2: Germination progress, fertigation, and a new light.
Wk 3: Two phenotypes.
Wk 4: Woe and wonder, nutrients, and water source.
Wk 5: Growing like a weed, and max power.
Wk 6: Soaking up rays and consuming the nutrients. Algae remediation and proactive pest control.
Wk 7: Will the size difference begin to fall in line with the predictions, and rearranging the wind.
Wk 8: Time slows down, as buds build and plants are thirsty.
Wk 9: A cone shaped bush, and trichome hunting season begins.
Wk10: Playing the guessing game and learning is doing.
Wk11: Escaping from Distancing.
Wk12:Trichome Hunting and Changes in diet.
Wk13:Lessons
Wk14:When will it be the ‘right’ time?
Wk15: This is the right time.
Wk16: Harvest time and Summary.
Final Weights:
Cream 1gallon 157g (5.5oz); Cream 3gallon 299g (10.5oz); Combined 456g (16oz) ((Individual plant weight logs in pix))
New names for the Jars, 1 Cream for the 1 gallon plants buds and 2 Cream for the 3 gallon plants buds.
👉The 1 gallon plant was harvested the 3rd day of the week, It had only a couple of white pistols on each bud and wasn’t producing anymore fresh calixs. There was still very few amber trichomes, but the majority were definitely milky. Very frosty sugar leaves, and overall the buds are mega frosty and remind me of the Gorilla Glue I grew. However the buds are more airy. I started trimming from the top, and worked my way down. I recorded the wet weight for each bud and placed it on a clip with a number that corresponded to the order it was removed. I do this to monitor the % of weight loss due to moisture loss and aim for 20-25%. I did a partial dry trim and left all the frosty sugar leaves to be dry trimmed before going into jars. It had minimal actually larfy buds. I trimmed those not part of the main cola group for each branch and placed them on the rack for drying. The process went fairly easy and I might have spent 3hrs total. The sweet smell of sweet creamy citrus and the overwhelming funky stank was very fun.
👉After 2 1/2 days I placed the buds in paper bags, each cola in its own bag. The main cola was too long so reluctantly I cut it down so it would fit. After another 2 days I placed in jars, some with hygrometers and moisture packs. The overnight humidity in the jars was on average 52%. I added some damp paper towels hung off the lids to restore a bit of the humidity. This worked well and the humidity is now average 62%. I added moisture packs to some of the jars. The jar aroma is sweet cream orange zest and funky stank.
👉I had expected to harvest the one gallon plant during week 16. Given the way the 3 gallon was going, I figured the 3 gallon had another week or so. I assumed that because it had been so slow to develop in all of its phases. After I had harvested the 1 gallon I finally had a chance to really inspect the 3 gallon really closely. I couldn’t inspect it as closely as I had been the 1 gallon because it was further back in the tent and the 1 gallon hindered access. I didn’t think it was a big deal. I hadn’t rotated the 3gallon for two weeks I think. So during my close inspection, I was rotating the plant and it actually took me a while to notice…a dried up tip of a cola. This cola had been sitting on the far side. It hadn’t been against the tent wall. As soon as I saw it it was like a slap in the face…its what I feared would happen to this plant since the buds were so fat and dense….botrytis. Budrot. Nasty, grey fuzziness. My heart sunk as my fears were realized. How many more buds would be affected? Will it be like my Critical Purple and all the best big buds have this hidden scourge? I immediately inspected a few of the bigger buds. I didn’t see any. But there are over 20 colas. The only way to know for sure is to harvest. I didn’t have time to harvest the whole plant right then, so I had to wait for the next evening after work.
👉I took off work a little early to get a head start. The buds were full of sugar leaves still a lot of fan leaves so lots of trimming to do. It took a total of 6 hours from start to finish. I started doing a partial wet trim leaving the smaller frosty sugar leaves to be trimmed dry. I experimented with full wet trim on some of the smaller buds that ended up on the drying net and not left on the branch. I needed the buds to dry slow enough not to taste like hay, and fast enough the botrytis gremlin wouldn’t pay a visit. A close thorough wet trim seemed to look like it could be optimum for these buds. On the 7th branch I started giving the buds a meticulous wet trim. I took the liberty to enjoy some of my Tangerine Dream from a year ago. I listened to Physical Graffiti, Animals, Frank Marino Live, Foxtrot, and some dead air when the album ended and I needed to pick another one. I scrutinized each bud closely for any signs of the evil spores. But I saw none, such a relief after each buds inspection to see nothing but happiness.
👉I had 28 total branch end colas. Most were chunky pine cones. I recorded each branch in the order it was removed. I started at the bottom and labeled them alphabetically. 4 of the branches were smaller near the top in the middle of the canopy and one branch had the bud-rot. I trimmed the buds off the branches but left the bud group forming the cola intact. I put small larfy buds on a separate rack from the good buds trimmed of the branches, I didn’t weigh the larf, and had 72g of good chunky branch buds. The colas when dried to approx 22% weighed in at 227g. The total in the jars is 299g. Very happy! The chunky colas were slow to dry on the interior. I took special care to monitor the buds, not let them get too dry and would spread the buds open a bit to prevent wet spots that could turn into botrytis. When they got a little dry to the touch I would place them in paper bags. That slowed the drying down and allowed the moisture to equalize on the bud. I would weigh the buds and calculate the % of weigh left to help determine how dry they were. When they were below 25% of its wet weight I placed them in jars with many of them getting a hygrometer to monitor the humidity in the jars. I had to take them back out of the jars after one day and back into paper bags because the humidity climbed as high as 80% in some fo the jars. This meant the interiors were still moist. The bigger the buds the longer they needed to stay in the paper bags. The final weights on the buds were after they were dry enough to be at 62% or lower humidity in the jars wish was still around 20% of the wet weight. The jar aroma is not very strong. The aroma is a light sweet orange zest. It should improve over time. The buds are dense and sticky. Not all the colas got their own jars unless they were big enough. Some of the colas I separated from the branches and placed in smaller jars, even combining some of them. The intact colas got the large jars and some were combined in those as well.
👉I have one of those Trim-trays with the screen in the bottom with a tray underneath to catch keif. I trimmed off fans leaves and leaves with no fuzziness on them. I trim the fuzzy leaves over the tray. I did this for both plants. When doing the 3 gallon plants trimming I also snipped up some of the larf and small buds into small pieces to add to the pile. I let the trim sit in the tray till it was crispy dry. I then used my hands to grind the trim into smaller bits. I used a plastic card to scrape the pile back and forth across the screen. I continued to grind up the trim with my hands and alternately scrape the screen and sift the pile. It was hard to tell how much I had got till I used the plastic card to scrap the catch tray. I was pleasantly surprised to see a nice pile form. I made 4 pucks.
👉The bud is cured and stable humidity in jars. I’m doing the typical jar burping and inspection daily for another few days. I have tested both plants and am extremely pleased! Both have a sweet creamy orange zest like aroma (but not like an orange creamsicle). The 1gallon, now called 1Cream, is the strongest jar aroma. When hit on the bong both have a sweet creamy smooth after taste, and again the 1Cream is the strongest flavor. Both are very sticky when pinching off a bit for the bong, and the 1 gallon is the stickiest. Both pass the one hit test with flying colors! Hard to tell the difference between the two as far as the high goes, creeper buzz, with a nice uplifting energy, settling into couch lock and sleep-inducing trail-off. Perfect for night time use. I’m surprised at how nice it is already. The typical 6 week cure review will be updated in the review. If its anything like the other plants Ive grown so far 6 months is when it really hits its stride and is at its best flavor and effect.
👉Methodology Summation: I am really happy with the fruits of my labor. Its not perfect, and I believe I have learned a lot of knowledge and insight. All my grows so far have been in 3 gallon cloth pots with coco coir mixed with 30% total volume of expanded clay pebbles for hydro. The one gallon plant got bigger than I expected it could. I believe that’s due to frequent fertigation I the coco/cloth pot. The problems of being in an undersized pot were somewhat mitigated but not eliminated. The 3 gallon was also showing some of the issues of an undersized container but not as severe as the one gallon. Knowing this will help if I choose to grow in a smaller pot again. Obviously the draw backs to the under sized pots is the issues show up during flower when the plant is at its biggest. Maybe next time I wont exacerbate the issues by chasing my tail. But the drawbacks are not enough to say its bad news to grow good big buds in undersized pots. There is a drawback to frequent fertigation method, the amount of time spent tending to the plant. Two times a day, every day. That is actually the minimum recommended. If I could have automated it I would have done 3 times a day. I am curious what my results might be if I was able to fertigate 3xs a day. I chose this method so I would be spending a lot of time tending my plants anyway, and with coco I avoid the pitfalls of over watering soil when you’re an overzealous gardener.
👉Growing Summary: The 3gallon was actually the second seed to germinate. The first seed petered out, and the 1 gallon was put in four days after the 3gallon had germinated. The 3 gallon was slow to straighten and open its cotyledons up. The cotyledons had a yellow tinge to part of them. It was slow grow for the rest of the grow when compared to the 1 gallon plant which started flowering 12 days before the 3 gallon and seemingly was always almost 2 weeks ahead of the 3 gallon. The trunks of both plants became very stout. I was wondering if somehow I had been given mismatched seed pack, but in the end I think they are the same strain due to the similarities such as aroma and high. The leaves were identical. Both had fat stout trunks, and both had super sturdy branches. I didn’t use one support for the 3 gallon plant, a first for me, and the buds were very dense and heavy. I put some on the 1 gallon plant but that was for its protection from me since it was at the front of the tent. Both plants also smelled similar, sweet caramel cream when sniffed up close. But different in the natural canopy both made around its queen cola, and in the structure of the flowers. Its been very fun and interesting watching these plants grow and seeing two phenotypes of the same strain!😻

Processing
Likes
47
Share


@Techpuffin
Follow
Flowers are still stretching towards the light.
Also starting to look like actual buds now all that work is starting to show.
Plant is now very thirsty and drinking about 3l during lighting hours it could probably drink more every morning the pot is so light showing me that it’s drinking all of it over night
I like this plant so much I started making more seeds by rooting the cuttings in soil. They will produce seeds as they will also produce pollen!
Hopefully I will contain the pollen away from the main plants by keeping the pots under humidity dome
Likes
2
Share

@GoodTimesOrganics
Follow
Welcome Back!💚
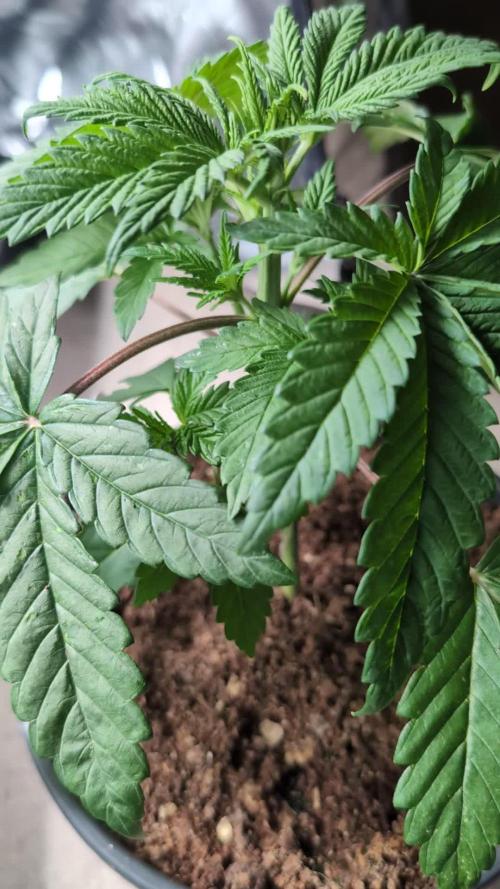
Nach der dritten Woche entwickelt sich die GG#4 weiterhin sehr homogen und sie erreicht jetzt die 5 interniode.
Da es sich um ein Indica Hybrid handelt, lass ich die Pflanze noch weiterhin Wachsen, da ich den Seitenaustrieb noch etwas weiter in die Höhe ausbreiten möchte
Die Umgebungsgegebenheiten sind bis jetzt optimal:
—————
🌞 Temp: 23°C bis 24°C
🌚 Temp: 18°C bis 19°C
💨 RH: 70%
VPD: 0,55 kPa👍
—————
Grüne Grüße 🥦


