


Likes
Comments
Share


@therealgrowmie
Follow
Autumn is coming, Growmies—at least in our tent environment!
The bottom leaves are starting to put on a beautiful fade, while the buds are stacking up day by day.
We can see clearly now the rain... that we’re in for a sweet harvest in just a couple of weeks!
Airflow is crucial from here on out, and since I’m not taking any chances with mold, I’ve dropped the VPD to maintain a steady humidity below 55%.

Processing
Likes
20
Share


@BudXs
Follow
"Chugging" along this week. Weather is hot, girls are loving the all time drip system. Forgot that my nutes and hot sun dont mix well and created a bad case of algae. Will monitor more often and maybe increase the drip flow


Likes
60
Share


@m0use
Follow
Alright! This week is finally done and this will be the last vegetative growth week for the plants. Switching to flower tonight :D
I have done some defoliation and a bit of lollipopping to the 3 plants, I was noticing the shadows where quite dark on the tent floor and the plants where not crazy tall so they needed to be managed, If I was outdoors I would just LST them some more and not worry about any of it but indoors the airflow is tight and it was needed, cleaning up the undercanopy was none negotiable or some bad things would have happened in flower. Mainly molds or worse WPM. I also removed the string supports I has on the plants when they broke from some LST I did a few weeks ago.
In the stripping down of the plants I removed a lot of lower immature growths and took out some immature branches, I have all these sitting in a glass of water and will clone them out for shits and giggles, I think their is about 15 of them or more, maybe I will go and plant them aorund my neighbourhood in municipal planters. Plus now I can work in the topdressings that will be required in the upcoming weeks to keep these plants happy and healthy. Going to continue amending in some of the bokashi in the feedings as well as worm castings as they give off a nice ammount of microbes for the soil. I wish I had some of my LABs for this grow but I did not make any.
The clones from before are doing fine, just did not take any pics of them.
The butterwort is doing a fantastic job of eating up the gnats. I have some nematodes on hand for when its had its fill as I won't want them getting into the flowers as they ripening.
Big shoutout to Medic Grow for sponsoring the lighting in my tent, They have provided me with 2x Mini Sun 2's in the 240w configuration, They use the v1 growing spectrum that is a all purpose seed to harvest spectrum so their is no hassle of switching it mid grow. If you interested in learning more about Medic Grow products please visit the web link below.
https://medicgrow.com/
https://growdiaries.com/grower/MedicGrowLED


Likes
20
Share


@BABS_Babies
Follow
Starting to see fatter buds, brown hairs, and lots of trichomes. When looking through the jewelers loop they are all still clear. Not long now for the Wedding Cheesecake. She is in the middle. This will be her last feeding. Then I will start flushing next two weeks until she is ready to harvest.
Likes
44
Share


@I_and_I
Follow
New light installed, twice as powerful as before but still a cheap light I've yet to learn fully
Like the first batch of seeds to germinate, I again get a strange 'quad' seedling, 4 embryo leaves, then attempts to grow it's first 4 leaves instead of 2 also, growth is severely stunted in both seedlings to start with 4 embryo leaves after seed popped
Likes
36
Share


@MadeInGermany
Follow
Hey everyone 😃.
Day 14 since time change to 12/12.
During the week they started to form their buds, which is why I will add 2 g of GHSC Powder Feeding Bio Bloom per liter of substrate over the next few days 😃👍.
The next few days I will also make some free space so that the energy doesn't end up in mini buds :-).
I wish you all a lot of fun with the update and a great week 🍀👌
You can buy this Strain at :
https://sweetseeds.es/de/sweet-skunk-f1-fast-version/
Type:
Sweet Skunk F1 Fast Version
☝️🏼
Genetics:
Sweet Skunk Auto (SWS34)
X
Early Skunk
👍
Vega lamp:
2 x Todogrow Led
Quantum Board 100 W
💡
Bloom Lamp :
2 x Todogrow Led
Cxb 3590 COB 3500 K 205W
💡💡☝️🏼
Soil :
Canna Coco Professional +
☝️🏼
Fertilizer:
Green House Powder Feeding
☝️🏼🌱
Water:
Osmosis water mixed with normal water (24 hours stale that the chlorine evaporates) to 0.2 EC. Add Cal / Mag to 0.4 Ec Ph with Organic Ph - to 5.5 - 5.8 .


Likes
44
Share


@BlackDragon22
Follow
Sembra andare tutto ok.. Però non capisco ancora perché ci mettano più del dovuto.. Vediamo gli sviluppi..
Likes
59
Share


@JeyGanesha
Follow
Última settimana.lavaggio radici...2 giorni e 2 notti. E tagliooooooo........ .
Ecco arrivato il momento del taglio😍😍😍
Eccoci arrivati al termine.oggi 30/09/3024 raccolta..forza belle mie, vedete sé anche in concia continuate a tirar fuori cannabinoidi 😂🤣😂🤣 portate il %di THC di queste runtz layer cake AD un livello mai visto prima.🤣😂🤣😂
E magari è più forte del normale...tra poco vi dirò com'è a livello di sballo e gusto.... Seguitemi e vedrete come finirà 😂🤣😜💪👍
Processing
Likes
18
Share


@Bread_n_Buds
Follow
What a trip with these Monster Zkittlez. We have almost reached the end, going through many fears we are reaching excellent results for real. I have three young ladies planted one before and two more after 10 days to test the right vegetative times. The first was worked with very aggressive LST and now I dominate many weeks of flowering is fantastic. They are putting all of them very much but they are filling up really well except one that seems lost and is not bad. In fact, the two smaller ones were also low stressed and treated with an aggressive pruning to keep only a big main cola and something lateral. One has filled very well another is filling less and very slowly but still with dignity, I gave it up for lost but even the ugliest is not bad. The big has some scary banana. The frozen speaks for itself sugar dripping from everywhere early harverst next weekend

Likes
2
Share


@Janerussel
Follow
First flowering week has started.
I feel stupid because in my case, at least in a similar setup to mine, you can't use any organic nutrients. Everything goes to hell, the pH goes to hell, etc. I wasted years on this. In ress, the water cleared up just as clear when I cut out all organic nutrients and everything stabilized. I think this should be talked about more and emphasized to new dwc breeders like me.
I had also calmag defiency but it should be ok now.
Likes
21
Share


@CanadianFillmore
Follow
Welcome growfessors to another episode of growfessor theatre, 4x4 edition!
Flush time, just water for LSD, Green Crack and Mandarin dreams!! Do-si-dos gets another week of feed before flush.
I'm very impressed with the bud sizes, trichomes and smell of each plant, mandarin dreams is especially ooozing with resin, it's almost like liquid soap touching your skin.
The Mars-Hydro TSW2000 light has been killing it! This light delivers way more than expected!
Thanks for stopping by growfessors, tune in next time 👽🌳💚


Likes
15
Share


@Dunk_Junk
Follow
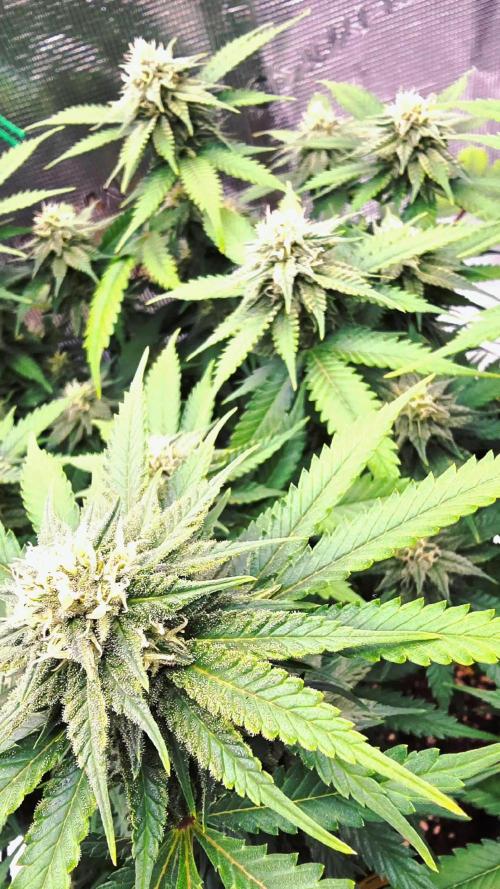
She grew 12cm in height this week and a whole lot bushier!!!
Day 42 - I trimmed off about 6 large fan leaves to get light to the lower bud sites.
This is her last week of 20/4 veg lighting.


Likes
103
Share


@Hou_Stone
Follow
Day 61 / Flowering 28
It's blooming 😀 I can't wait to see them go up in smoke 😋
My oscillating fan stopped working this week😵 I replaced it with 2 normal fans
---------------------------------------------
💧Watering
On average I water each pot with:
Day 59 : 1 Liter
Day 63 : 1 Liter with 0.3 Gram of BoosterPK+
I alternate watering, one with booster in my water and the next without.
I add Bioenhancer once every 14 days +/-.
I add very few nutrients to my water because I have already placed Bio Nutrients directly in my soil 😉 (BioGrow & BioBloom added on week 1 & 5)
------------------------------------------------------------
🔥❄️Temperature of the week :
Day : 21-24°C (Humidity : 55-70%)
Night : 16-19°C
------------------------------------------------------------
🚀Equipment of the week ⭐️ :
Lamp Led 300W : power 95% at 35cm
Extractor+ carbon filter ON 24/24h
2 fans ON 12/24h
------------------------------------------------------------
📜Links :
Tarte Tatin seeds 🌱:
https://shop.greenhouseseeds.nl/feminised-cannabis-seeds/tarte-tatin/
Food for your plants 🔥🔥👍
https://www.greenhousefeeding.com/
👨🚀My Instagram 🌱❤️️:
https://www.instagram.com/hou_stone420/
------------------------------------------------------------
☮️Thanks for your visit💚☮️
Likes
3
Share


@PhinolaGreen
Follow
12. Woche
Pheno 2 braucht scheinbar noch, hat das feeding soweit gut vertragen und entwickelt richtig schöne Buds 😍
Likes
37
Share


@GrownwithLED
Follow
After germinating the seeds are transplanted into small pots with soil (see tutorial in VIDEO above). The soil is prepared with water mixed with a little bit of BIO NOVA Roots (0,5 ml/l), which aids the development of the seedling. Transplanting is very easy now, because they have grown a STRAIGHT tap-root while hanging during the SERIOUS' WAY of germination. This straight root allows for easy potting of the seeds. Simply make a little hole in the center of the soil with your pinky finger and carefully place the germinated seed with the white root pointing DOWNWARDS into the hole. Best is to lay it onto one side-wall of the hole with the seed shell right at the surface. Then I push the other side inwards and enclose the whole root with soil. At the end only the top of the seed-shell peeks out of the soil. IT IS VERY IMPORTANT to plant the seeds NOT TO DEEP into the soil. The seedling only needs extra strength to work itself upwards thru the soil and you run the risk of the soil drying out and the seed dying off. When you PLANT THE SEED VERY SHALLOW into the soil (=with the top of the seed-shell still peeking out) your seedling can grow out right away and you have a small plant already 24 hours after putting the seed into the soil.
The small seedling sometimes still has the seed-shell on its 'head', it normally falls off by itself, but sometimes you have to carefully help and take it off with your finger nails. Be careful to NOT clip of the seedling accidentally when you do this!
The seed-shall has an inner lining, which feeds the small seedling when it germinates. This inner lining sometimes gets tangled around the stem of the small seedling after the shell has fallen off. This little skin MUST be taken off the stem right away! Once it dries up, it gets hard and can strangulate the seedling around the stem. In order to avoid this, the skin must be taken off as soon as possible! I show it in the pics above and also made a video about taking off the inner lining of the seed.


Likes
9
Share


@StickyFingah420
Follow
Última semana de engorde y ya se van revisando tricomas para preparar la otra semana el lavado de Raíz, y así poder cosechar una planta más limpia.
