Likes
Comments
Share
@GTools
Follow
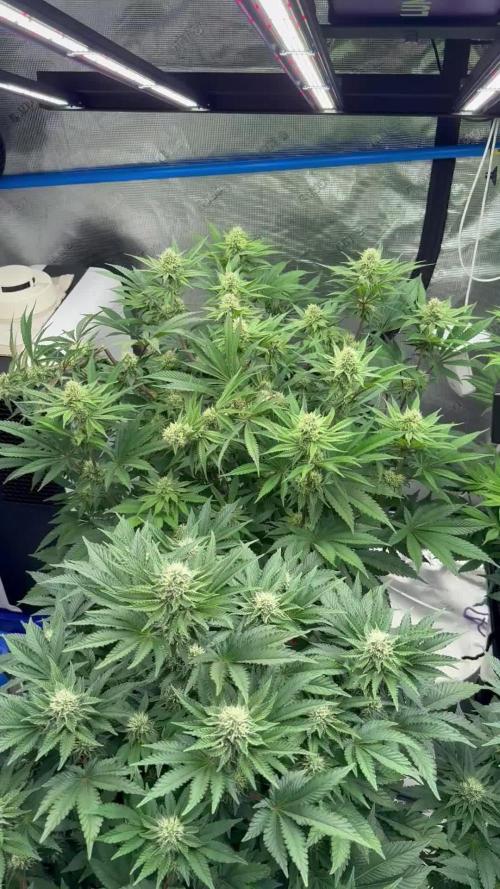
Flushing has started and I expect to harvest within the next days. Mostly all the trichomes are milky. Not many clear trichomes left, and some older sugar leaves have have trichomes getting yellowish amber.
Processing
Likes
3
Share
@Dico29
Follow
98 days in of the autoflower, pistils look crazy but calyxes are still beginning to form, I’m young and still trying to learn the best techniques of anyone would want to send me a link to their grows I’m open to all
Likes
57
Share
Pollenated for three days, took a funny photo shoot of the donor plant and tossed it. Let the plants marinate for a day, gutted the bloom room, scrubbed every inch of it down and moved the photos over there to finish, they were getting to tall for my 4x4. Put the Auto ultimates in their new home and they seem to be loving the spider farmer. From the video: ( Sour watermelon - Photo - tall plant ) ( Mac BX4 - Photo - Shorty ) ( Auto ultimate x2 - Auto - 4x4 Tent )
Likes
14
Share
ALL THE PHOTOPERIODS ARE IN THE 8X8 NOW. DID SOME MAJOR DEFOLIATION BECAUSE THEY ARE TOO BIG NOW. THEY ARE SWITCHED TO FLOWER AND THE STRIVE NUTRIENTS IS INSANE.. BEST FERTILIZER PRODUCTS EVER MADE. I USED IT 4 TIMES IN 13 DAYS AT FULL STRENGTH AND THERE IS NO NUTRIENT BURN AT ALL AND THEY EXPLODED. AND I HAD A FEW THAT WERE TURNING YELLOW, I THOUGHT IT WAS ROOTBOUND OR CALMAG DEFICIENCY BUT THE STRIVE NUTRIENTS BROUGHT THEM BACK AND THEY ARE SUPER HEALTHY AGAIN.... ATTENTION GROWERS:::::: YOU MUST TRY STRIVE NUTRIENTS. BY FAR THE BEST FERTILIZER PRODUCTS EVER.. I PROMISE YOU THAT AND IF YOU USE IT YOU WILL NEVER USE ANYTHING ELSE FOR EVERYTHING MARS HYDRO VISIT: www.mars-hydro.com www.marshydroled.ca PROMO CODE: rocknroll VISIT THE ALIEXPRESS STORE: @marshydro_aliexpress Instagram: @marshydropenny https://youtube.com/channel/UChU5ZWwNi-DvnO3oWVU3ceA (NEW) STRIVE NUTRIENTS 💪 https://strivenutrients.com/ Thanks for taking the time to read and check out my diary🤜🤛 FC-E6500 LED GROW LIGHT: FC-E6500 grow light with 3978pcs OSRAM BridgeLux Diodes & Moso Driver, market-leading PPF 2.7 µmol/J, Max 2.5g yield/watt with 30% higher Average PPE, more cost-effective when compared to same style type lights. Only consumes 650W, perfectly cover 5x5ft (personal), 4x4ft (commercial) grow space. Innovative Precise Uniform Lighting-Built-in removable bars interval & dimmability enable the exact & dynamic PPFD control over each of the plant growing stages, FC-E6500 detachable bars deliverSuperior Heat Dissipation: Real Aluminum heatsink together with 6 slim profile passive cooled bars (THINNER & LARGER surface) and detachable Meanwell Driver, create less heat. save 50% hydro than other old grow lights! Driver can be mounted remotely on the side of a grow tent/rack or on an adjacent wall to remove heat from grow space. Full Spectrum UV IR LED: With Yield Max spectrum (660nm Osram enhanced Deep Red,2800k-5000k,730-740nm IR,380-410nm UV LEDs), Average PPFD the FC-E6500 LED grow lamp enables cultivators to produce BIG FAT Dense Buds, perfect for full-cycle hydroponic, soil, grow tent/grow room. Dimmable Commercial Grow Light: Cost-efficient, easy dimming & daisy chain With a max up to 20 lights, IP65 Waterproof, master light easily controls the rest. Perfect for commercial & home horticulture. FC4800 LED GROW LIGHT: GET THE MAX FROM MARS👍: Welcome one of  the newest members of the Mars Hydro family🤜🤛🤘. The Mars Hydro FC 4800 480W LED Grow Light can accommodate up to a 4' x 4' area for flowering. It has OVER 2000 LED chips consisting of the best selling Samsung LM301B diodes which has a Luminous Efficacy of: 220 lm/W 0.2 W, 3 V mid power, Osram 660nm Diodes, Infrared light and UV LIGHT👍. It boasts the incredible efficiency of 2.8 µmol/J, maximum 2.5gram yield per watt with 30% higher Average PPFD. This High-intensity spectrum is beneficial for plants at all stages - from veg to bloom, and creates Big dense Buds👍. achieve 50% higher yields & quality compared with the old lights! Only consumes 480W for 4x4ft personal grows, and 3x3ft for commerical grow. It comes with a dimmer and daisy chain function with a  maximum of up to 15 lights, the master light controls the rest👍. Wide 6-bar design offers even & wide canopy coverage and can maximizes your grow space. slim 180° FOLDABLE DESIGN... YES I SAID FOLDABLE🤘🤣 , making it compact and easy to install, it's IP65 WATERPROOF and will give you no worries while growing in a humid environment and makes it a flexible high performance commercial grow light for enormous  SUPER FROSTY yields.😛😛😛. MARS GETS EM FROSTY BOYS👍 AWESOME HEAT DISSIPATION: The Low energy consumption FC4800 growing light has 6 passive-cooled bars and an aluminum heat-sink a removable driver  you can upgrade later or have it outside your tent. with zero noise  you can save up to 50% in your electricity bill compared to HID's or HPS lights! It also has a removable driver so you can upgrade it in the future or have it outside your grow space for better heat control in your growroom👍 UPGRADED FULL SPECTRUM: Yield Max Spectrum with enhanced red (Top-Bin Samsung 3000k-5000knm, Osram 660nm Deep Red), speed up blooming & fruiting, perfectly suited for full-cycle growing. The FC4800 LED grow lamp was born for Big Buds, perfect for commercial, grow tent, grow room, hydroponics, and all soil grows.👍 THE BEST SAMSUNG DIODES: THE FC4800 has Top Bin genuine Samsung Osram Diodes, combined with remarkable 2.8 µmol/J Efficacy, 30% higher Average PPFD, 50% less energy consumption, to maximize your yields. They give you a TRUSTED 3 years warranty 100% Satisfactory guaranteed!!! TSW2000 LED GROW LIGHT: INCREASE YIELD AND CROP QUALITY WITH MARS HYDRO LED GROW LIGHTS: NEWEST SMD LED technology provides the highest PAR/LUMEN output (1122umol@18") and can make you get 30% higher yield compared to OLD blurple led lights.  Max 2.5g yield per wattage and achieve maximum quality and quantity, much better than traditional HPS grow systems LOW ENERGY CONSUMPTION LED GROW LIGHT: Consuming only 300W true output with 684 LEDS! It saves up to 50% energy than other led grow lights. Perfect for 3.5x3.5ft bloom stage, 4x4ft veg stage. Over 90% light energy can be absorbed by plants, it will have higher intensity in a MARS HYDRO grow tent with diamond design mylar, or by crossing over using multiple TSW2000 HIGH EFFICIENCY FULL SPECTRUM INDOOR GROW: 3000K 5000K and IR 660nm 760nm RED, makes it close to natural light, highly engineered to provide improved growing performance for plants at all stages of growing, rapid plant response from seed to flower; Uniform and wide-beam light distribution for your plant's optimal growth 8x8 1680D GROW TENT The MARS HYDRO 8x8 Grow Tent interior is made of a unique diamond design mylar which is highly reflective. (Other companies mylar and reflective rate is as low as 50%, and it won't provide efficient light. They use thick 1680D oxford canvas, and being double stitched, it is tear proof and perfect for locking in the light. Their grow tent keeps 100% of the light inside the tent and helps your plants absorb more light. EXTRA-THICK material means No light leaks or rips at all.👍 Strong Stable metal corner adapters and poles are the trustful supporters of the tent. It's very sturdy, neither rusting or paint flaking off. quick and easy tool-free setup. They use heavy-duty metal zippers, with double layer black lining, by far the best on the market which creates a light-proof seal. The Easy observation windows are made by double layers of cloth. Observe the growing conditions of your plants without opening the tent and avoid disturbing your plants. The observation windows also serves to dissipate heat and ventilate the air. The tent includes 2 removable waterproof floor trays to hold soil and water. The removable tray can be taken out to wash easily. They guarantee the grow tents are easy to install even if you've never done something like this before. Clear Instructions and no tools needed! They also offer 30-day unconditional refunds for quality problems. Just contact their friendly 24 hours customer service 👍
Likes
40
Share
We’ve had a lot of rain and so I’m concerned about the more developed bud sites and bud rot. Hopefully have a dryer week. The amnesia Zkittles is now the tallest and she’s looking fantastic.
Likes
5
Share
@Ensign420
Follow
Week 02 Introduction This week has been a bit of a struggle. Had my first experience dealing with slime and brown algae. But I think adding enzymes and increasing the beneficial bacteria helped to fix the issue. Also experienced nutrient burn for the first time. My nutrient solution strength got as high as 671 PPMs. So backed it down to about 430 PPMs during the end-of-week reservoir change. Also cut Hydroguard (expired?), CaliMagic, and Superthrive from this grow. Now she's still stunted, but is starting to recover. Hopefully... [START OF WEEK 02] Day 01 - Monday - 08/10/20 - Total Days: 008 ----------------------------------- - [0830]: Still looks a bit yellow. But getting larger! --- Solution strength was at 248 PPMs. --- Just topped off with a bit of distilled water --- PH went up to 6.1 so PH'd down to 5.8 --- Ran the top feed for a bit to wet the hydroton. - [2130]: She's looking even more yellow now. --- Even the new leaves are really yellow. --- Decided to add more base nutes. --- Added 4ml of Sensi A --- Added 4ml of Sensi B --- Now at about --- Solution Strength went up to 304 PPM. --- PH was at 6, --- Also raised the water level a bit more. --- I really hope it's a nutrient deficiency and not an over-watering issue. --- Please live! Day 02 - Tuesday - 08/11/20 - Total Days: 009 ----------------------------------- - [0830]: Looking less droopy. But still yellow. --- Decided to do a reservoir change. --- 4.5gal of distilled water --- 8ml of Sensi Grow A --- 8ml of Sensi Grow B --- 8ml of Voodoo Juice --- 4ml of B-52 --- 4ml of CaliMagic --- 4ml of Hydroguard --- 4 drops of Superthrive --- PH'd down to 5.8 --- Solution strength: 302 PPM --- Since I didn't want to risk over-watering the rockwool, I did not to do a top feed, may do one tonight after the sleep cycle (lights are still set to go off at 10am and back on at 4pm). --- As I was doing a reservoir change, I noticed that the tubes and bucket were a bit slimy. Didn't really stink or anything. Is this normal? Maybe due to the Hydroguard and Voodoo Juice? --- I hope she gets better soon! - [2215]: Getting larger! But still yellow. --- Also can see a root growing through the net pot! Tiny little thing but it's there! Will have to start dropping water once more appear. --- After looking over a few DWC diaries using AN nutes, seems like my solution strength is still too low. Most around this stage average around 500 PPMs with about 4ml per gallon. --- Top fed for a minute to wet the top of the hydroton. --- Solution strength went down to 263 PPM. --- Added 8ml more of Sensi A --- Added 8ml more of Sensi B --- Now base nutes are at 16ml for 4.5 gal of water. --- PPMs went up to 411. --- Still lower than 500 PPMs, but that's okay. --- PH was at 6. Not sure if I should adjust PH using AN nutes. So going to not ajdust unless PH goes above 6.1. Day 03 - Wednesday - 08/12/20 - Total Days: 010 ----------------------------------- - [0830]: Looks like more root growth! --- She still looks yellow. But leaves are perky. --- PH was at 6.2 so lowered down to 5.8. --- Solution strength was at 394 PPMs --- Since roots are still growing, I decide to lower the water level a bit. Now water level is a bit below the net pot. - [2200]: Root is getting longer! --- Slime is returning. Not sure why. --- Solution strength: 357 PPMs --- PH: 6.1 --- Decided to add an enzyme along with more beneficial bacteria to hopefully cure the slime. --- Added 16ml of Sensizym --- Added 5ml of Hydroguard --- Added 8ml of Voodoo Juice --- New solution strength: 430 PPMs --- New PH: 6.1 --- Top fed for a minute. --- This slimy residue is really freaking me out! I hope the added enzymes will help eliminate the slime. --- Going to do a full reservoir sterilization/nutrient change over the weekend. Please survive until then girl! Day 04 - Thursday - 08/13/20 - Total Days: 011 ----------------------------------- - [0930]: I think the enzymes worked! There is little to no slime now! --- Although I think the root was also dissolved in the process. It's now just a little stub sticking just below the net pot. The enzyme is also suppose to dissolved dead roots too but guess that root was too weak? Not sure what happened there. But I think the slime is cured! --- Solution strength went down to 395 PPMs. Decided to add more base nutrients. --- Added 8ml of Sensi A --- Added 8ml of Sensi B --- Added 4ml of B-52 --- Solution strength went up to 598 PPMs. --- PH was at 6.1 --- As long as the PH is between 5.5 and 6.3, I'm not going to use PH Up or Down. But still will monitor PH levels. - [1715]: Checked up on her after her nap and shes looking alive but stunted. But no slime! --- Decided to add some sugars to help maintain the enzymes and beneficial bacteria. --- Solution strength was at 587 PPMs. --- PH was at 6.2 --- Added 8ml of Bud Candy --- Solution strength went up to 671 PPMs. --- PH also went up to 6.3 --- Lowered water level a bit to hopefully promote more root growth. --- Top fed for a minute. --- She is getting bigger, but still looks yellow. Day 05 - Friday - 08/14/20 - Total Days: 012 ----------------------------------- - [0915]: Leaves look a little burnt on the tips. Still no slime. --- Going to back off on the PPMs to hopefully fix the nutrient toxicity. --- Solution strength was at 632 PPMs --- PH was at 6.3 --- Added/Removed water until PPMs were at 536. --- PH was still at 6.3 --- Raised water up a bit, then top fed for a minute. - [2200]: Looking better. Still yellow though. --- Solution strength: 514 PPMs --- PH: 6.5 --- Added PH down. --- New solution strength: 518 PPMs --- New PH: 5.2 --- PH was kind of high. So decided to PH down. Had to use quite a bit to bring it down. But eventually got it to drop down to 5.3. A little low, but so far, the PH has always gone up so wanted to start it really low. --- Ran the top feed for a minute to re-saturate the top of the hydroton. Day 06 - Saturday - 08/15/20 - Total Days: 013 ----------------------------------- - [0830]: She looks stunted. leaves are still yellow. --- Solution strength: 514 PPMs --- PH: 5.6 --- Top fed for a minute. --- Not sure what to do at this point. Going to do another reservoir change soon. Hoping she lives until then. - [2145]: Looking pretty much the same. --- A bit of slime has returned. Since I've been diluting the nutrient solution, the enzyme ratio has dropped. So I guess this is expected. --- Also noticed that slime build up was on the air-stones. Never really checked the stones so not sure how long that has been there. Looks brown too, which can't be good. --- Going to do an H202 sterilization of the system (minus the net pot) tomorrow so did not add anything. --- Lowered the water level to below the net pot. --- Then top fed for a minute. Day 07 - Sunday - 08/16/20 - Total Days: 014 ----------------------------------- - [0900]: STERILIZATION DAY! --- Decided to skip today's night cycle for a deep clean. --- I'm hoping that skipping a night cycle won't be too stressful. --- Temporarily moved her to a new bucket. --- Used about a half of gallon of straight distilled water to flush out the net pot. --- Drained the system and wiped up all the brown sludge. Also removed the air stones and cleaned up all the goo. --- Filled the system with 2 gallons of distilled water and at least 30ml of food grade hydrogen peroxide (35% strength). --- Yea its a lot, but since I'm not going to sterilize the system overnight, I went with a really high doseage. Basically I kept adding until I started to see little bubbles start to form. --- Then I ran the water pump. - [0915]: Boiled the air stones in tap water for about 10 min. Then reconnected them to the airlines. --- I let the air stones and hose soak in the sterilization solution for about 5 minutes so the peroxide can absorb into the stones. Then ran the air stone to help mix and agitate the solution. --- Occasionally, I'd repeat the process of turning the air pump off for a few minutes to let the stones soak. - [1000]: Covered the top two row of holes of the net pot with some aluminum tape. Hopefully this solves the light leaking in through the hydroton. - [1200]: Used an old toothbrush and scrubbed the pump clean. Then drained the system. --- Refilled with more distilled water and peroxide. Again added a lot. --- Ran system again to sterilize even more. - [1530]: Drained the system and refilled with distilled water to rinse. --- Ran the system for a few minutes, then drained and rinsed again. --- Did this a few more times over about an hour. - [1630]: Added 4 gallons of fresh distilled water. --- Added 15ml Sensi Grow A --- Added 15ml Sensi Grow B --- Added 12ml of B-52 --- Added 16ml of Voodoo Juice --- Added 16ml Sensizym --- Solution strength was at 430 PPMs --- PH was at 5.6 --- I was going to add Hydroguard, but I think the bottle is expired. Since 2017 or 2018!? I think Hydroguard is good for up to 2 years from the date on the bottle or 6 months after opening. So not going to use from now on. I wonder if this could have contributed to the slime build up. --- Also removed the CaliMagic and Superthrive too. Going to only use AN products to eliminate the chance of incompatible nutrients. --- Placed her back in the bucket and top fed for a minute. --- Here's hoping for the best. Going to let it ride until morning! Please feel better! [END OF WEEK 02]
Processing
Likes
67
Share
Starting week 3 today, with a challenge ahead with this little bad girl! It seems to be a lack of Nitrogen, and I'm pretty afraid of burning the plant. I'm feeding the plant once each two days, with Seaweed Tonic, 150ml with the suggested dilution from the bottle. Now I have also a bottle of Canna Terra Vega, with NPKS 3-0-3-0. Is it a good idea to start feeding the plant, with also this nutrient? The soil is a mixture of 80% organic soil + 20% of coco coir. Could be a lack of nutrients from the soil? What is the best agenda to follow with nutrients? (: Cheers!! UPDATE (17/02 - Day 17): based on the suggestions made by many members, I've tried to gather the best of all and decided to make some moves in an effort to save this plant, and to avoid the same situation to the other 2 plants: #1 - Lifted the LED panel to double of the height, so the distance to the plants went from 50cm to 100cm #2 - This change with the distance from LED panel helped to low down the highest temperature achieved during the day from 27.5°C to 24°C #3 - Since day 15, the plants haven't been watered, in a move to try to dry a little bit the soil, once I was watering every day with something close to 250ml a day. Now I'll return with water in a few days, while I wait for some signals from the plants that they are needing water #4 - Pushed forward the idea to start feeding them this week, and maybe I give just a little bit of seaweed solution to root development when I come back with watering. Hope it works fine!
Likes
10
Share
@byte_me
Follow
Greetings, fellow cultivators and cannabis aficionados! It's that time again for a progress update on my cannabis grow diary. The journey continues to be an exciting one, with each day bringing new developments and surprises. The plants are on a determined mission to bulk up, and I couldn't be happier with their progress. Their growth during this flowering phase has been nothing short of remarkable. The buds are swelling day by day, becoming more robust and enticing. It's a rewarding sight that speaks volumes about the care and attention that have gone into their cultivation. With the buds maturing, the next milestone on the horizon is the impending flush. As the plants approach the final stage of their growth cycle, a flush will be in order to cleanse them of any accumulated nutrients. This process sets the stage for a smooth and flavorsome harvest, ensuring that the true essence of the buds shines through. One of the most captivating aspects of this phase is the visual transformation the plants undergo. As you can see from the photos, the buds have started to exhibit a mesmerizing purple hue. This natural phenomenon is a joy to behold and adds a touch of mystique to the grow space. The interplay of vibrant green and rich purple hues is a testament to the unique genetics of these plants. The journey thus far has been an amalgamation of learning, dedication, and admiration for the resilience of these cannabis plants. As we continue to nurture them through their final stretch, I'm reminded of the incredible community that surrounds this hobby. Your support and shared experiences have been invaluable in shaping this journey. Stay tuned for the upcoming flush and the final phase of this cultivation endeavor. Until then, keep cultivating with passion and keep celebrating the magic of cannabis!
Likes
2
Share
@EtnoGrow
Follow
here we see how the girls are advancing, the buds are becoming clearer and clearer which makes us feel that it will be a decent harvest at least, we cross our fingers.
Likes
21
Share
Ein herzliches Hallo an alle! Wir beschreiben die Vorblüte bzw. Blüte Woche 1 Sie hat ordentlich an Masse und Höhe zugelegt. Das Blätterdach entwickelt sich schön. Sie wächst sehr gut! Blattnager mögen sie noch immer besonders :-( Aufgrund des Wetterumschwungs musste ich die Düngemengen wie auch das Gießverhalten erhöhen. Das Düngen alle zwei Tage sagt ihr sehr zu, an den anderen Tagen verwende ich PH-angepasstes Wasser. Super Microbes gebe ich zwei mal die Woche mit einer Menge von 0,2 g / Viele Grüße an die Community! LueRootsGrowGermany!
Likes
12
Share
Running 4 autos in the same aeroponic system isnt ideal as 2 of my plants need to flush this week.. while the other 2 still have about 2 weeks again... its all good tho.. id take it out an flush them individually before harvesting.
Likes
4
Share
*This is not pictures of the 4 leaf baby*. That one died…moving on With This OG Kush auto pictured I haven’t done anything other than a few feedings and some water. I didn’t do any lst, topping or stress training. I am using air pots with some vermiculite, a bit of worm compost mix from local store, and a dash of 20/20/20 when it was a seedling.
Likes
39
Share
Likes
13
Share
THURSDAY 12/20: Delilah isn't recovering much at all...guess she'll end up in the trim bag for e-liquid...so sad. Dominique is a crispy critter too, but her trichromes are about half cloudy now, so she'll at least finish. I'll give her nutes at least once more with Cha Ching, then start flushing her. FRIDAY: The new evaporative cooler is working pretty well in the tent. High temp was 84f with it running on medium and with ice in the reservoir. That's a win. I suspect that when I need to run the other two 85w bar lights it will be pushing 90f again unless I run it on high. RH is is staying between 38% and 45%, which is another win! SATURDAY: I fed both DD's about a gallon of full-strength bloom nutes. Not sure how Delilah will like it..but it would be nice to see a little yield from her, too... SUNDAY: Photo session...Dominique is actually starting to "pink" a little bit..not the deep dark I had hoped for, but sexy just the same. Delilah didn't freak out on the nutes yesterday..I'll watch for the leaf production to diminish and the calyx production to intensify...🙏
Likes
4
Share
🌱 Woche - Week 8 Review (Umtopfen in den Garten)(Repotting in the garden) 📈 Wachstum: Diese Woche der große Umzug – die Pflanze wurde in den Garten verpflanzt 🌱➡️🏡. Sie hat dort mehr Platz für die Wurzeln. Wächst etwas schräg, wirkt aber stabil und vital 💪. 💡 Licht & Energie: Volle Sonne wird sehr gut angenommen ☀️, keinerlei Stress sichtbar. 🌿 Blattgesundheit: Nach kurzer Eingewöhnung zeigt sie wieder volle Kraft. 💧 Wasser & Nährstoffe: Direkt nach dem Umpflanzen mehr Wasser benötigt, jetzt wieder im Gleichgewicht. 🔄 Entwicklung: Noch volle Wachstumsphase, jetzt mit mehr Raum zur Entfaltung. ℹ️ Hinweis: Normalerweise ist eine Gorilla Zkittlez Auto nach etwa 75 Tagen fertig. Bei mir dauert es wohl länger – aber das ist völlig okay, da es meine allererste Pflanze überhaupt ist 🌱. Keine Growbox, kein Indoor, einfach draußen – mein erstes richtiges Grow-Erlebnis. ✅ Fazit: Erfolgreich im Garten angekommen, bereit für die nächste Phase 🚀. ------------------------------------------------------------------------------------------------------------------------------------------------------------- 📏 Growth: Big step this week – transplanted into the garden 🌱➡️🏡. More space for the roots now. Growing a bit tilted, but still strong and healthy 💪. 💡 Light & Energy: Full sun is well received ☀️, no stress signs. 🌿 Leaf Health: After a short adjustment, vitality came back. 💧 Water & Nutrients: Needed extra water right after transplant, now balanced again. 🔄 Development: Still in full vegetative growth, with more space to expand. ℹ️ Note: Normally a Gorilla Zkittlez Auto finishes in about 75 days. For me, it will probably take longer – but that’s fine, since this is my very first plant ever 🌱. No grow box, no indoor, just outside – my first real grow experience. ✅ Overall: Successfully settled in the garden, ready for the next stage 🚀.
Likes
12
Share
@LePensil
Follow
all week was high temp, but plant looks good, so continue to do my best... :D First view of flowering was at 27-28 days, at 5 floor of plant)
Likes
6
Share
These Chicken n Wafflez, Jelly Donutz, and Vanilla Frosting are in the final few weeks now, I'm thinking... I have absolutely loved this grow. Five of the phenos are pretty big and gorgeous. Three of the plants lagged a bit, either genetics, or my guess is I could have dialed their Blumats in better. I fear they may have been underwatered a tad, but they should still make good smoke! Also, my 4/20 gift to myself was purchasing the VCure from Vivosun. It's supposed to ship in May (I'm hoping early May!), if so it may make it here just in time for the dry/cure… Happy Growing!