
Likes
Comments
Share


@SubliminalSociety
Follow
The flowers have started to swell and increase in size nicely. She's not stretching much, so I guess, these 18cm will be it.
She's getting a really shimmery purple colour. I tried capturing it in a video.
I removed some of the older leaves to optimize for light and optimized fertilizer for bud size (Hi PLAGRON Alga Bloom!).
Give us all your CBD goodness, purple lady!

Likes
4
Share


@Andres
Follow
She has 104 days and is ready ... but I'll leave her one more week. She looks with compact flowers and a good smell...and also fed with fishbowl water...

Likes
43
Share


@Esoteric_growing
Follow
Low humidity seems to be causing what looks like heat stress, apart from that they are growing at a phenomenal rate. Going to try and raise the light another inch but it’s already mounted pretty much to the top of the tent.
I forgot how insane hydro growth is lol, next time I will be sure to flip them to 12/12 when they are a little smaller lol

Likes
4
Share


@Masshysteria
Follow
Day 71 Update: water today and likely pulled out and put in a closet for 48 hrs starting Tuesday or Wednesday. O is still well behind but seems to be on track for quite a harvest. S, V, and P are going to be harvested simultaneously in one go and then O will have the tent for its last week or two. Since O is still mid-flower, it got 8 ml of each of the GMB pH Perfect Trio in one gallon and the rest just got filtered tap.
Day 73 Update: Lot of action today. Uploading pics from my phone, will update with tags and details from desktop later.


Likes
18
Share

@HowtoBubatz
Follow
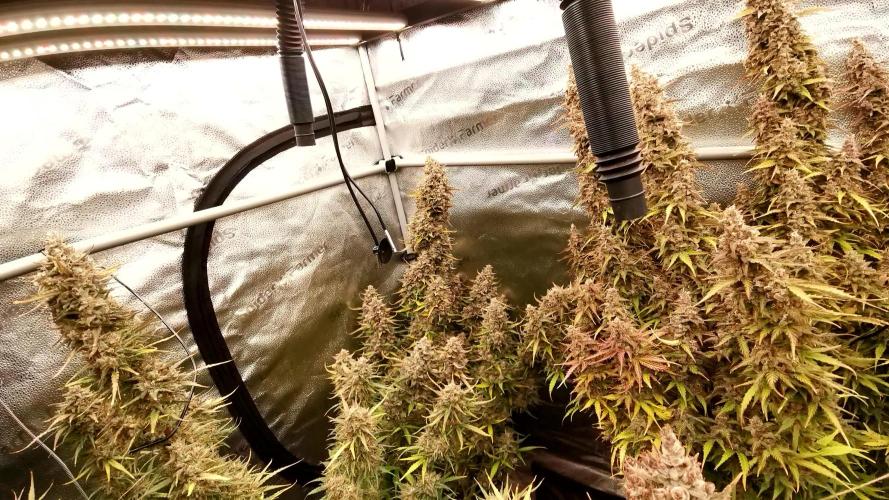
Week 12 pushed the Bruce Banner plants even closer to harvest 🌸❄️
The buds gained more density and weight, and all plants looked very mature at this point.
Trichome development showed that #2 and #3 were clearly entering their harvest window.
Most trichomes were milky, with some amber already visible, especially on the main colas.
Because of this, I decided to give them a little more time to fully ripen.
#1 was still slightly behind in maturity and will remain in the tent longer, while #2 and #3 are planned for harvest soon.
Due to the heavy buds, the plants needed continued support to stay upright.
Despite the weight, all flowers stayed compact and healthy with no signs of rot or stress.
Watering this week was kept simple with RO water + CalMag only, no additional feeding.
Environment:
Temp ~24°C
RH ~50–55%
Overall a very controlled and smooth late-flower week.
The plants are clearly finishing strong, and harvest is right around the corner ✂️❄️
Likes
99
Share


@Natrona
Follow
2025 Plagron / Zamnesia Eternity Grow Runtz Auto
Week 11 Flower 7
Runtz Automatic is in her last week; March 17 had her wet trim and was put in the dark for 2 days before getting the chop on March 20.
Runtz fade and nutrient usage apparent in the leaves combined with a check of her trichomes were an indication of readiness. The older pistils are turning orange brown and water consumption is slowing down.
Many leaves were fully yellow and fell off when I touched them. Her leaves look pretty with lime greens, pinky purples in the bud formation. The buds are dense and covered in trichomes supported nicely with her stems. Through the microscope, the trichomes are mostly milky with some amber as well.
She was harvested on day 74 from germination. As part of the flushing process, I topped the pot with ice, then watered with ph 6.5-6.7 water for 3 days. Then I put Runtz Auto in the dark for 2 days still in her pot. She will hang to dry in a darkened room. Temps are 71-72and 50% humidity.
This week the gals were fed on March 17 & 19. Pics were taken on the 17th.
Bloom Juice 120 ml
Royal Rush 0 ml
Power bud 15 ml
Green sensation
15ml
Cal Mag
20ml
Recharge 5ml
Ppm ranged from 676-777
Ph 6.5
Temp 68
Your likes and comments are appreciated. Thanks for stopping by.
Growers love 💚🌿
💫Natrona💫

Likes
26
Share


@Highgrade_Harvests
Follow
Girls are really starting to to take off now. Ramping up the nutrients slightly and started defoliation. It's interesting to see the phenotypes coming out. 3 plants. One short and bushy, one in between and one tall and lanky. Excited to watch the rest of the grow and how they end up. Off to a really good start. Tons of side growth. Completely topped 2 of them and fimmed the last one to see what happens. Currently trying to figure out the timelapse on my camera it only wants to save in few second long clips. I'll get it. I posted them anyway they are kinda neat.

Likes
12
Share


@InsideAz
Follow
Added a second scrog net for the taller plants last Friday. Constantly defoliating to increase light penetration but not trying to stress the plants. (Selective leaf picking)
Plants loved the tea I have them last week. Visual improvements in every plant 2 days later.
Top dressing later this week on 9/29:
5 tablespoons Gaia green 444
5 tablespoons Gaia Green 284
15 tablespoon Wiggle Worm Earth Worm Castings
Light increased to 75%


Likes
18
Share


@capogino
Follow
I probably won't grow this strain again, just due to the growing difficulties, short lifespan, and low yield, although the bud is definitely quality. I learned a lot as this was my first grow, and the next I'm hoping for better yield quantities.


Likes
73
Share

@Andres
Follow
I mean this genetics it's excellent ... if I would grow zombie kush again ... good job ripper seed ... she fought and was very strong against the plagues after a beginning outdoors ... she fought against the white fly. worms .. red spider and other insects ... and deserves your recognition ... it will not be the most beautiful plant with its leaves impeccable ... but she is a champion ... thank you ripper seed .. .

Likes
44
Share


@GODSGIFT_2005_JM
Follow
For LIQUIDS & NUTES ******GREEN BUZZ NUTRIENTS***** organic.
Also i’m using their LIVING SOIL CULTURE in powder form!
MARSHYDRO ⛺️ has large openings on the sides which is useful for mid section groom room work. 🤩
☀️ MARSHYDRO FC 3000 LED 300W
💨MARSHYDRO 6” in-line EXTRACTOR with speed-variation knob, comes complete with ducting and carbon filter.

Likes
72
Share


@HighFromHome
Follow
Another week done. Hard to see progress day to day but just looking back at photos it's easy to see her moving along.
It's my weekly ritual, photo, measure, smoke then update diary!
So...
She is still getting 1.5L each time i feed or water every 2 to 3 days. Increased the bloom nutrients further and decreased the grow to minimal.
Removed a few leaves blocking sites again. Also a couple poking into the fans. As for lst, i slighty tweaked the 4 middle stems. The rest would snap with any bending below the top 40mm.
Temperature spiked to 34 degrees in the tent for a few hours today but luckiky was watered last night. I think that helped her through those tough times. If she was almost dry and then had those temps i think she would be a bit annoyed! I was helping my brother move house and was a sweaty mess! Bet she was too and definitely appreciated my lights out being 1pm til 5pm. If it happens again and im home i will treat her to some ice packs by the intake again. :D
All seems good overall. Can't really complain about anything. Last week i mentioned how she didnt smell. She did smell if you rubbed her trichomes and smelt your fingers. But just putting your nose to her was only a plant smell. Now, she has just started to have a smell of weed.
I have a water pump and another timer to water her while i am away. All tested and after a bit of playing around i can feed 1.5L in 1 min :D
On to another week that i am as excited for as the last.
Thanks for checking it out
P.S Off to visit our remaining 2 outdoors tomorrow. Will get photos and upload next week. Fingers crossed all is good lol. (I say our, the outdoors grows were/are 50/50 with me and a close friend).


Likes
2
Share


Likes
23
Share


Likes
12
Share


@Tattooflashandweed
Follow
Ten days sence last post, more defoliation has been done. The stretch has stoped and frost on leafs is coming strong. 50 more days of buds getting bigger ... lets go.

Likes
10
Share


@colla69
Follow
It survived the holiday!
Roots and plant looking healthy 👍
I Topped it as soon as I came back and plan to start LST when the branches start to stretch.