
Likes
Comments
Share


@Skunkinyabag
Follow
Finishing off shortly one last push and then just some water to clean her up.

Processing
Likes
31
Share


@Thee_HoffGuyy
Follow
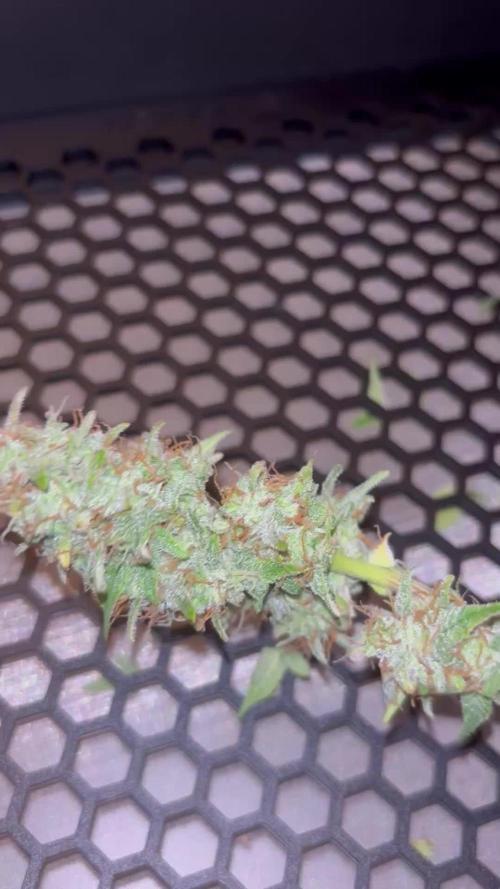
Hello my fellow Growers👊 It was another Great week for the Kush Fromage 🙌 All the pictures were taken on Sunday, which was Day 42 of Flower. She is really starting to reek the whole area up. It is a very earthy kush like smell with fresh grapes on a grapevine mixed in, it's a very unique smell😊 She is supposed to be a very heavy resin producer and have a high THC and CBD content. Anywhere from 18-26% THC and ~3% CBD according to the breeder. I can tell you this it is one very very resinous plant😵 even the fan leaves and smaller leaves that have no trichomes on them have developed an oily resin on them. It's awesome so I can definitely say it is a heavy resin producer. If a sugar leaf touches another leaf you can see an oily resin where it touched it, my fingers get sticky just from the fan leaves👍The breeders estimated time of Flower is around 63 Days. So we got a few more weeks to go!! I hope the buds will fill in a good bit more but I am not counting on them getting huge due to this strain being more on the quality over quantity side of things. It's not a bad producer and I'm sure they can get some pretty huge flowers on em, but I have seen plants that can produce way more, but this strain makes up for it in its potency and resin production. Plus I personally like the Quality over quantity strains. Though at least nowadays its nice that we have a lot of strains that are a nice compromise and have great yield while also having great quality😎 Thank for stopping by and checking out the Grow👊👍 Happy Growing an plentiful Harvests to you all!!🙏
Likes
16
Share

@Robertgrowsit86
Follow
Bag appeal on point , wonderfully complex nose on the first two we harvested , over ripe fruity notes with earthy , musk. The other two that are laggin we have two left
To harvest from this same cultivar but the last two have different smell profile . Burnt garlicky notes with earthy , pungent nose as well. I had to add a plant to the harvest. These took alot of extra time. But just gonna post few pics of the last two ladies from seed supreme, I almost lost these last two
Processing
Likes
11
Share


@4F1M6
Follow
I started germination of 3 Amnesiac beans on 29/12/2020. I pre moistened my rockwool cubes with ph balanced water to 6.4. Made sure the plugs were just damp and not soaked. Using a small wooden dowel I increased the size of the plugs pre made holes. Than I sowed my beans into the holes. Ripped off a small piece of rockwool and mulched it up. Lightly filled the holes in with the mulched rockwool. Than stuck the plugs into a misted humidity dome, to complete germination.
Shouldn't take anymore than 4-5 days to see some sprouts. Once I see some cotlydon leaves bursting to the surface. I will get the plugs planted into some 1 gallon pots. Plus get these ladies situated into their home. Cant wait!
Some background information on my first run with Amnesiac. She was super powerful straight out the gate. Hammering off quite the amount of veg growth in 6 weeks. She was a little stingy on nitrogen and really wanted s slightly decreased dose from my norm but nothing to extreme. She was the tallest in the room going into flower and she was quite the stretcher. She gained about 250% size after the first 2 weeks of bloom. Leading to me supercropping her at that point. She didnt mind the hst one bit! Was back to growing and turning her bud sites up withing about 12 hours.
She resulted in a great quantity of high quality flowers. Very fat chunky colas just coated in trichomes. Looking to knock her out of the park even further this time around!


Likes
87
Share


@Roberts
Follow
Auto Banana Kush has a lot of damage from ph fluctuations. She is bulking now and smells good. She has grown under the Medic Grow Mini Sun-2, in Athena blended line nutrition. This wasn't my best grow by any means. She was a lot hungrier then I expected. Thank you Medic Grow, Athena, and Weed Seeds Express. 🤜🏻🤛🏻🌱🌱🌱
Thank you grow diaries community for the 👇likes👇, follows, comments, and subscriptions on my YouTube channel👇. ❄️🌱🍻
Happy Growing 🌱🌱🌱
https://youtube.com/channel/UCAhN7yRzWLpcaRHhMIQ7X4g

Likes
4
Share


@kdifiori_
Follow
While the others have finished, for Cheese this will be the last week and he's already in flush, I'll give Bubblegum another week. What can I say? I'm so proud of these two!
Likes
4
Share


@GarciasGarden
Follow
In this week they were beyond beyond ready for bigger pots so it was time to bring them to there new and final home in a super secret space that no one will ever find.. it’s a garage but We built a cool ass room in it lol ! Anyways the plants are healthy and ready for a new pot this is the transfer from rockwoool cubes into coco coir for the flowering phase. We use this method because of the taste you get from coco coir in your buds and the speedy growth you get from rockwool !

Likes
4
Share

@Anon73
Follow
Victory over the moth larvae. Removed them with pipe cleaners. Still spraying Monterey BT.
No new larvae holes. Reinforced several plants with velcro tape.
The flowers are becoming heavy.
The scent is overpowering.
Sugar Cane is extraordinarily heavy and the flowers have not yet begun to swell.
Gorilla Glue 4 is heavy and the branches have started to bend outward from the weight. All three were reinforced. Garlic Z is not a large plant and the buds are behind all the rest in progress but the flowers are close and compact.

Likes
9
Share


@Colo420
Follow
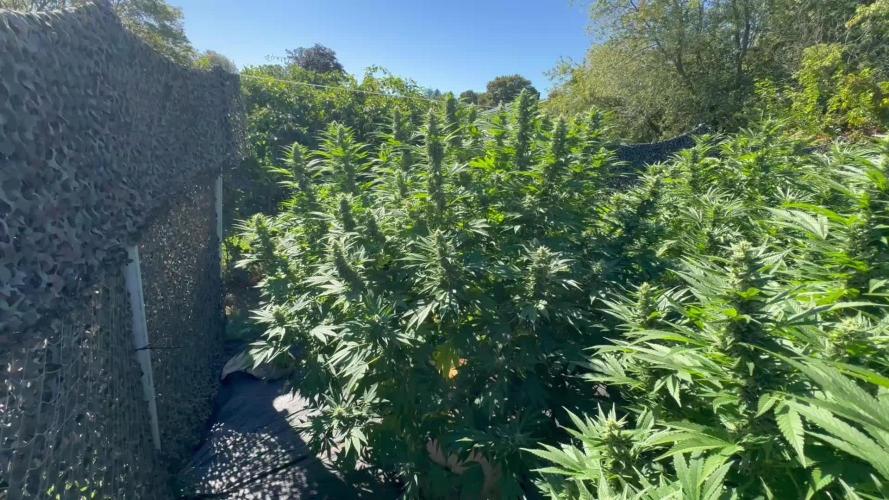
Atrasados con el seguimiento debido a las vacaciones pero aquí regresamos!!
Proximamente 6 comienzan su flora en exterior y 2 en interior


Likes
145
Share


@Salokin
Follow
Hello Growmies,
Week 16 unfolds with a sense of closure and accomplishment as we approach the final stages of this remarkable journey.
Throughout the week, the plants have undergone a meticulous flushing process with RO water, purging the last remnants of nutrients from the soil. This intentional cleansing is met with a positive response from our plant, as she gracefully transitions into the closing chapter of her life cycle. The effects of the flushing are vividly apparent as she starts to reveal her autumn colors. A captivating mix of purple and sandy brownish hues is painting her buds, creating a visual symphony that signifies the culmination of her growth.
In assessing her readiness for harvest, the trichomes provide valuable insights. The presence of approximately 10-15% amber trichomes suggests that we are nearing the optimal moment. However, a few scattered white hairs indicate the possibility of a slightly early harvest—perhaps by a mere couple of days. As we witness the plant's response to the flushing process and the emergence of autumn colors, it's a poignant moment to reflect on the entire journey. The care, attention, and shared experiences have converged into this final phase of growth.
In the coming days, we'll carefully monitor the trichomes and continue to observe any changes in her appearance. The anticipation for harvest is palpable, and every detail is scrutinized to ensure a perfect culmination.
I want to express gratitude to each of you who have joined me in this journey—your observations, enthusiasm, and shared joy have made this grow truly special.
Stay tuned for the next entry, where we'll delve into the harvesting process and celebrate the fruits of our collective labor.


Likes
46
Share


@Ju_Bps
Follow
Hello my friends,
I hope all's fine for you,
For me all's good
Plant are healthy and buds biggest each day, start to see pollen 😛, and nice smeel.
I've started more than one week
Tera flore and Sugar Royal,
See you next week!
Enjoy 😎😎

Likes
10
Share


@BasedBuds_89
Follow
Logging in a little late this week but these two girls are going SO well right now. Some of the most healthy genetics I've ever dealt with and they just keep stretching. I guarantee these will yield quite a bit.
Likes
10
Share


@CorinnaFarm
Follow
Die Sorte riecht und schmeckt super fruchtig.
Nach den ersten 4 Tagen trocknen wurde getrimmt hat etwas Zeit in Anspruch genommen aber es hat sich gelohnt. Fast 100g trocken was mich sehr gefreut hat.
Sie riecht extrem und ist schön harzig.
Eine echt schöne Sorte, da ich fruchtige Strains bevorzuge.

Likes
41
Share


@peggyo
Follow
Vortex Cold AF! We have been trying to balance RH and temperature inside the tent during this winter. The dam furnace in the space is a few feet away,
RH is 18 in the room, an open window helped cool off the temps - but was able to maintain a decent humidity level using 4 gallon wick humidifier.
Up Down - check the video out it's kinda sorta in range. Best we can do when it's 15F outside....


Likes
11
Share


@Thigh
Follow
Werde sie denke jetzt so lassen wie sie ist. Bin Mega zufrieden für mein erstes Outdoor Projekt. Die Farbe lila ist einfach Mega und der Geruch steigert einfach nur die Freude auf die Verkostung. 😄
Processing
Likes
9
Share


@MonkeeHaze
Follow
Starting the scrog net, gonna let her stay in veg state till the day 120th. 😎

Processing
Likes
4
Share


Likes
9
Share


Likes
5
Share


@Jays_Not_Here_Man
Follow
#1 Has stretched up and out! If she continues to fatten as tight as the other two, she will probably be the one with the most weight. Her branches are the tallest and reaching up at least 4-6 inches past both her sisters. Her main cola has some light bleaching, nothing I can do about that, we’ll see how she wraps up.
#2 is going to be a producer! She has so many tips and they are all fattening and developing at about the same rate, she is going to be a beast! Her main cola is rock hard. Did a defoliation on her, she is appreciating the extra light penetration 😎💨
#3 is fattening up! She never did stretch, but then again I had her tied and trained pretty far out. She has been thirsty, I have been feeding a dose close to 700 ppm every other feed which has been every 3rd day for her. During the lower feeds, ppm has been around 275. Her tricomes are mostly clear, with some cloudy starting to show. She has the longest to go, but us already dense, and will only get better.
