
Likes
Comments
Share

@Trinidad
Follow
Dried her for a total of 10 days. Give her a rough trim nothing fancy, just enough to put her in glass jars. The final dry weigh was 83grams after smoking a couple of grams. Her smoke gives me an energy high that keep me motivated complete my chores. The taste is citrus and fruity. Good grow decent weight and final product.


Likes
7
Share


@100Trillion
Follow
Week 3 of Flower we focus on Defoilation. This really is going to test the genetics response to extreme stress. Performed a 5 day Schwazze to minimize stress instead of ripping off most leave in one day. Plant seem to have reacted well so far. This technique has really opened the canopy and expose many bud sites. Preparing for a top feed at start of new week.

Processing
Likes
152
Share


@WhiteWidow
Follow
So today is the day i switch my plants to flowering lights schedule and flowering nutes, started with 1/4 the recommended dosage and will gradually up them, only boosters i left at recommended values.
Ppm is 800. Next will be 100, then 1200 and maybe 1400.
I plan to flush on days 16, 28, 35 and 42 of flowering, leave them to dry for 4-5 days so roots will oxygenize and help to stack more dense buds, and then add nutes. I plan to do the final flush for last 2 weeks with flawless finish.
You can see some before and after training photos and videos from today, defoliated some leaves and LST-ing branches, spreading them out last time so light can reach smaller branches, after all she got some more stretching to do and its why i left sensi grow with more Nitrogen.
I spent a lot of time training them now, hopefully it will pay out with massive buds :)
Stay tuned and bye bye, as always i am opened to every grower here, i will help and share advices with everyone, i love to exchange opinions in order to come to your own conclusion, people who talked to me so far already know that..

Likes
36
Share


@Roberts
Follow
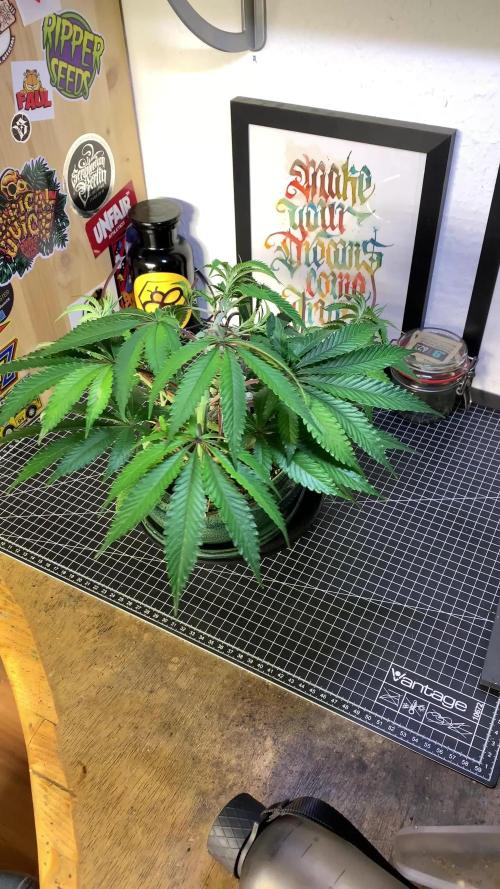
Gorilla Glue has been growing good. I think I been fighting manganese deficiency. I will try to correct it. My micro is super rich in nitrogen is issue I face bumping it up. I will give it a try. I did a heavy defoliation on her several days ago. Light defoliation and some lst today. Everything is looking good. Thank you Spider Farmer, and Amsterdam Marijuana Seeds. 🤜🤛🌱🌱🌱
Www.amsterdammarijuanaseeds.com
Thank you grow diaries community for the 👇likes👇, follows, comments, and subscriptions on my YouTube channel👇. ❄️🌱🍻
Happy Growing 🌱🌱🌱
https://youtube.com/channel/UCAhN7yRzWLpcaRHhMIQ7X4g
Spider Farmer G300w: https://amzn.to/3S2zvsd
Spider Farmer 10X20 Heat Mat Kit - https://amz.fun/lsa0J
Spider Farmer Amazon Store: https://www.amazon.com/spiderfarmer
Spider Farmer Official Site: https://spider-farmer.com
Discount code: saveurcash (is stackable)

Likes
4
Share


@Abendkraut
Follow
First week of flowering and I can see them all growing tall gaining a few cm/per day. First set of pistils are visible on all 4 ladies.
I started adding Terra Bloom 2ml/L every other day.

Likes
81
Share


@UnorthadoxDude
Follow
Hey! Welcome to week 9 for Karen! Week 8 is now complete so please go and check it out 🙏. Big week last week... massive.
Day 57: Fertigated 6l. Height 40cm.
Day 58: Scent has stepped up again and I'm noticing some of bud sites starting to develop frost.
Day 58.5 Flushed with 20l of PH & CalMag.
Day 59: reorganised tent
Day 60: Fertigated 3l. Karen has put on a load of frost in the last 24h. I mean seriously. Smell stepped up again. Height 44cm.
Day 60.5: I have had a really good look at other KKA grows. I think Karen is going to need a few extra weeks. I think she will be ready for harvest in about week 14. So I think we have about another 4-5 weeks to go.
Day 61: Adjusted the LST a bit. She's frosting rapidly now. 😍😍🤩 Height 45cm. Width: 60cm x 70cm
Day 61.5: It is only 8 days since I *heavily* defoliated and I think I probably should do it again already. Things are progressing well at the moment though so I am trying to resist doing it too soon. She is still stretching.
Day 61.75: Right, I have done some research and I have made a decision,. I'm going to give Karen 2 full weeks from the last defoliation on day 53, so on day 67 (i.e half way through next week) I will defoliate and perform final LST just to space out the colas a bite more at the "top" of the plant.
Incidentally, Nesia is now easily the same spread as Karen.. Nesia is going to be much bigger than Karen. Check out Nesia here: https://growdiaries.com/diaries/161801-grow-journal-by-unorthodoxdude
If you are interested in the stunted Big Bang Auto - Bertha - who is 2 days younger than Karen, check her out here: https://growdiaries.com/diaries/158111-grow-journal-by-unorthodoxdude - in the current week I have added various photos of the non-cannabis plants in my tent. Who knew basil flowers were so pretty? 😊
Day 62: Fertigated 3l
Day 63: Height 47cm width 65cm x 75cm
Week Summary: Another big week with a plant barely recognisable from herself a week ago. As well as the ongoing stretch she has started to frost over this week and I am hoping this continues because more and more is appearing all over the place.

Likes
3
Share


@UnicornSparklehorn
Follow
We're at the end of week 4 and she doesn't seem to have triggered flowering yet. Fortunately this is giving me time to fill up her canopy. Seedstockers claim she's an XXL plant and I hope to test that.

Likes
11
Share


@Professor_Daank
Follow
The main issue with Gorilla Glue #4 is that the strain grows so fast, you need to prune your plants regularly.
I had a light-stress issue in week 9, it stunted the growth of this one plant and it is taking approximately 1 more week to reach harvest stage.
Great grow. will do again!

Likes
5
Share


@0xcrlt
Follow
- June 25 - Day 16 - Today she will be topped. Watered with 800 ml of water and about 1.5 ml of Bio-Grow.
-
Likes
15
Share

@tsf_homegrow
Follow
🇩🇪
Die letzten Tage waren wir etwas aus der Spur. Sie hing etwas durch da ich nicht optimal gegossen hatte. Ich hab einen kleinen Teil der Wurzeln weiter frei gelegt und sie weiter und Form gehalten. Entscheiden das oben am Haupttrieb noch 4 weitere Seiten Trieben entstehen dürfen. Und dann wird es langsam auch Zeit sich Gedanken zu mache sie in die Blüte zu schicken. Aber ein paar Wochen darf sie noch wachsen. Happy growing💛✌️
🇬🇧
We've been a bit off track the last few days. She was drooping a little because I hadn't been watering her properly. I've exposed a small section of the roots and kept her in shape. I've decided to allow four more side shoots to develop at the top of the main stem. And then it will slowly be time to start thinking about putting her into flowering mode. But she can continue to grow for a few more weeks. Happy growing! 💛✌️
Likes
2
Share

@GreenEldritchGardens
Follow
It seems her internal clock did not persisted the issues with her roots as seedling. If you check on previous weeks, she had root problems as early seedling but did recover well but I thought that I've lost a week or more from Veg phase.
Next end of next week she starts flowering and let's see the development!

Processing
Likes
3
Share


@Ogbangbang2981
Follow
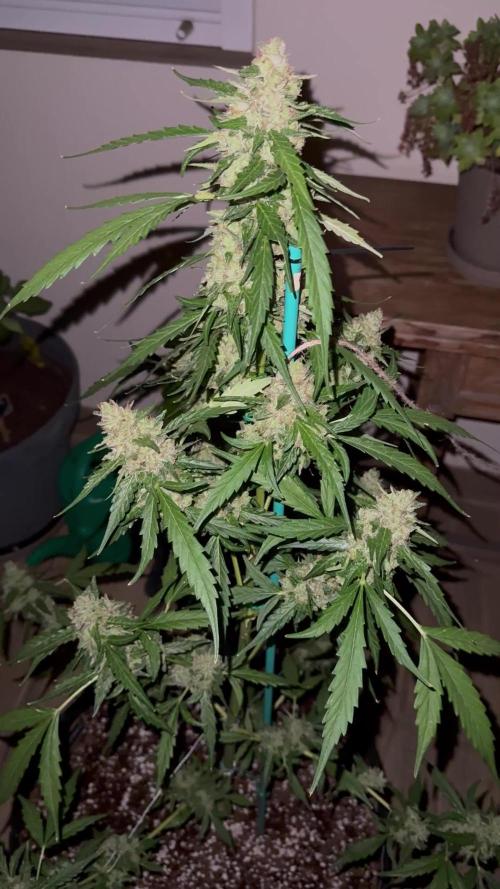
Every week I watch my girls grow into beautiful budding trees only difference is now she in flowering I take her outside to absorb some of the beautiful sunshine and she's loving every bit of it. I let her stay outside for 8 hours in nature then back inside for another 8 hours of led full spectrum and turn out my lights for another 8 hr she's an Auto so she loving every minute of this ...... this is the results ⬆️
Likes
38
Share


@Snakeking
Follow
Everything is fine i saw some fading on 2 plants but i think cold weather + molybdenum deficiency caused that purple color so i add some micro elements include molybdenum.
this week is warm again and i love it smells like candy but 2 of them got some sour aroma to :)
I believe they need more than what breeders say in my climate they say8/9 w but i think at least 10 w they need to mature maybe hot climate causes this


Likes
3
Share

@NidoR420
Follow
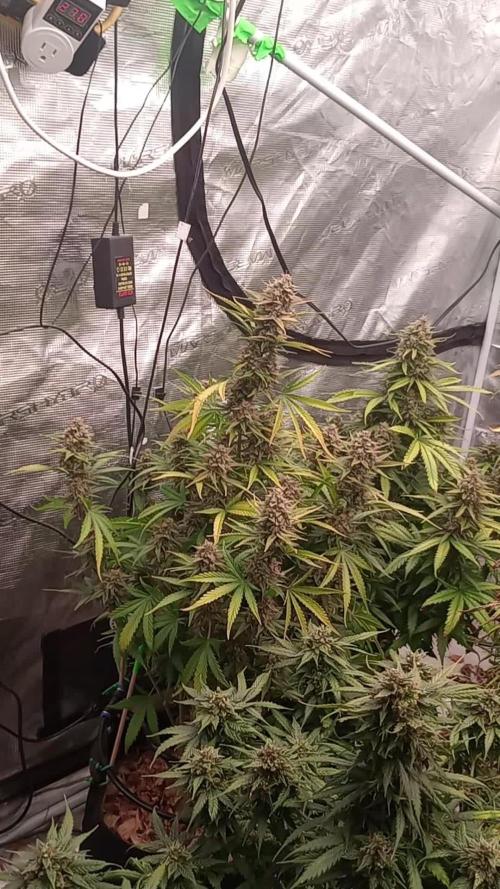
Another disaster on day 2 of the week :pp previous one avoided as the repair held tho, but a huge storm roughened her up this time :( it snapped one of the upper branch, I was also able to repair it so let’s see. However, her soil was really dry and she was bending at more than 90 degrees, which probably broke a few if not all roots. I’m waiting to see how she evolves, she also lost a lot of stability since then. But at the end of the day she’s at the end of her flowering, around 20% ambers 80% cloudy and nearly no white pistils anymore. I still need to flush her so finger crossed
Final week!! She’s ready, will harvest somewhere during next week. Added additional pictures & videos :)) not super visible on the picture but she actually shows some purple trichromes! Look a bit maroon-ish on the video but I confirmed it’s not mold with a lens. I think we’re around 30% amber 70% cloudy now, probably will harvest it all at once.

Likes
168
Share


@Tropicannibis_Todd
Follow
💩Holy Crap I Was Able To Get Them In The Ground💩
So super happy to be trying this one out , can't wait😝 .....The hope here is to do better then last summers outdoor grow ..👍
It's been a full week and she's doing great , very nice Growth, shes enjoying the sunny days 👌
No problems 😊 so far so good 👍
👉NutriNPK NUTRIENTS USED FOR FEEDING 👈rain water to be used entire growth👈
👉www.nutrinpk.com right now get 10% off using SPRING2022 as the coupon code👈

Likes
24
Share


@Aleks555
Follow
Hello everyone. We're doing well, we've been growing for 7 weeks and we're blooming, the binge has gotten stronger, the bumps are getting more and more. We've added more of these supplements from Xpert Nutrients.
Bloom Booster Sticky Fingers .

Likes
28
Share


@Salgeezi
Follow
As usual my grows take forever. Healthy... just slow growth.
Ph is good.
Runoff EC is good.
Lights 150w at 17".
Humidity 59
Temps 79

Likes
3
Share


@Grammo216
Follow
Late update, ran into some issues with the roots but the end product is still decent. Will make some tweaks next time, the problem was my transplant. I didn’t put the plants down deep enough and the soil was compacted to add. Plants start tipping over and nearly derooted when buds got heavier. Also was using too much nutes, will be switching to coco. Don’t think I used too much, soil just retained a lot of the nutes and water. Hoping coco will solve that issue for me.

Likes
2
Share


@KannaGrowing
Follow
Estamos en la tercera semana de crecimiento vegetativo.
Nuestras plantas ya tienen unos 15 centímetros aproximadamente, y han superado la fase crítica.
Recordamos que hasta ahora solo estamos regando con agua, aún no hemos incorporado los fertilizantes.
Seguimos manteniendo la humedad relativa bastante alta, y la temperatura entre 22 y 24ºC.
Pero aumentamos la potencia al 50% de ambas luminarias.