The Grow Awards 2026 🏆 


Likes
Comments
Share


Likes
28
Share
@MrGrowthSpurt
Follow
Week one is in the books. I planted them on directly into the substrate 11/28/22 (no germination) out of the 10 I planted 6 of them sprouted up. I'm excited for this grow because I have 3 new strains I have never grown.
This is grow #7 for me going on 2 years growing straight with no break. I feel like I know what I'm doing now, but still learning everyday.
Stay tuned for the progress and like always Happy Growing and may the grow goddesses bless you with a bountiful harvest!

Likes
18
Share
@VI_Cannabis
Follow
July 5 - The girls are still doing awesome. temps are between 21-26. Humidity is 40-50. Still feeding every 24-36 hours with 3L per plant.
July 6 - They are doing good. Showing lots of flower sites now. Unfortunately I did not get any pictures today.
July 7 - Tons of progress since last week. I don't see any signs of any problems, and still no pests! The smell is getting A lot stronger as it starts to flower more
July 8 - Still doing there thing, no problems, temps and humidity is fine. Have been feeding every 24 hours now as they seem to be really thirsty
July 9 - Super happy with how they are doing. No issues yet. Smell is heavier, and tons of bud sites showing up. Only issue is they are growing pretty uneven.
July 10 - Time to get a even canopy! First time doing some HST. I also did some defoliation. One of the stems split open a bit but it seems to be doing just fine. I did he HST and defoliation in the morning, i then took pictures of 12 hours later and everything seems just fine!
July 11 - Everything seems to be a lot more even and the broken stem doesn't seem to affect the growth.
Likes
60
Share
@Cannibalgardens
Follow
This was an overall amazing strain to grow i had little to no problems with this plant. The ease of growing it was great because as being a newby to growing weed for personel use that was super helpfull. I liked how the smell was strong from day one and just how she grew so fast . i would recommend this strain to anyone because it smells great piney , citrus, earthy sticky . Dinafem did a great job of making my life super easy when it came to growing it . As long as i can get a priper cure on this bud it will be amazing smoke for sure.. I hope anyone who sees the journal enjoys it and ill be doing more in the future i love this forum and the other amazing growers out there ..it says 8 weeks its been hard maintaining entries at first and timely so she is over 8 weeks flowering when i chopped it..smoked some of the plant that was chopped up alittle while before this girl tastes very good and the stickiness of the buds is very impressive i would like to enjoy this plant and grow her again some time ...


Likes
2
Share
@Weedwithwes
Follow
Day 72 from seed
Just feed water ph to 6
Both veg and bloom mode on the light.
Day 77 (D14 flower )
MoonBow112XUnicornPoop9
Top dressed again for flower.
1 tbsp 2-8-4 gia green
1 tbsp super fly insect frass
1.5 tsp bat guano
1.5 tsp langbeinite
Day 80 (D17 flower )
MoonBow112XUnicornPoop9
Feed microbial tea.
For 2.5 gal brew
* Fish Bone Meal: 1 tbsp
* Bat Guano (High Phosphorus): 1 tbsp
* Kelp Meal: 1 tbsp
* Molasses: 1 tbsp
* Power Bloom (2-8-4): 1tbsp
Help support early flower transition and bud development and soil health overall.
Eventually will add silica and fish shit to my mixes when
Likes
35
Share
@MadeInGermany
Follow
Info:
Unfortunately, I had to find out that my account is used for fake pages in social media.
I am only active here on growdiaries.
I am not on facebook instagram twitter etc All accounts except this one are fake.
Flowering day 21
since time change
to 12/12 h.
Hey everyone 😀.
Another nice week in which the lady developed super 😀.
The flowers start to get thicker :-).
For the next few days I will add another 1 g GHSC Bio Bloom Pro l Coconut 👍.
I wish you a lot spas and stay healthy 🙏🏻
You can buy this Strain at :
https://www.zamnesia.com/de/3271-zamnesia-seeds-blue-dream-feminisiert.html
Type:
Blue Dream
☝️🏼
Genetics:
Blueberry x Haze
20% Indica / 80% Sativa
👍
Vega lamp:
2 x Todogrow Led
Quantum Board 100 W
💡
Bloom Lamp :
2 x Todogrow Led
Cxb 3590 COB 3500 K 205W
💡💡☝️🏼
Soil :
Canna Coco Professional +
☝️🏼
Fertilizer:
Green House Powder Feeding
☝️🏼🌱
Water:
Osmosis water mixed with normal water (24 hours stale that the chlorine evaporates) to 0.2 EC. Add Cal / Mag to 0.4 Ec Ph with Organic Ph - to 5.5 - 5.8 .


Likes
5
Share
@most_dope
Follow
This is just for the gorilla zkittlez so far I will probably try to put all 5 on here but started 2 about 45 days apart from each other and the 5th seed about 3 weeks after the 2nd round. The 5th seed died from transplant shock (won’t be transplanting autos anymore) but the 2nd round of 2 plants just started flowering. I got 85 grams from the zkittlez and 60 grams from the afghan kush after drying. Not great but I’m happy it’s smokeable and smells/ tastes good. starting 2 bloody skunk today (5/11) because the gorilla cookies never germinated unfortunately :( . all out of seeds now so i will be maknig an order this week. still have 2 more strains to figure out when flowering kicks in more tho so that will be my fun for the next 1-2 months lol
Processing
Likes
2
Share
@MG2009
Follow
05/30/2019
What a week she responded well to the 12 - 12 light cycle flip and is in BEAST mode , check out last weeks pic before the light change to 12 - 12 she is lower than the green cross brace in background after 1 week she's made great progress, this week start defoiliating and watching for real flowers to start building up.

Likes
3
Share
@BjomaBudz
Follow
Vor 2 Tagen gab's ne Stamm Spaltung etwas Draht zum strecken . Seit gestern gibt es 2x30min UV Zusatzbeleuchtung und meine Ac ist auf Stufe 9 von 10

Processing
Likes
20
Share
@FlavoursUk
Follow
Day 50- All looking quiet good so far, no complaints. Fairly easy grow once you set up your plants training in veg. Only minor defoliation here and there when needed to expose bud sites to the light. Happy with the girls at the moment.


Likes
2
Share
@StickyBlack
Follow
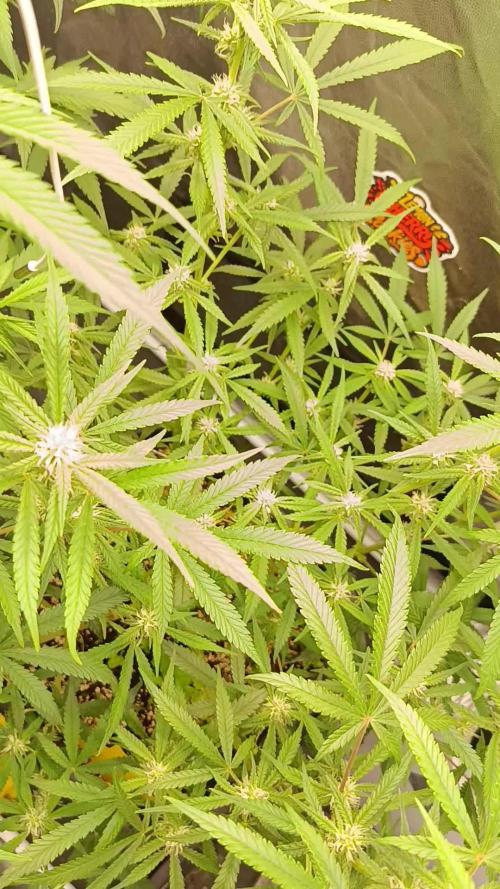
Forbidden Runtz - Beautiful Sphere shaped Colas forming. Covered in sticky trichomes. Right bud structure. Good nose. Excited to see how this finishes up.
Likes
9
Share
@Anonymous_buds
Follow
HAD THEM OUTSIDE FOR LIKE 3 WEEKS BEFORE I TOOK LOADS OF CUTS OFF IT THIS PLANT HAS BEEN GIONG FOR 9 MONTHS LOL SHES MOTHER PLANT

Likes
4
Share
@Squaregrouper
Follow
Cinderella is a great variety to grow a very quick sativa.. it's funny how she grows outdoors compared to indoors the bud structure is completely different.. but taking the Clones off of the outdoor tree.

Processing
Likes
17
Share
@Ashbash
Follow
Massive fattening this week from the Lemon AK, shes a big one. Another 2-3 weeks and she might be ready! Zkittles is maturing, but slower than i had hoped :( another week at least i think. but thats about what everyone else gets. Both of these plants are very true to their names and smell spot on. Lower nute intake seems to be working somewhat so im gonna keep it this way till the end.
Processing
Likes
3
Share
@Wizardgreen317
Follow
Thanks y’all for being apart of this seeds will be available in the near future.. peace out and check out the pics like or give me your opinions on anything that could help me


Likes
14
Share
@BLAZED
Follow
Week 14 (1-5 to 7-5)
1-5
Temperature: 28.2 degrees (lights on) 22 degrees (lights off)
Humidity: 62% (highest) 46% (lowest)
No pictures.
2-5
Temperature: 29.2 degrees (lights on) 20 degrees (lights off)
Humidity: 61% (highest) 48% (lowest)
Removed the net, and tied down some branches to the pot with some gardening wire.
This way i can easily remove the pots out of the tent to weigh them.
I also moved the oscilating fan from underneath the canopy to above the canopy.
This is because the leaves gets hotter as i increase the light's power output.
The Gorilla Kush #2 and the Chemdog #2 are showing some heat stress.
Installed a valve on the autopot from the Kush #2.
This is because its weight is higher then the other pots.
Before i watered them i weigh the pots.
Dry weight:
Gorilla Kush #1: 4.4 kg
Gorilla Kush #2: 6.0 kg
Added 10L to the reservoir.
Opened the reservoir for a couple of minutes.
3-5
Temperature: 26.2 degrees (lights on) 19.9 degrees (lights off)
Humidity: 61% (highest) 47% (lowest)
No pictures.
Increased the light's power output to 75%
LUX: 16.000 / 20.000
4-5
Temperature: 26.9 degrees (lights on) 21.2 degrees (lights off)
Humidity: 59% (highest) 41% (lowest)
Opened the reservoir for a couple of minutes.
5-5
Temperature: 27.6 degrees (lights on) 21.2 degrees (lights off)
Humidity: 60% (highest) 47% (lowest)
No pictures.
6-5
Temperature: 27.6 degrees (lights on) 20.4 degrees (lights off)
Humidity: 60% (highest) 42% (lowest)
Dry weight:
Gorilla Kush #1: 4.4 kg
Gorilla Kush #2: 5.4 kg
Added 10L to the reservoir, there was still 2850 ml left in the reservoir so now its almost 13L.
Opened the reservoir for a couple of minutes. (Only Gorilla Kush #1)
I also lowered the Gorilla Kush #2 a little bit, as she is showing some heat stress.
The bud development of the #2 is very mediocre, some buds show some THC, and some buds have almost none on them.
I am sure the yield will be low, so i will probably make some hash with the #2
7-5
Temperature: 27 degrees (lights on) 19.8 degrees (lights off)
Humidity: 57% (highest) 44% (lowest

Likes
19
Share
@jst4kicks420
Follow
first pic was april 25 second the 26 and about two day in between or so on the others up until today the may the 3rd last day of week 7 now i can say things are starting to look good 😌 thru picture of what it looks like under the bed in case anyone was curious.. one has slight light burn finally got passed me and didn’t give in aha till today aha (edit ) i forgot to mention pots are about 15 in and yea i measured from the floor every time old habits aha
