
Likes
Comments
Share


@Theia
Follow
ve repotted into her final 15l auto pot.
The procedure I used is as follows.
Items needed..
Clay pebbles
Hydro coco 60/40 clay pebbles/Coco.
Silicium Flash
Startrex
Mycrotrex
Bactrex
And of course Bio tablets X2.
15l of hydro coco was mixed with 25g of Silicium Flash and 25g of Startrex. Mixed up well to form the main substrate.
I filled the autopots to a depth of 5cm with clay pebbles and then layered up the amended substrate making a nice hole for my 300ml nursery pots.
Into this hole I sprinkled in 5g of Mycrotrex and then dropped the seedling in.
This then gets 2 biotabs pushed 5-8cm into the substrate and 1l of water mixed with 5ml of Bactrex
I need to top feed the autopots for a couple of weeks so the root system can establish before I transfer to my flower room and the gravity feeding trays..🤘🏼👍🏼
I'm keeping temps at a constant 25c and lights are on 24hrs a day. Rh is sitting around 65%.it too low hence the domes but then it goes too high. I'm going to run a couple of days with the 65% but vpd over 1 is a bit high for so early.. we shall see.
The sweet seeds all seem very strong and I'm really liking how fast these are growing in this substrate. I just need to work out the watering correctly..
🤞🏼🤞🏼🤞🏼
.

Likes
7
Share


@Krautbauern
Follow
Gradually, Gorilla Cookies begins to extract the nutrients from the leaves. it is impressive how much resin it produces. Hopefully she will do well in the last few weeks.

Processing
Likes
57
Share


@MadeInGermany
Follow
Hey everyone .
This week she was left in her 1 L pot, and will not be in the 11 L pot until next week :-).
She was topped again and accepted it super 😃.
By the time she is repotted next week and given Green House Powder Feeding for the first time, she will have received a small portion of Canna Vega :-).
Otherwise it grows very quickly and vigorously, and they look beautiful 😍👌.
I wish you all a lot of fun with the new update, stay healthy and let it grow 🙏🏻👍
You can buy this Strain at :
https://sweetseeds.es/de/red-mandarine-f1-fast-version/
Type:
Red Mandarine F1 Fast Version
☝️🏼
Genetics:
Red Poison Auto®️ (SWS39)
X
Tangie (California Orange x Hybrid Skunk)
👍
Vega lamp:
2 x Todogrow Led
Quantum Board 100 W
💡
Bloom Lamp :
2 x Todogrow Led
Cxb 3590 COB 3500 K 205W
💡💡☝️🏼
Soil :
Canna Coco Professional +
☝️🏼
Fertilizer:
Green House Powder Feeding
☝️🏼🌱
Water:
Osmosis water mixed with normal water (24 hours stale that the chlorine evaporates) to 0.2 EC. Add Cal / Mag to 0.4 Ec Ph with Organic Ph - to 5.5 - 5.8 .
Likes
17
Share


@plant
Follow
Day 15, slightly smaller then I’d like for day 15 but I’m sure they will fill out just fine. 🌱

Likes
Comments
Share

@Anon73
Follow
Still pinching out tops, clearing out wasteful inner growth points.
Growth is still very vigorous.

Likes
23
Share


@Master_weeda
Follow
Bonjour à tous les padawans et maîtres jedis
Pour la germination j'utilise la technique du sopalin
Pour faire germer vos graines dans du sopalin, vous aurez besoin :
Un Tupperware avec couvercle
Du Sopalin, ou autre quel papier de cuisine qui soit épais et qui retienne l’eau
Un verre d’eau
Si c’est l’hiver, vous placerez le Tupperware près d’une Box ou d’un Modem pour donner un peu de chaleur
Étapes de la germination:
faire germer vos graines de cannabis dans du sopalin
La première chose à faire est de tapisser le fond du Tupperware avec du sopalin, 2-3 feuilles suffiront. Si vous ne mettez qu’une feuille, elle captera peu d’eau et pourra sécher, vous mettrez donc plus de feuilles que pas assez.
Une fois les feuilles placées, versez l’eau du verre dessus, mais pas trop, juste de quoi imbiber toute la surface couverte par les feuilles. Vous aurez ainsi l’eau suffisante pour faire germer les graines sans avoir besoin d’essorer la feuille de papier.
Une fois les feuilles humidifiées, mettez vos graines par-dessus, et recouvrez le tout avec une autre couche de quelques serviettes. Une fois en place, humidifiez cette nouvelle couche.
faire germer vos graines de cannabis dans du sopalin
Lorsque vous graines seront placées entre les 2 couvertures de feuilles, fermez le Tupperware hermétiquement pour que l’eau reste bien dedans et que l’ensemble ne sèche pas malgré la chaleur.
Si vous êtes en hiver lorsque vous mettrez vos graines à germer, ou que les températures sont inférieures à 20°C, vous placerez le Tupperware sur votre Box ou modem jusqu’à germination, mais toujours en évitant le contact avec la lumière. Si vous êtes dans une zone au climat tempéré ou chaud, vous n’aurez qu’à placer le récipient avec les graines à l’ombre dans une armoire ou une caisse de rangement. Toutes les 24h, vous devrez vérifier l’état d’avancement de la germination. Si quelques-unes sont sorties mais pas d’autres, prenez celles qui ont germé pour les planter, laissez les autres dans le Tupperware et vérifier de nouveau le lendemain.

Likes
44
Share


@Kanndera
Follow
Приветствую тебя в моем дневнике!
Это мой первый гроурепорт и первое выращивание. И я буду очень рад, если проходящий мимо гораздо более опытный товарищ, даст свой совет, рекомендацию или просто комментарий. Ведь тогда мои шансы на успех вырастут. Спасибо заранее.
Исходные данные:
Придумал чем занять себя на самоизоляции, тем более что давно хотел за это взяться и выращивать самому, но нужен был толчок к этому. Быстренько набросал схемы, почитал форумы и приступил к делу.
Собрал свой гроубокс, размеры: 200 см высота, ширина 100 см, глубина 70 см.
Прекрасно понимаю, что мои условия не идеальны, но я исходил из того, чтобы собрать это самостоятельно и в короткие сроки, плюс я живу в небольшом городе и некоторые вещи нужно заказывать с доставкой.
Гроубокс стоит на неотапливаемой лоджии. Вентиляция идет прямо на улицу. Пока на улице прохладно внутри стоит инфракрасный обогреватель с терморегулятором от теплого пола. Вдув воздуха в бокс пока пассивный. На выдув стоит вентилятор Вентс 125 с регулировкой оборотов.
Электронный таймер для лампы, первую неделю стоит режим освещения в 24 часа. Есть гигрометр и увлажнитель на 4 литра.
Лампа собрана из 3-х LED прожекторов 6400К, плюс 6 фитоламп и 4 бытовые LED лампы. 4 уровня освещения включаются сверху.
Вентилятор направлен на обогреватель, чтобы равномерно распределять тепло.
Горшок Airpot на 15 литров. Грунт: 65 земля + 20 кокоса +15 перлита. Вода из под крана 7.1 pH, 138 ppm. У отстоенной воды 37 ppm.
Семечка заложена в горшок 3 апреля.
4 апреля сделал пролив горшка водой 1 литра: Отстоенная вода + Восток ЭМ-1 (1мл) + Фитоспорин (0,5 мл)+ Эпин Экстра (0,1 мл).
6 апреля посадил в горшок рядом семечку Авто АК47 (от Семяныча).
8 апреля был пролив водой с Восток ЭМ-1 (1мл).
11 апреля сделал свой CalMag на основе: сульфата магния и нитрата кальция.
Пролил раствором с CalMag 2 мл + 1,5 мл янтарной кислоты + 0,1 мл циркона.
Думаю буду теперь постоянно проливать с водой, под корень и по листу с CalMag 2 мл.
Информация не вся, позже еще добавлю, если будут вопросы по условиям выращивания.
Likes
7
Share


@gablmo
Follow
I finally turned 600 watts on, would love to get comments from you folks, so clueless here. If you see something wrong, please let me know.

Likes
1
Share


@922Grow
Follow
Llegando a las últimas semanas de floración, abundante cogollo central, tornándose cada vez más marrones los pistilos, se comienzan a notar en menor medida los terpenos en la planta.

Likes
9
Share


@WeedWagon
Follow
Day 21-28:
- watering plants 1l/every 2 days
- was on a trip humidifier didn't run
Big shout out to my mom watering my plants while I was away.
Likes
11
Share

@NidoR420
Follow
Super lucky with the weather, still a few older leaves yellowing but nothing concerning for now. The buds are quite leafy but I don’t really mind, also very frosty
Likes
5
Share


@CannaIGrow
Follow
This plant seems to have grown much denser and better than my first plant. I just got the ac infinity ventilation setup with controller 69 for my 2x2, still trying to learn, hopefully grow #3 goes even better. Stay tuned
Likes
19
Share


@JustifyGrower
Follow
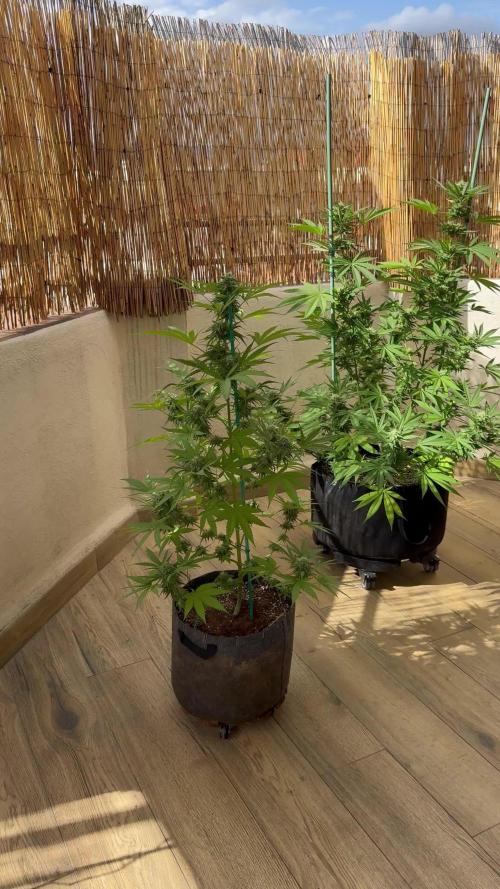
So here we go - the flowering stage. Made some defoliation and lst to open them for more light penetration.

Likes
142
Share

@MadeInGermany
Follow
Hi everyone :-)
This week a lot of nice things happened in the flower tent :-)
Everyone looks super nice, and is growing stronger and more beautiful week by week 😍👌.
The blue cheese smells like a dream ;-) As usual from this variety 👍.
The kosher tangie is also very, very tasty 👏🏻.
Both got Pk 13/14 this week for the last time :-)
Everyone else is developing very well 👍, That will be the last diary with several strains together :-)
In future everyone will come individually 👌.
I wish you a lot of fun with the videos, have a nice weekend, stay healthy 🙏🏻 and let it grow 😎👌


Likes
11
Share


@Vegetoo420
Follow
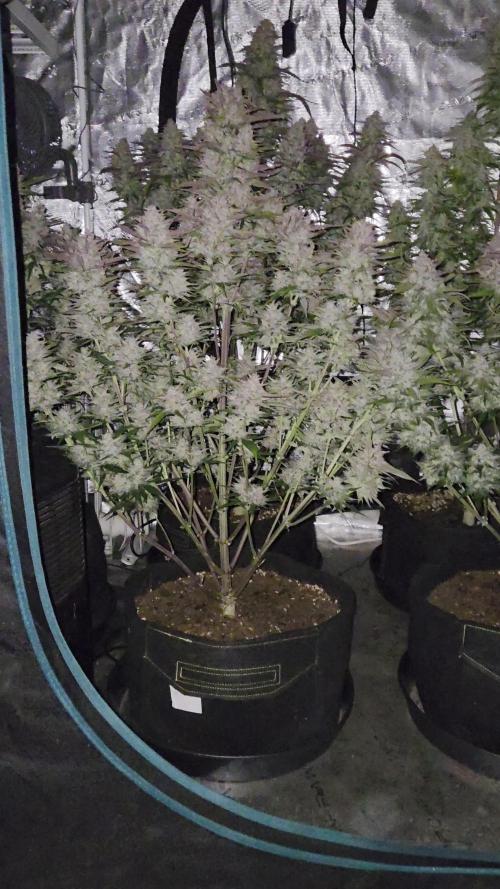
We continue the flush!
I’ll give them 2ml/l canna flush on next watering
Purple tones appeared on dos si dos 33 !
Trichomes started to turn amber and buds are more denses ! Harvest day is for soon !!

Likes
38
Share


@Haoss
Follow
The plant is male, I barely got to the desired shapes and it made such a terrible surprise to me, it smelled very good orange but disappointed me. I was eliminated in the championship in which I participated.
Likes
61
Share


@Esoteric_growing
Follow
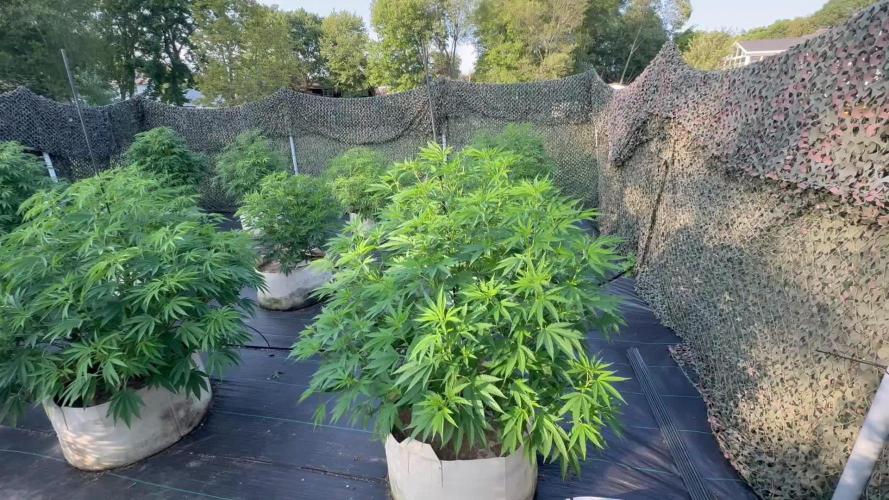
Had one plant hemi, probably due to the high stress training I did last week.
All plants looking very healthy, two out of the remaining 4 are several inches taller so may tie these down to even the canopy a little.
One pheno is a lot more sativa looking than the others and had a much bigger stretch.
Processing
Likes
24
Share

@MadeInGermany
Follow
Hey guys :-)
Today I start the other 2 Runtz parallel to the Spring Cup diary :-).
A few days ago they were germinated and planted :-).
All 3 came. 🌱🙏🏻
I wish you much fun with this Diary :-) Let it grow 🌱👌👍
Type:
Runtz
☝️🏼
Genetics:
Zkittlez x Gelato
👍
Vega lamp: 2 x Todogrow Led
Quantum Board 100 W
💡
Flower Lamp : 2 x Todogrow Led
Cxb 3590 COB 3500 K 220 W
💡💡☝️🏼
Earth: Canna Bio
☝️🏼
Fertilizer: Canna Bio
☝️🏼🌱
Water: Osmosis water mixed with normal water (24 hours stale that the chlorine evaporates) to 0.2 EC. Add Cal / Mag to 0.4 Ec Ph with Organic Ph - to 6.0
💦💧

Likes
27
Share


@ohserp
Follow
First time growing so this week went well i'd say. Everything seems to be on time and looking well so we will see how the further weeks play out. Very excited to see the progress.


Likes
4
Share


@adam_pawloski87
Follow
@twenty20Mendocino R&DUpdate ~ Let’s Go day 49 for these girls an we are looking beautiful! This week we gave them another trim up a tied them down more a today they have bounced back like nothing happened, strong ones they gonna be an so nice an healthy!
The Sangria is looking really beautiful, she’s Been flowering for lil over 2 weeks now so we still got a good amount of weeks for her to build a little more but she is already looking amazing, can’t wait for her to be done, smelling delicious! Hope you all enjoy an have an amazing productive day as well as a great safe weekend! Peace love positive vibes to all y’all Cheers 😶🌫️💨💨💨💨🤙🏻
