
Likes
73
Share


@Rwein93
Follow
Ciao ragazzi e bentoranti per i nuovi aggiornamenti!!!😉
Purtroppo ragazzi questa settimana non è stata delle migliori per i parametri. In Italia il caldo inizia a farsi sentire e nel box si sono raggiunte temperature di 30°C e l umidità è salita al 70% anche bagnando al minimo loro.😱
Le MimOrange crescono bene, forse il troppo caldo ha reso i rami più esili un po molli, ma tutto sommato crescono molto bene.👍
La numero 2 adesso misura 30cm. La numero 1 se non l avessi piegata sarebbe stata almeno 40 cm. Ottimo!
La numero 3 è più bassa e folta, penso che dovrò aprirla e pulirla un po.👌
Avendo cambiato zona di crescita non avevo calcolato il cambio di ph dell acqua del rubinetto e il fatto che non usi prodotti con un regolatore di ph incorporato mi ha tratto in inganno.🤦♂️
Ho misurato il Ph dell acqua dopo averla fertilizzata ed era di 7.7 così ho introdotto 0.25 ml di Ph Down e l ho portato a 6.27. Ora dovrebbe assorbire i Super nutrienti che gli stando alla grandissima!!!💪
Eh niente ragazzi! Speriamo che le temperature si abbassino di un paio di gradi, anche per noi perché si muore, e sembra solo l inizio.
Grazie a tutti per aver guardato e restate collegati per nuovi aggiornamenti.🙏
Buona settima e felice crescita🌱🌱🌱
P.S.
il video riprende le 3 talee varie all inizio, le Lemon tree, le MimOrange e 1 altra talea

Likes
21
Share


@3lementa1
Follow
They look great. They were thirsty this week. Ph is still lower and PPM higher on this one than the White Widow, and this one is bigger. I think it likes the spot right under the light. That air pump hose is also tighter so it probably has better aeration as well.


Likes
5
Share
@CaveGanja
Follow
Took only 4 1/2 days to dry smells ok after trimming have to cut away a lot of foxtails but still nice buds not extrem dense thx to the temputure.
I will take soon pictures and test some before curing.

Likes
6
Share


@Dairon
Follow
Buenas, como podéis ver han pegado un buen tirón, después de hacer las fotos tuve que volver a realizar poda de bajos, sacando unas ramas bastante grandes, las cuales voy a clonar y etiquetar por si sale algo que merezca conservarse. ya están mostrando preflores, aunque lleven 4 semanas a 12 /12 es como si fuese la 1ª en ejemplares de marihuana indica, sigo con una EC de 1.2 hasta que empieze a ver flores, donde iré subiendo poco a poco con cuidado pues es la primera vez que planto sativas y no quiero sobre abonarlas, hago un riego con abono y otro con agua de ósmosis corrigiendo hasta alcanzar una EC de 0.4, mido el agua que drena de las macetas tanto el PH como la EC para controlar que no alla carencias o excesos de nutrientes. Realizaré una limpieza del armario y pulverizare las plantas con Leaf Coat para prevenir, van como un tiro a ver que tal siguen, Buenos Humos!!!😃


Likes
6
Share

@eldruida_lamota
Follow
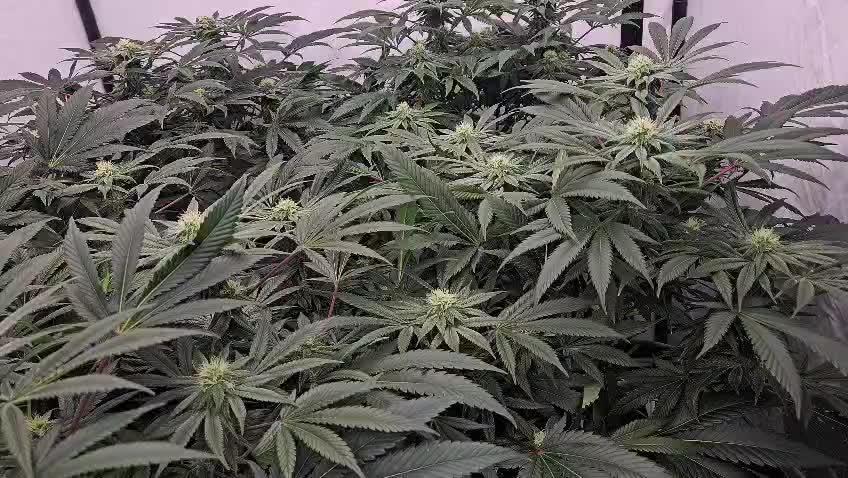
Que pasa familia, vamos con la cuarta de floración de estas Pink Sunset feminizadas de silentseeds.
Vamos al lío ,se trasplantaron en macetas de 7 litros definitivamente.
El ph se controla en 6.0 , la temperatura la tenemos entre 24/20 grados y la humedad ronda el 50%.
El ciclo de floración puse 12h de luz, el foco está al 80% de potencia.
De momento van creciendo a buen ritmo y tienen un buen color.
La flor está engordando y gobiwndo formarse, también empieza a producir tricomas.
Agradecer Agrobeta por el envío de un kit para la temporada, son unos jefes.
- os dejo por aquí un CÓDIGO: Eldruida
Descuento para la tienda de MARS HYDRO.
https://www.mars-hydro.com
Hasta aquí todo, Buenos humos 💨💨💨


Likes
2
Share

@SkullRipper
Follow
Hi Greenies,
End of week 4 flowering.
Still on track although been unable to replace C02 yet.
Plants have been given PK all week on top of normal nuits.
Also been doing a bit of leaf tucking for bud sites ( no more defoliation or I will have no plants left..)
💧 Watering: Every fith feed
🌡️ Temp: 24–27°C
💦 Humidity: 60% RH
📈 VPD: ~1.2 kPa
💡 Light: ~850 PPFD

Likes
48
Share

@Kirsten
Follow
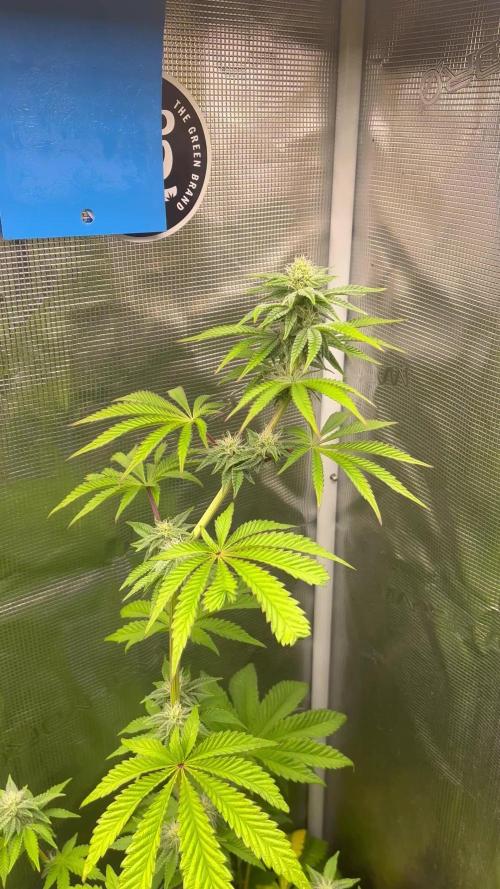
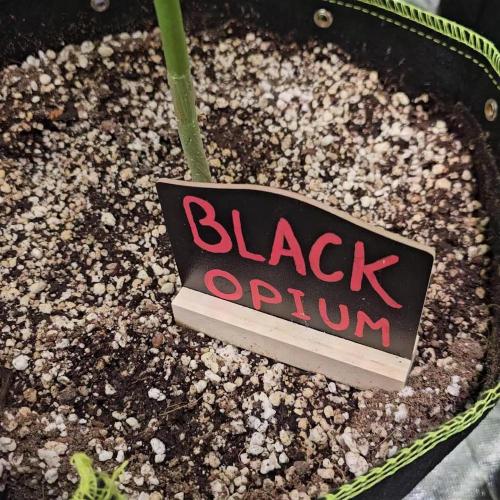
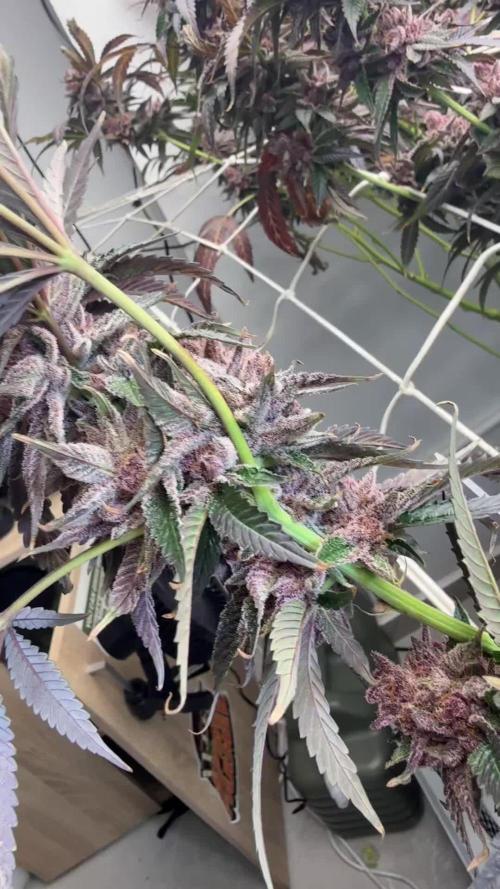
Black Opium has just begun to flower.
It has grown quite a lot since last week, and we are looking good overall 👌
Here is what I did this week.
9.8.25
I top dressed this week for the first time for this plant, along with the Pablo Escobar. I planted these at the same time.
Here is what I used for the top dressing. I top dressed with the following organic dry amendments;
As a base for the dry amendments I used:
🧡 Worm Castings - 1 Cup
🧡 Coco - 1 Cup
🧡 Perlite - 1/2 Cup
Dry Amendments:
💚 Ecothrive Life Cycle 1TBS
💚 Ecothrive Bloom 1 TBS
💚 Ecothrive Charge 1TBS
💚 Diatomaceous Earth 1TBS
9.8.25:
I watered this in with 2ltrs of dechlorinated water PH'd to 6.0 with;
💜 2ml Trace
PH: 6.5
PPM: 336.
That's all for this week, thank you for stopping by and hanging out in the comments 😁💚🙏🍃✌️

Likes
25
Share


@Ferenc
Follow
I had to take a big decision. I know it is not good it is way too hot in the tent but needed to remove from my garden because of some reasons.
Firstly, illegal which is fine but I do not want to take a risk for 3 g of harvest. She should start flowering in autumn when less sun and weather is basically shitty here in London it is okay to grow but when starts flowering.... so I planted an auto and saw that it wont yiled good so I was thinking what will happend to my Zkittlez in autumn when mush less sun and weather is going down. So realised I can have a 2-3 m plant but it ain't gonna flower just a bit. Soni decided to put under artificial light but it is summer my plants are suffering in the tent. Inhave no choice I will try to manage maximum I will cut back. Hopefully all goes ok.
Day 86: Fucked up she was totally wilt I removed all the leaves basically the stalk left only..... she will be okay

Likes
11
Share


@AUTOBUDDHA
Follow
Plant is yellowing slightly. Thought to get this girl enough nutrients in a solocup. But. Shes still growing, so we're gonna ride it out..

Likes
26
Share


@pifflestikkz
Follow
Day 71
09/09/24 Monday
Feed today using de-chlorinated tap water pH 6 with calmag.
Day 72
10/09/24 Tuesday
Nothing, just monitoring mould.
Day 73
11/09/24 Wednesday
(END OF QUARANTINE)
De-chlorinated tap water pH 6 only today.
Now I have put them to finish underground a 600w hps under 12/12 schedule with the Divine Black opium.
Luckily no more mould has spread, and all plants look happy healthy and still developing. Overall very happy I saved the crop ✌️💚
Day 74
12/09/24 Thursday
De-chlorinated tap water pH 6 today with Plagron products.
Finally a video and pictures update
✌️💚
Day 76
14/09/24 Saturday
De-chlorinated tap water pH 6 only today.


Likes
52
Share


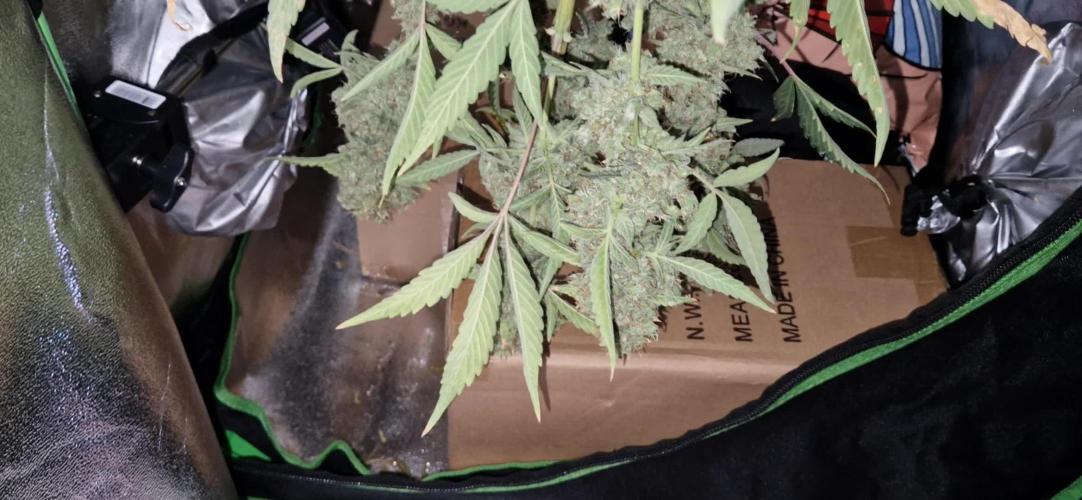
@MeaCulpa
Follow
I counted the days again and came to the conclusion that I have 70 days full and harvested tonight.
Enough brown and amber trichomes are also present. I'm excited to see how they taste and pop.
They definitely look and smell very good.
What's really funny: From the 2-3 week onwards, I turned both TS1000s up to 100% for 18 hours a day. I just wanted to find out my cap.
I used around 100kW/h and €40 less in electricity costs. Compared to my last grow with Feminized and 10 weeks of flowering + Veggy. I wouldn't have expected that.
Well... let it dry in peace first.
Another project is already underway. Have a nice weekend everyone.


Likes
7
Share


@cwgrows
Follow
Got the SCROG set up from netting we had around from a batting cage setup. The holes were a little small so we did some cutting and got everything working nicely.


Likes
19
Share


@AsNoriu
Follow
Day 50. Tallest Kush chopped by breeders recommendations, but in my conditions like a week at least away. Had max 20% milky, most clear, plant suffered some deficiency and was faiding slowly, still. Instead of Christmas flowers - 5 colas surprised my friends, colours and crystals are amazing.
She was watered last 4 rounds with water and i will compare taste and effect , but i think it's a loosing tactics - such early crop. Not more than 40 expected from what left ;))) 5 out of 17 colas was taken away. I will add a third of weight, for real feel in totals.
Day 67. After 24 hours of darkness all girls are chopped. Will make review and update in a week or so.