
Likes
Comments
Share


Likes
33
Share


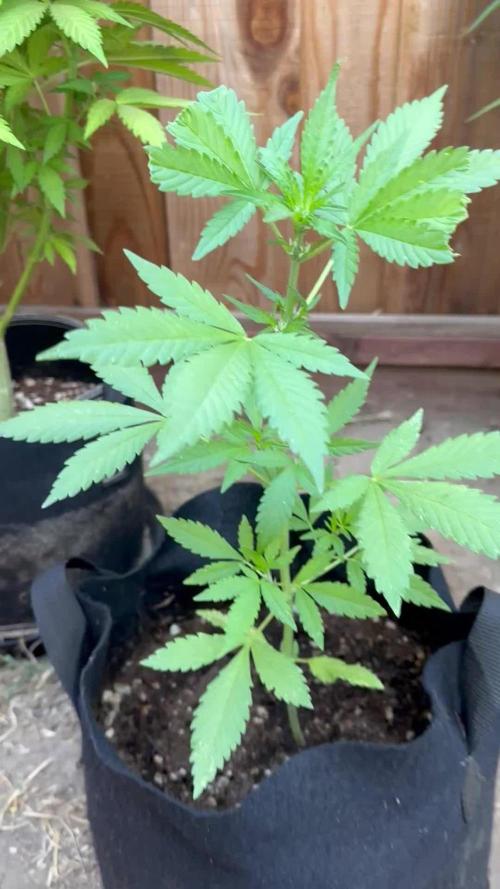
@Pirangueiro
Follow
I found a seed in a bud of super lemon haze. Put into the soil and the magic starts. Good luck to me 🙌🏻🙌🏻
Processing
Likes
33
Share


@Rasta_Faraev
Follow
Hello everyone, brothers and sisters.
CMOG: 75 Days. W / C / C: 40/17/18.
Nutrition 2.5 ml / l Canna Coco a / b. Ph = 5.8 / 6.3; ppm = 900/1050.
The conditions are stable, good.
A week passed, I didn’t do anything special, just a cliff of leaves, a disturbing bump. Smog is beautiful, she is one of those who owe nothing to anyone, neither by weight, nor by anything; she is exceptionally gorgeous, graceful and fragrant.

Likes
19
Share


@Black_Widow
Follow
Привет Садоводы !
дело близится к концу
есть конечно и минусы , стали портиться верхние листья , но я думаю она достоит еще пару недель
а в общем выглядит не плохо и пахнет приятно сладостями !

Likes
24
Share


@SkunkyDog
Follow
Hallo zusammen 🤙.
Sie wächst sehr schön und macht keine Probleme.
Rabattcode für den BIOTABS-Webshop https://biotabs.nl/en/shop/ GDBT420, damit erhalten Sie 15 Prozent


Likes
29
Share


@gottagrowsometime
Follow
2 part Harvest. 95+ Grams I got from this pheno. Took about a week to find the bottom 3rd. She is lovely, gasey & fruity. Smooth smoke with a lil bite to the back of my throat.
Xpert nutrients did 90-95% of this grow. Love 'em.
Will definitely be a fastbud do over. I wouldn't mind a few jars of this.
9.5☆

Likes
10
Share


@Smokwiri
Follow
Welcome to my Super Silver Haze week 2, genetics by: Zamnesia seeds
Looking great, kinda fast for a haze by the looks, but very happy.
Probably transplant tomorrow.
....tranplanted a couple hours later
++ some hash oil cartridges for coming weeks, and some high grade morrocan hash rosin

Likes
12
Share


@bud_goode
Follow
For my second grow, I am OVER THE MOON!! I just yielded 16.1 ounces (wet trimmed) from a single lady in a small 23"x19" x 48" DIY tent.
The strain; Mandarin Cookies v2 from Ethos Genetics, was very easy to manage and did not have any issues even in my small space. It was really difficult to determine the run time, it suggested 9 weeks from the breeder, I ended up going almost 13 weeks!! the trichomes stayed white

Likes
21
Share


@PrairieFrostGrow
Follow
********Week 9 Vegetation- Sept 12 to 18, 2020*******
This will be the last veg week. Flipped to flower cycle at the end of the week:)
These girls are pushing out branch Baby!!!! Getting long and keeping them tied down for now. They want to flower and almost aren’t waiting for the lights to switch😃
LST this week on these girls. Getting them ready to put in a SCROG I think. Pull them down for now to start pulling them wider and make it easier to fill in the canopy’s net. Actually, they were only tied down for this week. At the end of the week I removed the ties.
There were 4 feed days this week and Advanced Nutrients Bud Ignitor was introduced this week.......getting ready for flower👍 Switch to Bloom nutes next week. Going to finish these girls with Advance Nutrients line this run. I may have to use a supplemental from Green Planet to get through to harvest. This lines bottles are getting closer to a year and a half old now........use em uip👌😃 Not buying more Bud Factor X for example (still have a couple of syringes worth) but rather will add Terpinator and Rezin instead.
Little more detail:
Sept 12/20
- CalMag @ 2ml, VeloKelp, Vitrathrive @ 1.5ml, AN Sensi Grow A&B @ 1ml
- 610ppm and 5.9pH
- Each girl given 2L
- Pulled out and cleaned up to get ready for netting
- Canopy height fairly even today.....little more time to fill in though.
Sept 14/20
- Giving them a hearty feeding today with lots of ml’s to rinse off the roots a little more
- Sensi CalMag @ 2ml, B52, Microbial Mass @ 1.5ml, Sensi Grow @ 1ml
- 880ppm and 5.4pH
- Each girl given 4L and they had a nice amount of runoff - maybe 30% this time.
Sept 15/20
- Add some sweetener to feed the microbes today,.
- Sensi CalMag @ 2ml, Bud Candy, B52 @ 1.5ml
- 625ppm and 5.2pH
- 2L each for the girls
- Leaf colour is a little light so getting the Magnesium up and Nitrogen......that’s why using the heigh nitrogen Advance Nutrients Cal Mag.
- pH is a little low but I am cool with it and working on not letting the pH drift too much yet in their run.
- They are ready.........they want to flower😃
Sept 17/20
- Bud Ignitor introduced today as we get ready for Flower phase next week.
- Sensi CalMag, Sensi Grow A&B, Bud Ignitor, all @ 1ml/L
- 485 ppm and 5.7pH
- Each girl given 2L
- Swtich the light cycle tonight to 12/12 and get the party started👊👍
That takes us to the end of Veg for these two girls.
Cheers Growmies and have a great week🙏

Processing
Likes
19
Share


@HempnainteZ
Follow
😈 Only On It'z 3 Day Of It'z 12 Week Binge! I Can Alwayz See Her Name Disintegrating From Their Lipz! "3rd Day" 😈-[V][V]-😈
Day 4 And Already Show'n Root! Using Clonex Water Solution In RO Water Ph'd Down To 6.5 And 2 T8 6500k Fluorescent 2' Tubez!
🌱 Day 5! She'z Reach'n For The Sky With Her Root Get'n Longer! After Her 2nd Node And Fan Leaf Im'a Put Her On The Juice! (Emerald Harvest'z) Cali Pro Gro A-B, Emerald Goddess, Root Wizzard And Study Stalk Into RO Water Ph'd To 6.8! After Her 6th Node And Fan Leaf! Move'n Her Into Her Lucious Condo! To Start Her Low Strezz Workout'z, Manicure'n And Scrog'n! Im'a Start Add'n (Emerald Harvest'z) Honey Chome And King Kola To Her Mix! Until She Hit'z Puberty! Once She Get'z A Little Fuzz On Her Peach! I'll Switch Out The Cali Pro Gro A-B With Cali Pro Gro Bloom A-B And (Emerald Harvest'z) Cal-Mag Keep'n Her Drink At A Chilly 59° And Her Air At 68° All While Get'n Her Hook'd Like A Crackhead On Co2! After That, 1-2 Weekz B4 She'z Ready To Pop! Im'a Starve Her Little Azz Cauze It'z Flush Time! (Botanicare'z) Clearex And RO Water Only! Don't Want Terrible Tasting Headaches! 🌱
After The 1'st Week I'll Only Be Updating Once A Week Unless Something Spectacular Happenz With The PC Grow. I Got To Much To Do With The New Big Auto Grow! Man I Love Fastbudz! Thiz Run Will Be FB'z GG Auto Fem And FB'z Six Shooter Auto Fem Som It Shoulb Be Exiciting! But Back To The Micro PC Grow! I Just Posted This Morning Day 5 And Damn! Big Difference From Thiz Morning! It'z The End Of Day 5 And The Rootz Are Fill'n The Grodan Like It'z Last'z Year'z Shoe! It'z Get'n Straight Shwifty!
😈🌱Day 6! Hey! Your A Crazy Bitch! But You Fuck So Good I'm On Top Of It! When I Dream I'm Doing You All Night! Scratcez All Down My Back I Keep It Right On! Crazy Bitch, Crazy Bitch, Crazy Bitch! "Crazy Bitch" Buckcherry🌱😈

Likes
9
Share


@Staffedition
Follow
Привет друзья.
Наше знакомства продолжается с новым сортом автоцветущих растений от Smail_Seeds сорт ORIGINAL AUTO CHEMZKITTLEZ F1 reg.
Сегодня растению 58 дней.
Растение очень хорошо развивается, ни каких сбоев в генетике не наблюдается.
Шишки наливаются😀
Сорт выводим сами.
Смотри мой профиль, у нас всегда есть что то интересное.
Не забудь поставить лайк❤️, если понравилась как прошла неделя
И читайте наш TELEGRAM: https://t.me/smail_seeds
#Smail_Seeds 😀
Likes
36
Share


@Erpollic3verde
Follow
Molto orgoglioso di come sta procedendo,le piante stanno benissimo, la wappa continua a crescere a vista d'occhio e ora posso dire con certezza che sarà la pianta più grande che io abbia mai coltivato. Ormai stiamo entrando nelle ultime settimane di vegetazione dunque procedo nell nebulizzare sulle piante una miscela di alghe e micronutrienti

Likes
Comments
Share

@grimm420
Follow
Decided to fim because I was kinda sad with my Slime Machine yield, always had more success with topping and fimming. Gave her a bit of Flower Girl Fertilizer. So far it’s looking great! Looking forward to buying a greenhouse to control all the pests eating my poor plants 😭 I see a lot of mites.


Likes
77
Share


@Krisis
Follow
03/10/25. Start week 2 flower or day 8
Again…going with these definitely are based off candy and not size.
She’s stretched 8 inches already. Her sister, Mellow yellow, is the same height. As usual she’s still yellow lol.
Both seem to be more shy than their friends about showing some buds. Lots of white hairs sprouting all over. I’m sure they’ll be showing up any time now.
These things are so bushy and leafy they almost look like some kinda big plant that you’d just see near some piece of art in the corner of your house.
Anyhow, they’re drinking a gallon and a half about every 4 days. Usually feed every other water but these were getting a bit of spots around leaf edges.. that I’m thinking is potassium deficiency. So, didn’t skip feeding and actually increasing by going early with green sensation at half dose. The bottle says 4 weeks and up, but if they’re lacking, what can it hurt?
I’ve increased light intensity to about 75% and they’re currently 13 inches from it. Going to raise it up some in the morning, as this seems a bit close for the moment.
That about covers it for now. ✌️✌️
Likes
24
Share


@MrPott
Follow
Everyone is B L O O M I N G. Definitely a few weeks to go and right now it's just about feeding them and making em ladies T H I C C.


Likes
1
Share

@Organic_G
Follow
Absolut ungewohnt das Zelt mit so abgemargerten Pflanzen zu sehen 🤣🤣🤣
Die Ladys von draußen sind endlich nach innen gezogen für den restlichen Blüte Schub.
Sehen wie Crackys aus im vergleich zu den den davor drin waren 🤣
