
Likes
Comments
Share

@phenosaurus
Follow
Runtz is a very hardy plant, has a great structure that folds well. The buds are medium sized and insanely hard, full of resin. Even the bottom buds are hard and nice when you let the light through. I definitely recommend this strain

Likes
5
Share


@Organic473
Follow
2 of the 6 survived...my bad! I am left with one male and one female which I would generate some seeds.


Likes
69
Share


@MrHightimes
Follow
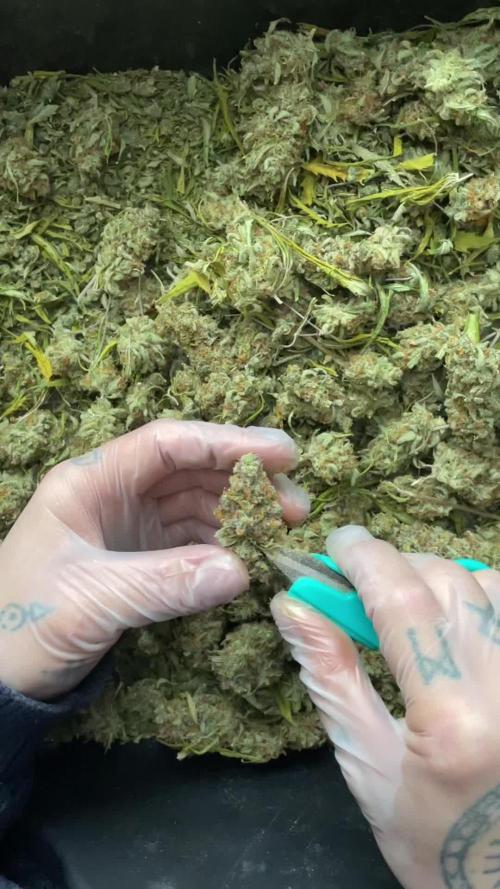
Chop Chop! Glad to have finished up this dope little plant! Looking forward to growing this strain in full size pots!

Likes
11
Share


@Young_agronomist
Follow
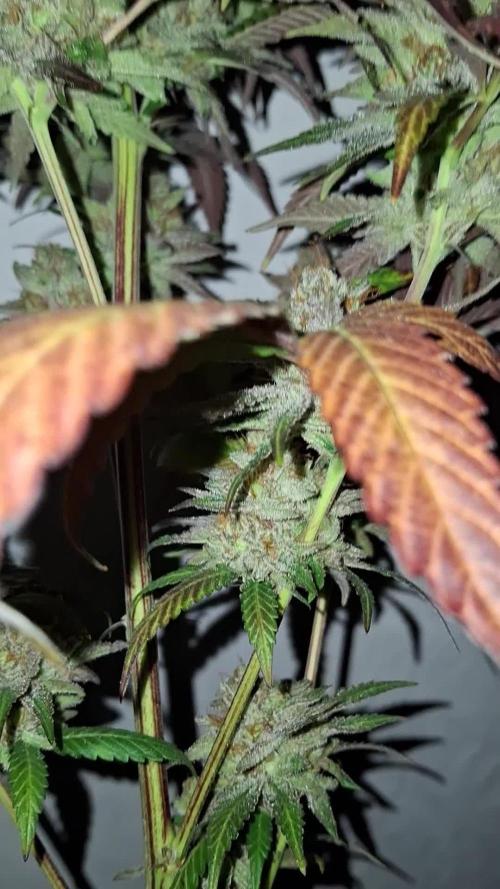
24.11.23- 116 день (56 дней 12/12)
На данный момент это самое большое растение в палатке .
Размер его почек просто огромный и они еще продолжают расти (большинство стигм еще белые ) . Огромное количество сахара на листьях и почках,трогать руками невозможно 😂 Пахнет сладким дизелем или газировкой .
Выглядит потрясающе 😻
Завтра начинаю давать рипен 10 дней

Likes
5
Share


@ChiloteAnonimo
Follow
08-11-2022
Primer día de la 4ta semana.
Recordar q sufrieron un estrés de agua por ende la planta va a ir desfasada una semana, yo pienso.
Aun no tiene resina y me preocupa, espero q empiece a resinar antes de terminar esta 4ta semana...
14-11-2022
Ultimo día de la semana 4 de flora
Ya empiezan a resinar todas de apoco, la pandemia kush se ve un poquito más avanzada a el resto

Likes
15
Share


@Growshh
Follow
Almost there! Final lap, colors really coming in! Thrichs are milky with some clear...can't wait!


Likes
24
Share


@Dingle
Follow
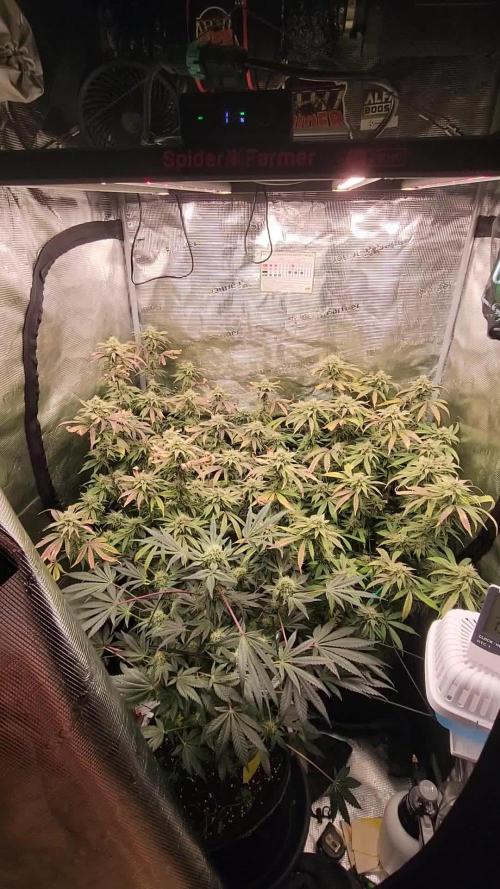
All going well as they start to stretch into early flower.
Lots of bud-sites forming which is nice to see.
Seeing a noticeable pick up in speed of the daily growth now along with a slight change in smell.
Not much maintenance just some minor defoliation and adjustments to the scrog and ties to help open things up.
✌️

Processing
Likes
13
Share


@TheAutoflowerShow
Follow
Day one of this week entailed me going to the hydro shop, grabbing so blue sky organics super soil, some 1 gal fabric pots and off I went. I always pot my soil then water the pots down and wait 24 hours for everything to acclimate so as to not shock my seeds. I germinate straight into the soil. I will post more pics to beef up this week! I will be planting 2 fastbuds orange sherbet beans, 1 in a 1gal fabric pot and 1 in a 3gal from the bucket company.

Processing
Likes
29
Share


@Grey_Wolf
Follow
****************** GINGER NUT COOKIES *************************************************3rd Jan 2020**********************************************************
Awhile back I made a diary on here, about how I used a Clone of a Red Diesel from Barneys Farm plant, to create feminised pollen by reversing the sex using
sodium thiosulphate mixed with silver nitrate which then makes silver thiosulfate solution or STS as its probably better known To get up to speed that diary can be found here
https://growdiaries.com/diaries/42051-barney-039-s-farm-red-diesel-grow-journal-by-grey-wolf-growdiaries
Then after I proccured some pollen I pollinated two Plants from Fastbuds in this Diary
https://growdiaries.com/diaries/42635-gelato-auto-girl-scout-cookies-grow-journal-by-grey-wolf-growdiaries
This diary will be showing the Growth of the result of Crossing the @BarneysFarm Red Diesel with the @Fastbuds Girl Scout Cookies auto .
In Australia we have a cookie variety called Ginger nuts and I thought that an apt name for this strain combo
I will be growing it in Soil fully organically with Sunshine and Love. Fuck knows how it will go and how it will even turn out but that just makes it more interesting & challenging for Me. So here we go & Let the Fun begin........................🙏🙏
Once a week I will post a link to an Aussie Band/performer performing one of their best songs to start things off Please Watch this video clip Dance Monkey https://www.youtube.com/watch?v=q0hyYWKXF0Q
Likes
5
Share


@RnDgrows
Follow
A great week with the buds really swelling in size and the smell getting more potent!
Gave it a last bit of molasses and continued with the flush.
Trichomes are milky with a few clear still.
Super excited to harvest soon!!!


Likes
5
Share


@Drtomb
Follow
Plants are looking awesome. Skullcap is extremely frosty, the whole tent reeks and no hiccups. I've noticed that the (14) pineapple express #2 seems to be less dense of a bud cola, its looking like the (15) Pineapple express #2 is the better version. If it doesn't tighten up this one's out of the running. I already got rid of the skullcap mom, great quality, but not the quantity I wanted to see.


Likes
6
Share


@Broffel
Follow
The end of the week and the girls are doing great, addet a Co2 bucket today and it's only run when the ligths are on
Processing
Likes
5
Share


@Greenbean15
Follow
Bud development going strong this week, seeing lots of sugar leaves and new bud sites forming each day. Hoping to see the buds stack a little more soon.
All seven plants are in flower now, this purple trainwreck plant being the furthest along. She should have another 4-6 weeks left before her chop.
Likes
3
Share


@mistaminista420
Follow
I really waited long to cut away the last leave as I thought it would maybe help the plant to still grow a little, but no no, she didn’t grow much more.


Likes
2
Share


@Manchu
Follow
Mi experiencia con esta variedad, fue realmente buena. una semilla con mucho vigor, muy resistente a plagas, y con sabores y olores exquisitos

Likes
40
Share


@KingSalomonsWeed
Follow
Oh, day 27. Flower 1
23.10.
For real? Poor plant. She doesn't look happy.

Likes
34
Share

@Philhsy
Follow
Huge yield of sticky buds, took 12 weeks from seed and filled a full 1.2m tent. Needed quite a bit of maintenance so happy to reach harvest day. Ran simple nutrients, slight foxtailing at the end, but most buds in the net are around 100g each plus ( and the net is full!
and still a whole plant hanging with fat buds👍